

Salt and Detergent Cleaning: Sounds like a science experiment, right? Well, it’s actually a super simple and surprisingly effective way to tackle some of the most common cleaning challenges around your home! Forget those expensive, chemical-laden cleaners – I’m going to show you how to harness the power of these everyday ingredients for a sparkling clean space.
Humans have been using salt for cleaning and preservation for centuries! Think back to ancient civilizations using salt to preserve food or scrub surfaces. While detergent is a more modern invention, combining it with salt creates a powerful synergy. This isn’t just some newfangled trend; it’s a return to simpler, more natural cleaning methods.
Let’s face it, cleaning can be a real drag. We’re all busy, and spending hours scrubbing stubborn stains or dealing with grimy surfaces is nobody’s idea of a good time. That’s where this salt and detergent cleaning trick comes in! It’s a game-changer for anyone looking to save time, money, and effort while still achieving amazing results. I’m excited to share these easy DIY cleaning hacks that will leave your home fresh and clean!
DIY Power Cleaner: Salt and Detergent for Sparkling Results!
Hey everyone! I’m always on the lookout for simple, effective, and budget-friendly cleaning solutions. And guess what? I’ve stumbled upon a real winner: a cleaning concoction using just salt and detergent! Yes, you read that right. These two humble ingredients, when combined, create a surprisingly powerful cleaner that tackles grime, grease, and even stubborn stains. I’m going to walk you through exactly how I make and use this amazing cleaner.
What Makes This Cleaner So Great?
Before we dive into the how-to, let’s talk about why this combination works so well.
* Salt’s Abrasive Power: Salt acts as a gentle abrasive, helping to scrub away dirt and grime without scratching most surfaces. It’s perfect for tackling tough stains on sinks, tubs, and even some fabrics.
* Detergent’s Cleaning Action: Detergent, of course, is a surfactant. This means it reduces the surface tension of water, allowing it to penetrate dirt and grease more effectively. It also helps to lift the grime away from the surface, making it easier to wipe clean.
* The Synergy: The magic happens when you combine these two. The salt provides the scrubbing power, while the detergent helps to loosen and lift the dirt. Together, they create a cleaning force that’s surprisingly effective.
What You’ll Need
Okay, let’s gather our supplies. This is super simple!
* Table Salt: Plain old table salt is perfect. No need for anything fancy.
* Dish Detergent: I usually use a standard liquid dish soap. Any brand will do, but I find that the ones designed for grease-cutting work best.
* Spray Bottle (Optional): If you want to make a spray cleaner, you’ll need a spray bottle.
* Mixing Bowl: For mixing the paste.
* Spoon or Spatula: For stirring.
* Cleaning Cloths or Sponges: For applying and wiping the cleaner.
* Gloves (Optional): If you have sensitive skin, you might want to wear gloves.
Making the Salt and Detergent Cleaning Paste
This is where the fun begins! I’ll show you how to make a cleaning paste that’s perfect for tackling tough stains.
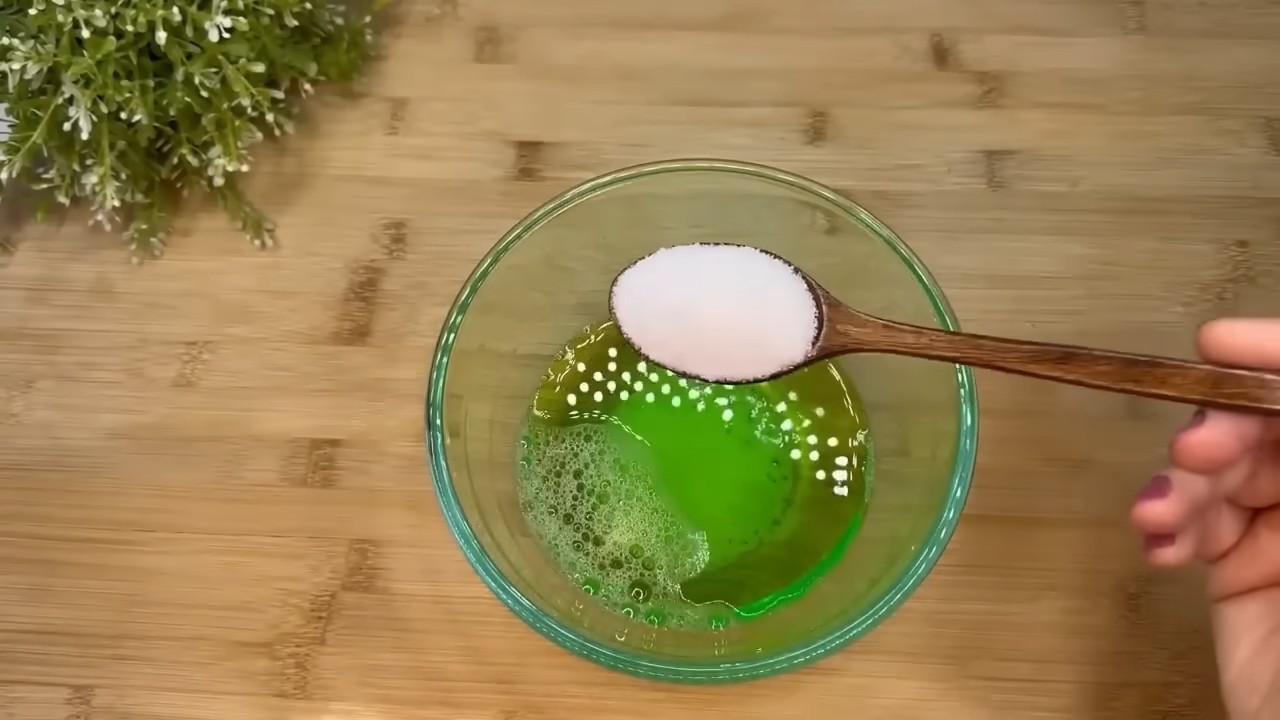
1. Combine the Ingredients: In your mixing bowl, add about 1/2 cup of table salt. Then, pour in enough dish detergent to create a thick paste. I usually start with about 1/4 cup and add more as needed.
2. Mix Thoroughly: Use your spoon or spatula to mix the salt and detergent together until you have a smooth, even paste. Make sure there are no clumps of salt. The consistency should be similar to toothpaste.
3. Adjust as Needed: If the paste is too thick, add a little more detergent. If it’s too thin, add a little more salt. You want it to be thick enough to stick to surfaces but still spreadable.
Using the Cleaning Paste: Step-by-Step
Now that we have our cleaning paste, let’s put it to work!
1. Apply the Paste: Using your fingers, a sponge, or a cloth, apply the cleaning paste to the surface you want to clean. Be generous, especially on stubborn stains.
2. Let it Sit (Optional): For really tough stains, I like to let the paste sit for a few minutes (5-10 minutes is usually enough). This gives the salt and detergent time to work their magic.
3. Scrub Gently: Using a sponge or cloth, gently scrub the surface in a circular motion. Don’t scrub too hard, as you don’t want to scratch the surface. The salt will provide the abrasive power you need.
4. Rinse Thoroughly: Once you’ve scrubbed the surface, rinse it thoroughly with water. Make sure to remove all traces of the cleaning paste.
5. Dry the Surface: Use a clean cloth to dry the surface. And that’s it! You should have a sparkling clean surface.
Making a Salt and Detergent Spray Cleaner
If you prefer a spray cleaner, this is just as easy to make!
1. Combine the Ingredients: In your spray bottle, add about 1 tablespoon of table salt. Then, add about 1/4 cup of dish detergent.
2. Add Water: Fill the rest of the spray bottle with warm water.
3. Shake Well: Secure the spray bottle lid and shake well to dissolve the salt and mix the ingredients.
4. Test Before Use: Before spraying on a large surface, test the cleaner on a small, inconspicuous area to make sure it doesn’t damage the material.
Using the Spray Cleaner: Step-by-Step
Here’s how to use the spray cleaner for everyday cleaning tasks.
1. Spray the Surface: Spray the cleaner liberally onto the surface you want to clean.
2. Let it Sit (Optional): For tougher grime, let the cleaner sit for a minute or two.
3. Wipe Clean: Use a clean cloth or sponge to wipe the surface clean.
4. Rinse (Optional): If desired, rinse the surface with water. This is especially helpful for surfaces that come into contact with food.
5. Dry the Surface: Use a clean cloth to dry the surface.
Where Can You Use This Cleaner?
This salt and detergent cleaner is incredibly versatile! Here are some of my favorite uses:
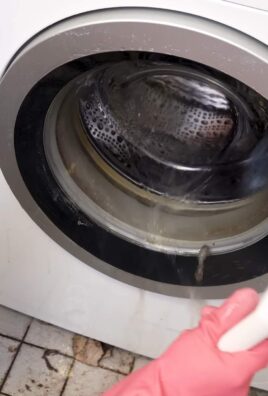
* Sinks and Tubs: This is where I use it most often. It’s fantastic for removing soap scum, water stains, and general grime.
* Tile and Grout: The salt helps to scrub away dirt and mildew from tile and grout.
* Stovetops: It’s great for cutting through grease and food splatters on stovetops. Just be careful not to scratch the surface.
* Ovens: While it won’t replace a dedicated oven cleaner for baked-on messes, it’s helpful for cleaning up spills and splatters before they become too stubborn.
* Countertops: I use it on my laminate countertops to remove spills and stains. Always test on an inconspicuous area first, especially on delicate surfaces.
* Toilet Bowls: Sprinkle some salt directly into the toilet bowl, add a squirt of detergent, let it sit for a few minutes, and then scrub with a toilet brush.
* Laundry Stains: For some laundry stains, I make a paste and apply it directly to the stain before washing. Always test on an inconspicuous area of the fabric first. I’ve had success with grease stains and some food stains.
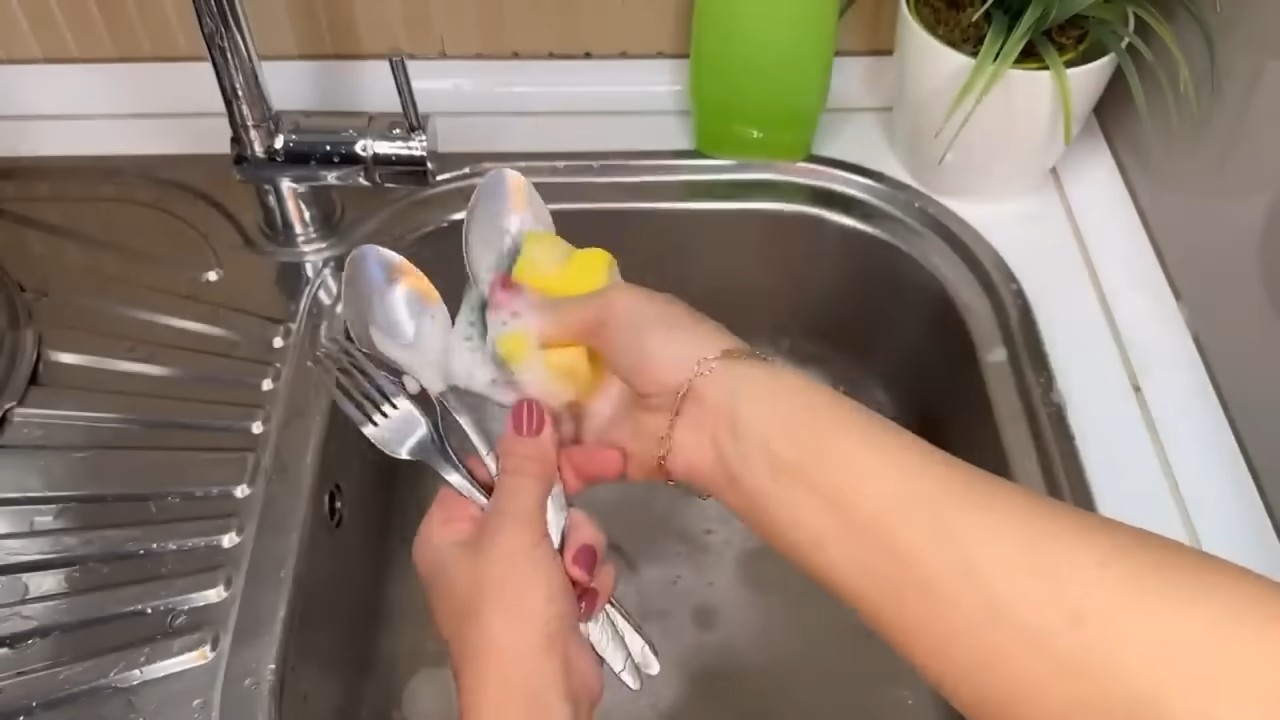
* Cleaning Sponges: I use this mixture to clean my kitchen sponges. It helps to remove food particles and odors.
* Cleaning Cutting Boards: Sprinkle salt on the cutting board, add a little detergent, and scrub with a sponge. Rinse thoroughly.
Important Considerations and Safety Tips
While this cleaner is generally safe and effective, here are a few things to keep in mind:
* Test on an Inconspicuous Area: Before using the cleaner on any surface, always test it on a small, inconspicuous area to make sure it doesn’t damage the material. This is especially important for delicate surfaces like painted walls, wood, and certain types of fabric.
* Avoid Abrasive Surfaces: While the salt is generally gentle, it can scratch some surfaces. Avoid using this cleaner on delicate surfaces like polished metal, glass, and some types of plastic.
* Don’t Mix with Other Cleaners: Never mix this cleaner with other cleaning products, especially bleach. Mixing cleaners can create dangerous fumes.
* Rinse Thoroughly: Always rinse the surface thoroughly after cleaning to remove all traces of the salt and detergent.
* Store Properly: Store the cleaning paste or spray cleaner in a cool, dry place. Keep it out of reach of children and pets.
* Wear Gloves (Optional): If you have sensitive skin, you might want to wear gloves when using this cleaner.
* Not for All Fabrics: While I’ve used it successfully on some laundry stains, it’s not suitable for all fabrics. Avoid using it on delicate fabrics like silk or wool.
Troubleshooting
* Cleaner Not Working? If the cleaner isn’t working as well as you’d like, try increasing the amount of salt or detergent. You can also let the cleaner sit on the surface for a longer period of time.
* Surface is Scratched? If you accidentally scratch a surface, try using a polishing compound to buff out the scratches.
* Residue Left Behind? If you’re having trouble rinsing away the cleaner, try using a clean, damp cloth to wipe the surface. You may need to rinse the cloth several times.
Why I Love This DIY Cleaner
I’ve been using
Conclusion
So, there you have it! This simple yet incredibly effective salt and detergent cleaning trick is a game-changer for anyone looking to tackle stubborn grime and stains without resorting to harsh chemicals or expensive cleaning products. We’ve shown you how easy it is to combine these two household staples to create a powerful cleaning solution that can revitalize everything from your grimy stovetop to your dingy bathroom tiles.
Why is this DIY cleaning method a must-try? Because it’s economical, readily accessible, and surprisingly potent. You likely already have both salt and detergent in your pantry, making this a budget-friendly alternative to commercial cleaners. Plus, it’s a more environmentally conscious choice, reducing your reliance on products packed with potentially harmful chemicals. The abrasive nature of the salt, combined with the degreasing power of the detergent, creates a synergistic effect that lifts away dirt and grime with minimal effort.
But the beauty of this method lies in its versatility. Feel free to experiment with different types of salt. Coarse sea salt can provide extra scrubbing power for tough stains, while finer table salt is gentler on more delicate surfaces. You can also adjust the ratio of salt to detergent to suit your specific cleaning needs. For heavily soiled areas, try using a higher concentration of salt. For lighter cleaning tasks, a smaller amount will suffice.
Consider adding a few drops of essential oils, like lemon or tea tree, for a fresh, clean scent and added antibacterial properties. Just be sure to test the solution on an inconspicuous area first to ensure it doesn’t damage the surface. Another variation involves using baking soda in conjunction with salt and detergent for an even more powerful cleaning boost. Baking soda is a natural deodorizer and can help to further lift away stubborn stains.
We strongly encourage you to give this salt and detergent cleaning method a try. You’ll be amazed at how effectively it cleans and how much money you can save. Don’t just take our word for it – experience the difference for yourself!
Once you’ve tried it, we’d love to hear about your results. Share your experiences, tips, and variations in the comments below. Let us know what surfaces you’ve cleaned, what challenges you’ve overcome, and any creative ways you’ve adapted the recipe to suit your needs. Your feedback will not only help other readers but also contribute to a community of DIY cleaning enthusiasts. Let’s revolutionize the way we clean, one salt and detergent solution at a time! We are confident that this cleaning hack will become a staple in your cleaning routine.
Frequently Asked Questions (FAQ)
What types of detergent can I use for this cleaning solution?
You can use a variety of detergents, but dish soap is generally the most effective and readily available option. Look for a detergent that is designed to cut through grease and grime. Liquid laundry detergent can also be used, but be sure to dilute it properly to avoid leaving a residue. Avoid using detergents that contain bleach or other harsh chemicals, as these can react negatively with the salt and potentially damage surfaces. A mild, pH-neutral detergent is always a safe bet, especially for delicate surfaces. When in doubt, test the solution on an inconspicuous area first.
Can I use this cleaning solution on all surfaces?
While this salt and detergent cleaning solution is generally safe for most surfaces, it’s always best to exercise caution and test it on an inconspicuous area first. Avoid using it on delicate surfaces like polished wood, marble, or granite, as the abrasive nature of the salt can scratch them. It’s also not recommended for use on electronics or surfaces that are sensitive to moisture. Surfaces like stainless steel, ceramic tile, porcelain, and plastic are generally safe to clean with this solution. Always rinse the surface thoroughly after cleaning to remove any residue.
How much salt and detergent should I use?
The ideal ratio of salt to detergent will depend on the severity of the grime and the type of surface you’re cleaning. A good starting point is a 1:1 ratio, such as 1 tablespoon of salt to 1 tablespoon of detergent. For heavily soiled areas, you can increase the amount of salt. For lighter cleaning tasks, you can reduce the amount of salt. It’s always better to start with a smaller amount and gradually increase it until you achieve the desired cleaning power. Remember to dilute the solution with water to create a paste or spray.
Is this cleaning solution safe for my skin?
While salt and detergent are generally considered safe, prolonged exposure can irritate the skin. It’s always a good idea to wear gloves when using this cleaning solution, especially if you have sensitive skin. If you do get the solution on your skin, rinse it off immediately with soap and water. Avoid getting the solution in your eyes. If contact occurs, rinse thoroughly with water and seek medical attention if irritation persists.
How should I store the leftover cleaning solution?
It’s best to use the cleaning solution immediately after preparing it, as the salt can settle over time. However, if you have leftover solution, you can store it in a sealed container in a cool, dark place. Be sure to label the container clearly to avoid accidental ingestion. The solution may separate over time, so shake it well before using. It’s generally recommended to discard any leftover solution after a few days, as it may lose its effectiveness.
Can I add other ingredients to this cleaning solution?
Yes, you can add other ingredients to enhance the cleaning power or scent of the solution. As mentioned earlier, essential oils like lemon or tea tree can add a fresh scent and antibacterial properties. Baking soda can also be added for extra cleaning power and deodorizing benefits. Vinegar can be added to help cut through grease and grime, but be careful when mixing it with detergent, as it can create fumes. Always test any new additions on an inconspicuous area first to ensure they don’t damage the surface.
What are some specific uses for this cleaning solution?
This cleaning solution is incredibly versatile and can be used for a variety of cleaning tasks. It’s effective for cleaning stovetops, ovens, bathroom tiles, sinks, bathtubs, and showers. It can also be used to remove stains from clothing and carpets. It’s great for cleaning outdoor furniture and grills. The abrasive nature of the salt makes it particularly effective for removing stubborn grime and stains. Just remember to test the solution on an inconspicuous area first to ensure it doesn’t damage the surface.
How does this cleaning solution compare to commercial cleaners?
This salt and detergent cleaning solution offers several advantages over commercial cleaners. It’s more economical, readily accessible, and environmentally friendly. It reduces your reliance on products packed with potentially harmful chemicals. While commercial cleaners may be more convenient, they often come with a higher price tag and can contain ingredients that are harmful to your health and the environment. This DIY solution is a simple, effective, and sustainable alternative.
Leave a Comment