

Propagating plants in June? Absolutely! I’m so excited you’re here because June is, in my humble opinion, one of the *best* months to expand your green family through propagation. Forget expensive trips to the garden center – we’re about to unlock the secrets to creating new plants from the ones you already love, all with a little DIY magic!
For centuries, gardeners have understood the art of propagation. Think back to ancient civilizations, carefully nurturing cuttings to ensure bountiful harvests and beautiful landscapes. It’s a tradition steeped in resourcefulness and a deep connection to the natural world. And while the methods have evolved, the core principle remains the same: turning one plant into many.
But why is propagating plants in June so crucial? Well, the weather is usually just right! The warmth encourages root growth, and the longer daylight hours provide the energy your cuttings need to thrive. Plus, let’s be honest, who doesn’t love the feeling of accomplishment that comes with successfully creating new life? This DIY guide will walk you through simple, effective techniques to propagate your favorite plants, saving you money and adding a personal touch to your garden. Get ready to roll up your sleeves and dive into the wonderful world of plant propagation!

Propagating Plants Like a Pro in June: A DIY Guide
Hey plant lovers! June is prime time for plant propagation. The weather’s warm, the plants are actively growing, and success rates are generally higher. I’m going to walk you through some of my favorite propagation methods, perfect for June, so you can expand your plant collection without breaking the bank!
Understanding Plant Propagation
Before we dive in, let’s quickly cover the basics. Plant propagation is simply creating new plants from existing ones. There are several methods, each suited to different plant types. We’ll focus on stem cuttings, leaf cuttings, and division, as these are the easiest and most effective for many common houseplants and garden plants in June.
Section 1: Stem Cuttings – Cloning Your Favorites
Stem cuttings are a fantastic way to replicate your favorite plants. This method works well for plants like pothos, philodendrons, succulents (like echeveria and sedum), herbs (like rosemary and mint), and many more.
What You’ll Need:
* A healthy mother plant
* Sharp, clean pruning shears or a knife (sterilize with rubbing alcohol)
* Rooting hormone (optional, but it speeds things up!)
* Small pots or containers
* Well-draining potting mix or propagation medium (like perlite or vermiculite)
* Water
* Clear plastic bag or humidity dome (optional, but helpful)
Step-by-Step Instructions:
1. Prepare Your Cutting Tools: This is crucial! Sterilize your pruning shears or knife with rubbing alcohol. This prevents the spread of diseases to your new cuttings. I usually wipe them down thoroughly and let them air dry.
2. Select a Healthy Stem: Choose a healthy stem from your mother plant. Look for stems with several leaves or nodes (the points where leaves emerge). Avoid stems that are flowering or have signs of disease.
3. Take the Cutting: Using your sterilized shears or knife, make a clean cut just below a node. The ideal cutting length is usually 4-6 inches. For succulents, you can take shorter cuttings.
4. Prepare the Cutting: Remove the leaves from the bottom 1-2 inches of the cutting. This prevents them from rotting when they’re in the soil or water. If the remaining leaves are very large, you can trim them in half to reduce water loss.
5. Apply Rooting Hormone (Optional): Dip the cut end of the stem into rooting hormone powder or liquid. This encourages root development. Don’t skip this step if you want to see roots faster!
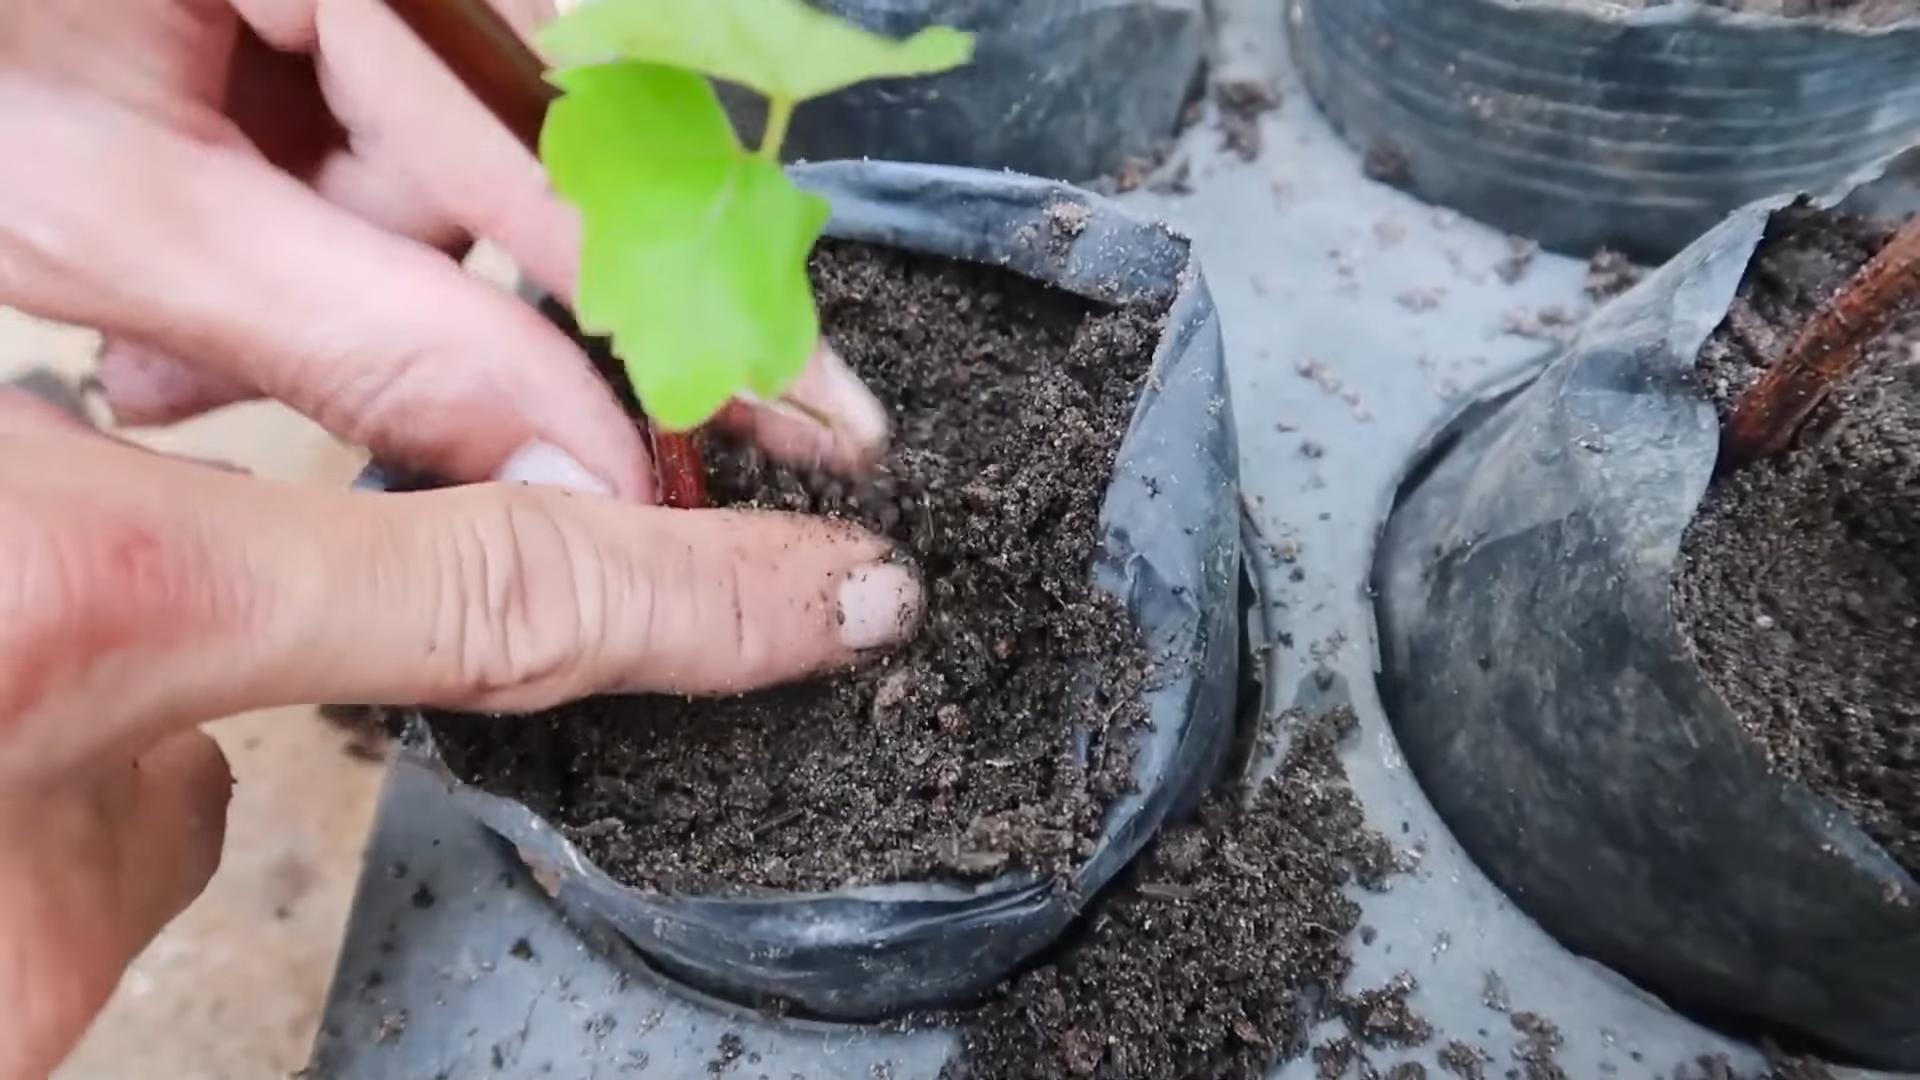
6. Plant the Cutting: Fill your small pot or container with well-draining potting mix or your chosen propagation medium. Make a small hole in the center and gently insert the cutting, ensuring that the bottom nodes are buried.
7. Water Thoroughly: Water the cutting gently but thoroughly until the soil is moist.
8. Create a Humid Environment (Optional): Place a clear plastic bag over the pot or use a humidity dome to create a humid environment. This helps prevent the cutting from drying out before it develops roots. Make sure the bag doesn’t touch the leaves to prevent rot. You can also mist the inside of the bag to increase humidity.
9. Provide Bright, Indirect Light: Place the cutting in a location with bright, indirect light. Avoid direct sunlight, which can scorch the leaves.
10. Monitor and Water: Check the cutting regularly to ensure the soil stays moist but not soggy. Water when the top inch of soil feels dry. Remove the plastic bag or humidity dome for a few hours each day to allow for air circulation and prevent fungal growth.
11. Check for Root Development: After a few weeks (usually 2-4 weeks, but it varies depending on the plant), gently tug on the cutting. If you feel resistance, it means roots have developed! You can also gently dig around the base of the cutting to check for roots.
12. Transplant (If Needed): Once the cutting has developed a good root system, you can transplant it into a larger pot with regular potting mix.
Water Propagation Variation:
Instead of planting the cutting directly into soil, you can also propagate it in water. Simply place the cutting in a glass or jar of water, ensuring that the bottom nodes are submerged. Change the water every few days to prevent algae growth. Once the roots are about an inch long, you can transplant the cutting into soil. I find this method particularly satisfying because you can watch the roots grow!
Section 2: Leaf Cuttings – Multiplying Succulents and More
Leaf cuttings are a super fun way to propagate certain plants, especially succulents like echeveria, sedum, and kalanchoe. Some other plants, like snake plants (Sansevieria), can also be propagated from leaf cuttings, although the process is slightly different.
What You’ll Need:
* A healthy mother plant
* Sharp, clean knife or pruning shears
* Small pots or trays
* Well-draining succulent potting mix or propagation medium
* Water
* Spray bottle
Step-by-Step Instructions (Succulents):
1. Prepare Your Tools: As always, sterilize your knife or pruning shears with rubbing alcohol.
2. Select Healthy Leaves: Choose healthy, plump leaves from your mother plant. Gently twist or cut the leaves off the stem, ensuring that you get a clean break at the base of the leaf. It’s important to get the entire leaf, including the base where it connects to the stem, as this is where the roots will emerge.
3. Callus the Leaves: This is a crucial step for succulents. Allow the cut ends of the leaves to callus over for a few days. This prevents them from rotting when they’re placed on the soil. Simply lay the leaves on a paper towel in a dry, well-ventilated area.
4. Prepare the Soil: Fill your small pots or trays with well-draining succulent potting mix.
5. Place the Leaves on the Soil: Lay the calloused leaves on top of the soil. You can gently press them into the soil slightly, but don’t bury them completely.
6. Mist the Soil: Lightly mist the soil with water. Avoid overwatering, as this can cause the leaves to rot.
7. Provide Bright, Indirect Light: Place the leaves in a location with bright, indirect light.
8. Monitor and Mist: Check the leaves regularly to ensure the soil stays slightly moist. Mist the soil when it feels dry.
9. Wait for Roots and New Growth: Be patient! It can take several weeks or even months for roots and new plantlets to emerge. You’ll start to see tiny roots growing from the base of the leaf, followed by small plantlets.
10. Transplant (If Needed): Once the plantlets are large enough to handle, you can gently separate them from the original leaf and transplant them into their own small pots. The original leaf will eventually wither and die, but the new plantlet will continue to grow.
Step-by-Step Instructions (Snake Plant):
1. Prepare Your Tools: Sterilize your knife or pruning shears.
2. Cut a Leaf into Sections: Cut a healthy snake plant leaf into 2-3 inch sections. Make sure to remember which end was the top and which was the bottom!
3. Callus the Sections: Allow the cut ends of the leaf sections to callus over for a few days.
4. Plant the Sections: Plant the leaf sections upright in well-draining potting mix, burying the bottom end about an inch deep.
5. Water and Wait: Water the soil lightly and place the pot in bright, indirect light. It can take several weeks for roots to develop.
6. Transplant (If Needed): Once the leaf sections have developed a good root system, you can transplant them into larger pots. Note that snake plants propagated from leaf cuttings will often revert to a solid green color, even if the original plant had variegated leaves.
Section 3: Division – Multiplying Clumping Plants
Division is a simple and effective way to propagate plants that grow in clumps, such as snake plants, ZZ plants, peace lilies, and many ornamental grasses. This method involves separating the plant into multiple smaller plants, each with its own roots and shoots.
What You’ll Need:
* A mature, clumping plant
* Sharp, clean knife or trowel
* Pots or containers
* Potting mix
* Water
Step-by-Step Instructions:
1. Prepare Your Tools: Sterilize your knife or trowel.
2. Remove the Plant from Its Pot: Gently remove the plant from its pot. If the plant is root-bound, you may need to loosen the roots by gently squeezing the pot or running a knife around the inside edge.
3. Inspect the Root Ball: Examine the root ball to identify natural divisions. You
Conclusion
So, there you have it! Propagating plants in June, especially using the techniques we’ve discussed, is not just a gardening activity; it’s a gateway to expanding your green space, saving money, and experiencing the sheer joy of nurturing new life. This is a must-try for any plant enthusiast, from the seasoned gardener to the curious beginner.
June offers the ideal conditions for successful propagation. The increased sunlight and warmer temperatures provide the perfect environment for root development and new growth. Think of it as giving your cuttings a head start on a thriving life.
But don’t feel limited to the methods we’ve outlined. Experiment! Try different types of cuttings – stem cuttings, leaf cuttings, even root cuttings for certain plants. Consider using different rooting mediums, such as perlite, vermiculite, or even just plain water. You can also explore using rooting hormones to give your cuttings an extra boost, although many plants will root perfectly well without them.
For example, if you’re propagating succulents, try letting the cut ends callous over for a few days before planting them in well-draining soil. This helps prevent rot. If you’re working with herbs like mint or basil, try propagating them in water first, then transplanting them to soil once they’ve developed roots. The possibilities are endless!
The key is to be patient and observant. Check your cuttings regularly for signs of root development and adjust your care accordingly. Don’t be discouraged if some cuttings don’t take – propagation is a learning process, and even experienced gardeners face failures.
We are confident that you will find propagating plants in June a rewarding and fulfilling experience. It’s a fantastic way to expand your plant collection, share your love of gardening with friends and family, and connect with nature on a deeper level.
So, grab your pruners, gather your supplies, and get ready to create some new life! We encourage you to try these DIY propagation tricks and share your experiences with us. Let us know what plants you’ve successfully propagated, what challenges you’ve faced, and any tips or tricks you’ve discovered along the way. Share your photos and stories in the comments below – we can’t wait to see what you create! Happy propagating!
Frequently Asked Questions (FAQ)
What are the best plants to propagate in June?
June is an excellent month for propagating a wide variety of plants. Some of the most popular and successful choices include:
* **Herbs:** Basil, mint, rosemary, lavender, sage, and thyme all propagate easily from stem cuttings in June.
* **Succulents:** Echeveria, sedum, and sempervivum are great candidates for leaf or stem cuttings.
* **Houseplants:** Pothos, snake plants, ZZ plants, spider plants, and philodendrons are all relatively easy to propagate using various methods.
* **Flowering Plants:** Hydrangeas, roses, and geraniums can be propagated from stem cuttings, although success rates may vary depending on the variety.
* **Vegetables:** Tomato suckers, pepper cuttings, and even some herbs like oregano can be propagated to extend your harvest.
The best plants to propagate will also depend on your local climate and growing conditions. Research the specific needs of the plants you’re interested in propagating to ensure the best chance of success.
What tools do I need for propagating plants?
You don’t need a lot of fancy equipment to propagate plants. Here’s a basic list of essential tools:
* **Sharp Pruners or Scissors:** Clean, sharp tools are crucial for making clean cuts that will heal quickly and prevent disease.
* **Rooting Medium:** Options include potting soil, perlite, vermiculite, coco coir, or even just water. Choose a medium that is well-draining and sterile.
* **Containers:** Small pots, seedling trays, or even recycled containers like yogurt cups can be used to hold your cuttings.
* **Spray Bottle:** For misting your cuttings to keep them hydrated.
* **Plastic Bag or Humidity Dome:** To create a humid environment that encourages root development.
* **Rooting Hormone (Optional):** Can help speed up the rooting process, but is not always necessary.
* **Labels:** To keep track of what you’re propagating.
How do I take a stem cutting?
Taking a stem cutting is a common and effective method of propagation. Here’s a step-by-step guide:
1. **Choose a healthy stem:** Select a stem that is actively growing and free from pests or diseases.
2. **Make the cut:** Using clean, sharp pruners or scissors, make a cut just below a node (the point where leaves emerge from the stem). The cutting should be about 4-6 inches long.
3. **Remove lower leaves:** Remove the leaves from the bottom 1-2 inches of the cutting to prevent them from rotting when they come into contact with the rooting medium.
4. **Apply rooting hormone (optional):** Dip the cut end of the stem into rooting hormone powder or liquid.
5. **Plant the cutting:** Insert the cut end of the stem into your chosen rooting medium, making sure that at least one node is buried.
6. **Water and cover:** Water the cutting gently and cover it with a plastic bag or humidity dome to create a humid environment.
7. **Provide bright, indirect light:** Place the cutting in a location that receives bright, indirect light. Avoid direct sunlight, which can scorch the leaves.
8. **Keep the rooting medium moist:** Check the rooting medium regularly and water as needed to keep it moist but not soggy.
9. **Wait for roots to develop:** It can take several weeks for roots to develop. You can gently tug on the cutting to check for resistance, which indicates that roots have formed.
How long does it take for cuttings to root?
The time it takes for cuttings to root can vary depending on the plant species, the propagation method, and the environmental conditions. Some plants, like pothos and basil, may root in as little as a week or two, while others may take several weeks or even months.
Factors that can affect rooting time include:
* **Temperature:** Warmer temperatures generally promote faster rooting.
* **Humidity:** High humidity helps prevent the cuttings from drying out.
* **Light:** Bright, indirect light is essential for photosynthesis and root development.
* **Rooting Hormone:** Using rooting hormone can speed up the rooting process.
Be patient and don’t give up if your cuttings don’t root immediately. Keep providing them with the right conditions, and they will eventually develop roots.
What do I do after the cuttings have rooted?
Once your cuttings have developed a healthy root system, it’s time to transplant them into individual pots.
1. **Gently remove the cutting from the rooting medium:** Be careful not to damage the delicate roots.
2. **Plant the cutting in a pot filled with well-draining potting soil:** Choose a pot that is appropriately sized for the size of the root system.
3. **Water thoroughly:** Water the newly potted cutting thoroughly to help settle the soil around the roots.
4. **Provide bright, indirect light:** Place the potted cutting in a location that receives bright, indirect light.
5. **Gradually acclimate the cutting to its new environment:** Over the next few weeks, gradually expose the cutting to more sunlight and less humidity.
6. **Fertilize regularly:** Once the cutting has established itself in its new pot, you can begin fertilizing it regularly with a balanced fertilizer.
With proper care, your newly propagated plants will thrive and bring you years of enjoyment. Remember that **propagating plants in June** offers a significant advantage due to the optimal growing conditions.
Leave a Comment