

Bean Sprouts Growing DIY: Unlock the secrets to cultivating your own crunchy, nutritious bean sprouts right in your kitchen! Forget those bland, pre-packaged sprouts from the grocery store. I’m going to show you how incredibly easy and rewarding it is to grow your own, bursting with fresh flavor and packed with vitamins.
Sprouting beans is an ancient practice, dating back thousands of years in Asian cultures, where they were prized for their nutritional value and ease of cultivation, especially during times of scarcity. Think of it – a readily available source of fresh greens, even in the dead of winter! Isn’t that amazing?
In today’s fast-paced world, we’re all looking for ways to eat healthier and connect with our food. That’s where this bean sprouts growing DIY guide comes in. You’ll learn a simple, cost-effective method that requires minimal space and effort. Imagine adding a handful of freshly grown sprouts to your salads, sandwiches, or stir-fries. Not only will you be boosting your nutrient intake, but you’ll also be experiencing the satisfaction of growing your own food. Plus, it’s a fantastic project for kids, teaching them about the wonders of nature and healthy eating habits. So, let’s get sprouting!
Regrow Celery From Kitchen Scraps: A Beginner’s Guide
Hey there, fellow plant enthusiasts! Ever feel guilty about tossing those celery ends after chopping up the stalks for a snack or soup? Well, I’m here to tell you that you can easily regrow celery from those very scraps! It’s a super rewarding and surprisingly simple DIY project that brings a little bit of the garden indoors. Plus, it’s a fantastic way to reduce food waste. Let’s dive in!
What You’ll Need
Before we get started, let’s gather our supplies. This is a pretty low-key project, so you probably already have most of these things lying around:
* A celery stalk with the base intact (about 2-3 inches from the bottom).
* A shallow dish or bowl (a saucer works great).
* Water (tap water is fine).
* A sunny windowsill or well-lit area.
* Potting soil.
* A pot with drainage holes (around 6-8 inches in diameter).
* A sharp knife or scissors (optional, for trimming).
Phase 1: Rooting Your Celery Base
This is where the magic begins! We’re going to coax those celery cells into producing roots. Don’t worry, it’s easier than it sounds.
1. Prepare the Celery Base: Carefully inspect your celery base. If there are any brown or mushy outer stalks, gently peel them away. You want to expose the fresh, green core. You can use a sharp knife or scissors to trim the top of the celery base, leaving about 2 inches of the stalks. This helps direct the plant’s energy towards root growth.
2. Place in Water: Fill your shallow dish with about an inch of water. Place the celery base, cut-side up, in the water. Make sure the bottom of the base is submerged, but the top portion remains above the water line. This prevents rotting.
3. Find a Sunny Spot: Place the dish on a sunny windowsill or in a well-lit area. Celery needs plenty of light to thrive. A south-facing window is ideal, but an east or west-facing window will also work.
4. Change the Water Regularly: This is crucial! Change the water every 1-2 days to prevent bacteria growth and keep the water fresh. I usually do this every morning while I’m making my coffee.
5. Observe and Wait: Now comes the patience part. Over the next few days, you should start to see small roots emerging from the bottom of the celery base. You might also notice new green shoots sprouting from the top. This is a sign that your celery is happy and healthy!
Phase 2: Planting Your Celery
Once your celery has developed a good root system (about 1-2 inches long), it’s time to move it to a pot with soil.
1. Prepare the Pot: Fill your pot with good-quality potting soil. Make sure the pot has drainage holes to prevent waterlogging. I like to use a mix of potting soil and compost for extra nutrients.
2. Create a Hole: Use your finger or a small trowel to create a hole in the center of the soil, large enough to accommodate the celery base and its roots.
3. Carefully Transplant: Gently remove the celery base from the water. Be careful not to damage the delicate roots. Place the celery base in the hole, making sure the top of the base is level with the soil surface.
4. Fill and Water: Fill the hole with soil, gently pressing down around the celery base to secure it. Water the soil thoroughly until water drains out of the drainage holes.
5. Back to the Sunny Spot: Return the pot to your sunny windowsill or well-lit area.
Phase 3: Caring for Your Regrown Celery
Now that your celery is planted, it’s time to provide it with the care it needs to grow into a healthy plant.
1. Watering: Keep the soil consistently moist, but not soggy. Water when the top inch of soil feels dry to the touch. I usually water mine every 2-3 days, but this will depend on the temperature and humidity in your home.
2. Fertilizing: Celery is a heavy feeder, so it benefits from regular fertilization. Use a balanced liquid fertilizer diluted to half strength every 2-3 weeks. You can find these at any garden center.
3. Light: As mentioned before, celery needs plenty of light. If you don’t have a sunny windowsill, you can supplement with a grow light.
4. Harvesting: You can start harvesting celery stalks once they reach a decent size (around 6-8 inches long). Simply cut the outer stalks near the base of the plant. The plant will continue to produce new stalks.
5. Pest Control: Keep an eye out for pests like aphids or spider mites. If you notice any, you can try spraying the plant with a mixture of water and dish soap.
Troubleshooting
Sometimes, things don’t go exactly as planned. Here are a few common issues you might encounter and how to fix them:
* Celery base rotting: This is usually caused by too much moisture. Make sure the top of the base is not submerged in water. Change the water more frequently.
* No root growth: This could be due to lack of light or poor water quality. Make sure the celery is in a sunny spot and that you’re changing the water regularly.
* Yellowing leaves: This could be a sign of overwatering or underwatering. Check the soil moisture and adjust your watering accordingly. It could also be a sign of nutrient deficiency, so try fertilizing.
* Slow growth: This could be due to lack of light, nutrients, or water. Make sure your celery is getting enough of all three.
Tips and Tricks
Here are a few extra tips to help you succeed with your celery regrowing project:
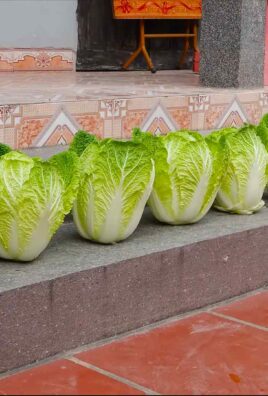
* Choose a healthy celery stalk: Look for a stalk that is firm and crisp, with bright green leaves. Avoid stalks that are wilted or discolored.
* Use filtered water: If your tap water is heavily chlorinated, consider using filtered water for the rooting process.
* Be patient: It can take several weeks for the celery to develop a good root system. Don’t get discouraged if you don’t see results immediately.
* Experiment with different varieties: There are many different varieties of celery, so try regrowing a few different ones to see which ones you like best.
* Consider hydroponics: If you’re feeling adventurous, you can try regrowing celery hydroponically. This involves growing the celery in water without soil.
Beyond Regrowing: Growing Celery from Seed
While regrowing from scraps is fun and easy, you can also grow celery from seed for more variety and control. Here’s a quick overview:
1. Start Seeds Indoors: Celery seeds are tiny and need a long growing season, so start them indoors 10-12 weeks before the last expected frost. Sow seeds thinly on the surface of a seed-starting mix and gently press them in. Keep the soil consistently moist and provide plenty of light.
2. Transplant Seedlings: Once the seedlings have developed several sets of true leaves, transplant them into individual pots. Harden them off gradually by exposing them to outdoor conditions for a few hours each day before transplanting them into your garden.
3. Plant in Rich Soil: Celery needs rich, well-drained soil with plenty of organic matter. Amend your soil with compost or well-rotted manure before planting.
4. Provide Consistent Moisture: Celery needs consistent moisture to thrive. Water regularly, especially during hot, dry weather. Mulching around the plants can help retain moisture.
5. Fertilize Regularly: As mentioned before, celery is a heavy feeder. Fertilize regularly with a balanced fertilizer.
6. Blanching (Optional): Blanching celery stalks makes them more tender and less bitter. To blanch, mound soil around the stalks or wrap them with paper or cardboard a few weeks before harvest.
Growing celery from seed requires more effort than regrowing from scraps, but it’s a rewarding experience that allows you to grow a wider variety of celery.
Enjoy Your Homegrown Celery!
And there you have it! You’ve successfully regrown celery from kitchen scraps. Now you can enjoy fresh, homegrown celery in your salads, soups, and snacks. It’s a great feeling to know that you’re reducing food waste and growing your own food. Happy gardening!
Conclusion
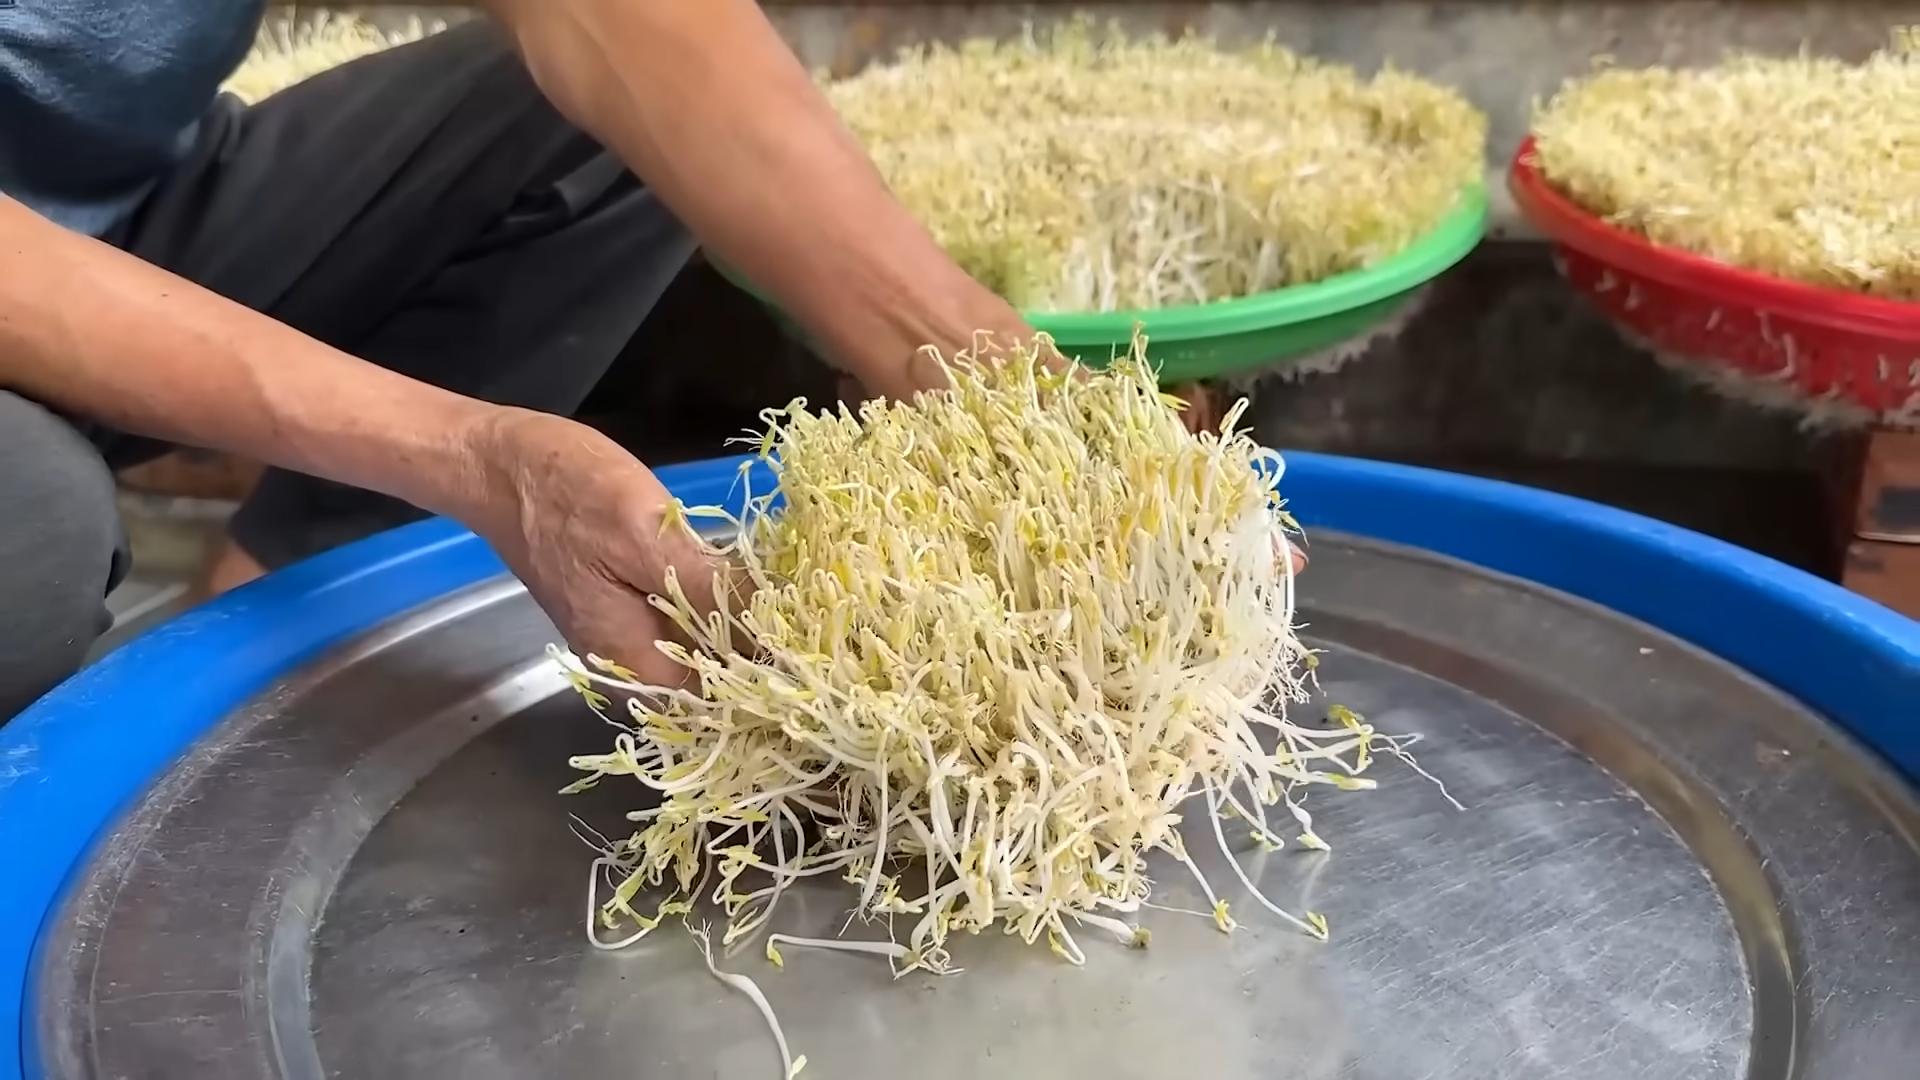
So, there you have it! Growing your own bean sprouts at home is not only incredibly easy and cost-effective, but it also provides you with a continuous supply of fresh, crunchy goodness. Forget those limp, sad-looking sprouts from the grocery store – with this simple DIY trick, you can enjoy vibrant, flavorful bean sprouts whenever you want.
The beauty of this method lies in its simplicity. You don’t need any fancy equipment or a green thumb. Just a jar, some beans, water, and a little patience. The satisfaction of watching those tiny sprouts emerge and grow is truly rewarding. Plus, you know exactly what you’re eating – no hidden preservatives or additives, just pure, natural goodness.
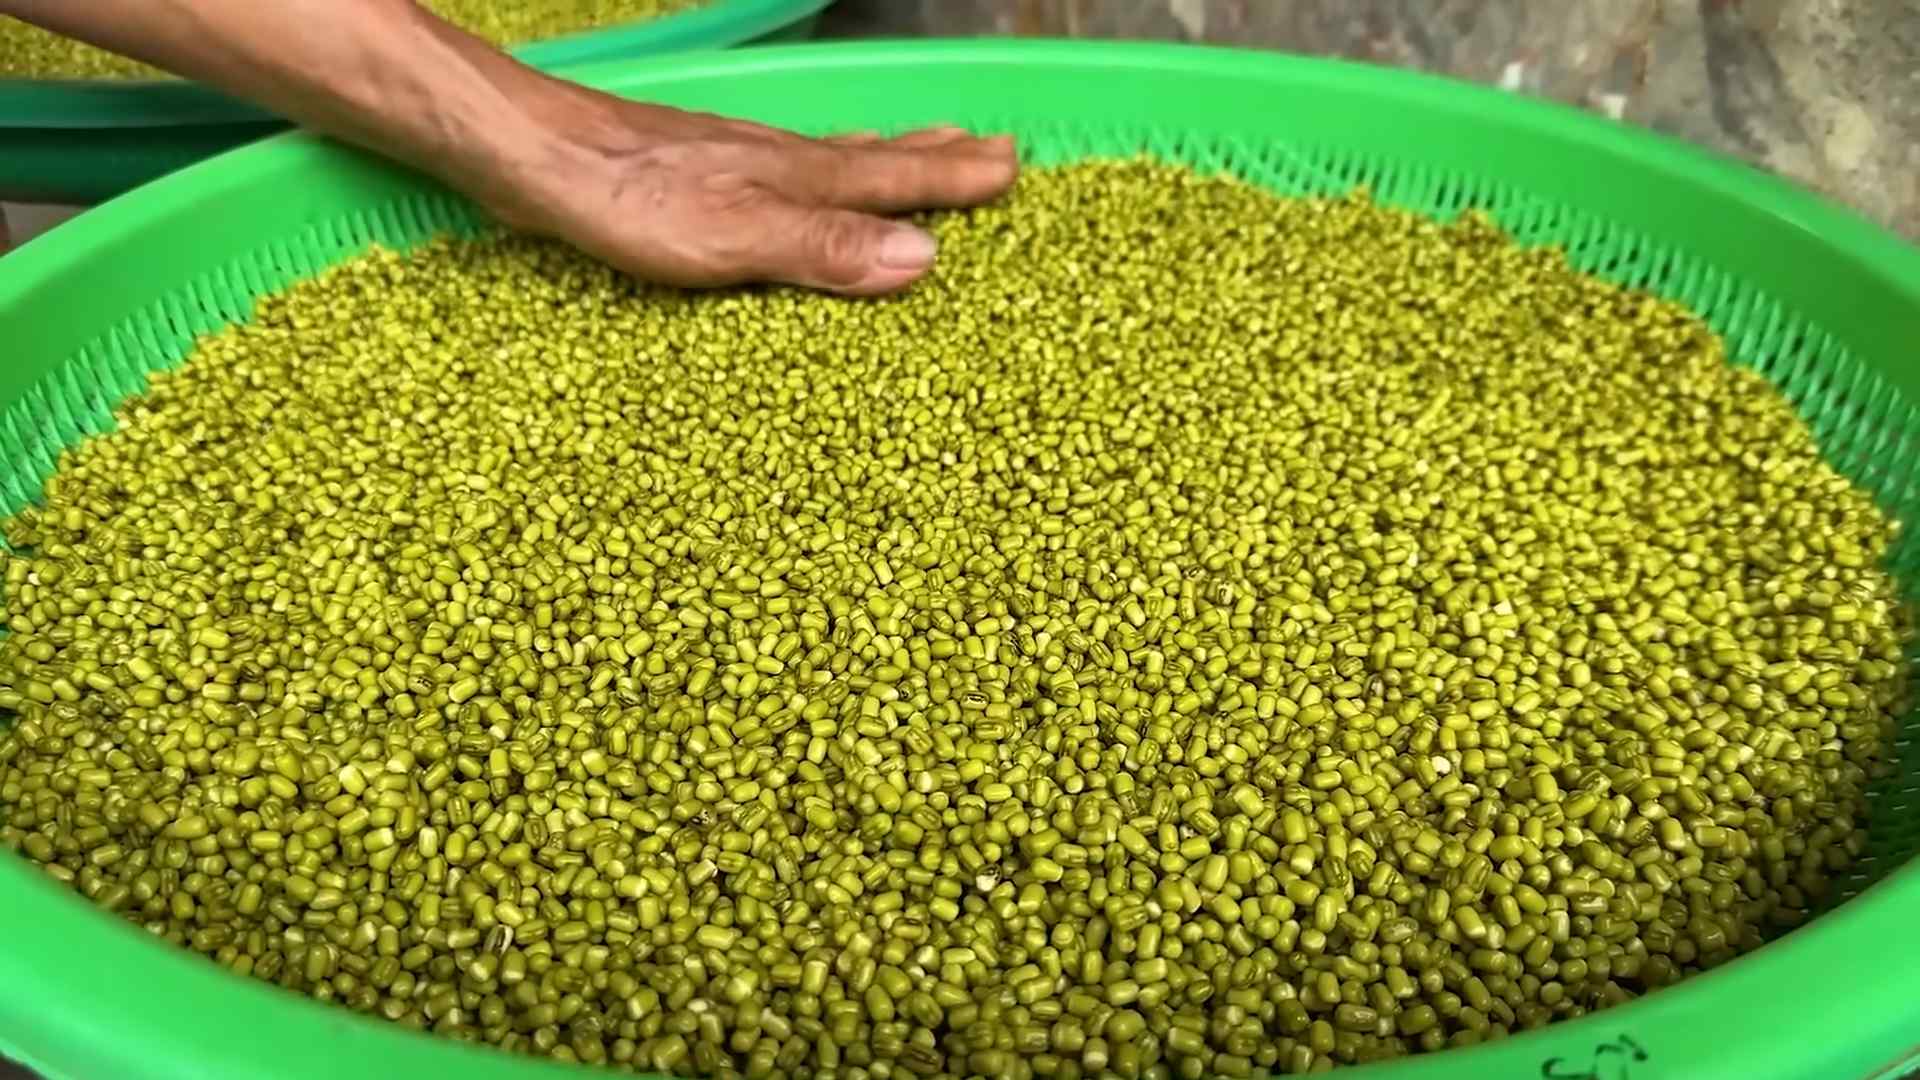
But the fun doesn’t stop there! Feel free to experiment with different types of beans. Mung beans are the classic choice, but you can also try adzuki beans, lentils, or even chickpeas for a unique flavor profile. Consider adding a touch of spice to your sprouting water for an extra kick. A pinch of chili flakes or a dash of turmeric can add a subtle warmth and complexity to your bean sprouts.
Another variation to consider is the sprouting location. While a dark cupboard is ideal for initial sprouting, you can expose your sprouts to indirect sunlight for the last day or two to encourage chlorophyll production, resulting in greener and slightly sweeter sprouts. Just be careful not to expose them to direct sunlight, as this can dry them out and hinder their growth.
This bean sprouts growing DIY method is a game-changer for anyone who loves fresh, healthy food. It’s a sustainable way to reduce your grocery bill, minimize food waste, and connect with the natural world.
We wholeheartedly encourage you to give this DIY trick a try. It’s a fun and educational project for the whole family, and the results are simply delicious. Once you’ve mastered the basics, you can start experimenting with different beans, flavors, and growing conditions to create your own signature bean sprout recipe.
Don’t be afraid to get creative and share your experiences with us! We’d love to hear about your successes, challenges, and any unique variations you’ve discovered. Share your photos and tips on social media using #HomegrownBeanSprouts and let’s inspire others to embrace the joy of DIY sprouting. Happy sprouting!
Frequently Asked Questions (FAQ)
What types of beans can I use for sprouting?
The most common and readily available bean for sprouting is the mung bean. However, you can also successfully sprout adzuki beans, lentils, chickpeas, and even some types of peas. Just be sure to use beans that are specifically intended for sprouting or cooking, as some beans may contain toxins that are neutralized during the cooking or sprouting process. Avoid using ornamental beans or beans that have been treated with pesticides or fungicides.
How long does it take for bean sprouts to grow?
Generally, bean sprouts will be ready to harvest in 3-5 days. The exact time will depend on the type of bean, the temperature, and the humidity. Mung beans tend to sprout the fastest, while other beans may take a little longer. Keep an eye on your sprouts and harvest them when they reach your desired length and crunchiness.
How often should I rinse the bean sprouts?
It’s crucial to rinse your bean sprouts at least twice a day, preferably three times a day, to prevent mold and bacteria growth. Rinse them thoroughly with cool, clean water, ensuring that all the beans are moistened. This also helps to remove any accumulated waste products from the sprouting process.
What if my bean sprouts start to smell bad?
A foul odor is a sign that your bean sprouts may be contaminated with bacteria or mold. This can happen if they are not rinsed frequently enough or if the sprouting environment is too warm and humid. If you notice a bad smell, it’s best to discard the sprouts and start a new batch, taking extra care to rinse them regularly.
Can I eat the bean sprout roots?
Yes, the roots of bean sprouts are perfectly edible and contain nutrients. They are often just as crunchy and flavorful as the sprouts themselves.
How do I store bean sprouts?
Once your bean sprouts have reached your desired length, rinse them thoroughly and drain them well. Store them in an airtight container lined with a paper towel in the refrigerator. The paper towel will help to absorb excess moisture and keep the sprouts fresh for up to a week.
Why are my bean sprouts not sprouting?
There could be several reasons why your bean sprouts are not sprouting. First, make sure your beans are viable and not too old. Old beans may have a lower germination rate. Second, ensure that the beans are properly soaked before sprouting. Soaking helps to activate the germination process. Third, the temperature may be too cold. Bean sprouts prefer a warm environment (around 70-75°F). Finally, make sure the beans are kept moist but not waterlogged.
Can I grow bean sprouts in direct sunlight?
No, direct sunlight can damage your bean sprouts and hinder their growth. It can also cause them to dry out and become bitter. It’s best to keep them in a dark or dimly lit location during the initial sprouting phase. You can expose them to indirect sunlight for the last day or two to encourage chlorophyll production, but avoid direct sunlight at all costs.
Are there any health benefits to eating bean sprouts?
Yes, bean sprouts are a nutritious food that is low in calories and high in vitamins, minerals, and fiber. They are a good source of vitamin C, vitamin K, folate, and manganese. They also contain antioxidants that can help protect against cell damage.
Can I use tap water for sprouting?
While tap water is generally safe to use, it may contain chlorine or other chemicals that can inhibit sprouting. If you are concerned about the quality of your tap water, you can use filtered water or let the tap water sit out for 24 hours to allow the chlorine to evaporate.
How do I prevent mold from growing on my bean sprouts?
The key to preventing mold growth is to rinse your bean sprouts frequently and thoroughly. This helps to remove any accumulated waste products and keep the sprouts clean. Also, ensure that the sprouting environment is well-ventilated and not too humid.
What can I do with my bean sprouts?
Bean sprouts are incredibly versatile and can be used in a variety of dishes. They are a popular addition to stir-fries, salads, soups, and sandwiches. They can also be eaten raw as a crunchy snack. Experiment with different recipes and find your favorite way to enjoy your homegrown bean sprouts!
Leave a Comment