

Grow Celery in Your Backyard – imagine strolling into your garden, not to weed or water, but to harvest crisp, refreshing celery stalks for your salad or a healthy snack! Sounds like a dream, right? Well, it doesn’t have to be! For centuries, celery has been cultivated for its medicinal properties and culinary uses, dating back to ancient Greece and Rome. Today, we often take it for granted, readily available in supermarkets. But what if I told you that you could easily bypass the grocery store and grow celery in your backyard, enjoying fresher, more flavorful celery than you’ve ever tasted?
This DIY guide is your ticket to unlocking the secrets of home-grown celery. Forget complicated gardening techniques and expensive equipment. I’m going to share simple, effective tricks and hacks that will empower even the most novice gardener to cultivate a thriving celery patch. Why is this so important? Because store-bought celery can be loaded with pesticides and often lacks the vibrant flavor of freshly harvested produce. Plus, there’s nothing quite as satisfying as nurturing your own food from seed to table. So, let’s ditch the store-bought stuff and embark on this exciting journey to grow your own delicious celery!
Growing Celery From Kitchen Scraps: A Beginner’s Guide
Hey there, fellow gardening enthusiasts! Have you ever looked at the celery stalks you’re about to toss in the compost and thought, “Hmm, could I grow more celery from this?” Well, the answer is a resounding YES! Growing celery from kitchen scraps is a fun, easy, and surprisingly rewarding project. It’s a great way to reduce food waste, save money, and enjoy fresh, homegrown celery. Let me walk you through the process, step-by-step.
What You’ll Need
Before we dive in, let’s gather our supplies. This is a pretty low-key project, so you probably have most of these things already:
* A celery stalk base (the part you usually cut off and discard). Make sure it’s relatively fresh and firm.
* A shallow dish or bowl.
* Water.
* A sunny windowsill or well-lit area.
* Potting soil.
* A pot or container (at least 6 inches in diameter).
* Optional: Rooting hormone (this can help, but isn’t essential).
Phase 1: Rooting Your Celery Base
This is where the magic begins! We’re going to coax those celery cells into producing roots.
1. Prepare the Celery Base: Carefully cut off the celery stalk about 2 inches from the bottom. You want to keep the base intact, as this is where the new growth will emerge. Remove any loose or damaged outer stalks.
2. Place in Water: Put the celery base in your shallow dish or bowl. Add enough water to cover the bottom inch or so of the base. Be careful not to submerge the entire base, as this can lead to rot.
3. Find a Sunny Spot: Place the dish on a sunny windowsill or in a well-lit area. Celery needs plenty of light to thrive.
4. Change the Water Regularly: This is crucial! Change the water every 1-2 days to prevent bacteria growth and keep the water fresh.
5. Observe and Wait: Over the next few days, you should start to see small roots emerging from the bottom of the celery base. You might also notice new green shoots sprouting from the top. This is a good sign!
6. Patience is Key: It usually takes about 5-7 days for the roots to develop enough for planting. You want the roots to be at least an inch long before moving on to the next phase.
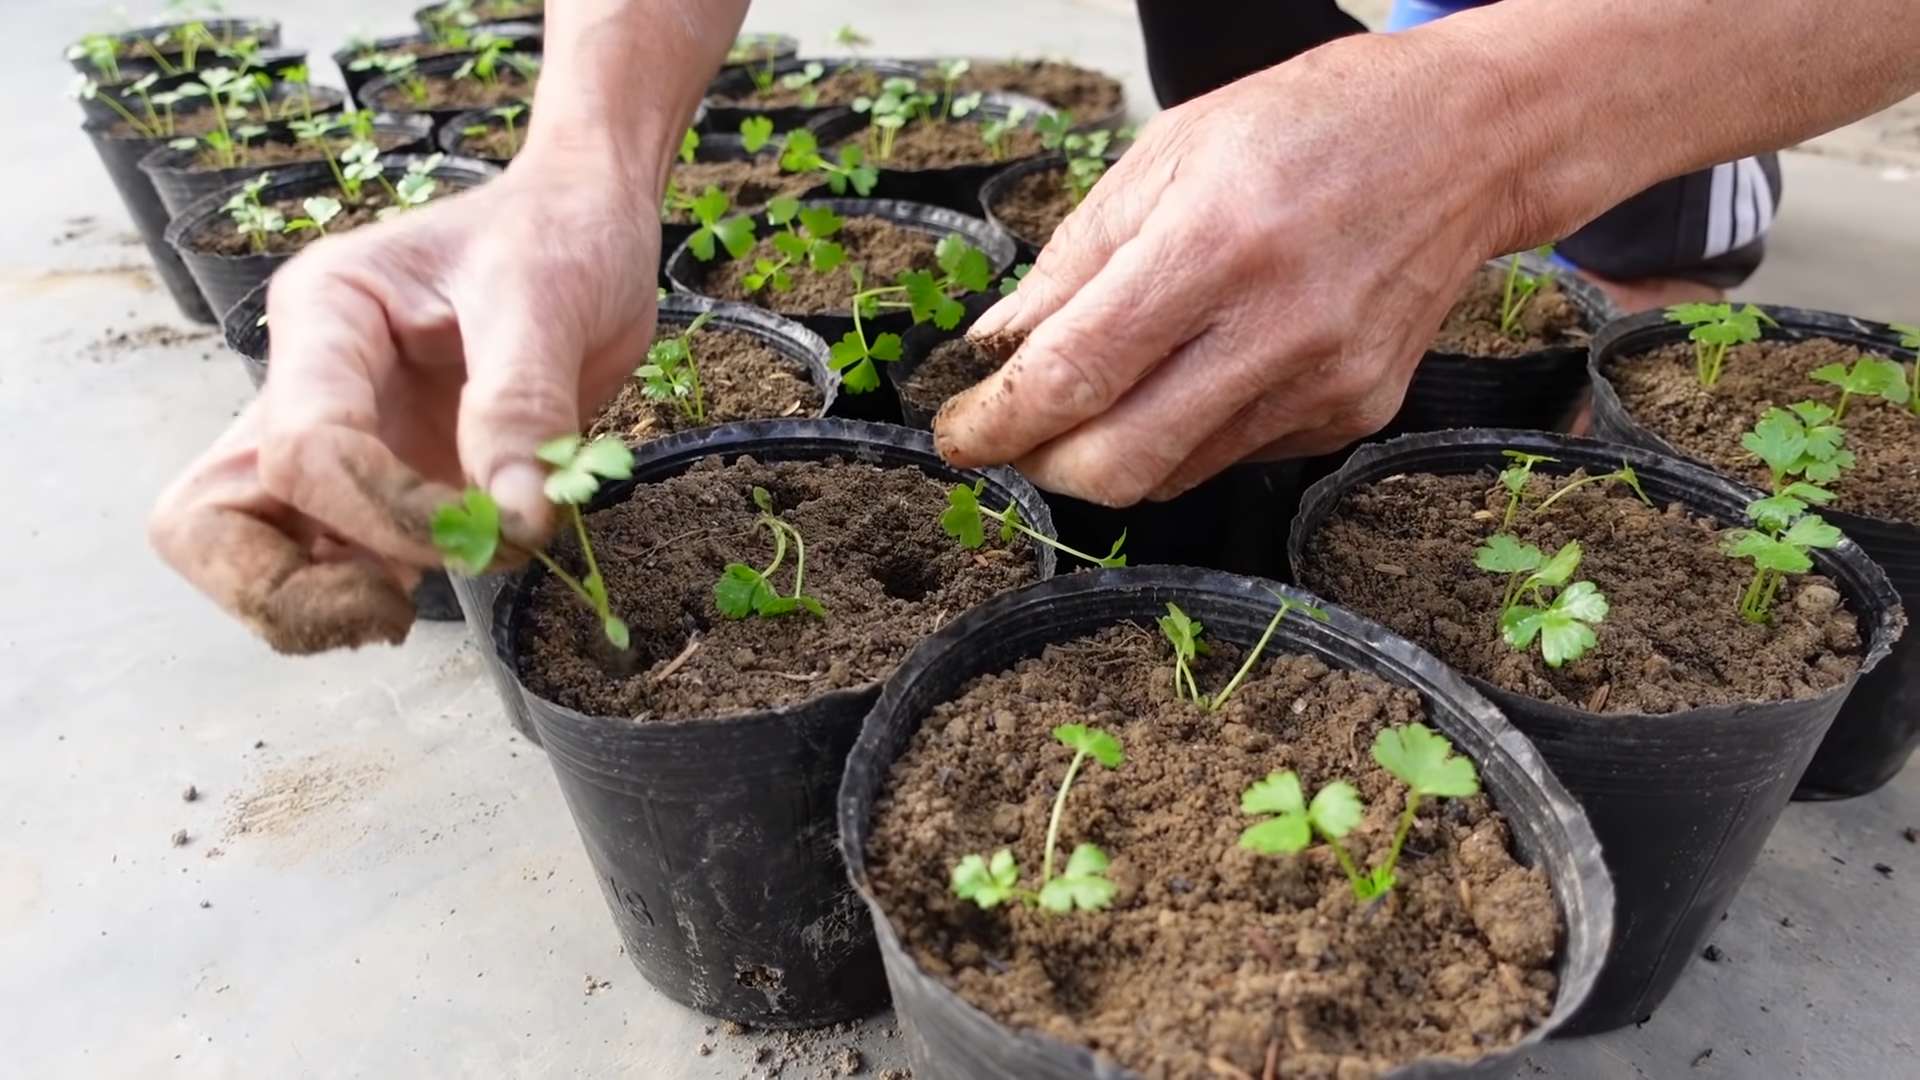
Phase 2: Planting Your Rooted Celery
Now that our celery has roots, it’s time to give it a proper home in some soil.
1. Prepare Your Pot: Fill your pot or container with potting soil. Make sure the pot has drainage holes to prevent waterlogging.
2. Create a Planting Hole: Use your finger or a small trowel to create a hole in the center of the pot, deep enough to accommodate the celery base and its roots.
3. Optional: Rooting Hormone: If you have rooting hormone, dip the roots of the celery base in it. This can help promote further root growth.
4. Plant the Celery: Carefully place the celery base into the hole, making sure the roots are spread out. Gently backfill the hole with potting soil, leaving the top of the celery base exposed.
5. Water Thoroughly: Water the soil thoroughly until water drains out of the drainage holes. This will help settle the soil around the roots.
6. Choose a Sunny Location: Place the pot in a sunny location that receives at least 6 hours of sunlight per day. Celery loves sunshine!
Phase 3: Caring for Your Celery Plant
Now that your celery is planted, it’s time to provide it with the care it needs to grow into a healthy, delicious plant.
1. Water Regularly: Celery needs consistent moisture to thrive. Water the plant whenever the top inch of soil feels dry to the touch. Avoid overwatering, as this can lead to root rot.
2. Fertilize Occasionally: Celery is a heavy feeder, so it benefits from regular fertilization. Use a balanced liquid fertilizer every 2-3 weeks. Follow the instructions on the fertilizer packaging.
3. Monitor for Pests and Diseases: Keep an eye out for common celery pests, such as aphids and slugs. If you spot any pests, treat them with an appropriate insecticide or organic pest control method. Celery can also be susceptible to diseases like blight, so make sure to provide good air circulation and avoid overhead watering.
4. Blanching (Optional): Blanching is the process of excluding light from the celery stalks to make them more tender and less bitter. You can blanch your celery by wrapping the stalks with newspaper or cardboard a few weeks before harvesting.
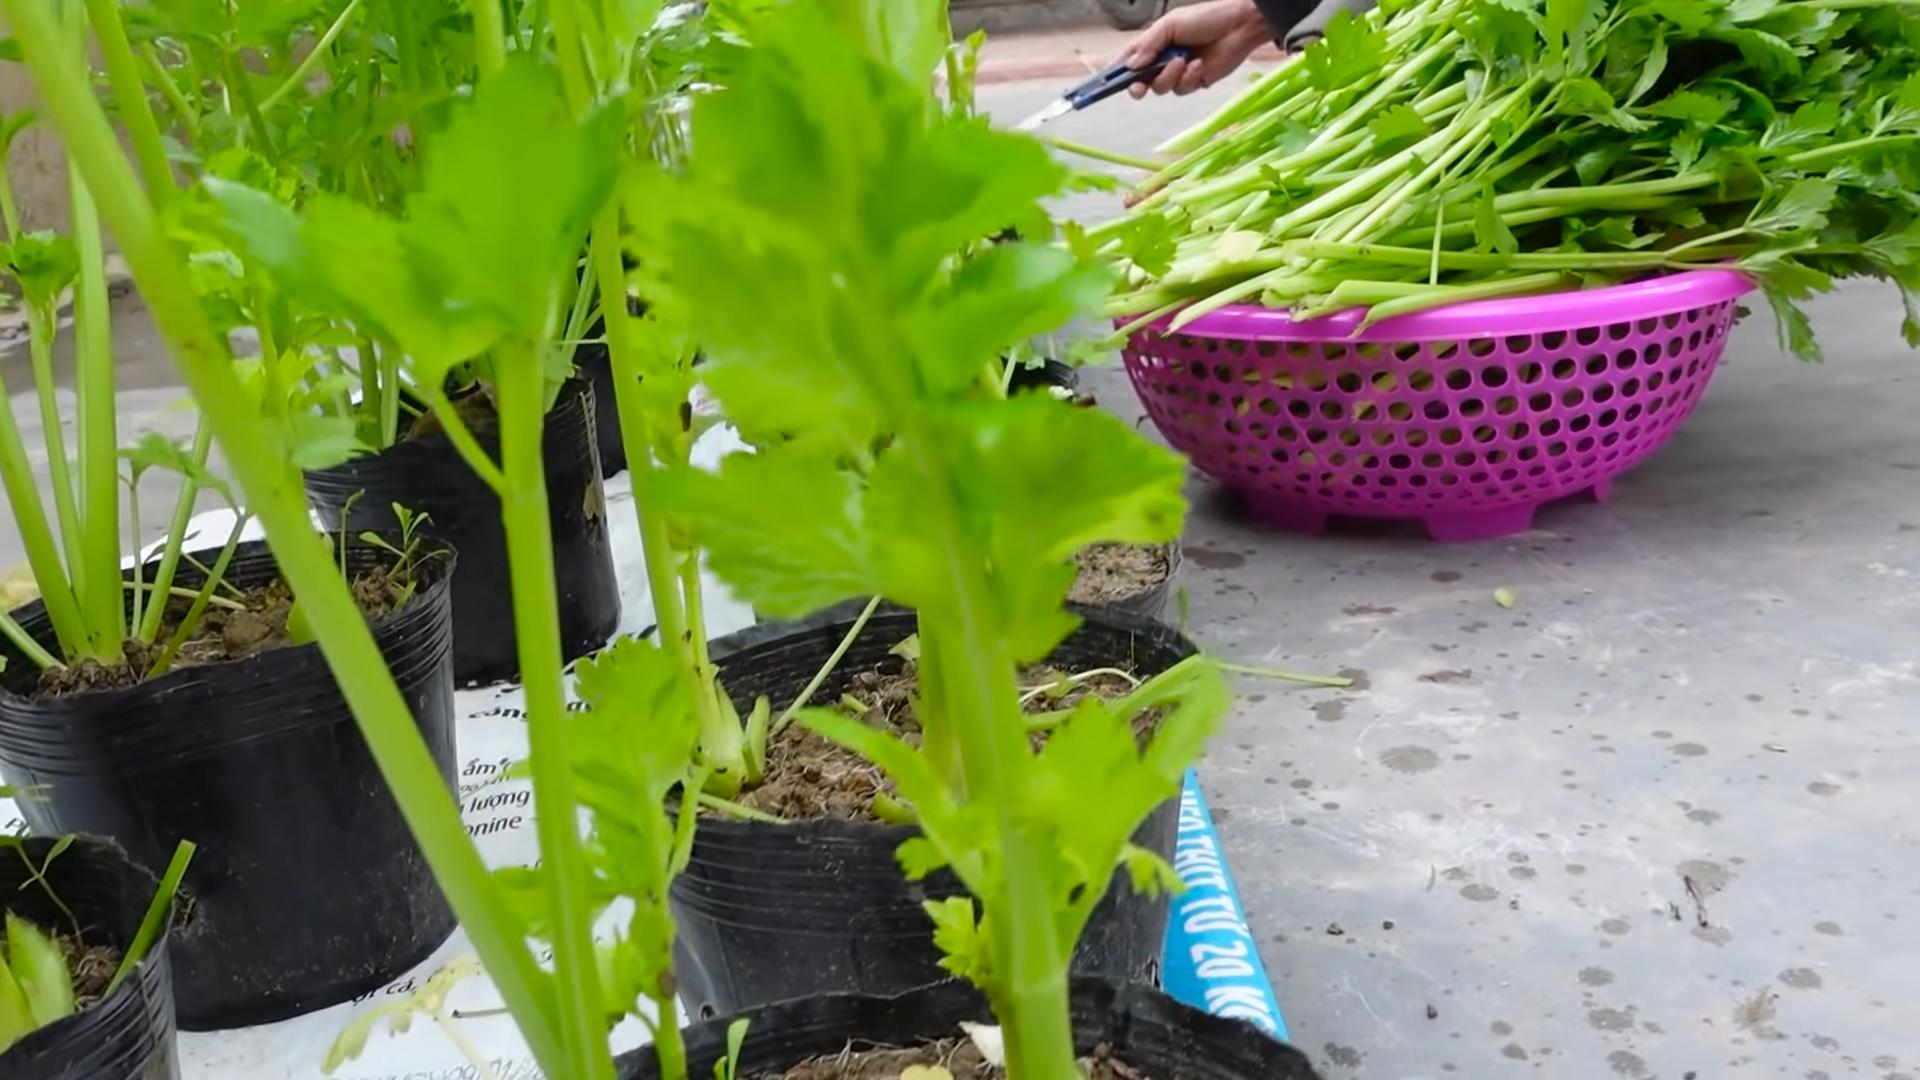
5. Harvesting: You can start harvesting your celery when the stalks are about 6-8 inches long. Simply cut off the stalks you need with a sharp knife. The plant will continue to produce new stalks as long as you keep watering and fertilizing it. You can harvest individual stalks as needed, or harvest the entire plant at once.
Troubleshooting Tips
Sometimes, things don’t go exactly as planned. Here are a few common issues you might encounter and how to address them:
* Celery base rotting: This is usually caused by overwatering or not changing the water frequently enough. Make sure to change the water every 1-2 days and avoid submerging the entire base.
* No roots developing: This could be due to a number of factors, such as using an old or damaged celery base, not providing enough light, or using contaminated water. Try starting with a fresh celery base, moving the dish to a sunnier location, and using filtered water.
* Slow growth: Celery needs plenty of sunlight, water, and nutrients to grow. Make sure your plant is getting enough of all three. You can also try adding some compost or other organic matter to the soil to improve its fertility.
* Yellowing leaves: This can be a sign of overwatering, underwatering, or nutrient deficiency. Check the soil moisture and adjust your watering schedule accordingly. You may also need to fertilize your plant more frequently.
Extra Tips for Success
Here are a few extra tips to help you grow the best celery possible:
* Choose a healthy celery stalk: Start with a fresh, firm celery stalk base. Avoid stalks that are wilted, discolored, or have any signs of rot.
* Use filtered water: Tap water can contain chlorine and other chemicals that can inhibit root growth. Use filtered water or let tap water sit out for 24 hours to allow the chlorine to evaporate.
* Provide good air circulation: Celery is susceptible to diseases like blight, so it’s important to provide good air circulation around the plant. Avoid overcrowding and make sure the plant is not too close to other plants.
* Be patient: Growing celery from kitchen scraps takes time and patience. Don’t get discouraged if you don’t see results immediately. Just keep providing your plant with the care it needs, and you’ll eventually be rewarded with fresh, homegrown celery.
* Consider your climate: Celery prefers cooler temperatures. If you live in a hot climate, you may need to provide some shade during the hottest part of the day.
Growing celery from kitchen scraps is a fun and rewarding project that anyone can do. With a little patience and care, you can enjoy fresh, homegrown celery all season long. Happy gardening!
Conclusion
So, there you have it! Growing celery in your backyard isn’t just a whimsical gardening project; it’s a genuinely rewarding experience that puts fresh, crisp, and flavorful celery right at your fingertips. Forget those limp, store-bought stalks that have traveled miles and lost their vibrancy. Imagine the satisfaction of harvesting your own celery, knowing exactly where it came from and how it was grown.
This DIY approach to growing celery offers a multitude of benefits. You’ll have access to fresher, more nutritious celery, free from the pesticides and herbicides often used in commercial farming. Plus, it’s a fantastic way to connect with nature, learn about the growing process, and reduce your carbon footprint. It’s a win-win for your health, your wallet, and the environment.
But the best part? The possibilities are endless! Once you’ve mastered the basics, you can experiment with different celery varieties. Try growing ‘Utah Tall’ for its classic flavor and crisp texture, or ‘Golden Self-Blanching’ for a milder, sweeter taste. You can even try growing celery from the base of a store-bought stalk – a fantastic way to recycle and reduce waste.
Consider companion planting to further enhance your celery’s growth and flavor. Marigolds can deter pests, while onions and garlic can help to repel aphids. Experiment with different combinations to find what works best in your garden.
And don’t limit yourself to just eating the stalks! Celery leaves are packed with flavor and can be used in soups, salads, and stir-fries. Celery seeds are also a valuable spice, adding a unique depth of flavor to your dishes.
Growing your own celery is more than just a gardening project; it’s a lifestyle choice. It’s about embracing fresh, healthy food, connecting with nature, and taking control of your food supply.
We wholeheartedly encourage you to give this DIY trick a try. It may seem daunting at first, but with a little patience and care, you’ll be rewarded with a bountiful harvest of delicious, homegrown celery. And once you’ve experienced the joy of growing your own, you’ll never look at celery the same way again.
Don’t forget to share your experiences with us! We’d love to hear about your successes, your challenges, and any tips or tricks you’ve discovered along the way. Share your photos and stories on social media using #HomegrownCelery and inspire others to embark on their own celery-growing adventures. Let’s create a community of celery enthusiasts and celebrate the joys of homegrown goodness! This method of growing celery is a game changer.
Frequently Asked Questions (FAQ)
What is the best time of year to start growing celery?
The best time to start growing celery depends on your climate. Celery is a cool-season crop, so it thrives in temperatures between 60°F and 70°F (15°C and 21°C). In most regions, it’s best to start seeds indoors 10-12 weeks before the last expected frost. This allows the seedlings to develop a strong root system before being transplanted outdoors. If you live in a warmer climate with mild winters, you can start seeds in the fall for a winter harvest.
How much sunlight does celery need?
Celery needs at least 6 hours of sunlight per day to thrive. Choose a location in your garden that receives full sun, but is also sheltered from strong winds. If you live in a particularly hot climate, providing some afternoon shade can help prevent the celery from bolting (going to seed prematurely).
What kind of soil is best for growing celery?
Celery prefers rich, well-drained soil with a pH between 6.0 and 6.8. Amend your soil with compost or other organic matter to improve its fertility and drainage. Celery is a heavy feeder, so it’s important to provide it with plenty of nutrients. Consider adding a slow-release fertilizer at planting time.
How often should I water celery?
Celery needs consistent moisture to thrive. Water deeply and regularly, especially during hot, dry weather. Aim to keep the soil consistently moist, but not waterlogged. Mulching around the plants can help to retain moisture and suppress weeds.
How long does it take for celery to mature?
Celery typically takes 120-140 days to mature from seed. However, you can start harvesting individual stalks as soon as they reach a usable size. The outer stalks will mature first, so you can harvest them as needed, leaving the inner stalks to continue growing.
What are some common pests and diseases that affect celery?
Celery can be susceptible to a variety of pests and diseases, including aphids, celery leaf tiers, and celery blight. Regularly inspect your plants for signs of infestation or disease. Use organic pest control methods, such as insecticidal soap or neem oil, to control pests. To prevent diseases, ensure good air circulation around the plants and avoid overhead watering.
Can I grow celery in containers?
Yes, you can grow celery in containers, but you’ll need to choose a large container (at least 12 inches in diameter) to accommodate its root system. Use a high-quality potting mix and water regularly. Container-grown celery may require more frequent fertilization than celery grown in the ground.
How do I blanch celery?
Blanching celery is a technique used to reduce its bitterness and make it more tender. To blanch celery, you can either mound soil around the stalks or wrap them in paper or cardboard. Start blanching about two weeks before harvest.
How do I harvest celery?
To harvest celery, simply cut the stalks at the base of the plant with a sharp knife. You can harvest individual stalks as needed, or harvest the entire plant at once.
How do I store celery?
Store celery in the refrigerator, wrapped in a damp paper towel or in a plastic bag. Celery can last for several weeks in the refrigerator if stored properly. You can also freeze celery, but it will lose some of its crispness. To freeze celery, blanch it for 2-3 minutes, then cool it in ice water. Drain well and freeze in airtight containers.
Can I grow celery from the base of a store-bought stalk?
Yes, you can! Cut off the celery stalks, leaving about 2 inches of the base intact. Place the base in a shallow dish of water, with the cut side facing up. Place the dish in a sunny location and change the water every day. After a few days, you should see new roots and leaves starting to grow. Once the roots are well-developed, you can transplant the celery base into a pot or directly into your garden. This is a great way to recycle and reduce waste, and it’s a fun experiment for kids.


Leave a Comment