

Grow Angled Luffa at Home and unlock the secrets to cultivating your own natural sponges! Imagine stepping into your backyard and harvesting a sustainable, eco-friendly alternative to synthetic scrubbers. It’s not just a dream; it’s an achievable reality with a little know-how and some simple DIY techniques.
The luffa, also known as the sponge gourd, has a rich history, particularly in Asian cultures where it’s been used for centuries not only for its practical cleaning abilities but also as a food source when young. From ancient bathhouses to modern kitchens, the luffa’s versatility has stood the test of time. But why buy one when you can grow angled luffa at home and experience the satisfaction of nurturing your own?
In today’s world, where sustainability and eco-consciousness are more important than ever, growing your own luffa is a fantastic way to reduce your reliance on plastic and embrace a more natural lifestyle. Plus, let’s be honest, who doesn’t love a good DIY project? This guide will provide you with easy-to-follow steps and insider tips to successfully cultivate these fascinating gourds in your own backyard. I’m excited to share these simple tricks with you, so you can enjoy the rewarding experience of growing your own angled luffa!
Grow Your Own Angled Luffa Sponges: A Complete DIY Guide
Hey there, fellow gardening enthusiasts! Have you ever thought about growing your own luffa sponges? It’s surprisingly easy and incredibly rewarding. Imagine having a sustainable, natural sponge right from your backyard! This guide will walk you through every step, from seed to scrub, so you can enjoy the satisfaction of creating your own luffa sponges.
What You’ll Need
Before we dive in, let’s gather our supplies. Here’s a list of everything you’ll need to successfully grow angled luffa:
* Angled Luffa Seeds: You can find these online or at your local garden center. Make sure they are specifically *angled* luffa (Luffa acutangula), as there are different varieties.
* Seed Starting Trays or Small Pots: For starting your seeds indoors.
* Seed Starting Mix: A light, well-draining mix is essential for healthy seedlings.
* Larger Pots (Optional): If you plan to grow your luffa in containers.
* Well-Draining Soil: Luffa plants need rich, fertile soil. Amend your garden soil with compost or aged manure.
* Trellis or Support Structure: Luffa vines are vigorous climbers and need strong support.
* Fertilizer: A balanced fertilizer or one high in phosphorus will encourage flowering and fruit production.
* Watering Can or Hose: For regular watering.
* Gloves: To protect your hands.
* Pruning Shears or Scissors: For trimming the vines.
* Patience: Luffa takes time to mature, so be prepared to wait!
Section 1: Starting Your Luffa Seeds
Luffa has a long growing season, so starting seeds indoors is crucial, especially if you live in a cooler climate. I usually start mine about 6-8 weeks before the last expected frost.
1. Soaking the Seeds: Luffa seeds have a tough outer shell. To improve germination, soak them in warm water for 24-48 hours. This helps soften the shell and encourages sprouting. I like to use a small bowl and change the water once or twice.
2. Planting the Seeds: Fill your seed starting trays or small pots with seed starting mix. Make a small hole, about 1/2 inch deep, in the center of each cell or pot. Place one or two seeds in each hole and cover gently with soil.
3. Watering and Warmth: Water the soil gently until it’s moist but not soggy. Cover the trays or pots with a clear plastic lid or plastic wrap to create a humid environment. Place them in a warm location, ideally around 75-85°F (24-29°C). A heat mat can be helpful if your home is cooler.
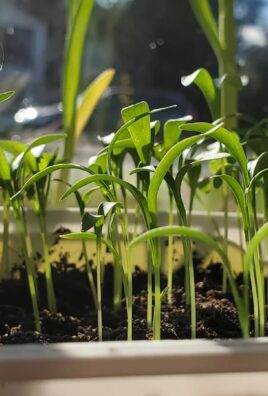
4. Germination: Keep the soil consistently moist. You should see seedlings emerge in about 7-14 days. Once the seedlings appear, remove the plastic cover and place them in a sunny location or under grow lights.
5. Thinning (If Necessary): If you planted two seeds per cell and both germinate, thin them out by snipping off the weaker seedling at the soil line. This ensures the remaining seedling has enough space and nutrients to thrive.
Section 2: Transplanting Your Luffa Seedlings
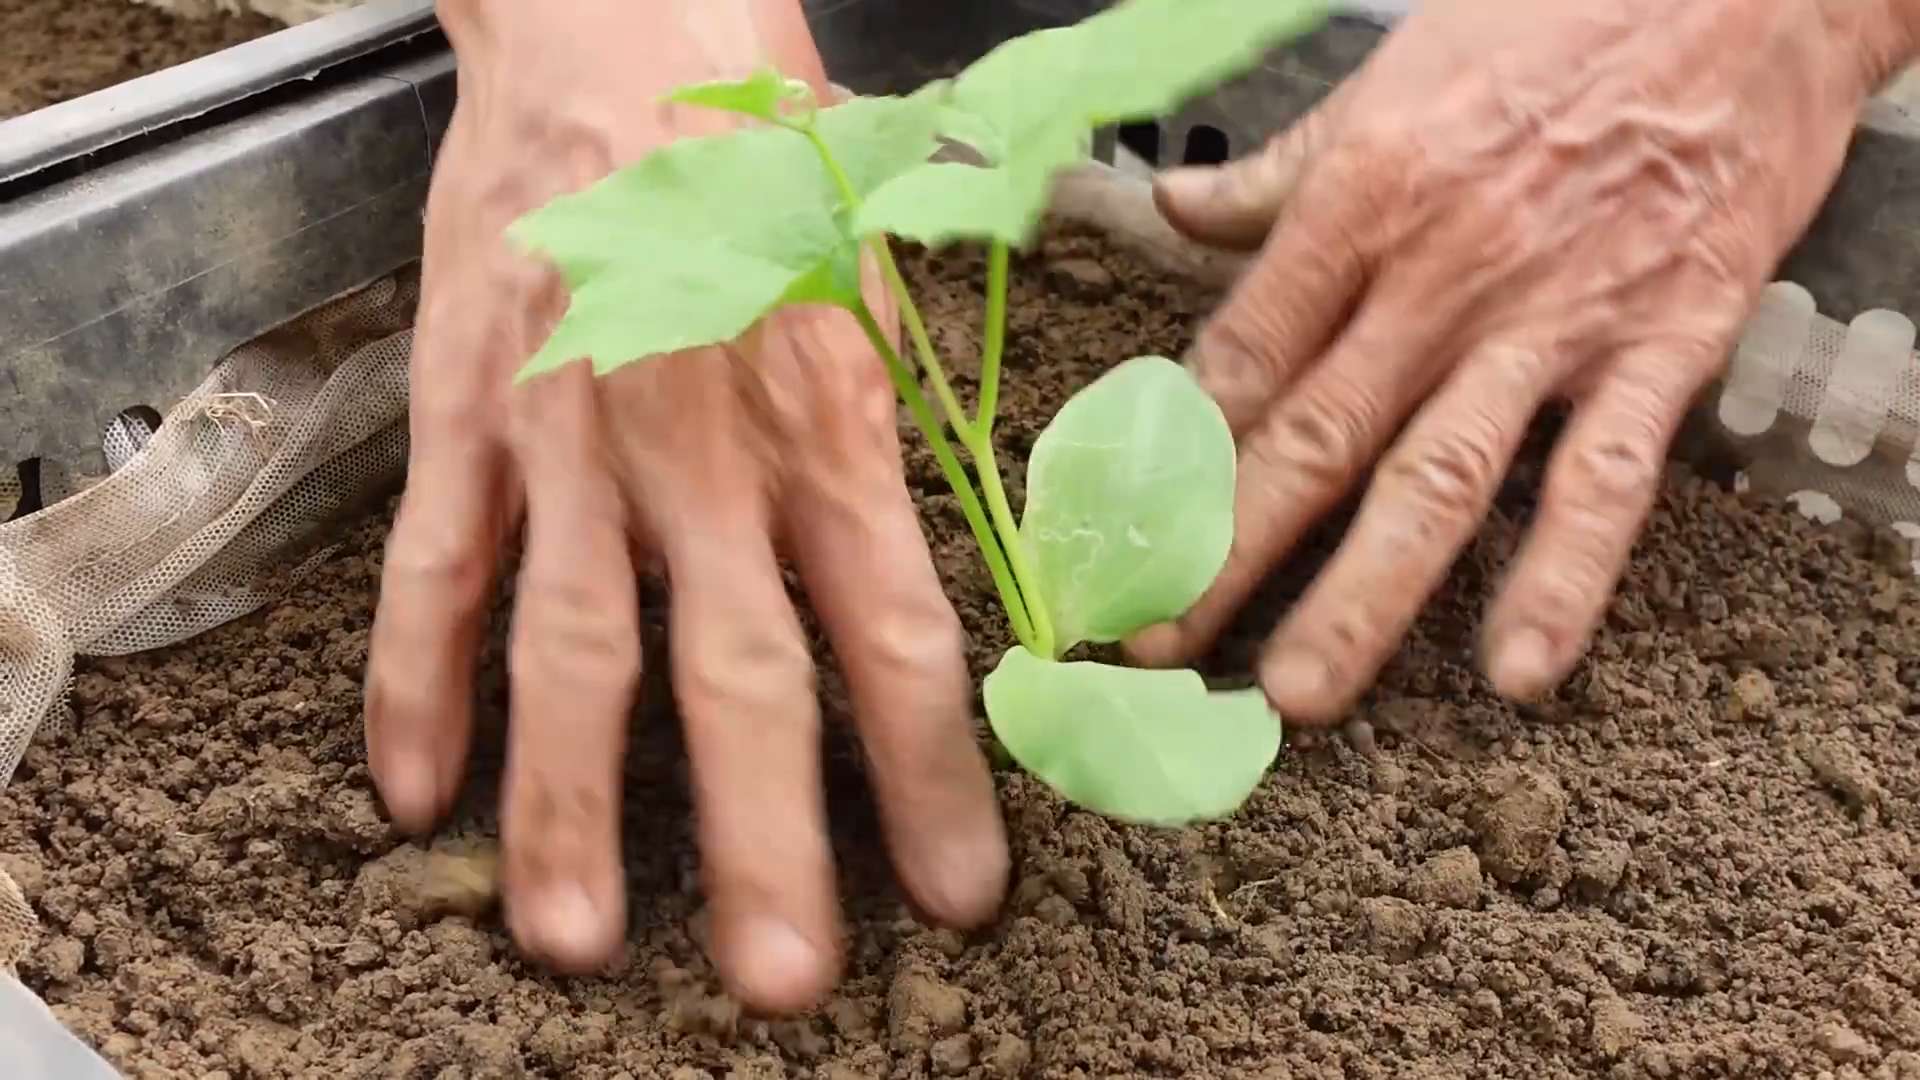
Once the danger of frost has passed and your seedlings have developed a few sets of true leaves (the leaves that look like miniature versions of the adult leaves), it’s time to transplant them outdoors.
1. Hardening Off: Before transplanting, you need to “harden off” your seedlings. This process gradually acclimates them to outdoor conditions. Start by placing the trays or pots outdoors in a sheltered location for a few hours each day, gradually increasing the amount of time they spend outside over the course of a week. This helps them adjust to the sun, wind, and temperature changes.
2. Preparing the Soil: Choose a sunny location with well-draining soil. Luffa plants are heavy feeders, so amend the soil with plenty of compost or aged manure. Dig a hole that is slightly larger than the root ball of your seedling.
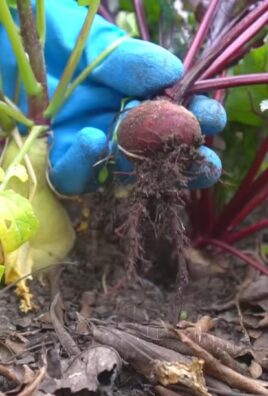
3. Transplanting: Gently remove the seedling from its tray or pot, being careful not to damage the roots. Place the seedling in the hole and backfill with soil. Water thoroughly.
4. Spacing: If you’re planting multiple luffa plants, space them about 3-4 feet apart to allow for adequate growth.
5. Adding Support: Immediately after transplanting, provide a trellis or other support structure for the vines to climb. Luffa vines can grow quite long and heavy, so a sturdy support is essential. I’ve used everything from cattle panels to sturdy fences.
Section 3: Caring for Your Luffa Plants
Now that your luffa plants are in the ground, it’s time to provide them with the care they need to thrive.
1. Watering: Luffa plants need consistent moisture, especially during hot weather. Water deeply whenever the top inch of soil feels dry. Avoid overhead watering, as this can promote fungal diseases. Drip irrigation is a great option.
2. Fertilizing: Feed your luffa plants regularly with a balanced fertilizer or one high in phosphorus. Fertilize every 2-3 weeks during the growing season. I like to use a liquid fertilizer diluted according to the package instructions.
3. Pruning: Pruning can help improve air circulation and encourage fruit production. Remove any yellowing or dead leaves. You can also trim back the vines if they become too unruly.
4. Pest and Disease Control: Luffa plants are generally pest-resistant, but they can be susceptible to certain pests and diseases, such as squash bugs, aphids, and powdery mildew. Inspect your plants regularly and take action if you notice any problems. Insecticidal soap or neem oil can be effective for controlling pests. For powdery mildew, improve air circulation and consider using a fungicide if necessary.
5. Pollination: Luffa plants have separate male and female flowers. The female flowers have a small luffa fruit behind them. Bees and other pollinators are essential for pollination. If you’re not seeing many pollinators in your garden, you can hand-pollinate the flowers by transferring pollen from the male flowers to the female flowers using a small brush.
Section 4: Harvesting and Processing Your Luffa Sponges
This is the most exciting part! Harvesting and processing your luffa sponges is where all your hard work pays off.
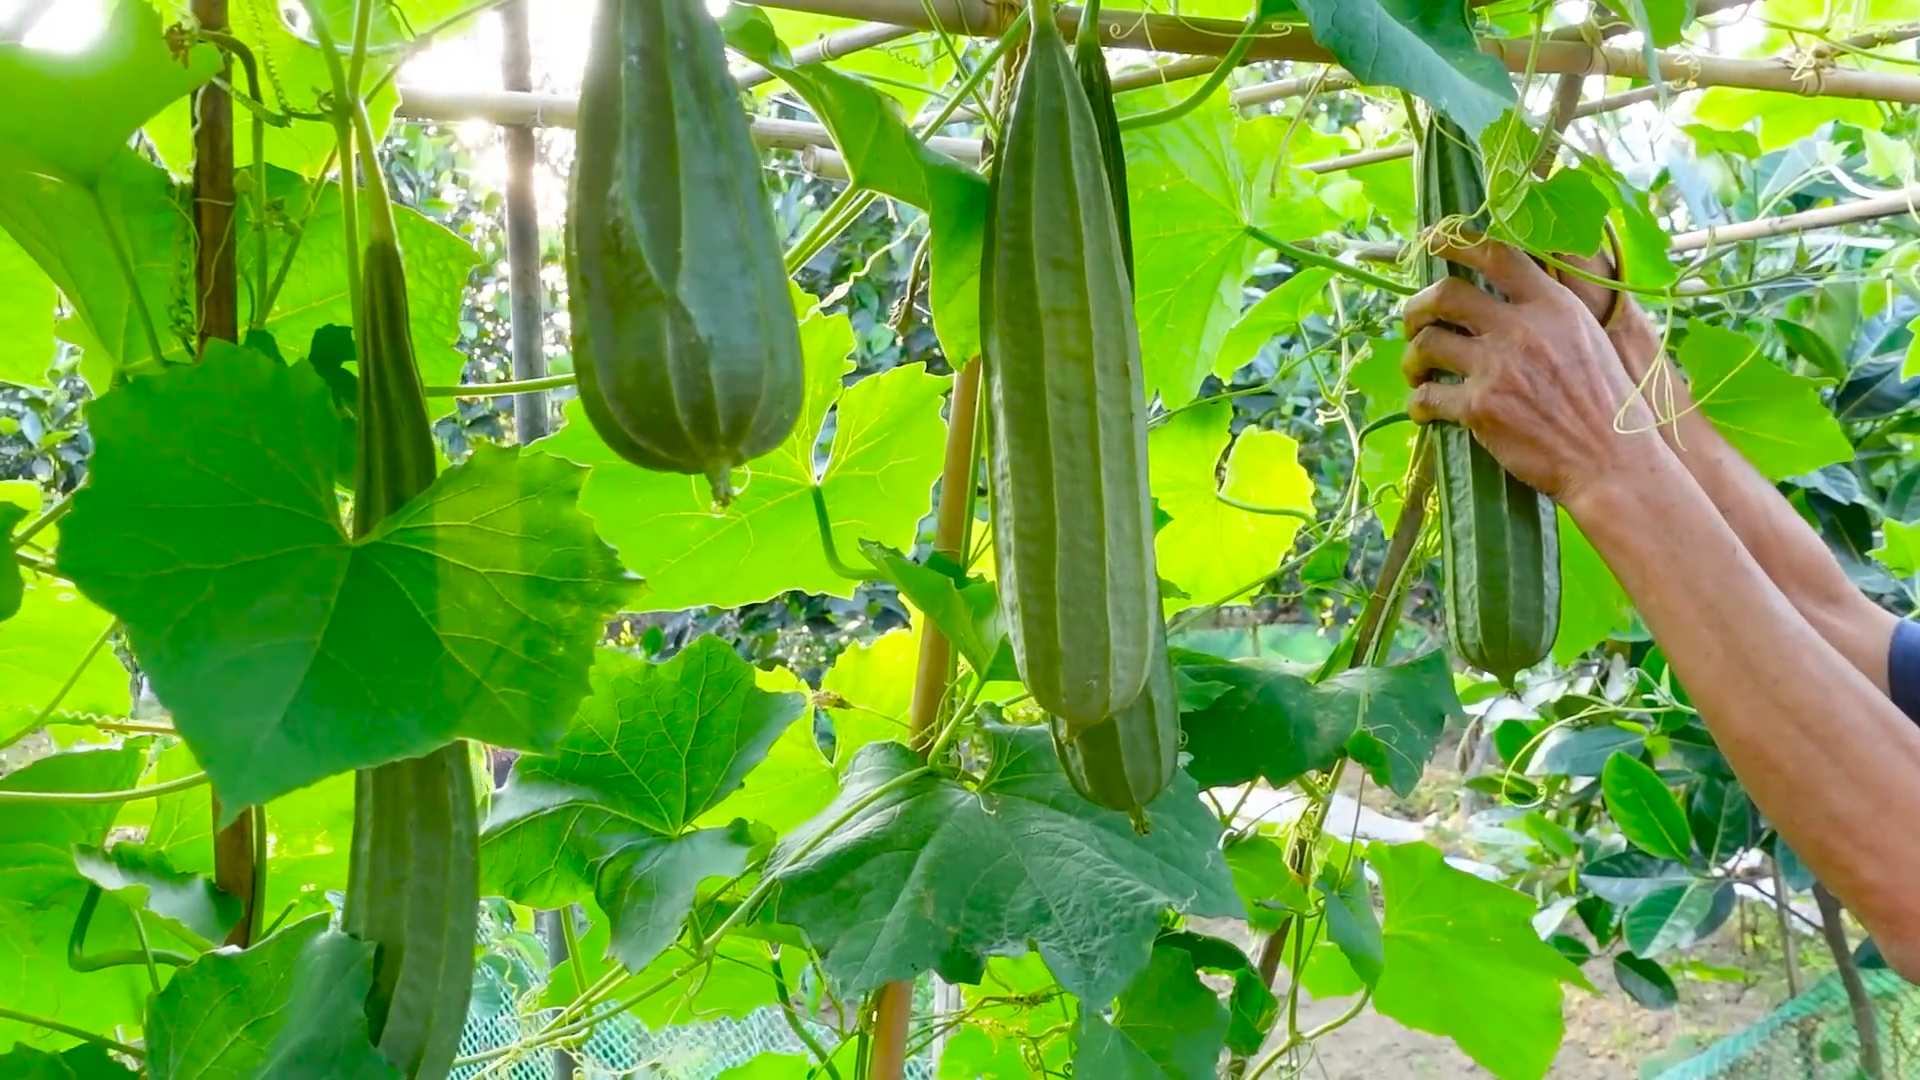
1. Harvesting: Luffa fruits are ready to harvest when they turn yellow or brown and the skin becomes dry and brittle. The fruit should feel lightweight. You can gently squeeze the fruit to check for ripeness. If it feels firm and solid, it’s not ready yet. If it feels hollow and the skin is easily cracked, it’s time to harvest.
2. Cutting the Luffa: Use pruning shears or a sharp knife to cut the luffa fruit from the vine. Leave a few inches of stem attached.
3. Peeling the Luffa: This can be a bit messy, but it’s a crucial step. There are a few ways to peel the luffa:
* Method 1 (Dry Peeling): If the luffa is very dry, you may be able to simply crack the skin and peel it off by hand. This works best in dry climates.
* Method 2 (Soaking): Soak the luffa in water for a few days to soften the skin. This makes it easier to peel. You can also use a pressure washer on a low setting to remove the skin. Be careful not to damage the sponge inside.
* Method 3 (Boiling): Boil the luffa for about 30 minutes to soften the skin. This is a quick and easy method, but it can sometimes make the sponge a bit softer.
4. Removing the Seeds: Once the skin is removed, shake out the seeds. You can save these seeds for planting next year. Be sure to dry them thoroughly before storing them in an airtight container.
5. Washing the Luffa: Rinse the luffa thoroughly with water to remove any remaining pulp or debris. You can use a hose or a bucket of water.
6. Bleaching (Optional): If you want a whiter sponge, you can soak it in a diluted bleach solution (1 part bleach to 10 parts water) for about 30 minutes. Rinse thoroughly with water after bleaching.
7. Drying the Luffa: Hang the luffa in a well-ventilated area to dry completely. This can take several days. Make sure the luffa is completely dry before storing it to prevent mold growth.
8. Cutting to Size: Once the luffa is dry, you can
Conclusion
So, there you have it! Growing angled luffa at home is not only achievable, but it’s also a deeply rewarding experience. Forget those expensive, mass-produced sponges from the store. Imagine the satisfaction of harvesting your own, organically grown luffa sponges, knowing exactly where they came from and how they were nurtured. This DIY project offers a sustainable and eco-friendly alternative, reducing your reliance on plastic and contributing to a healthier planet.
But the benefits extend far beyond environmental responsibility. Think about the sheer versatility of your homegrown luffa. Beyond the obvious use as a fantastic exfoliating sponge in the shower, consider its potential in the kitchen for scrubbing vegetables, cleaning countertops, or even as a gentle abrasive for delicate surfaces. You can even use smaller pieces for crafting projects, creating unique and natural textures in your artwork.
Why is this DIY trick a must-try? Because it connects you with nature, provides a sustainable resource, and offers a unique and versatile product. It’s a project that’s both educational and practical, perfect for gardeners of all levels. Plus, the vibrant green vines and beautiful yellow flowers of the luffa plant add a touch of tropical beauty to your garden.
Ready to take your luffa growing to the next level? Consider these variations:
* Vertical Gardening: Train your luffa vines up a trellis, pergola, or even a sturdy fence. This not only saves space but also creates a stunning visual display.
* Companion Planting: Plant basil, marigolds, or nasturtiums near your luffa to deter pests and attract beneficial insects.
* Seed Saving: Once your luffa fruits are fully mature and dried, save the seeds for next year’s planting. This ensures a continuous supply of luffa sponges for years to come.
* Gifting: Share your homegrown luffa sponges with friends and family. They’ll appreciate the thoughtful and sustainable gift.
Don’t be intimidated by the thought of growing your own luffa. With a little patience, the right conditions, and these simple steps, you’ll be well on your way to harvesting a bountiful crop of natural sponges. Remember to provide ample sunlight, well-drained soil, and a sturdy support structure for your vines to thrive.
We encourage you to embark on this exciting gardening adventure and discover the joys of growing angled luffa at home. It’s a project that’s good for you, good for the environment, and incredibly satisfying.
So, grab your seeds, prepare your garden, and get ready to experience the magic of homegrown luffa. And most importantly, don’t forget to share your experiences with us! We’d love to hear about your successes, challenges, and creative uses for your homegrown luffa sponges. Share your photos and stories on social media using #HomegrownLuffa and inspire others to join the movement. Let’s cultivate a community of sustainable gardeners and celebrate the beauty and versatility of this amazing plant. Happy growing!
Frequently Asked Questions (FAQ)
What is the best time to plant angled luffa seeds?
The ideal time to plant angled luffa seeds is in the spring, after the last frost has passed and the soil has warmed up to at least 70°F (21°C). Luffa requires a long growing season, typically around 150-200 days, so starting seeds indoors 6-8 weeks before the last frost can give you a head start. If you live in a region with a shorter growing season, starting seeds indoors is highly recommended.
How much sunlight does angled luffa need?
Angled luffa thrives in full sunlight, requiring at least 6-8 hours of direct sunlight per day. Insufficient sunlight can lead to stunted growth, reduced flowering, and smaller fruit production. Choose a sunny location in your garden where your luffa plants will receive ample sunlight throughout the day.
What type of soil is best for growing angled luffa?
Luffa prefers well-drained, fertile soil that is rich in organic matter. Amend your soil with compost or well-rotted manure before planting to improve drainage and nutrient content. A slightly acidic to neutral soil pH of 6.0 to 7.0 is ideal. Avoid heavy clay soils that retain too much moisture, as this can lead to root rot.
How often should I water my angled luffa plants?
Water your luffa plants regularly, especially during hot and dry weather. Aim to keep the soil consistently moist but not waterlogged. Water deeply at the base of the plants, avoiding wetting the foliage, which can increase the risk of fungal diseases. Mulching around the plants can help retain moisture in the soil and suppress weed growth.
What kind of support structure does angled luffa need?
Angled luffa vines are vigorous climbers and require a sturdy support structure to grow on. A trellis, pergola, fence, or even a strong netting can be used. The support structure should be at least 6-8 feet tall to accommodate the growing vines. Ensure the structure is strong enough to support the weight of the mature luffa fruits.
How do I know when my angled luffa is ready to harvest?
The timing of harvest depends on your intended use for the luffa. For sponges, allow the luffa fruit to mature fully on the vine until the skin turns brown and dry. The fruit should feel lightweight and the seeds should rattle inside. For edible luffa, harvest the fruit when it is young and tender, typically around 6-8 inches long.
How do I process my angled luffa into a sponge?
Once the luffa fruit is fully mature and dry, cut off both ends and shake out the seeds. Soak the luffa in water for several hours to loosen the skin. Peel off the skin and rinse the luffa thoroughly to remove any remaining pulp or seeds. Allow the luffa to dry completely in the sun before using it as a sponge.
Are there any pests or diseases that affect angled luffa?
Angled luffa can be susceptible to pests such as squash bugs, aphids, and cucumber beetles. Regularly inspect your plants for signs of infestation and take appropriate measures to control pests. Common diseases that can affect luffa include powdery mildew and fungal leaf spots. Ensure good air circulation around the plants and avoid overhead watering to minimize the risk of disease.
Can I grow angled luffa in containers?
Yes, you can grow angled luffa in containers, but you’ll need a large container (at least 20 gallons) to accommodate the plant’s root system. Use a well-draining potting mix and provide a sturdy support structure for the vines to climb on. Container-grown luffa may require more frequent watering and fertilization than plants grown in the ground.
How can I save seeds from my angled luffa for next year?
To save seeds from your angled luffa, allow the fruit to fully mature and dry on the vine. Once the fruit is completely dry, cut it open and remove the seeds. Spread the seeds out on a paper towel to dry completely for a few days. Store the dried seeds in an airtight container in a cool, dark, and dry place until next planting season.
Leave a Comment