

Chili Growing Tips for Beginners: Ever dreamt of spicing up your life, literally? Imagine stepping into your backyard and plucking a fiery chili pepper, grown with your own two hands! For centuries, chili peppers have added zest to cuisines around the globe, with roots tracing back to South America where they were cultivated as early as 6,000 years ago. From ancient civilizations to modern-day foodies, the love for chili peppers is undeniable.
But let’s be honest, the thought of growing your own can be a little intimidating, especially if you’re a beginner. That’s where I come in! I’m here to share some simple, effective chili growing tips for beginners that will transform your garden (or even your balcony!) into a chili paradise.
Why do you need these tips? Because store-bought chilies, while convenient, often lack the vibrant flavor and freshness of homegrown ones. Plus, there’s nothing quite like the satisfaction of nurturing a plant from seed to harvest. With a few clever tricks and a little patience, you can bypass common pitfalls and enjoy a bountiful chili harvest. So, grab your gardening gloves, and let’s get started on this exciting journey!
Chili Growing Tips for Beginners: From Seed to Spice!
Okay, so you want to grow your own chilies? Awesome! It’s seriously rewarding to harvest your own spicy peppers, and honestly, it’s not as hard as you might think. I’m going to walk you through everything you need to know, from starting seeds to getting those fiery fruits. Let’s get started!
Choosing Your Chili Variety
First things first, what kind of heat are you craving? There’s a whole world of chilies out there, from mild bell peppers (yes, they’re technically chilies!) to scorching habaneros and ghost peppers. Think about what you’ll be using them for. Do you want a subtle kick in your stir-fries, or are you aiming for a face-melting salsa?
Here are a few popular choices, ranging from mild to hot:
* **Bell Peppers:** Zero heat, great for stuffing and salads.
* **Poblano:** Mild heat, perfect for chili rellenos.
* **Jalapeño:** Medium heat, versatile for everything from pickling to poppers.
* **Serrano:** Hotter than jalapeños, adds a good kick to salsas.
* **Cayenne:** Hot, great for drying and making chili powder.
* **Habanero:** Very hot, use with caution! Adds intense flavor and heat.
* **Ghost Pepper (Bhut Jolokia):** Extremely hot, only for the brave!
Once you’ve decided on your heat level, consider the size of your growing space. Some chili plants can get quite large, so choose varieties that will fit comfortably in your garden or containers.
Starting Your Chili Seeds
Chili seeds need a warm environment to germinate, so starting them indoors is usually the best bet, especially if you live in a cooler climate. I usually start mine about 6-8 weeks before the last expected frost.
Here’s what you’ll need:
* Chili seeds
* Seed starting trays or small pots
* Seed starting mix (a light, well-draining mix)
* A heat mat (optional, but highly recommended)
* A grow light (optional, but helpful)
* A spray bottle with water
Now, let’s get those seeds started!
1. **Prepare your seed starting trays or pots:** Fill them with seed starting mix, leaving about half an inch of space at the top. Gently tap the trays to settle the mix.
2. Moisten the soil: Use your spray bottle to thoroughly moisten the seed starting mix. You want it damp, but not soggy.
3. **Sow the seeds:** Place 2-3 seeds in each cell or pot, about ¼ inch deep. This increases your chances of at least one seed germinating.
4. **Cover the seeds:** Gently cover the seeds with a thin layer of seed starting mix.
5. **Water again:** Lightly mist the surface with your spray bottle.
6. **Provide warmth:** Place the trays on a heat mat, if you have one. This will help the seeds germinate faster.
7. **Provide light:** Place the trays under a grow light, or in a sunny windowsill. If using a windowsill, rotate the trays regularly to prevent the seedlings from leaning towards the light.
8. **Maintain moisture:** Keep the seed starting mix consistently moist, but not waterlogged. Check it daily and mist as needed.
9. **Wait patiently:** Chili seeds can take anywhere from 7 to 21 days to germinate, depending on the variety and temperature.
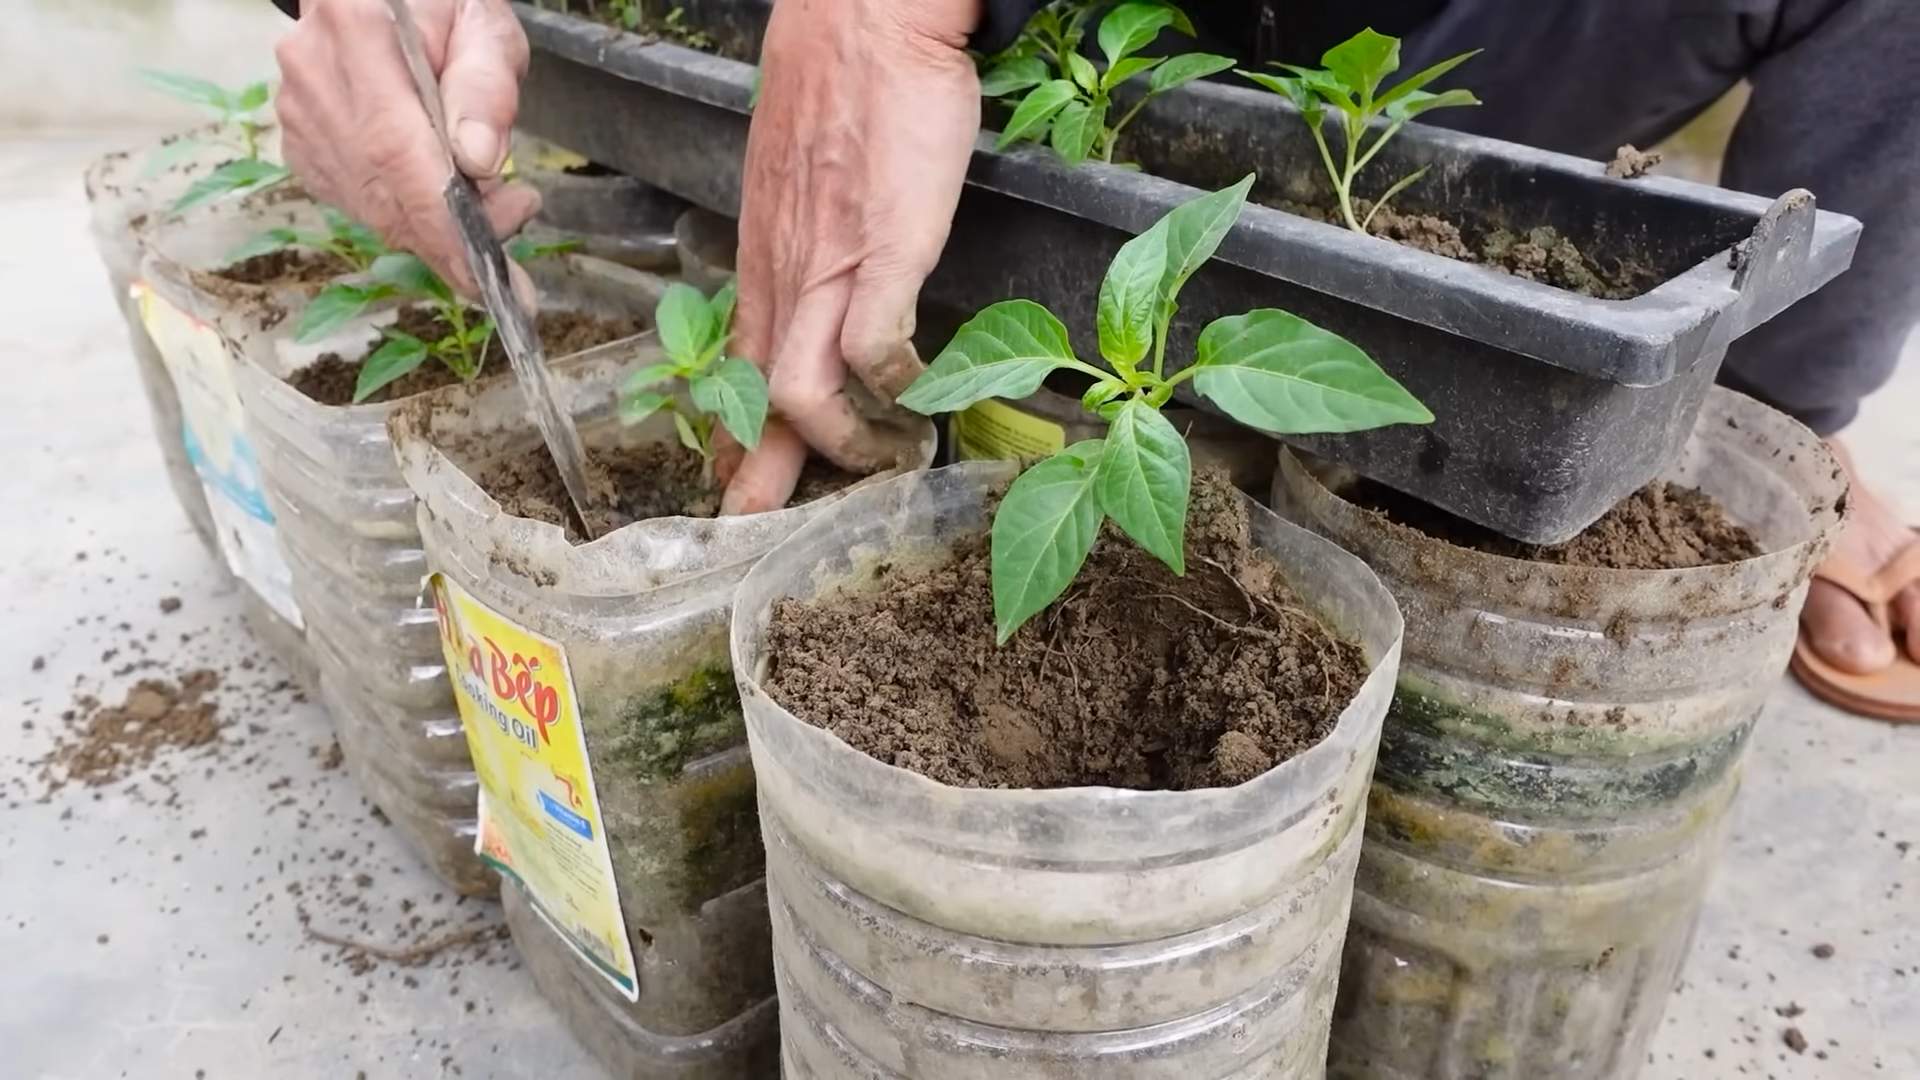
Transplanting Your Chili Seedlings
Once your seedlings have developed their first set of true leaves (the leaves that look like miniature versions of the adult leaves, not the initial seed leaves), it’s time to transplant them into larger pots.
Here’s what you’ll need:
* Larger pots (at least 4 inches in diameter)
* Potting mix (a good quality potting mix, not seed starting mix)
* A small trowel or spoon
Here’s how to transplant:
1. **Prepare your pots:** Fill the larger pots with potting mix, leaving about an inch of space at the top.
2. **Gently remove the seedlings:** Carefully loosen the soil around the seedlings in the seed starting tray. Use a small trowel or spoon to gently lift the seedlings out, being careful not to damage the roots. If you planted multiple seeds in one cell, choose the strongest seedling and snip off the others at soil level with scissors.
3. **Plant the seedlings:** Make a small hole in the potting mix in the larger pot. Place the seedling in the hole, making sure the top of the root ball is level with the surface of the soil.
4. **Fill in the hole:** Gently fill in the hole with potting mix, and lightly pat down the soil around the seedling.
5. **Water thoroughly:** Water the seedlings thoroughly after transplanting.
6. **Provide light:** Place the transplanted seedlings under a grow light or in a sunny windowsill.
Hardening Off Your Chili Plants
Before you can plant your chili plants outdoors, you need to “harden them off.” This process gradually acclimates them to the outdoor environment, preventing them from getting shocked by the sun, wind, and temperature changes.
Here’s how to harden off your chili plants:
1. **Start slowly:** Begin by placing your chili plants outdoors in a sheltered location (like a porch or patio) for just an hour or two each day.
2. **Gradually increase the time:** Over the next week or two, gradually increase the amount of time your plants spend outdoors each day.
3. **Monitor the weather:** Avoid placing your plants outdoors on days with strong winds, heavy rain, or extreme temperatures.
4. **Bring them in if necessary:** If the weather turns bad, bring your plants back indoors.
5. **After about two weeks:** Your chili plants should be fully hardened off and ready to be planted in your garden or containers.
Planting Your Chili Plants Outdoors
Now for the exciting part – planting your chilies in their final home!
Here’s what you’ll need:
* Your hardened-off chili plants
* A garden bed or large containers (at least 5 gallons in size)
* Well-draining soil (amend your garden soil with compost or other organic matter)
* A trowel
* Water
* Fertilizer (optional)
* Stakes or cages (optional, for support)
Here’s how to plant:
1. **Choose a sunny location:** Chili plants need at least 6-8 hours of sunlight per day.
2. **Prepare the soil:** If you’re planting in a garden bed, amend the soil with compost or other organic matter to improve drainage and fertility.
3. **Dig a hole:** Dig a hole that is slightly larger than the root ball of your chili plant.
4. **Remove the plant from its pot:** Gently remove the chili plant from its pot, being careful not to damage the roots.
5. **Place the plant in the hole:** Place the chili plant in the hole, making sure the top of the root ball is level with the surface of the soil.
6. **Fill in the hole:** Gently fill in the hole with soil, and lightly pat down the soil around the plant.
7. **Water thoroughly:** Water the chili plant thoroughly after planting.
8. **Fertilize (optional):** If desired, fertilize your chili plant with a balanced fertilizer according to the package directions.
9. **Provide support (optional):** If you’re growing a tall or bushy chili variety, you may want to provide support with stakes or cages.
Caring for Your Chili Plants
Once your chili plants are planted, it’s important to provide them with proper care to ensure a bountiful harvest.
Here are some key things to keep in mind:
* **Watering:** Water your chili plants regularly, especially during hot, dry weather. Aim to keep the soil consistently moist, but not waterlogged. Check the soil moisture by sticking your finger about an inch into the soil. If it feels dry, it’s time to water.
* **Fertilizing:** Fertilize your chili plants every 2-3 weeks with a balanced fertilizer, or a fertilizer specifically formulated for peppers and tomatoes.
* **Weeding:** Keep the area around your chili plants free of weeds, which can compete for nutrients and water.
* **Pest control:** Keep an eye out for pests like aphids, whiteflies, and spider mites. If you spot any pests, treat them with an insecticidal soap or neem oil.
* **Pruning:** Pruning isn’t strictly necessary, but it can help to improve air circulation and encourage bushier growth. You can prune off any dead or yellowing leaves, as well as any suckers (small shoots that grow from the base of the plant).
* **Sun Scald Prevention:** In extremely hot climates, chili peppers can be susceptible to sun scald. This appears as white or bleached spots on the peppers. To prevent this,
Conclusion
So, there you have it! Mastering chili growing doesn’t have to be intimidating. By implementing these simple yet effective DIY tricks, you’re well on your way to harvesting a bumper crop of fiery peppers right in your own backyard or balcony. We’ve covered everything from optimizing soil conditions and providing adequate sunlight to crafting your own natural pest control solutions and understanding the nuances of watering. Remember, patience and observation are key. Each chili plant is unique and will respond differently to its environment.
This isn’t just about saving money; it’s about connecting with your food, understanding the growing process, and enjoying the unparalleled satisfaction of nurturing something from seed to table. Plus, think of the bragging rights when you serve up a dish made with chilies you grew yourself!
Why is this a must-try? Because it empowers you to take control of your chili growing journey, reduces reliance on expensive store-bought products, and ultimately leads to healthier, more flavorful chilies. You’ll be amazed at the difference these simple techniques can make.
Ready to take your chili growing to the next level? Consider experimenting with different types of soil amendments based on your local conditions. Try composting kitchen scraps to create your own nutrient-rich fertilizer. Explore companion planting to naturally deter pests and attract beneficial insects. For example, basil is a great companion plant for chilies. You could also try different methods of seed starting, such as using egg cartons or peat pots.
Don’t be afraid to get your hands dirty and experiment! The beauty of gardening lies in the learning process. And most importantly, don’t forget to document your journey. Take pictures, keep notes, and track your progress. This will help you identify what works best for you and your chili plants.
We are confident that with these chili growing tips for beginners, you’ll be enjoying a spicy harvest in no time. Now it’s your turn! We encourage you to try these DIY tricks and share your experiences with us. Let us know what works best for you, what challenges you encounter, and any other tips you discover along the way. Share your photos and stories in the comments below. We can’t wait to hear from you and celebrate your chili growing success! Happy growing!
Frequently Asked Questions (FAQ)
What kind of soil is best for growing chilies?
Chilies thrive in well-draining soil that is rich in organic matter. A slightly acidic to neutral pH (around 6.0 to 7.0) is ideal. You can improve your soil by adding compost, aged manure, or other organic amendments. Avoid heavy clay soils, as they can retain too much water and lead to root rot. A good starting mix is equal parts garden soil, compost, and perlite or vermiculite for drainage. Consider getting a soil test to determine the specific nutrient needs of your soil.
How much sunlight do chili plants need?
Chili plants are sun-loving and require at least 6-8 hours of direct sunlight per day to produce a good yield. If you’re growing them indoors, place them near a sunny window or use grow lights to supplement natural light. Insufficient sunlight can result in leggy plants with fewer flowers and fruits. Rotate your plants regularly to ensure even light exposure on all sides.
How often should I water my chili plants?
Water your chili plants deeply but infrequently, allowing the soil to dry out slightly between waterings. Overwatering can lead to root rot, while underwatering can stress the plants and reduce fruit production. The frequency of watering will depend on factors such as the weather, soil type, and size of the pot. Check the soil moisture by sticking your finger about an inch deep. If it feels dry, it’s time to water. Water at the base of the plant to avoid wetting the foliage, which can encourage fungal diseases.
What are some common pests that affect chili plants, and how can I control them naturally?
Common pests that attack chili plants include aphids, spider mites, whiteflies, and thrips. You can control these pests naturally by using insecticidal soap, neem oil, or introducing beneficial insects like ladybugs. Regularly inspect your plants for signs of infestation and take action promptly. You can also try companion planting with herbs like basil or marigolds, which can repel certain pests. A strong blast of water from a hose can also dislodge aphids and spider mites.
How do I fertilize my chili plants?
Chili plants benefit from regular fertilization, especially during the flowering and fruiting stages. Use a balanced fertilizer with a slightly higher phosphorus content to promote flower and fruit development. You can also use organic fertilizers like compost tea, fish emulsion, or bone meal. Avoid over-fertilizing, as this can lead to excessive foliage growth at the expense of fruit production. Follow the instructions on the fertilizer label carefully.
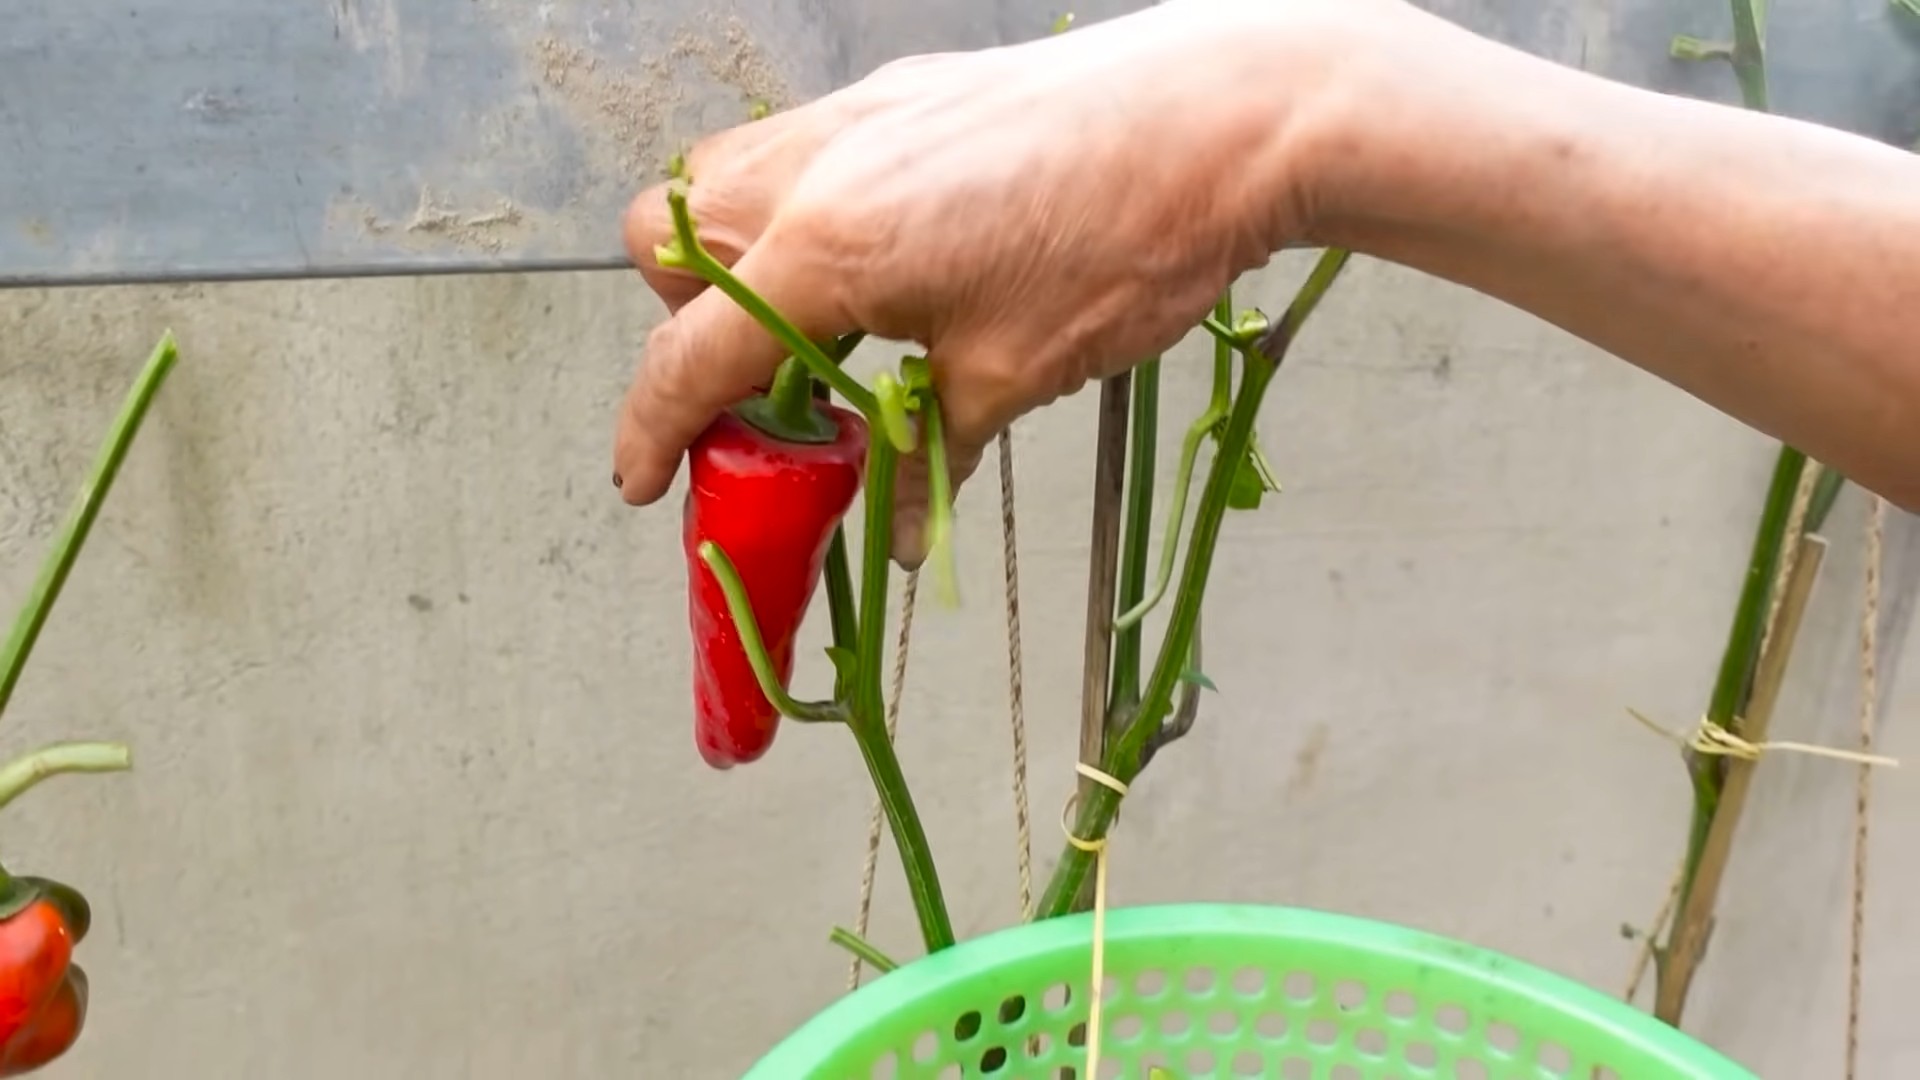
When is the best time to harvest chilies?
The best time to harvest chilies depends on the variety and your desired level of heat. Most chilies will change color as they ripen, from green to red, yellow, orange, or brown. You can harvest them at any stage of ripeness, but the flavor and heat will intensify as they mature. Use pruning shears or scissors to cut the chilies from the plant, leaving a small stem attached. Wear gloves when handling hot chilies to avoid skin irritation.
How can I increase the heat of my chilies?
Several factors can influence the heat level of chilies, including genetics, growing conditions, and stress. To increase the heat, ensure your plants receive plenty of sunlight, water them sparingly during the fruiting stage, and avoid over-fertilizing. Some growers believe that stressing the plants slightly can increase capsaicin production, the compound responsible for the heat in chilies. However, avoid stressing the plants to the point of damage.
Can I grow chilies indoors?
Yes, you can grow chilies indoors, but you’ll need to provide them with adequate light, warmth, and humidity. Use grow lights to supplement natural light, especially during the winter months. Maintain a consistent temperature of around 70-80°F (21-27°C) and provide good air circulation. You may also need to hand-pollinate the flowers to ensure fruit set. Choose compact chili varieties that are well-suited for container growing.
How do I save seeds from my chili plants?
To save seeds from your chili plants, allow the fruits to fully ripen on the plant. Once they are completely dry and shriveled, carefully remove the seeds and spread them out on a paper towel to dry for several days. Store the dried seeds in an airtight container in a cool, dark, and dry place. Label the container with the variety and date. Use seeds from healthy, disease-free plants for the best results.
My chili plant is producing flowers, but no fruit. What could be the problem?
There are several reasons why your chili plant might be producing flowers but no fruit. Common causes include insufficient pollination, temperature extremes, nutrient deficiencies, and stress. Ensure your plants are receiving adequate sunlight and water, and fertilize them with a balanced fertilizer. You may also need to hand-pollinate the flowers by gently shaking the plant or using a small brush to transfer pollen from one flower to another. Protect your plants from extreme temperatures and sudden changes in weather.

Leave a Comment