

Growing Potatoes at Home might seem daunting, but trust me, it’s one of the most rewarding experiences a home gardener can have! Imagine pulling fresh, earthy potatoes straight from your own backyard – the taste is simply unmatched. For centuries, potatoes have been a staple food around the world, originating in the Andes Mountains and playing a crucial role in feeding populations throughout history. From simple peasant fare to gourmet dishes, the humble potato has proven its versatility and importance.
But why should you bother growing potatoes at home? Well, store-bought potatoes often lack the freshness and flavor of homegrown varieties. Plus, you have complete control over what goes into your spuds – no pesticides or harmful chemicals! In this DIY guide, I’m going to share some simple yet effective tricks and hacks that will help you achieve a bountiful potato harvest, even if you have limited space. Whether you’re a seasoned gardener or just starting out, these tips will empower you to enjoy the satisfaction of growing your own delicious, nutritious potatoes. Let’s get digging!
Unlocking the Magic of Vinegar: DIY Hacks for a Sparkling Home and More!
Hey there, fellow DIY enthusiasts! Get ready to be amazed by the sheer versatility of vinegar. This humble kitchen staple is a powerhouse when it comes to cleaning, deodorizing, and even solving everyday household problems. I’m going to share some of my favorite vinegar hacks that will save you money, reduce your reliance on harsh chemicals, and leave your home sparkling. Let’s dive in!
Cleaning Powerhouse: Vinegar to the Rescue!
Vinegar’s acidity makes it a fantastic natural cleaner. It cuts through grease, dissolves mineral deposits, and disinfects surfaces. But remember, never mix vinegar with bleach, as this creates toxic fumes.
Cleaning Your Coffee Maker
Is your coffee tasting a little off? It might be time to descale your coffee maker. Mineral buildup can affect the taste and performance of your machine. Here’s how to clean it with vinegar:
1. Prepare the Vinegar Solution: Fill the water reservoir with equal parts white vinegar and water.
2. Run a Brewing Cycle: Turn on your coffee maker and let it run through a full brewing cycle.
3. Rinse Thoroughly: After the cycle is complete, discard the vinegar solution. Fill the reservoir with fresh water and run two or three more brewing cycles to rinse away any residual vinegar.
4. Enjoy Fresh Coffee: Now your coffee maker is clean and ready to brew delicious coffee!
Sparkling Clean Showerhead
Hard water can leave mineral deposits on your showerhead, reducing water pressure and making it look grimy. Here’s a simple vinegar soak to restore its shine:
1. Gather Your Supplies: You’ll need a plastic bag (a Ziploc bag works well), white vinegar, and a rubber band or twist tie.
2. Fill the Bag with Vinegar: Pour enough white vinegar into the plastic bag to completely submerge the showerhead.
3. Secure the Bag: Carefully attach the bag to the showerhead, ensuring the showerhead is fully immersed in the vinegar. Use a rubber band or twist tie to secure the bag tightly.
4. Soak Overnight: Let the showerhead soak in the vinegar overnight. This will give the vinegar ample time to dissolve the mineral deposits.
5. Remove and Rinse: The next morning, remove the bag and discard the vinegar. Rinse the showerhead thoroughly with water to remove any remaining vinegar and loosened deposits.
6. Wipe Clean: Use a clean cloth or sponge to wipe away any lingering residue. Your showerhead should now be sparkling clean and have improved water pressure!
Microwave Magic
Cleaning a microwave can be a messy chore, but vinegar makes it a breeze.
1. Vinegar Steam Clean: Fill a microwave-safe bowl with 1 cup of water and 2 tablespoons of white vinegar.
2. Microwave for Several Minutes: Microwave the mixture on high for 3-5 minutes, or until the solution boils and the microwave is filled with steam.
3. Let it Sit: Let the bowl sit in the microwave for another 5-10 minutes. The steam will loosen any splattered food and grime.
4. Wipe Clean: Carefully remove the bowl (it will be hot!) and wipe down the inside of the microwave with a clean cloth or sponge. The grime should wipe away easily.
Deodorizing Your Dishwasher
Dishwashers can sometimes develop unpleasant odors. Vinegar can help freshen things up.
1. Vinegar Rinse: Place a dishwasher-safe cup filled with 1 cup of white vinegar on the top rack of your empty dishwasher.
2. Run a Hot Cycle: Run the dishwasher on a hot cycle. The vinegar will help to deodorize and clean the interior of the dishwasher.
Window and Glass Cleaner
Skip the expensive window cleaners and make your own with vinegar.
1. Mix the Solution: In a spray bottle, combine equal parts white vinegar and water.
2. Spray and Wipe: Spray the solution onto your windows or glass surfaces and wipe clean with a microfiber cloth or paper towel. You’ll be amazed at the streak-free shine!
Vinegar as a Deodorizer: Banish Unwanted Smells!
Vinegar is excellent at neutralizing odors, making it a great alternative to chemical air fresheners.
Eliminating Fridge Odors
A smelly fridge can be a real turn-off. Here’s how to use vinegar to absorb those unpleasant odors:
1. Vinegar Sponge: Soak a sponge in white vinegar and place it in a bowl in the back of your refrigerator.
2. Replace Regularly: Replace the vinegar-soaked sponge every few days to keep your fridge smelling fresh.
Freshening Up Laundry
Vinegar can be added to your laundry to help remove odors and brighten colors.
1. Add to the Rinse Cycle: Add 1/2 cup of white vinegar to the rinse cycle of your washing machine. It will help to remove detergent residue and soften fabrics.
2. Odor Removal: For particularly smelly clothes, soak them in a solution of water and vinegar (1 cup of vinegar per gallon of water) for 30 minutes before washing.
Garbage Disposal Refresh
A stinky garbage disposal is no fun. Vinegar can help clean and deodorize it.
1. Vinegar Ice Cubes: Freeze white vinegar in ice cube trays.
2. Grind the Cubes: Drop a few vinegar ice cubes into your garbage disposal and run it until the cubes are completely ground. The vinegar will help to clean the blades and freshen the disposal.
Beyond Cleaning: Unexpected Vinegar Hacks
Vinegar’s uses extend far beyond cleaning and deodorizing. Here are a few more surprising ways to use this versatile liquid.
Weed Killer
Vinegar can be used as a natural weed killer.
1. Undiluted Vinegar: Pour undiluted white vinegar directly onto weeds. Be careful not to get it on plants you want to keep, as it will kill them as well.
2. Sunlight Boost: For best results, apply the vinegar on a sunny day. The sunlight will help to enhance its effectiveness.
Eggcellent Egg Poaching
Poaching eggs can be tricky, but vinegar can help.
1. Vinegar in the Water: Add a tablespoon of white vinegar to the simmering water before poaching your eggs. The vinegar helps the egg whites coagulate faster, resulting in perfectly poached eggs.
Sticker Removal
Stubborn stickers can be a pain to remove. Vinegar can help loosen the adhesive.
1. Soak with Vinegar: Soak a cloth or paper towel in white vinegar and place it over the sticker.
2. Let it Sit: Let it sit for a few minutes to allow the vinegar to penetrate the adhesive.
3. Peel Away: Gently peel away the sticker. The vinegar should have loosened the adhesive, making it easier to remove.
Rust Removal
Vinegar’s acidity can help dissolve rust.
1. Soak Rusty Items: Submerge small rusty items in white vinegar for several hours or overnight.
2. Scrub Away Rust: Remove the items from the vinegar and scrub away the rust with a brush or steel wool.
3. Rinse and Dry: Rinse the items thoroughly with water and dry them completely to prevent further rusting.
Softening Paint Brushes
Hardened paint brushes can be revived with vinegar.
1. Soak in Vinegar: Heat white vinegar in a saucepan (do not boil).
2. Submerge the Brush: Submerge the hardened paint brush in the hot vinegar for about 30 minutes.
3. Rinse and Clean: Remove the brush from the vinegar and rinse it thoroughly with warm water. The paint should soften and come off easily.
Extending the Life of Cut Flowers
Keep your cut flowers looking fresh longer with a little vinegar.
1. Vinegar and Sugar Solution: Add 2 tablespoons of white vinegar and 1 tablespoon of sugar to the water in your flower vase.
2. Regular Water Changes: Change the water every few days and add more vinegar and sugar as needed. The vinegar helps to inhibit bacterial growth, while the sugar provides nourishment for the flowers.
DIY Fruit Fly Trap
Fruit flies can be a nuisance, especially in the summer. Here’s a simple vinegar trap to get rid of them.
1. Vinegar in a Jar: Pour a small amount of apple cider vinegar into a jar or glass.
2. Add Dish Soap: Add a few drops of dish soap to the vinegar. The soap will break the surface tension of the liquid, causing the fruit flies to drown.
3. Cover with Plastic Wrap: Cover the jar with plastic wrap and poke a few small holes in the top.
4. Place Near Fruit: Place the trap near where you see fruit flies. They will be attracted to the vinegar and enter the trap

Conclusion
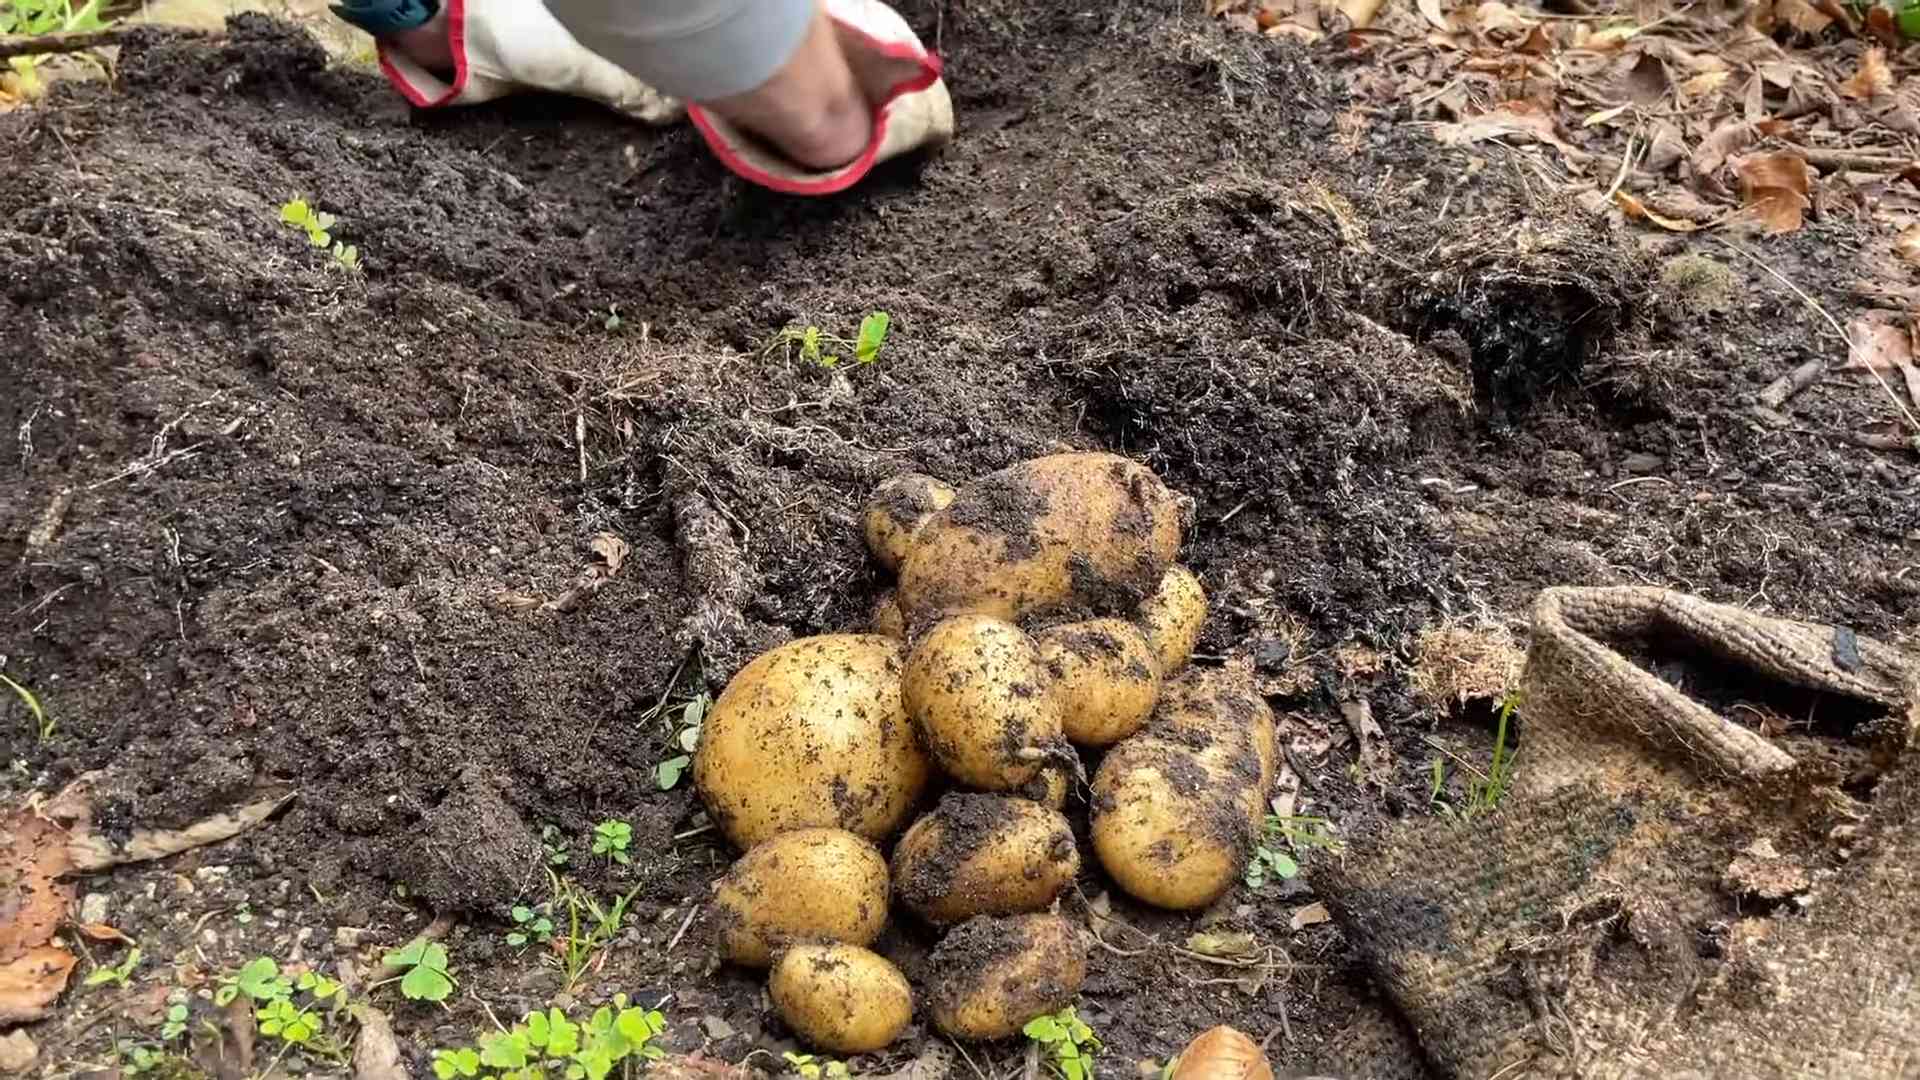
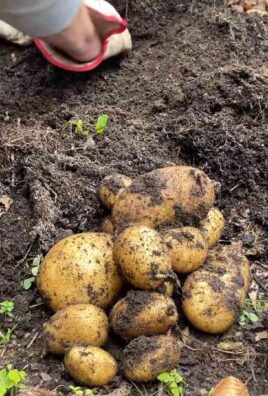
So, there you have it! Growing potatoes at home, while it might seem daunting at first, is surprisingly achievable and incredibly rewarding. This DIY trick, using containers or even repurposed bags, opens up the possibility of fresh, homegrown potatoes even if you lack a traditional garden. Think about it: the satisfaction of harvesting your own spuds, knowing exactly where they came from and what went into them, is simply unmatched. Forget those bland, store-bought potatoes; get ready for an explosion of flavor and freshness!
This method isn’t just about convenience; it’s about control. You control the soil quality, the watering schedule, and the overall environment, leading to healthier, more flavorful potatoes. Plus, it’s a fantastic way to get kids involved in gardening and teach them about where their food comes from. Imagine their excitement as they dig through the soil, unearthing their very own treasure trove of potatoes!
But the best part? The possibilities are endless! Experiment with different potato varieties – Yukon Gold for creamy mashed potatoes, Red Pontiac for vibrant potato salads, or even fingerling potatoes for a gourmet touch. You can also tailor the soil mix to your specific needs, adding compost for extra nutrients or perlite for improved drainage. Consider companion planting with herbs like basil or thyme to deter pests and enhance the flavor of your potatoes.
Don’t be afraid to get creative with your containers, either. Old laundry baskets, plastic storage bins, or even burlap sacks can all be repurposed into potato-growing vessels. Just make sure they have adequate drainage holes. And if you’re short on space, try growing potatoes vertically in stacked tires or specially designed potato towers.
This DIY potato growing trick is more than just a gardening project; it’s an investment in your health, your taste buds, and your connection to nature. It’s a chance to reconnect with the earth, learn new skills, and enjoy the fruits (or rather, tubers) of your labor.
We wholeheartedly encourage you to give this method a try. It’s easier than you think, and the rewards are well worth the effort. Start small, experiment with different techniques, and don’t be discouraged if you encounter a few bumps along the way. Gardening is a learning process, and every mistake is an opportunity to grow (pun intended!).
Once you’ve harvested your first batch of homegrown potatoes, be sure to share your experience with us! We’d love to hear about your successes, your challenges, and any tips or tricks you’ve discovered along the way. Post photos of your potato plants, your harvests, and your delicious potato dishes on social media using #HomeGrownPotatoes and #DIYGardening. Let’s inspire others to join the potato-growing revolution!
So, what are you waiting for? Grab some seed potatoes, a container, and some soil, and get ready to embark on a delicious and rewarding gardening adventure. Happy growing!
Frequently Asked Questions (FAQ)
What kind of potatoes should I use for growing potatoes at home?
You’ll want to use seed potatoes, which are potatoes specifically grown for planting. These are different from the potatoes you buy at the grocery store, which may have been treated to prevent sprouting. You can purchase seed potatoes from garden centers or online retailers. Look for varieties that are well-suited to your climate and your taste preferences. Popular choices include Yukon Gold, Red Pontiac, Kennebec, and fingerling potatoes. Avoid using potatoes from the grocery store, as they may not sprout or may carry diseases.
How big of a container do I need for growing potatoes at home?
The size of the container depends on the variety of potato you’re growing and how many potatoes you want to harvest. As a general rule, a container that is at least 15 gallons in size is recommended. This will provide enough space for the potato plants to develop a healthy root system and produce a decent yield. The container should also be at least 12 inches deep to allow for proper hilling. Larger containers, such as 20-gallon or 30-gallon bins, will provide even more space and may result in a larger harvest.
What kind of soil should I use for growing potatoes at home?
Potatoes prefer well-draining, slightly acidic soil. A good potting mix specifically designed for vegetables is ideal. You can also create your own soil mix by combining equal parts of compost, peat moss (or coconut coir), and perlite or vermiculite. Compost provides nutrients, peat moss or coconut coir helps retain moisture, and perlite or vermiculite improves drainage. Avoid using heavy clay soil, as it can become waterlogged and prevent the potatoes from developing properly.
How often should I water my potato plants?
Water your potato plants regularly, especially during hot, dry weather. The soil should be kept consistently moist, but not waterlogged. Check the soil moisture by sticking your finger into the soil about an inch deep. If the soil feels dry, it’s time to water. Water deeply, allowing the water to drain out of the bottom of the container. Avoid watering the foliage, as this can encourage fungal diseases.
How do I “hill” my potato plants?
Hilling is the process of adding soil around the stems of the potato plants as they grow. This encourages the plants to produce more potatoes along the buried stems. Start hilling when the plants are about 6 inches tall. Add a few inches of soil around the stems, leaving the top leaves exposed. Repeat this process every few weeks as the plants grow, until the container is almost full.
When are my potatoes ready to harvest?
Potatoes are typically ready to harvest about 70-90 days after planting, depending on the variety. You can harvest “new potatoes” early, when the plants are still flowering, for a smaller, more tender crop. For mature potatoes, wait until the foliage starts to die back and turn yellow. This indicates that the potatoes have stopped growing and are ready to be harvested. To harvest, carefully dig around the base of the plant and lift the potatoes out of the soil.
What are some common problems when growing potatoes at home?
Some common problems include pests such as aphids, potato beetles, and slugs, as well as diseases such as blight and scab. To prevent pests, consider using organic pest control methods such as neem oil or insecticidal soap. To prevent diseases, ensure good air circulation around the plants and avoid overwatering. If you notice any signs of pests or diseases, take action immediately to prevent them from spreading.
Can I grow potatoes in bags?
Yes, growing potatoes in bags is a popular and effective method. Use a large, sturdy bag made of burlap, plastic, or fabric. Fill the bag with soil, plant the seed potatoes, and follow the same hilling and watering instructions as for container gardening. Bags are lightweight and easy to move, making them a great option for small spaces.
How do I store my harvested potatoes?
Store your harvested potatoes in a cool, dark, and dry place. A root cellar is ideal, but a basement or garage can also work. Avoid storing potatoes in the refrigerator, as this can cause them to develop a sweet taste. Store potatoes away from apples and bananas, as these fruits release ethylene gas, which can cause potatoes to sprout prematurely. Properly stored potatoes can last for several months.

Leave a Comment