

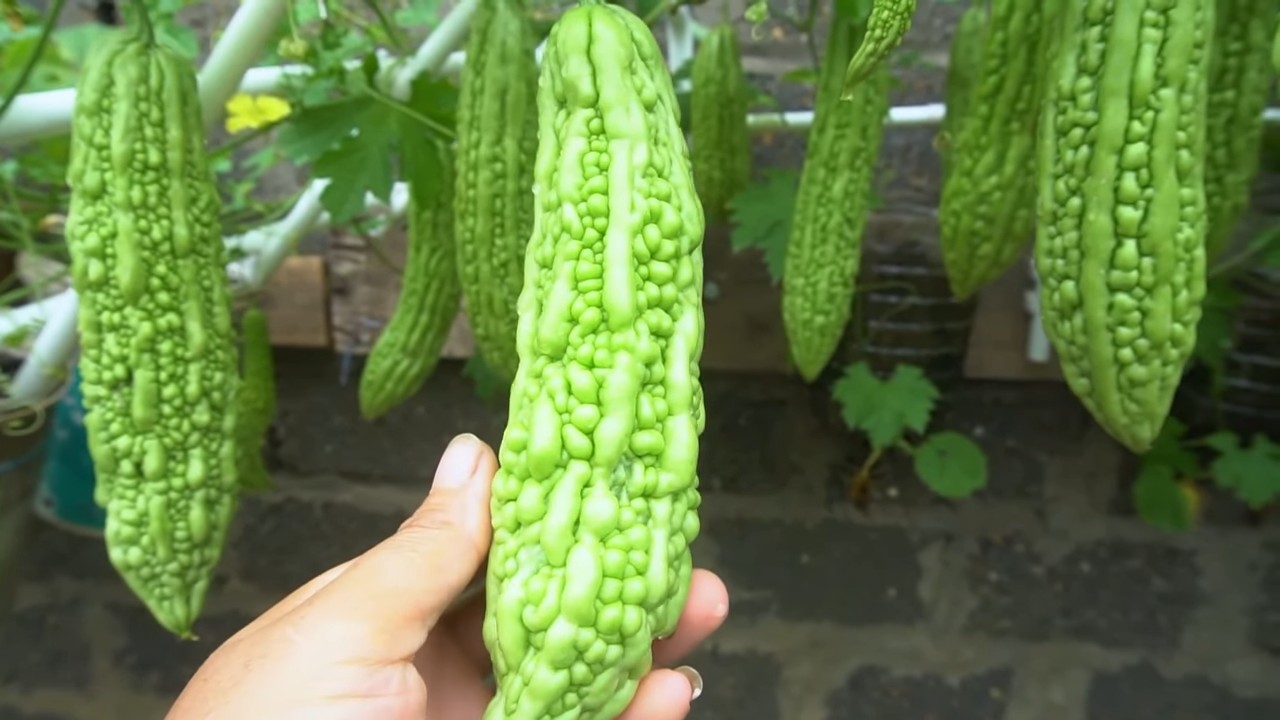
Growing bitter melon indoors might seem like a challenge, but trust me, it’s totally achievable and incredibly rewarding! Have you ever dreamt of harvesting your own exotic vegetables right from the comfort of your home? Imagine the satisfaction of plucking a fresh, vibrant bitter melon, knowing you nurtured it from seed to fruit. This DIY guide will unlock the secrets to successfully cultivating this unique and nutritious gourd, even if you don’t have a sprawling garden.
Bitter melon, also known as bitter gourd or karela, has a rich history deeply rooted in Asian cultures, where it’s been prized for centuries for its culinary and medicinal properties. From traditional Chinese medicine to Indian Ayurvedic practices, bitter melon has been used to promote overall well-being. But you don’t need to travel to Asia to enjoy its benefits!
Many people shy away from growing bitter melon because they think it requires a tropical climate or extensive outdoor space. That’s where this DIY trick comes in! I’m going to show you how to overcome these challenges and create the perfect indoor environment for your bitter melon to thrive. Whether you’re looking to add a unique flavor to your dishes, explore the health benefits of this superfood, or simply enjoy the satisfaction of growing your own food, this guide will provide you with the essential tips and tricks for growing bitter melon indoors successfully. Let’s get started!
Bittermelone im Haus anbauen: Dein umfassender DIY-Leitfaden
Hallo liebe Gartenfreunde! Habt ihr schon mal überlegt, Bittermelone (auch bekannt als Bittergurke oder Karela) im Haus anzubauen? Es mag erstmal ungewöhnlich klingen, aber mit ein bisschen Know-how und Geduld könnt ihr diese exotische Frucht auch in euren eigenen vier Wänden ernten. Ich zeige euch, wie es geht!
Warum Bittermelone im Haus anbauen?
* Verlängerte Anbausaison: Im Haus seid ihr unabhängig vom Wetter und könnt die Anbausaison deutlich verlängern.
* Kontrollierte Bedingungen: Ihr habt die volle Kontrolle über Temperatur, Luftfeuchtigkeit und Licht, was sich positiv auf das Wachstum auswirken kann.
* Schutz vor Schädlingen: Im Haus sind eure Pflanzen weniger anfällig für Schädlinge und Krankheiten.
* Dekorativer Aspekt: Eine wachsende Bittermelone kann auch ein echter Hingucker in eurer Wohnung sein.
Was du brauchst: Die Materialliste
Bevor wir loslegen, hier eine Liste mit allen Materialien, die du für den Anbau von Bittermelone im Haus benötigst:
* Bittermelonensamen: Am besten Bio-Samen von einem vertrauenswürdigen Händler.
* Anzuchttöpfe oder -schalen: Kleine Töpfe oder Schalen für die Voranzucht der Samen.
* Anzuchterde: Spezielle Erde für die Anzucht von Sämlingen, die nährstoffarm und locker ist.
* Große Pflanzgefäße: Töpfe mit einem Durchmesser von mindestens 30 cm für die ausgewachsenen Pflanzen.
* Hochwertige Blumenerde: Eine Mischung aus Blumenerde, Kompost und eventuell etwas Sand oder Perlit.
* Rankhilfe: Ein Spalier, ein Rankgitter oder Schnüre, an denen die Bittermelone hochklettern kann.
* Pflanzenlampe (optional): Wenn dein Standort nicht genügend Sonnenlicht bietet.
* Sprühflasche: Zum Befeuchten der Erde und der Blätter.
* Gießkanne: Zum Bewässern der Pflanzen.
* Flüssigdünger: Ein organischer Flüssigdünger für Gemüse.
* Gartenschere: Zum Beschneiden der Pflanzen.
* Handschuhe: Zum Schutz deiner Hände.
Phase 1: Die Voranzucht der Samen
Die Voranzucht der Samen ist ein wichtiger Schritt, um sicherzustellen, dass deine Bittermelonenpflanzen einen guten Start haben.
1. Samen vorbereiten: Bittermelonensamen haben eine harte Schale. Um die Keimung zu beschleunigen, kannst du die Samen leicht anrauen. Das geht am besten, indem du sie vorsichtig mit Schleifpapier oder einer Nagelfeile bearbeitest. Achte darauf, die Samen nicht zu beschädigen!
2. Samen einweichen: Lege die angerauten Samen für 24 Stunden in lauwarmes Wasser. Das hilft, die Schale aufzuweichen und die Keimung zu fördern.
3. Anzuchttöpfe vorbereiten: Fülle die Anzuchttöpfe oder -schalen mit Anzuchterde. Drücke die Erde leicht an.
4. Samen aussäen: Lege in jeden Topf ein bis zwei Samen, etwa 1-2 cm tief. Bedecke die Samen mit Erde und drücke sie leicht an.
5. Bewässern: Befeuchte die Erde vorsichtig mit einer Sprühflasche. Die Erde sollte feucht, aber nicht nass sein.
6. Standort wählen: Stelle die Anzuchttöpfe an einen warmen und hellen Ort. Eine Temperatur von 25-30°C ist ideal für die Keimung.
7. Feuchtigkeit halten: Decke die Anzuchttöpfe mit Frischhaltefolie oder einem Mini-Gewächshaus ab, um die Luftfeuchtigkeit hoch zu halten. Lüfte die Töpfe täglich kurz, um Schimmelbildung zu vermeiden.
8. Geduld haben: Die Keimung dauert in der Regel 7-14 Tage. Sobald die ersten Keimlinge erscheinen, entferne die Folie oder das Mini-Gewächshaus.
Phase 2: Die Jungpflanzen pflegen
Sobald die Samen gekeimt sind, beginnt die Phase der Jungpflanzenpflege. Hier ist es wichtig, den kleinen Pflanzen die bestmöglichen Bedingungen zu bieten.
1. Licht: Stelle die Jungpflanzen an einen sehr hellen Ort. Wenn du nicht genügend Sonnenlicht hast, verwende eine Pflanzenlampe. Die Pflanzen benötigen mindestens 6-8 Stunden Licht pro Tag.
2. Bewässerung: Gieße die Jungpflanzen regelmäßig, aber vermeide Staunässe. Die Erde sollte immer leicht feucht sein.
3. Temperatur: Die ideale Temperatur für die Jungpflanzen liegt zwischen 20-25°C.
4. Düngen: Beginne etwa zwei Wochen nach der Keimung mit dem Düngen. Verwende einen organischen Flüssigdünger für Gemüse und dünge die Pflanzen einmal pro Woche.
5. Pikieren (optional): Wenn du mehrere Samen in einen Topf gesät hast, musst du die Jungpflanzen pikieren. Das bedeutet, dass du die Pflanzen vorsichtig aus dem Topf nimmst und in separate Töpfe umpflanzt. Achte darauf, die Wurzeln nicht zu beschädigen.
Phase 3: Die Bittermelone umtopfen und pflegen
Wenn die Jungpflanzen kräftig genug sind (etwa 15-20 cm hoch), ist es Zeit, sie in größere Töpfe umzutopfen.
1. Pflanzgefäße vorbereiten: Fülle die großen Pflanzgefäße mit hochwertiger Blumenerde. Mische die Erde mit Kompost und eventuell etwas Sand oder Perlit, um die Drainage zu verbessern.
2. Pflanzen umtopfen: Nimm die Jungpflanzen vorsichtig aus den Anzuchttöpfen und setze sie in die neuen Pflanzgefäße. Achte darauf, dass die Wurzeln genügend Platz haben.
3. Rankhilfe installieren: Bittermelonen sind Kletterpflanzen und benötigen eine Rankhilfe. Installiere ein Spalier, ein Rankgitter oder Schnüre in den Pflanzgefäßen, an denen die Pflanzen hochklettern können.
4. Standort wählen: Stelle die Pflanzgefäße an einen sonnigen und warmen Ort. Bittermelonen benötigen mindestens 6-8 Stunden Sonnenlicht pro Tag.
5. Bewässerung: Gieße die Pflanzen regelmäßig, besonders während der Wachstums- und Blütezeit. Die Erde sollte immer feucht, aber nicht nass sein.
6. Düngen: Dünge die Pflanzen alle zwei Wochen mit einem organischen Flüssigdünger für Gemüse.
7. Beschneiden: Bittermelonen können stark wachsen. Beschneide die Pflanzen regelmäßig, um das Wachstum zu fördern und die Fruchtbildung anzuregen. Entferne Seitentriebe und abgestorbene Blätter.
8. Bestäubung: Bittermelonen sind einhäusig, das heißt, sie haben männliche und weibliche Blüten auf derselben Pflanze. Im Haus kann die Bestäubung jedoch schwierig sein. Du kannst die Bestäubung von Hand vornehmen, indem du mit einem kleinen Pinsel Pollen von den männlichen Blüten auf die weiblichen Blüten überträgst. Die weiblichen Blüten erkennst du an dem kleinen Fruchtansatz direkt hinter der Blüte.
Phase 4: Erntezeit!
Nach etwa 2-3 Monaten solltest du die ersten Bittermelonen ernten können.
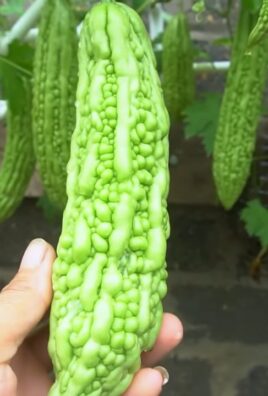
1. Erntezeitpunkt: Die Bittermelonen sind reif, wenn sie ihre typische Farbe haben (je nach Sorte grün, gelb oder orange) und sich leicht vom Stiel lösen lassen.
2. Ernten: Schneide die Bittermelonen mit einer Gartenschere vom Stiel ab.
3. Lagerung: Bittermelonen sind nicht lange haltbar. Lagere sie im Kühlschrank und verbrauche sie innerhalb weniger Tage.
Häufige Probleme und Lösungen
* Gelbe Blätter: Gelbe Blätter können ein Zeichen für Überwässerung, Nährstoffmangel oder Schädlingsbefall sein. Überprüfe die Bewässerung, dünge die Pflanzen und untersuche sie auf Schädlinge.
* Schädlinge: Bittermelonen können von Blattläusen, Spinn

Conclusion
So, there you have it! Growing bitter melon indoors might seem like a challenge, but with a little patience, the right setup, and this simple DIY trick, you can absolutely enjoy fresh, homegrown bitter melon even if you don’t have a sprawling garden. This method not only extends your growing season but also gives you greater control over the plant’s environment, protecting it from pests and unpredictable weather.
Why is this DIY approach a must-try? Because it empowers you to cultivate a unique and nutritious vegetable regardless of your living situation. Imagine the satisfaction of harvesting your own bitter melon, knowing exactly where it came from and how it was grown. Beyond the bragging rights, you’ll have access to a fresh, healthy ingredient that’s often difficult to find in local stores, especially at peak ripeness.
But don’t stop there! Experiment with different varieties of bitter melon to find your favorite. Try using different types of potting mix to see which yields the best results. Consider adding companion plants like basil or marigolds to your indoor garden to deter pests naturally. You can even explore different trellising methods to maximize space and support the growing vines.
We’ve armed you with the knowledge and the tools – now it’s your turn to get your hands dirty! We wholeheartedly encourage you to give this DIY bitter melon growing method a try. The rewards are well worth the effort.
And most importantly, we want to hear about your experiences! Share your successes, your challenges, and any modifications you make along the way. Did you find a particular variety that thrived indoors? Did you discover a secret to boosting fruit production? Your insights could help other aspiring indoor gardeners achieve their bitter melon dreams. Post your photos and stories on social media using #IndoorBitterMelon or tag us in your posts. Let’s build a community of indoor bitter melon enthusiasts and learn from each other!
This DIY project is more than just growing a vegetable; it’s about connecting with nature, learning new skills, and enjoying the fruits (or rather, vegetables) of your labor. So, embrace the challenge, get creative, and start growing your own bitter melon indoors today! You’ll be amazed at what you can achieve.
Frequently Asked Questions (FAQ)
What are the ideal conditions for growing bitter melon indoors?
Bitter melon thrives in warm, sunny environments. Aim for a temperature range of 70-85°F (21-29°C) during the day and no lower than 60°F (15°C) at night. Provide at least 6-8 hours of direct sunlight per day. If you don’t have enough natural light, supplement with grow lights. Humidity is also important; aim for 50-70%. You can increase humidity by using a humidifier, placing the pot on a tray filled with pebbles and water, or misting the plants regularly.
What size pot should I use for growing bitter melon indoors?
Choose a pot that is at least 12 inches in diameter and 12 inches deep. Bitter melon plants have extensive root systems, so they need ample space to grow. A larger pot will also help retain moisture and prevent the plant from becoming root-bound. Fabric pots are a great option as they allow for better aeration and drainage.
What type of soil is best for growing bitter melon indoors?
Use a well-draining potting mix that is rich in organic matter. A mix of peat moss, perlite, and vermiculite is a good option. You can also add compost or aged manure to improve the soil’s fertility. Avoid using garden soil, as it can be too heavy and may contain pests or diseases.
How often should I water my indoor bitter melon plant?
Water your bitter melon plant regularly, keeping the soil consistently moist but not waterlogged. Check the soil moisture by sticking your finger about an inch deep. If the soil feels dry, it’s time to water. Water deeply, allowing the excess water to drain out of the bottom of the pot. Avoid overwatering, as this can lead to root rot. Reduce watering frequency during cooler months.
How do I pollinate my indoor bitter melon plant?
Bitter melon plants are monoecious, meaning they have separate male and female flowers on the same plant. In an outdoor setting, insects typically pollinate the flowers. However, indoors, you’ll need to hand-pollinate them. Use a small paintbrush or cotton swab to collect pollen from the male flowers (those with a long, thin stem) and transfer it to the female flowers (those with a small, immature fruit behind the flower). Do this in the morning when the flowers are open.
What are some common pests and diseases that affect bitter melon plants?
Common pests include aphids, spider mites, and whiteflies. These can be controlled with insecticidal soap or neem oil. Diseases include powdery mildew and fungal leaf spots. Prevent these by providing good air circulation and avoiding overhead watering. If you notice any signs of disease, remove the affected leaves and treat the plant with a fungicide.
How long does it take for bitter melon to mature?
Bitter melon typically takes 60-90 days to mature after planting. The fruits are ready to harvest when they are still green and firm. If you wait too long, they will turn orange and become bitter. Harvest the fruits regularly to encourage the plant to produce more.
Can I grow bitter melon from seeds saved from store-bought fruit?
Yes, you can grow bitter melon from seeds saved from store-bought fruit, but the results may vary. The fruit may not be true to type, meaning it may not have the same characteristics as the parent plant. To improve your chances of success, choose a ripe, healthy fruit and allow the seeds to dry completely before planting.
How do I trellis my indoor bitter melon plant?
Bitter melon vines can grow quite long, so they need a trellis to support them. You can use a variety of trellising methods, such as a bamboo stake, a tomato cage, or a trellis made from wire or netting. Train the vines to climb the trellis by gently tying them to it with twine or plant ties.
What kind of fertilizer should I use for my indoor bitter melon plant?
Feed your bitter melon plant with a balanced fertilizer every 2-3 weeks during the growing season. A fertilizer with an NPK ratio of 10-10-10 is a good option. You can also use a fertilizer specifically formulated for vegetables. Follow the instructions on the fertilizer label carefully.
How do I deal with yellowing leaves on my bitter melon plant?
Yellowing leaves can be a sign of several problems, including overwatering, underwatering, nutrient deficiency, or pest infestation. Check the soil moisture and adjust your watering accordingly. If the soil is dry, water deeply. If the soil is waterlogged, allow it to dry out before watering again. Fertilize the plant with a balanced fertilizer to address any nutrient deficiencies. Inspect the plant for pests and treat accordingly.
Is growing bitter melon indoors worth the effort?
Absolutely! While it requires some attention and care, growing bitter melon indoors is a rewarding experience. You’ll have access to fresh, homegrown bitter melon, which is a nutritious and delicious vegetable. Plus, you’ll gain a sense of accomplishment from successfully cultivating a plant indoors. The unique flavor and health benefits of fresh, homegrown bitter melon make it well worth the effort.
Leave a Comment