

Dollar Store Space Saving Rack: Maximize Your Garden’s Potential
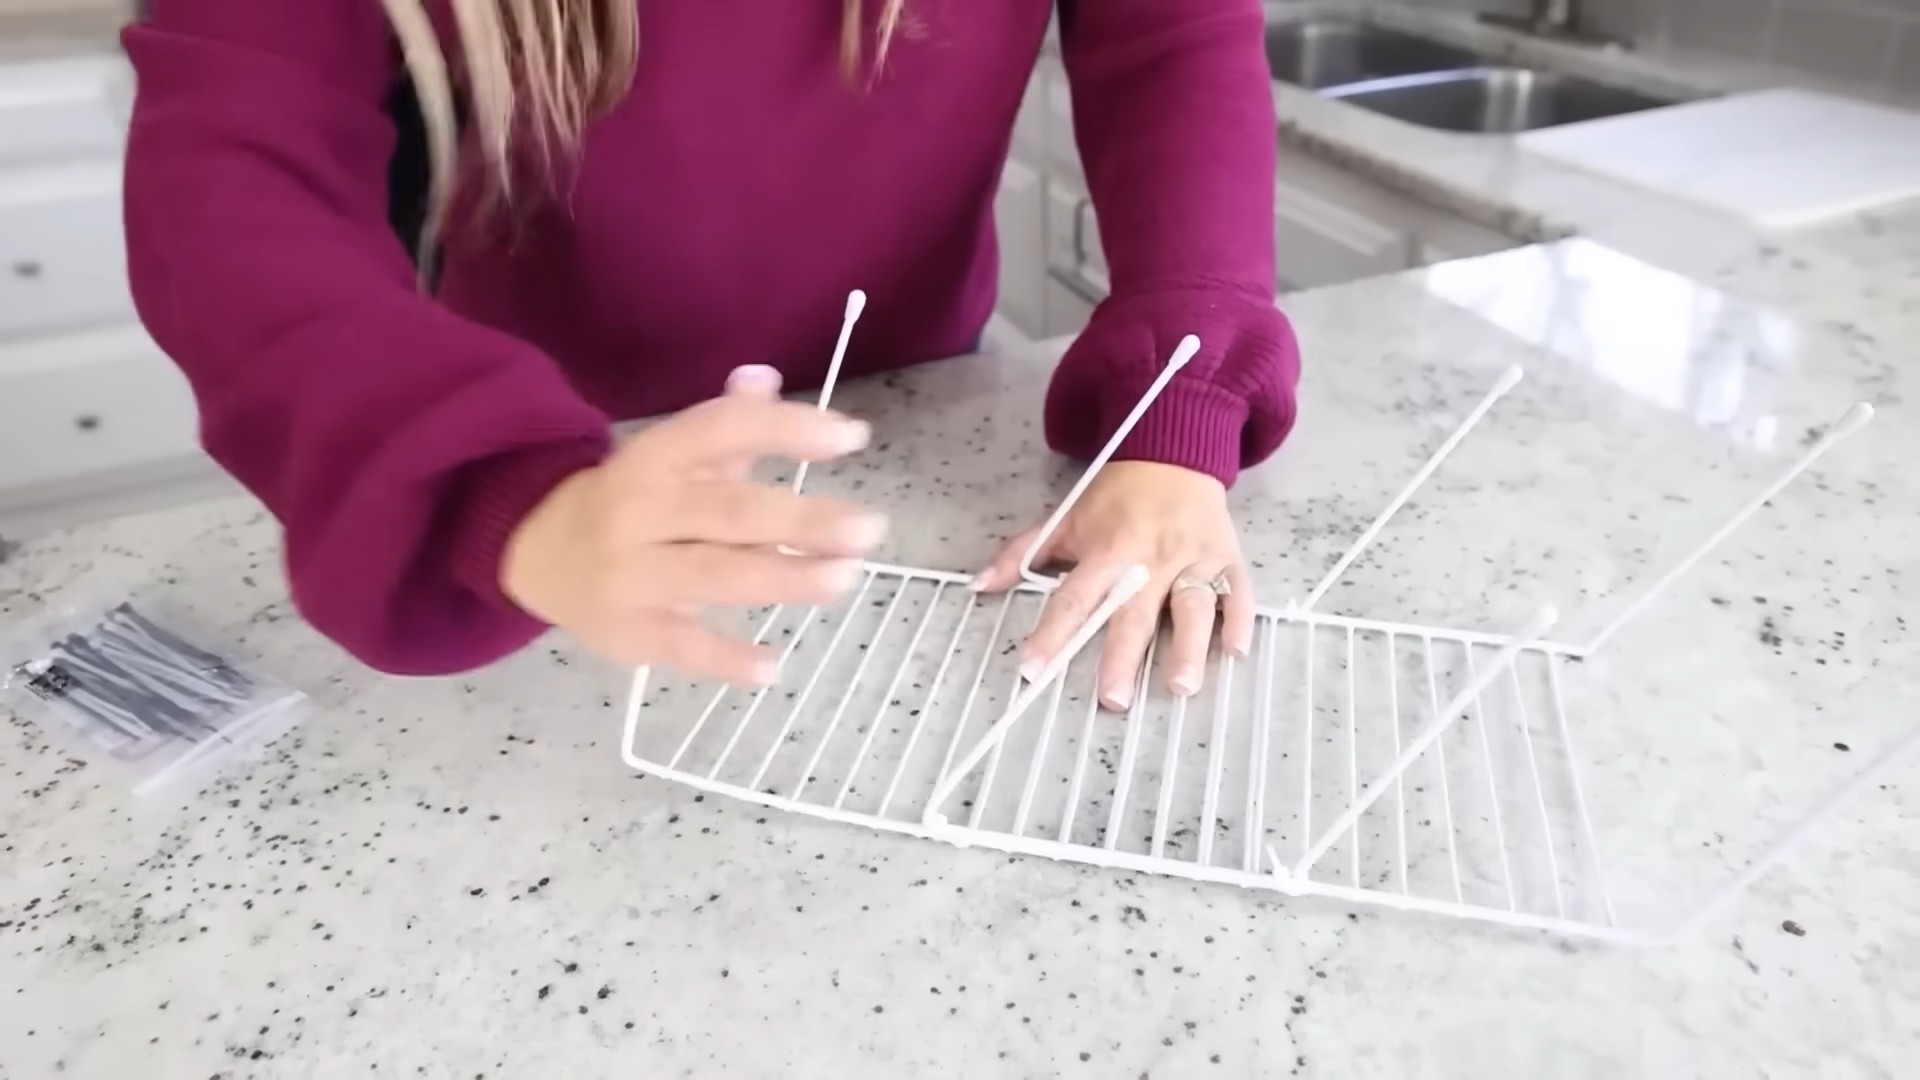
I love gardening, but let’s be honest, space is often the biggest challenge! Finding room for all your seedlings, tools, and supplies can feel like a constant battle. That’s why I’m so excited to share this amazing Dollar Store Space Saving Rack project with you. It’s a game-changer for small gardens and balconies, and the best part? It costs practically nothing!
For years, I’ve struggled with cluttered gardening sheds and overflowing windowsills. The search for efficient storage solutions often led to expensive, bulky shelving units. Then, one day, while browsing my local Dollar Store, inspiration struck! I realized the potential of their everyday items to create a customized, space-saving solution. This isn’t just about saving money; it’s about reclaiming valuable space in your garden, allowing you to grow more of what you love.
A Little History (and a Lot of Ingenuity)
While this particular Dollar Store Space Saving Rack is a modern invention born from necessity and resourcefulness, the need for efficient storage in gardening has existed for centuries. Think about the ingenious vertical gardening techniques used for generations in small spaces around the world. This DIY project taps into that same spirit of innovation, offering a budget-friendly and easily customizable approach to maximizing your garden’s potential, no matter how limited your space.
Whether you’re a seasoned gardener or just starting out, this DIY project is perfect for you. You’ll learn how to transform inexpensive materials into a functional and attractive storage solution. So, let’s get started and unlock the hidden space in your garden with this incredible Dollar Store Space Saving Rack!
Building a Custom Bookshelf from Reclaimed Wood
I love the look of reclaimed wood, and I’ve always wanted a unique bookshelf. So, I decided to build my own! This project took a little time, but the result is a beautiful, sturdy bookshelf that perfectly fits my space and style. Here’s how I did it:
Phase 1: Sourcing and Preparing the Wood
- Find your wood: This is the fun part! I scoured local salvage yards and antique shops for reclaimed wood planks. Look for planks that are relatively straight and free of major cracks or rot. Aim for a variety of widths and lengths for a more rustic look. I ended up with about 10 planks, ranging from 6 to 12 inches wide and 6 to 8 feet long.
- Clean the wood: Once you’ve got your wood, it’s time to clean it. I used a wire brush to remove loose debris, dirt, and any stubborn paint or varnish. A pressure washer could also work well, but be careful not to damage the wood. After brushing, I wiped down each plank with a damp cloth.
- Assess and cut: Lay out your planks and visualize your bookshelf design. I wanted three shelves, so I needed to cut my planks to the appropriate lengths. Measure carefully and use a saw (I used a circular saw, but a hand saw would also work) to cut the planks to your desired lengths. Remember to account for the thickness of the wood when calculating shelf spacing.
- Sanding is key: This step is crucial for a smooth finish. I started with a coarser grit sandpaper (around 80 grit) to remove any remaining imperfections and then moved to a finer grit (around 120 grit) for a smoother surface. Sanding along the grain is important to avoid scratches. Wear a dust mask to protect your lungs!
Phase 2: Assembling the Bookshelf
- Choose your supports: I decided to use sturdy 4×4 posts for the sides of my bookshelf. You can adjust this based on the size and weight of your bookshelf. Cut the 4x4s to the desired height of your bookshelf. I made mine 72 inches tall.
- Mark shelf positions: Using a level, mark the positions for your shelves on the 4×4 posts. Make sure the spacing is even and consistent. I spaced my shelves 12 inches apart.
- Pre-drill holes: Before attaching the shelves, pre-drill pilot holes in the 4×4 posts where the shelves will be attached. This prevents the wood from splitting when you screw it together. Use a drill bit slightly smaller than the diameter of your screws.
- Attach the shelves: I used wood screws to attach the shelves to the 4×4 posts. Make sure the screws are long enough to go through the shelf and securely into the posts. Use a screwdriver or drill to fasten the screws. Check for levelness as you go.
- Reinforce the structure (optional): For extra stability, especially if you plan on loading the shelves heavily, consider adding support brackets or corner braces to the back of the bookshelf. This will help prevent the bookshelf from racking or warping over time.
Phase 3: Finishing Touches
- Apply wood stain or paint: This is where you can personalize your bookshelf. I chose a dark walnut stain to enhance the natural beauty of the reclaimed wood. Apply the stain according to the manufacturer’s instructions. Let it dry completely before moving on to the next step.
- Apply a sealant (optional): A sealant will protect your bookshelf from moisture and wear. I used a polyurethane sealant to give my bookshelf a durable finish. Apply several thin coats, allowing each coat to dry completely before applying the next.
- Add any extra details: Once the sealant is dry, you can add any extra details you like. I added some small metal brackets to the corners for extra reinforcement and a touch of industrial style. You could also add decorative knobs or pulls to the shelves.
- Let it cure: Allow the sealant to cure completely before placing any books or heavy objects on the shelves. This usually takes 24-48 hours, depending on the type of sealant you used.
Phase 4: Placement and Enjoyment!
- Find the perfect spot: Carefully move your new bookshelf to its final location. Make sure the floor is level to prevent the bookshelf from tilting.
- Start organizing: The best part! Fill your beautiful, custom-built bookshelf with your favorite books and decorative items. Enjoy your handiwork!
Tips for Success:
- Measure twice, cut once: Accuracy is key in woodworking. Take your time and double-check your measurements before cutting any wood.
- Use the right tools: Having the right tools will make the job easier and safer. Invest in good quality tools if you plan on doing more woodworking projects.
- Safety first: Always wear safety glasses and a dust mask when working with wood. Use caution when operating power tools.
- Take your time: This is a project that requires patience. Don’t rush the process, and enjoy the journey of creating something beautiful with your own hands.
Troubleshooting:
If you encounter any problems, don’t be discouraged! Woodworking can be challenging, but it’s also very rewarding. If you have trouble with a particular step, search online for tutorials or ask for help from a more experienced woodworker.
Conclusion
So there you have it – a simple, affordable, and incredibly effective way to maximize your storage space using nothing more than items from your local Dollar Store! This Dollar Store Space Saving Rack DIY project is a must-try for anyone looking to declutter and organize their home without breaking the bank. The beauty of this project lies in its adaptability. You’re not just limited to a single design; the possibilities are endless. The fundamental principle – utilizing readily available, inexpensive materials to create a functional and aesthetically pleasing storage solution – is incredibly versatile.
Imagine the satisfaction of transforming a cluttered corner into a neatly organized space, all thanks to your own ingenuity and a few dollars worth of supplies. This isn’t just about saving money; it’s about reclaiming valuable space and creating a more organized, less stressful living environment. The sense of accomplishment you’ll feel after completing this project is truly rewarding. You’ll be amazed at how much you can achieve with a little creativity and resourcefulness.
Beyond the basic design, consider these variations to personalize your Dollar Store Space Saving Rack:
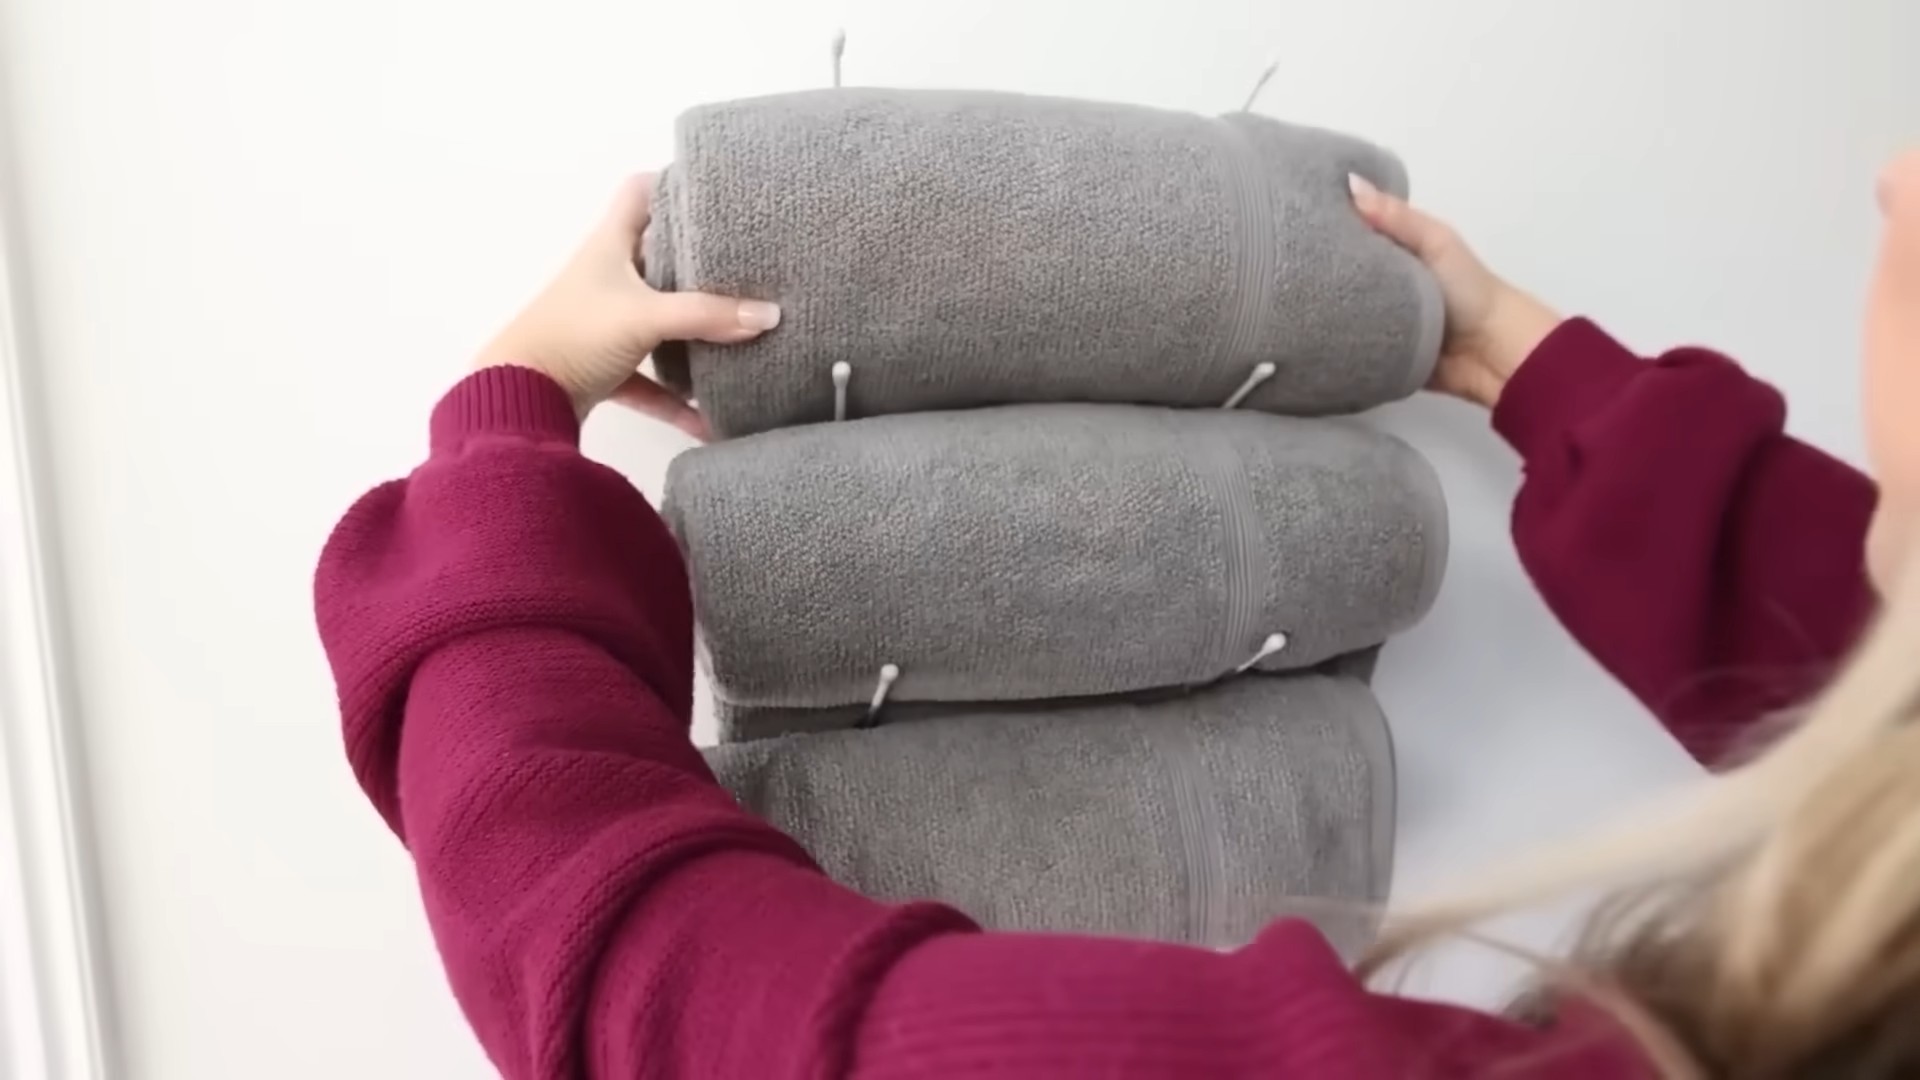
- Different Materials: Experiment with different types of baskets or containers. Wire baskets offer a different aesthetic than fabric bins, and plastic containers provide a waterproof option for storing items like cleaning supplies.
- Customizable Sizes: Adjust the dimensions of your rack to perfectly fit the space you’re working with. A taller rack might be ideal for a pantry, while a shorter, wider rack could be perfect for a bathroom.
- Added Features: Consider adding hooks to the sides of the rack for hanging smaller items, or attaching labels to the baskets for easy identification of contents.
- Decorative Touches: Personalize your rack with paint, fabric, or decorative paper to match your home’s décor. This allows you to seamlessly integrate the rack into your existing style.
- Multiple Racks: Don’t limit yourself to just one rack! Create multiple racks to address various storage needs throughout your home. A set of matching racks can create a cohesive and stylish storage solution.
We strongly encourage you to try this Dollar Store Space Saving Rack DIY project and share your experience with us! Post pictures of your finished rack on social media using the hashtag #DollarStoreSpaceSavingRack. We’d love to see your creative variations and how you’ve transformed your space. Let’s inspire each other to create organized and beautiful homes on a budget!
Frequently Asked Questions
What tools do I need for this project?
The beauty of this project is its simplicity! You’ll primarily need a screwdriver (or drill if using screws instead of nails) and possibly a measuring tape for accurate placement. Some projects might benefit from a level to ensure the rack is straight, but this isn’t strictly necessary.
Can I use different types of shelving?
Absolutely! The instructions provide a guideline, but feel free to experiment with different types of shelving. Wooden shelves, metal shelves, or even sturdy cardboard shelves (for lighter items) can be adapted to fit the design. Just ensure the shelves are strong enough to support the weight of the items you plan to store.
What if I don’t have all the exact materials listed?
Don’t worry! The Dollar Store Space Saving Rack is all about adaptability. If you don’t have the exact same baskets or containers, find similar ones that fit the dimensions of your chosen shelving. The key is to find items that are sturdy enough to hold your belongings and fit the overall design.
How much weight can the rack hold?
The weight capacity depends on the materials you use and how securely you assemble the rack. For the materials suggested, it’s best to avoid placing excessively heavy items on the shelves. Distribute weight evenly across the shelves to prevent any instability. If you are concerned about weight capacity, consider using stronger materials or reinforcing the structure.
Can I customize the size of the rack?
Yes! The dimensions provided are a suggestion; you can easily adjust the size of the rack to fit your specific needs and available space. Simply measure the area where you plan to place the rack and adjust the dimensions of the shelving and supports accordingly. Remember to ensure the supports are strong enough to hold the shelves and the items you plan to store.
What if I don’t have a lot of space?
This Dollar Store Space Saving Rack is perfect for small spaces! Its compact design allows you to maximize vertical space, making it ideal for apartments, small bedrooms, or any area where space is limited. You can even create a smaller, more compact version of the rack to fit even tighter spaces.
Where can I find the materials?
The beauty of this project is that most of the materials can be found at your local Dollar Store! Check the shelving, storage, and organizational sections for baskets, containers, and shelving units. If you need additional materials like screws or brackets, you can also find these at most hardware stores or even online retailers.
Is this project difficult for beginners?
No! This project is designed to be beginner-friendly. The instructions are straightforward, and the assembly process is simple. Even if you’re not experienced with DIY projects, you should be able to complete this project with ease. If you encounter any difficulties, there are plenty of online resources and tutorials available to guide you.


Leave a Comment