

Growing Flavorful Chili Peppers at home might seem daunting, but trust me, it’s an incredibly rewarding experience! Imagine plucking vibrant, fiery peppers straight from your garden, ready to spice up your favorite dishes. Forget bland, store-bought chilies – with a few simple tricks, you can cultivate peppers bursting with flavor and heat, tailored exactly to your taste.
The history of chili peppers is as rich and vibrant as their colors. Originating in South America, these fiery fruits have been cultivated for thousands of years, playing a crucial role in cuisines and cultures worldwide. From the ancient Aztecs using them in rituals to their global spread through trade routes, chili peppers have always been more than just a spice.
But why should *you* bother with growing your own? Well, for starters, you have complete control over the growing process, ensuring your peppers are free from harmful pesticides and chemicals. Plus, let’s be honest, there’s a certain satisfaction that comes from nurturing a plant from seed to harvest. More importantly, growing flavorful chili peppers allows you to experiment with varieties you might never find in your local supermarket. Think ghost peppers, habaneros, or even milder varieties like poblanos – the possibilities are endless! I’m going to share some easy DIY tricks and hacks that will help you achieve a bountiful harvest of delicious, fiery peppers, even if you’re a complete beginner. Let’s get started!
Growing Flavorful Chili Peppers: A DIY Guide From Seed to Spice
Hey there, fellow chili enthusiast! I’m so excited you’re diving into the world of growing your own flavorful chili peppers. Trust me, there’s nothing quite like the satisfaction of harvesting peppers you’ve nurtured from tiny seeds. This guide will walk you through everything you need to know, from choosing the right seeds to enjoying your fiery harvest. Let’s get started!
Choosing Your Chili Pepper Varieties
Before we get our hands dirty, let’s talk about choosing the right chili pepper varieties. The world of chili peppers is vast and exciting, ranging from mild and sweet to scorching hot. Here’s what to consider:
* Heat Level: This is measured using the Scoville Heat Unit (SHU) scale. Do you prefer a gentle warmth, a medium kick, or a blazing inferno? Research the SHU of different varieties to find your perfect match. Some popular choices include:
* Bell Peppers (0 SHU): For those who prefer no heat.
* Poblano Peppers (1,000-2,000 SHU): Mild and flavorful, great for stuffing.
* Jalapeño Peppers (2,500-8,000 SHU): A classic medium heat.
* Serrano Peppers (10,000-25,000 SHU): A step up in heat from jalapeños.
* Cayenne Peppers (30,000-50,000 SHU): Adds a significant kick to dishes.
* Habanero Peppers (100,000-350,000 SHU): Seriously hot!
* Ghost Peppers (855,000-1,041,427 SHU): Handle with extreme caution!
* Carolina Reaper (1,500,000-2,200,000 SHU): One of the hottest peppers in the world.
* Flavor Profile: Beyond the heat, chili peppers offer a wide range of flavors. Some are fruity, some are smoky, and some are even citrusy. Read descriptions and reviews to find varieties that appeal to your taste buds.
* Growing Conditions: Consider your local climate and growing space. Some chili peppers thrive in hot, sunny conditions, while others are more tolerant of cooler temperatures. Choose varieties that are well-suited to your environment.
* Plant Size: Chili pepper plants come in various sizes, from compact varieties perfect for containers to larger plants that need more space in the garden. Think about how much room you have available.
Starting Your Chili Pepper Seeds Indoors
Starting your chili pepper seeds indoors is crucial, especially if you live in a region with a shorter growing season. This gives your plants a head start and ensures a bountiful harvest.
1. Gather Your Supplies:
* Chili pepper seeds (of course!)
* Seed starting trays or small pots
* Seed starting mix (a light, well-draining mix is essential)
* Spray bottle filled with water
* Heat mat (optional, but highly recommended)
* Grow light (also optional, but provides optimal light)
* Clear plastic dome or plastic wrap (to create humidity)
2. Sow the Seeds:
* Moisten the seed starting mix thoroughly.
* Fill the seed starting trays or pots with the moistened mix.
* Make a small indentation (about ¼ inch deep) in the center of each cell or pot.
* Place 1-2 seeds in each indentation.
* Gently cover the seeds with the seed starting mix.
* Lightly mist the surface with water.
3. Create a Humid Environment:
* Cover the seed starting trays or pots with a clear plastic dome or plastic wrap. This will help to retain moisture and create a humid environment, which is essential for germination.
4. Provide Warmth and Light:
* Place the seed starting trays or pots on a heat mat, if using. The ideal temperature for germination is around 80-85°F (27-29°C).
* Position a grow light above the seed starting trays or pots, if using. Keep the light on for 14-16 hours per day. If you don’t have a grow light, place the trays or pots in a warm, sunny location.
5. Monitor and Water:
* Check the seed starting mix daily and mist with water as needed to keep it consistently moist, but not soggy.
* Once the seeds germinate (usually within 7-14 days), remove the plastic dome or plastic wrap.
6. Thin the Seedlings:
* If you planted more than one seed per cell or pot, thin the seedlings to one per cell or pot once they have developed their first true leaves (the leaves that appear after the initial seed leaves). Snip off the weaker seedling at the soil line.
Transplanting Your Chili Pepper Seedlings
Once your chili pepper seedlings have grown strong and developed several sets of true leaves, it’s time to transplant them into larger pots or directly into the garden.
1. Harden Off the Seedlings:
* Before transplanting, you need to “harden off” the seedlings. This means gradually acclimating them to outdoor conditions. Start by placing the seedlings outdoors in a sheltered location for a few hours each day, gradually increasing the amount of time they spend outside over the course of a week. This will help them adjust to the sun, wind, and temperature changes.
2. Prepare the Planting Location:
* Choose a sunny location with well-draining soil. Chili peppers need at least 6-8 hours of sunlight per day.
* Amend the soil with compost or other organic matter to improve drainage and fertility.
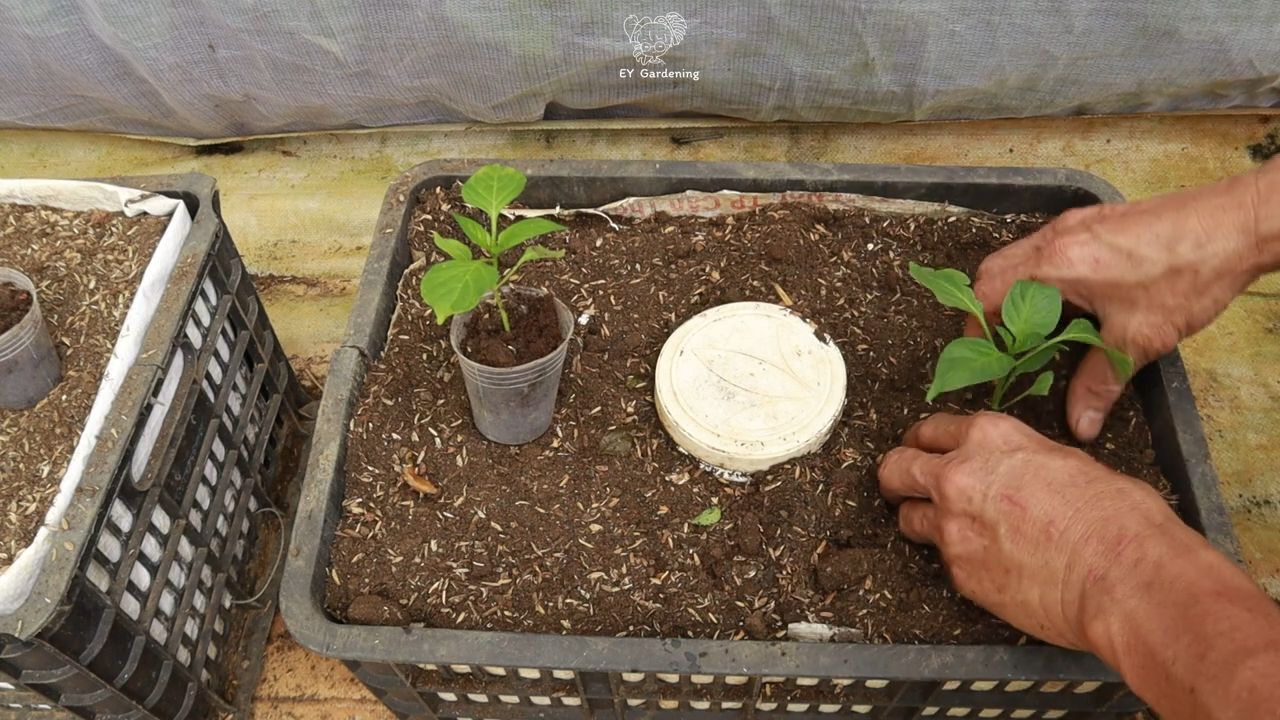
3. Transplant the Seedlings:
* Gently remove the seedlings from their pots or trays. Be careful not to damage the roots.
* Dig a hole that is slightly larger than the root ball of the seedling.
* Place the seedling in the hole and backfill with soil.
* Water thoroughly.
* Space the plants according to the mature size of the variety you are growing. Generally, allow 18-24 inches between plants.
Caring for Your Chili Pepper Plants
Now that your chili pepper plants are in their permanent location, it’s time to provide them with the care they need to thrive.
1. Watering:
* Water regularly, especially during hot, dry weather. Chili peppers need consistent moisture, but avoid overwatering, which can lead to root rot. Water deeply when the top inch of soil feels dry.
2. Fertilizing:
* Fertilize your chili pepper plants every 2-3 weeks with a balanced fertilizer. You can also use a fertilizer specifically formulated for peppers and tomatoes.
3. Mulching:
* Apply a layer of mulch around the base of the plants to help retain moisture, suppress weeds, and regulate soil temperature.
4. Pruning:
* Pruning is not essential, but it can help to improve air circulation and encourage bushier growth. You can prune away any suckers (small shoots that grow from the base of the plant) or any dead or damaged leaves.
5. Pest and Disease Control:
* Keep an eye out for pests and diseases. Common pests of chili peppers include aphids, spider mites, and whiteflies. Common diseases include blossom end rot and fungal infections. Treat any problems promptly with appropriate organic pest control methods or fungicides.
6. Support:
* As your chili pepper plants grow, they may need support to prevent them from falling over. You can use stakes, cages, or trellises to provide support.
Harvesting Your Chili Peppers
The moment you’ve been waiting for! Harvesting your chili peppers is the most rewarding part of the process.
1. When to Harvest:
* The timing of harvest depends on the variety of chili pepper you are growing and your personal preference. Generally, chili peppers are ready to harvest when they have reached their mature size and color. The color will vary depending on the variety. Some peppers turn red, while others turn yellow, orange, or even purple.
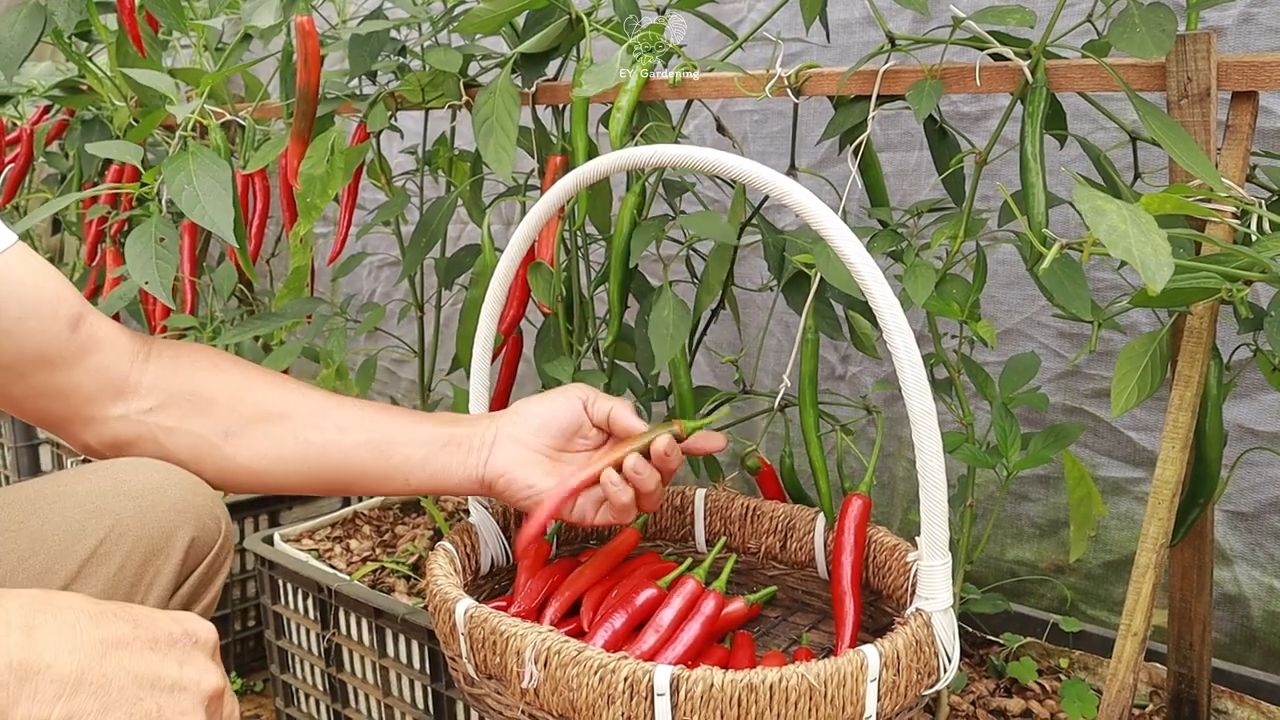
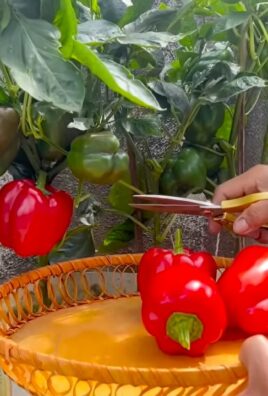
2. How to Harvest:
* Use pruning shears or scissors to cut the peppers from the plant. Be careful not to damage the plant.
* Wear gloves when harvesting hot peppers to avoid skin irritation.
3. Storing Your Chili Peppers:
* Fresh chili peppers can be stored in the refrigerator for up to a week.
* You can also dry, freeze, or pickle your chili peppers for longer storage.
Enjoying Your Harvest
Now comes the best part – enjoying the fruits (or should I
Conclusion
So, there you have it! Growing flavorful chili peppers at home isn’t just a gardening project; it’s an investment in your culinary future. It’s about taking control of the heat, the flavor, and the freshness that ends up on your plate. Forget those bland, mass-produced peppers from the grocery store – with a little effort and the right techniques, you can cultivate a vibrant array of chili peppers bursting with unique tastes and aromas.
This DIY approach to growing chili peppers offers a level of customization you simply can’t achieve any other way. Want intensely spicy habaneros? Go for it! Prefer the smoky sweetness of chipotle peppers? Plant some jalapeños and learn to smoke them yourself! The possibilities are truly endless.
Beyond the flavor benefits, growing your own chili peppers is also incredibly rewarding. There’s something deeply satisfying about nurturing a plant from seed to harvest, knowing that you’ve played a direct role in creating something delicious. Plus, it’s a fantastic way to connect with nature and learn more about the fascinating world of botany.
Don’t be intimidated if you’re a beginner gardener. Chili peppers are surprisingly resilient plants, and with a little attention to their basic needs – sunlight, water, and well-draining soil – you’ll be well on your way to a bountiful harvest.
Consider these variations to personalize your chili pepper growing experience:
* **Hydroponics:** For those with limited space or a desire for a more controlled environment, hydroponic chili pepper cultivation is an excellent option.
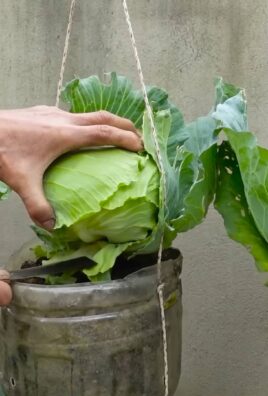
* **Container Gardening:** Even if you only have a balcony or patio, you can still grow chili peppers in containers. Just be sure to choose appropriately sized pots and provide adequate drainage.
* **Companion Planting:** Enhance your chili pepper garden by planting beneficial companion plants like basil, marigolds, and carrots. These plants can help deter pests, attract pollinators, and improve soil health.
* **Experiment with different varieties:** Don’t limit yourself to just one type of chili pepper. Explore the vast world of chili peppers and discover new flavors and heat levels. Try growing a variety of peppers, from mild bell peppers to scorching ghost peppers.
We wholeheartedly encourage you to give this DIY trick a try. Start small, learn as you go, and don’t be afraid to experiment. The rewards – both culinary and personal – are well worth the effort.
And most importantly, we want to hear about your experiences! Share your successes, your challenges, and your favorite chili pepper recipes in the comments below. Let’s build a community of chili pepper enthusiasts and learn from each other. Happy growing!
Frequently Asked Questions (FAQ)
What is the best time of year to start growing chili peppers?
The ideal time to start growing chili peppers depends on your climate. In general, chili peppers thrive in warm weather and require a long growing season. If you live in a region with mild winters, you can start seeds indoors 6-8 weeks before the last expected frost. If you live in a colder climate, you may need to start seeds even earlier. Alternatively, you can purchase seedlings from a local nursery or garden center.
What kind of soil is best for growing chili peppers?
Chili peppers prefer well-draining soil that is rich in organic matter. A slightly acidic to neutral pH (around 6.0-7.0) is ideal. You can improve the soil quality by adding compost, aged manure, or other organic amendments. Avoid heavy clay soils, as they can retain too much moisture and lead to root rot. If you’re growing chili peppers in containers, use a high-quality potting mix specifically formulated for vegetables.
How much sunlight do chili peppers need?
Chili peppers require at least 6-8 hours of direct sunlight per day to thrive. Choose a sunny location in your garden or on your patio where your plants will receive ample sunlight. If you’re growing chili peppers indoors, use grow lights to supplement natural sunlight.
How often should I water my chili peppers?
Water chili peppers regularly, especially during hot, dry weather. The soil should be kept consistently moist, but not waterlogged. Avoid overwatering, as this can lead to root rot. Check the soil moisture level regularly by sticking your finger into the soil. If the top inch of soil feels dry, it’s time to water.
What are some common pests and diseases that affect chili peppers?
Chili peppers can be susceptible to a variety of pests and diseases, including aphids, spider mites, whiteflies, blossom-end rot, and fungal diseases. Regularly inspect your plants for signs of pests or diseases. If you detect any problems, take action immediately to prevent them from spreading. Use organic pest control methods whenever possible, such as insecticidal soap, neem oil, or beneficial insects. Ensure good air circulation around your plants to prevent fungal diseases.
How do I harvest chili peppers?
The timing of harvest depends on the variety of chili pepper and your desired level of ripeness. In general, chili peppers are ready to harvest when they have reached their mature color and size. Use pruning shears or scissors to cut the peppers from the plant, leaving a small stem attached. Wear gloves when handling hot chili peppers to avoid skin irritation.
How do I store chili peppers?
Fresh chili peppers can be stored in the refrigerator for up to a week. For longer storage, you can dry, freeze, or pickle them. To dry chili peppers, string them together and hang them in a well-ventilated area until they are completely dry. To freeze chili peppers, wash and dry them thoroughly, then place them in freezer bags or containers. To pickle chili peppers, follow a recipe for pickled peppers.
How can I increase the heat level of my chili peppers?
Several factors can influence the heat level of chili peppers, including genetics, growing conditions, and stress. To increase the heat level, provide your plants with plenty of sunlight, water, and nutrients. Avoid overwatering or underwatering, as this can stress the plants and reduce their heat. Some growers believe that withholding water for a short period before harvest can also increase the heat level.
What are some good companion plants for chili peppers?
Companion planting can benefit chili peppers by attracting pollinators, repelling pests, and improving soil health. Some good companion plants for chili peppers include basil, marigolds, carrots, onions, and garlic. Avoid planting chili peppers near fennel or brassicas (such as cabbage and broccoli), as these plants can inhibit their growth.
My chili pepper plants are producing flowers, but no peppers. What could be the problem?
There are several reasons why chili pepper plants might produce flowers but no peppers. One common cause is lack of pollination. Chili peppers are self-pollinating, but they often benefit from insect pollination or hand-pollination. You can hand-pollinate your chili pepper plants by gently shaking the flowers or using a small paintbrush to transfer pollen from one flower to another. Other possible causes include nutrient deficiencies, temperature stress, and pest infestations. Ensure that your plants are receiving adequate nutrients, sunlight, and water, and that they are protected from pests and diseases.
Leave a Comment