

Grow Onions at Home Easily, even if you think you have a “brown thumb”! Imagine stepping outside your back door and snipping fresh, flavorful onions for your favorite recipes. No more trips to the grocery store for that one missing ingredient! This isn’t just a dream; it’s an achievable reality with a few simple DIY tricks.
Onions have been cultivated for thousands of years, with evidence suggesting their use dating back to ancient Egypt. They were even revered and used in burial rituals! From humble beginnings to a culinary staple, onions have truly stood the test of time. But let’s be honest, buying onions can sometimes be a gamble. They might be bruised, sprouting, or just lacking that vibrant flavor you crave. That’s where our DIY guide comes in.
I’m going to show you how to grow onions at home easily, regardless of your gardening experience. We’ll cover everything from choosing the right variety for your climate to simple hacks for maximizing your yield. Plus, you’ll learn how to avoid common pitfalls and enjoy a continuous supply of fresh, delicious onions right from your own backyard (or even your balcony!). Get ready to ditch the store-bought onions and embrace the satisfaction of growing your own!
Grow Onions at Home Easily: A Beginner’s Guide
Hey there, fellow gardening enthusiasts! Ever dreamt of snipping fresh onions right from your backyard for your favorite recipes? Well, dream no more! Growing onions at home is surprisingly easy and rewarding. I’m going to walk you through everything you need to know, from choosing the right type of onion to harvesting your flavorful bounty. Let’s get started!
Choosing Your Onion Variety
Before we get our hands dirty, let’s talk onions! There are three main types you can grow:
* Bulb Onions: These are the classic onions we all know and love, forming a large, round bulb underground. They come in various colors (yellow, white, red) and flavors (sweet, pungent).
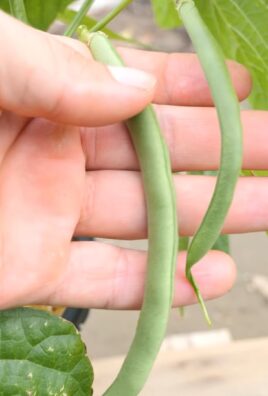
* Bunching Onions (Scallions): These don’t form a bulb but are grown for their long, green stalks. They’re mild and perfect for salads and garnishes.
* Shallots: These are similar to onions but have a milder, more delicate flavor. They grow in clusters, like garlic.
For beginners, I recommend starting with bulb onions or bunching onions. They’re generally easier to grow and offer a good introduction to onion cultivation.
Getting Started: Seeds, Sets, or Transplants?
You have three options for starting your onion journey:
* Seeds: Growing from seed is the most economical option, but it requires more time and effort. You’ll need to start the seeds indoors several weeks before the last frost.
* Sets: These are small, immature onion bulbs that are already partially grown. They’re a great option for beginners because they’re easy to plant and grow quickly.
* Transplants: These are young onion plants that have been started in a greenhouse. They’re the most expensive option, but they give you a head start and are ideal if you’re short on time.
I personally prefer using sets because they’re the easiest and most reliable option for me. But if you’re feeling adventurous, go for seeds!
Preparing the Soil: The Foundation for Success
Onions need well-drained, fertile soil to thrive. Here’s how to prepare your garden bed:
* Choose a Sunny Spot: Onions need at least 6-8 hours of sunlight per day.
* Loosen the Soil: Use a garden fork or tiller to loosen the soil to a depth of at least 12 inches.
* Amend the Soil: Incorporate plenty of organic matter, such as compost or well-rotted manure. This will improve drainage, fertility, and water retention.
* Check the pH: Onions prefer a soil pH of 6.0-7.0. You can test your soil with a pH meter or a soil testing kit. If the pH is too low, add lime to raise it. If it’s too high, add sulfur to lower it.
* Fertilize: Add a balanced fertilizer, such as 10-10-10, according to the package directions.
Planting Your Onions: Getting Them in the Ground
Now for the fun part! Here’s how to plant your onions, depending on whether you’re using seeds, sets, or transplants:
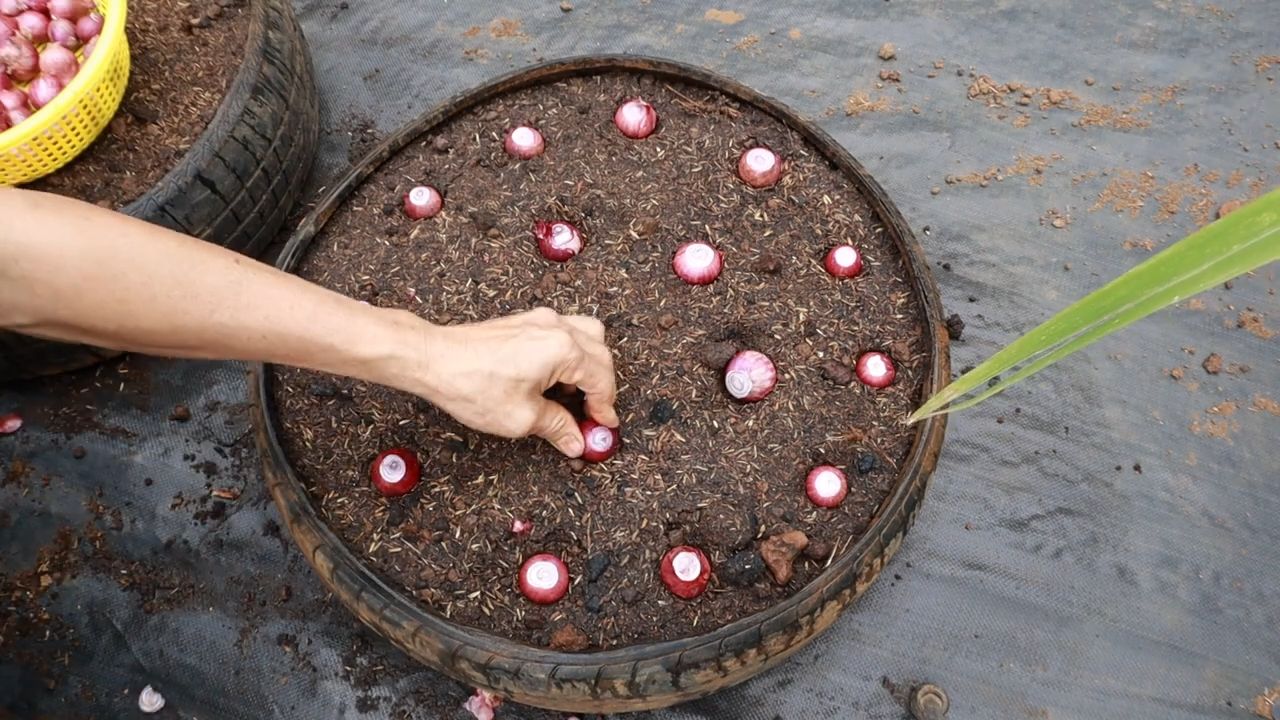
Planting Onion Sets
1. Prepare the Planting Bed: Make sure your soil is well-prepared as described above.
2. Create Furrows: Dig shallow furrows about 1 inch deep and 4-6 inches apart.
3. Plant the Sets: Place the onion sets in the furrows, spacing them about 2-3 inches apart. Make sure the pointed end of the set is facing up.
4. Cover the Sets: Gently cover the sets with soil, leaving the very tip of the set exposed.
5. Water Thoroughly: Water the planting bed thoroughly to settle the soil around the sets.
Planting Onion Transplants
1. Prepare the Planting Bed: Again, ensure your soil is well-prepared.
2. Dig Holes: Dig holes that are slightly larger than the root ball of the transplants, spacing them about 4-6 inches apart.
3. Remove Transplants from Containers: Gently remove the transplants from their containers, being careful not to damage the roots.
4. Place Transplants in Holes: Place the transplants in the holes, making sure the top of the root ball is level with the soil surface.
5. Fill Holes with Soil: Fill the holes with soil, gently firming it around the transplants.
6. Water Thoroughly: Water the planting bed thoroughly to settle the soil around the transplants.
Planting Onion Seeds
1. Start Seeds Indoors (Optional): If you’re starting seeds indoors, sow them in seed trays or pots about 6-8 weeks before the last frost. Use a seed-starting mix and keep the soil moist.
2. Harden Off Seedlings: Before transplanting seedlings outdoors, harden them off by gradually exposing them to outdoor conditions for a week or two.
3. Prepare the Planting Bed: As always, make sure your soil is well-prepared.
4. Sow Seeds Directly (Optional): You can also sow seeds directly in the garden, but this is less reliable. Sow the seeds about 1/2 inch deep and 1 inch apart.
5. Transplant Seedlings: Transplant the seedlings to the garden, spacing them about 4-6 inches apart.
6. Water Thoroughly: Water the planting bed thoroughly to settle the soil around the seedlings.
Caring for Your Onions: Keeping Them Happy and Healthy
Once your onions are planted, it’s important to provide them with the care they need to thrive.
* Watering: Onions need consistent moisture, especially during bulb formation. Water deeply whenever the top inch of soil feels dry. Avoid overwatering, which can lead to rot.
* Weeding: Keep the garden bed free of weeds, which can compete with the onions for nutrients and water. Hand-pull weeds carefully to avoid disturbing the onion roots.
* Fertilizing: Fertilize your onions every 2-3 weeks with a balanced fertilizer or a fertilizer specifically formulated for onions.
* Mulching: Apply a layer of mulch around the onions to help retain moisture, suppress weeds, and regulate soil temperature.
* Pest and Disease Control: Keep an eye out for pests and diseases, such as onion maggots, thrips, and downy mildew. Treat any problems promptly with appropriate organic or chemical controls.
Harvesting Your Onions: The Moment of Truth
The time to harvest your onions depends on the variety and your growing conditions. Here are some general guidelines:
* Bulb Onions: Harvest bulb onions when the tops start to fall over and turn yellow or brown. This usually happens in late summer or early fall.
* Bunching Onions (Scallions): Harvest bunching onions when they reach the desired size, usually about 6-8 inches tall. You can harvest them at any time during the growing season.
* Shallots: Harvest shallots when the tops start to fall over and turn yellow or brown, similar to bulb onions.
Harvesting Steps
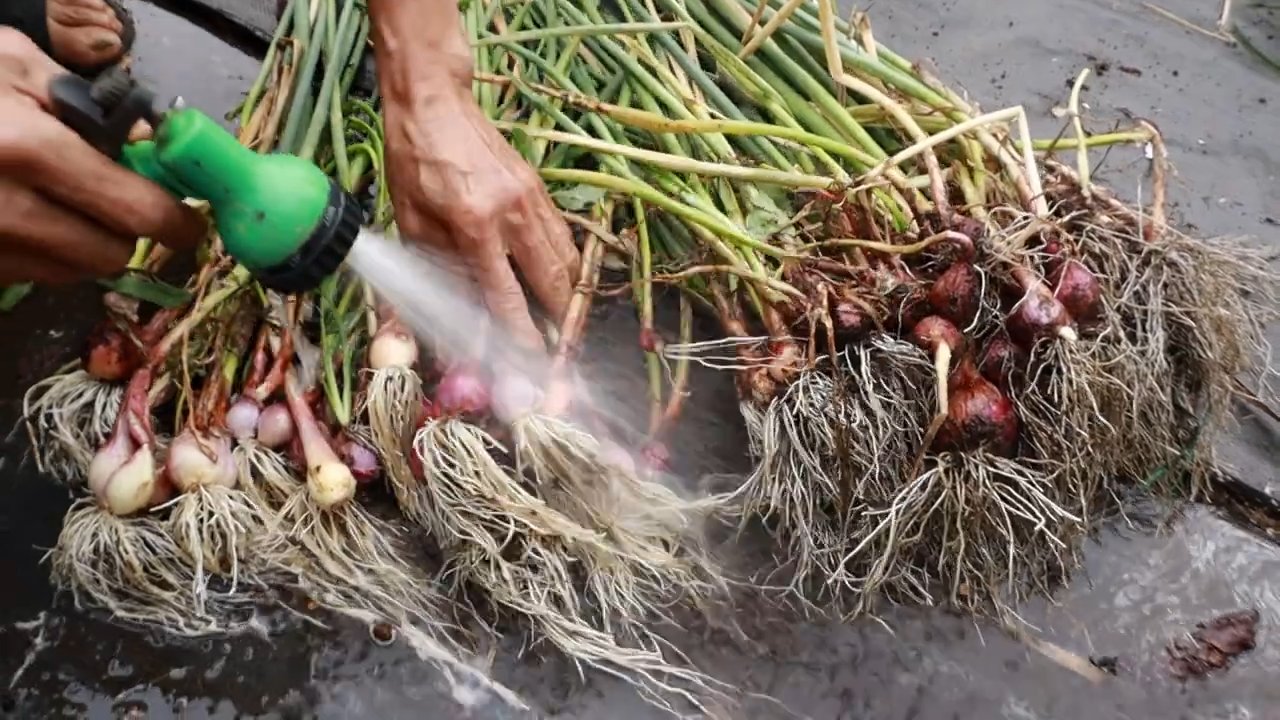
1. Loosen the Soil: Use a garden fork to gently loosen the soil around the onions.
2. Pull the Onions: Carefully pull the onions from the ground, holding them by the tops.
3. Cure the Onions: Cure the onions by laying them out in a single layer in a warm, dry, well-ventilated place for 1-2 weeks. This will help them to dry out and develop a protective outer layer.
4. Store the Onions: Once the onions are cured, store them in a cool, dry, dark place. You can store them in mesh bags or crates.
Troubleshooting: Common Onion Problems and Solutions
Even with the best care, you may encounter some problems when growing onions. Here are some common issues and how to address them:
* Yellowing Leaves: This can be caused by a variety of factors, including nutrient deficiencies, overwatering, or pests and diseases. Check the soil pH, fertilize regularly, and inspect the plants for pests and diseases.
* Small Bulbs: This can be caused by insufficient sunlight, poor soil fertility, or overcrowding. Make sure your onions are getting enough sunlight, amend the soil with compost, and thin out the plants if they’re too close together.
* Onion Maggots: These are small, white larvae that feed on the roots of onions. Prevent onion maggots by using row covers or applying beneficial nematodes to the soil.
* Downy Mildew: This is a fungal disease that can cause yellow spots on the leaves. Prevent downy mildew by providing good air circulation and avoiding overhead watering.
Enjoying Your Homegrown Onions: From Garden to Table
Congratulations
Conclusion
So, there you have it! Growing onions at home easily is not just a possibility, it’s a rewarding and surprisingly simple endeavor. We’ve walked through the steps, debunked the myths, and armed you with the knowledge to cultivate your own supply of these culinary staples. Forget those bland, mass-produced onions from the grocery store. Imagine the satisfaction of harvesting plump, flavorful onions that you nurtured from seedling to bulb, knowing exactly where they came from and what went into them.
This isn’t just about saving a few dollars; it’s about connecting with your food, embracing a more sustainable lifestyle, and adding a touch of homegrown goodness to your meals. The difference in taste between a store-bought onion and a freshly harvested one is truly remarkable. The homegrown variety boasts a sharper, more vibrant flavor that elevates everything from simple sautés to complex stews.
But the benefits extend beyond the culinary realm. Gardening is a therapeutic activity, a chance to de-stress and reconnect with nature. Tending to your onion patch can be a meditative experience, a welcome respite from the hustle and bustle of daily life. Plus, you’ll be contributing to a healthier environment by reducing your reliance on commercially grown produce and minimizing your carbon footprint.
Don’t be afraid to experiment with different varieties! Try growing red onions for their beautiful color and mild sweetness, or shallots for their delicate flavor. Consider planting scallions for a continuous supply of green onions throughout the growing season. You can even try growing onions from scraps – simply plant the root end of a store-bought onion in soil and watch it sprout!
Growing onions at home easily is a gateway to a more fulfilling and flavorful life. It’s a project that’s accessible to gardeners of all skill levels, whether you have a sprawling backyard or just a sunny windowsill. The key is to start small, be patient, and learn from your experiences.
We encourage you to take the plunge and embark on your own onion-growing adventure. Don’t be intimidated by the prospect of gardening; it’s a journey of discovery, and every mistake is a learning opportunity. And once you’ve harvested your first crop of homegrown onions, be sure to share your success with us! We’d love to hear about your experiences, see your photos, and learn any tips or tricks you’ve discovered along the way. Share your stories in the comments below, and let’s inspire others to embrace the joy of growing their own food. Happy gardening!
Frequently Asked Questions (FAQ)
What is the best time of year to plant onions?
The ideal time to plant onions depends on your climate and the type of onion you’re growing. In general, you can plant onion sets or transplants in early spring, as soon as the ground can be worked. For those in warmer climates, fall planting is also an option. For long-day onions (which need 14-16 hours of daylight to bulb), plant in early spring in northern regions. Short-day onions (which need 10-12 hours of daylight to bulb) are best planted in the fall or early winter in southern regions. Day-neutral onions are more adaptable and can be planted in spring or fall in most regions. Check your local extension office for specific recommendations for your area.
How much sunlight do onions need?
Onions require at least 6-8 hours of direct sunlight per day to thrive. Without sufficient sunlight, they will produce small bulbs or fail to bulb altogether. Choose a planting location that receives full sun throughout the day. If you’re growing onions indoors, supplement with grow lights if necessary.
What kind of soil is best for growing onions?
Onions prefer well-drained, fertile soil that is rich in organic matter. Amend your soil with compost or well-rotted manure before planting to improve drainage and fertility. The ideal soil pH for onions is between 6.0 and 7.0. Avoid heavy clay soils, as they can become waterlogged and inhibit bulb development. If you have clay soil, consider growing onions in raised beds or containers.
How often should I water my onions?
Onions need consistent moisture, especially during bulb formation. Water deeply whenever the top inch of soil feels dry to the touch. Avoid overwatering, as this can lead to root rot. During hot, dry weather, you may need to water more frequently. Mulching around your onion plants can help retain moisture and suppress weeds.
What are onion sets, and are they better than seeds?
Onion sets are small, immature onion bulbs that are grown from seed the previous year. They offer a head start compared to starting from seed, resulting in earlier harvests. Sets are also easier to handle and plant than tiny onion seeds. However, sets can sometimes be more prone to bolting (going to seed prematurely), especially if they are exposed to cold temperatures after planting. Starting from seed allows you to choose from a wider variety of onion types, but it requires more time and effort. Ultimately, the best choice depends on your preferences and growing conditions.
How do I prevent onion maggots from attacking my plants?
Onion maggots are a common pest that can damage or kill onion plants. To prevent onion maggots, consider using row covers to protect your plants from egg-laying flies. You can also apply beneficial nematodes to the soil, which will attack the maggots. Crop rotation can also help reduce the risk of infestation. Avoid planting onions in the same location year after year. Diatomaceous earth can also be sprinkled around the base of the plants as a deterrent.
When and how do I harvest my onions?
Onions are typically ready to harvest when the tops begin to fall over and turn yellow or brown. This usually occurs about 100-120 days after planting. Once the tops have fallen over, stop watering the onions and allow them to dry out in the ground for a few days. Then, gently pull the onions from the soil and cure them in a warm, dry, well-ventilated place for 2-3 weeks. Curing allows the outer layers of the onions to dry and harden, which helps prevent spoilage.
How do I store my harvested onions?
Store cured onions in a cool, dry, and dark place with good ventilation. Braiding the tops together and hanging them is a traditional storage method. You can also store onions in mesh bags or crates. Avoid storing onions near potatoes, as they can cause each other to spoil more quickly. Properly stored onions can last for several months.
Can I grow onions in containers?
Yes, onions can be successfully grown in containers. Choose a container that is at least 8-10 inches deep and wide. Use a well-draining potting mix and ensure that the container has drainage holes. Water regularly and fertilize every few weeks. Container-grown onions may require more frequent watering and fertilization than those grown in the ground.
What fertilizer should I use for growing onions?
Onions are heavy feeders and benefit from regular fertilization. Use a balanced fertilizer with a higher nitrogen content during the early stages of growth to promote leafy growth. Once the bulbs begin to form, switch to a fertilizer with a higher phosphorus and potassium content to encourage bulb development. Follow the instructions on the fertilizer label for application rates. You can also amend the soil with compost or well-rotted manure to provide a slow-release source of nutrients.
Leave a Comment