

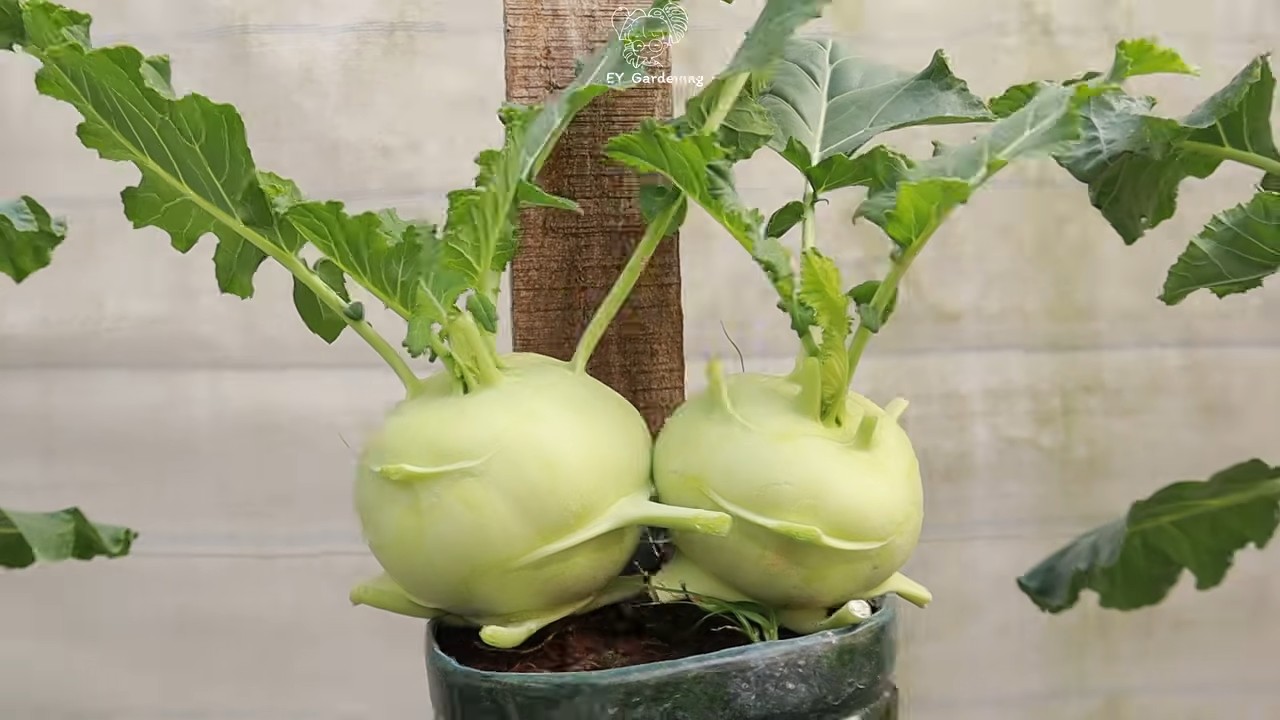
Hanging kohlrabi bottle gardening – sounds a bit out there, right? But trust me, it’s about to become your new favorite way to grow this quirky and delicious vegetable! Forget traditional garden beds; we’re taking kohlrabi to new heights (literally!) with this super-easy and incredibly rewarding DIY project.
For centuries, humans have sought innovative ways to cultivate food, especially in limited spaces. From ancient terrace farming to modern vertical gardens, the desire to connect with nature and grow our own sustenance has always been strong. While kohlrabi might not have the same historical gravitas as, say, tomatoes, it’s a staple in many cuisines, particularly in Central and Eastern Europe, where it’s enjoyed raw, cooked, or pickled.
But why should you bother with hanging kohlrabi bottle gardening? Well, for starters, it’s a fantastic solution if you’re short on space – perfect for balconies, patios, or even sunny windowsills. Plus, it’s a great way to recycle plastic bottles, turning waste into something beautiful and productive. More importantly, growing your own kohlrabi means you get to enjoy fresh, organic produce, free from harmful pesticides and bursting with flavor. I think you’ll find that this method is not only fun and eco-friendly but also surprisingly effective. So, let’s dive in and learn how to create your own hanging kohlrabi oasis!
DIY Hanging Kohlrabi Bottle Garden: A Step-by-Step Guide
Hey there, fellow gardening enthusiasts! I’m so excited to share this super fun and surprisingly easy DIY project with you: creating a hanging kohlrabi garden using recycled plastic bottles. Not only is it a fantastic way to grow your own fresh veggies, but it’s also a great way to upcycle and add a unique touch to your balcony, patio, or even a sunny window. Let’s get started!
What You’ll Need
Before we dive in, let’s gather all the necessary materials. Trust me, having everything ready beforehand will make the process much smoother.
* **Plastic Bottles:** You’ll need a few plastic bottles, preferably 2-liter soda bottles or similar. The number of bottles depends on how many kohlrabi plants you want to grow. I usually aim for one plant per bottle.
* **Kohlrabi Seeds or Seedlings:** You can start from seeds or buy small seedlings from your local nursery. Starting from seeds gives you more control over the process, but seedlings are quicker.
* **Potting Mix:** Use a good quality potting mix that drains well. Kohlrabi doesn’t like soggy roots.
* **Drill or Utility Knife:** For creating drainage holes and cutting the bottles. Be careful!
* **Scissors:** For trimming and making small adjustments.
* **Rope or Twine:** To hang the bottles. Choose something strong and weather-resistant.
* **Measuring Tape or Ruler:** For accurate cutting and spacing.
* **Marker:** For marking cutting lines on the bottles.
* **Watering Can:** For, well, watering!
* **Gloves (Optional):** To keep your hands clean.
* **Small Stones or Gravel:** To improve drainage at the bottom of the bottles.
Preparing the Bottles
This is where we transform those ordinary plastic bottles into mini-gardens!
1. **Clean the Bottles:** Thoroughly wash the plastic bottles with soap and water to remove any residue. Rinse them well and let them dry completely. This is important to prevent any contamination that could harm your plants.
2. **Cut the Bottles:** This is the trickiest part, so take your time and be careful.
* Using your marker and measuring tape, mark a line around the bottle about 4-5 inches from the top. This will be the cutting line.
* Carefully cut along the marked line using your utility knife or scissors. You’ll essentially be creating a “lid” that can be removed and reattached.
* Repeat this process for all the bottles you plan to use.
3. **Create Drainage Holes:** Kohlrabi needs good drainage, so don’t skip this step!
* Using your drill or utility knife, carefully create several small drainage holes in the bottom of each bottle. I usually make about 5-6 holes, each about ¼ inch in diameter.
* Make sure the holes are evenly spaced to ensure proper drainage.
4. **Prepare the Hanging Mechanism:** Now, let’s create a way to hang our bottle gardens.
* On the “lid” portion of the bottle (the top part you cut off), drill or cut two small holes on opposite sides, near the cut edge. These holes will be used to thread the rope or twine through.
* Make sure the holes are large enough to accommodate your rope or twine, but not so large that the rope slips through easily.
Planting the Kohlrabi
Time to get our hands dirty and plant those kohlrabi!
1. **Add Drainage Layer:** Place a layer of small stones or gravel at the bottom of each bottle. This will further improve drainage and prevent the potting mix from clogging the drainage holes. I usually add about an inch or two of stones.
2. **Fill with Potting Mix:** Fill the bottles with your chosen potting mix, leaving about an inch or two of space at the top. Gently pat down the soil to remove any air pockets.
3. **Plant the Seeds or Seedlings:**
* **From Seeds:** Sow the kohlrabi seeds according to the instructions on the seed packet. Usually, this involves planting them about ½ inch deep and spacing them about 2-3 inches apart. You can always thin them out later if too many germinate.
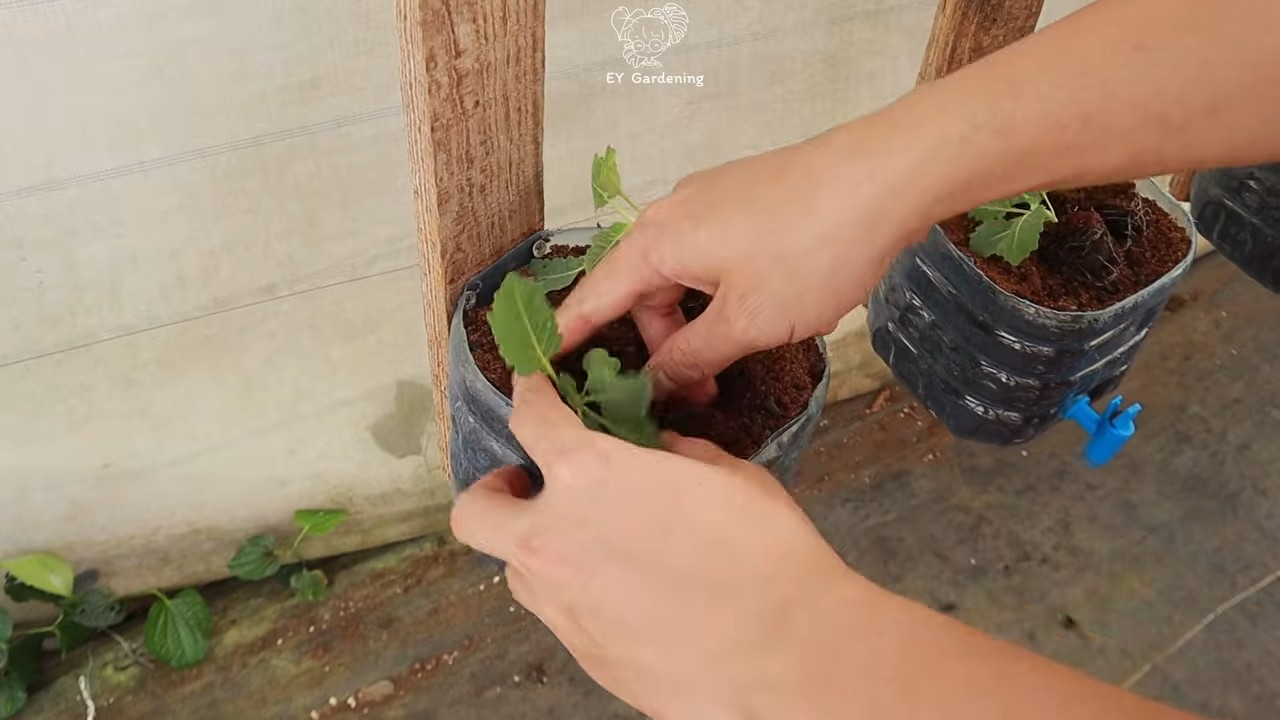
* **From Seedlings:** Gently remove the kohlrabi seedlings from their containers and plant them in the bottles, making sure the top of the root ball is level with the surface of the potting mix. Space the seedlings about 4-6 inches apart.
4. **Water Thoroughly:** After planting, water the kohlrabi thoroughly until the water drains out of the drainage holes. This will help settle the soil and ensure the roots are properly hydrated.
Hanging the Bottles
Let’s get these mini-gardens hanging!
1. **Thread the Rope or Twine:** Take your rope or twine and thread it through the holes you created in the “lid” portion of the bottle. Tie a secure knot on each side to prevent the rope from slipping.
2. **Adjust the Length:** Adjust the length of the rope or twine to your desired hanging height. Make sure the bottles are hanging at a comfortable height for watering and harvesting.
3. **Hang the Bottles:** Find a suitable location to hang your kohlrabi bottle gardens. Choose a spot that receives at least 6 hours of sunlight per day. A balcony railing, patio overhang, or even a sturdy plant stand can work well.
4. **Secure the Bottles:** Make sure the bottles are securely hung and won’t be easily knocked down by wind or other disturbances. You may need to use additional rope or twine to secure them in place.
Caring for Your Hanging Kohlrabi Garden
Now that your kohlrabi is planted and hanging, it’s time to provide the care it needs to thrive.
1. **Watering:** Kohlrabi needs consistent moisture, but it doesn’t like to be waterlogged. Water your plants regularly, especially during hot and dry weather. Check the soil moisture by sticking your finger into the soil. If the top inch feels dry, it’s time to water.
2. **Fertilizing:** Kohlrabi is a heavy feeder, so it will benefit from regular fertilization. Use a balanced liquid fertilizer diluted to half strength every 2-3 weeks. Follow the instructions on the fertilizer label.
3. **Sunlight:** Ensure your kohlrabi plants receive at least 6 hours of sunlight per day. If you live in a very hot climate, you may need to provide some afternoon shade to prevent the plants from overheating.
4. **Pest Control:** Keep an eye out for common garden pests such as aphids, cabbage worms, and flea beetles. If you notice any pests, treat them promptly with an appropriate organic insecticide or insecticidal soap.
5. **Weeding:** Remove any weeds that may sprout in the bottles. Weeds can compete with your kohlrabi plants for nutrients and water.
6. **Rotating the Bottles:** To ensure even sunlight exposure, rotate the bottles periodically. This will help prevent the plants from leaning towards the sun.
Harvesting Your Kohlrabi
The best part! Harvesting your homegrown kohlrabi.
1. **Timing:** Kohlrabi is typically ready to harvest about 50-60 days after planting. The bulbs should be about 2-3 inches in diameter.
2. **Harvesting:** To harvest, simply cut the kohlrabi bulb from the stem using a sharp knife. You can also harvest the leaves, which are edible and can be used in salads or stir-fries.
3. **Enjoy!** Enjoy your fresh, homegrown kohlrabi in salads, slaws, stir-fries, or roasted as a side dish. It’s a delicious and nutritious addition to any meal.
Troubleshooting
Even with the best care, you might encounter a few challenges along the way. Here are some common problems and how to address them:
* **Yellowing Leaves:** This could be a sign of overwatering, underwatering, or nutrient deficiency. Check the soil moisture and adjust your watering accordingly. Fertilize with a balanced fertilizer to provide essential nutrients.
* **Slow Growth:** Slow growth can be caused by insufficient sunlight, poor soil, or pest infestations. Ensure your plants are receiving enough sunlight and fertilize regularly. Check for pests and treat them promptly.
Hey there, fellow gardening enthusiasts! I’m so excited to share this super fun and surprisingly easy DIY project with you: creating a hanging kohlrabi garden using recycled plastic bottles. Not only is it a fantastic way to grow your own fresh veggies, but it’s also a great way to upcycle and add a unique touch to your balcony, patio, or even a sunny window. Let’s get started!
What You’ll Need
Before we dive in, let’s gather all the necessary materials. Trust me, having everything ready beforehand will make the process much smoother.
* **Plastic Bottles:** You’ll need a few plastic bottles, preferably 2-liter soda bottles or similar. The number of bottles depends on how many kohlrabi plants you want to grow. I usually aim for one plant per bottle.
* **Kohlrabi Seeds or Seedlings:** You can start from seeds or buy small seedlings from your local nursery. Starting from seeds gives you more control over the process, but seedlings are quicker.
* **Potting Mix:** Use a good quality potting mix that drains well. Kohlrabi doesn’t like soggy roots.
* **Drill or Utility Knife:** For creating drainage holes and cutting the bottles. Be careful!
* **Scissors:** For trimming and making small adjustments.
* **Rope or Twine:** To hang the bottles. Choose something strong and weather-resistant.
* **Measuring Tape or Ruler:** For accurate cutting and spacing.
* **Marker:** For marking cutting lines on the bottles.
* **Watering Can:** For, well, watering!
* **Gloves (Optional):** To keep your hands clean.
* **Small Stones or Gravel:** To improve drainage at the bottom of the bottles.
Preparing the Bottles
This is where we transform those ordinary plastic bottles into mini-gardens!
1. **Clean the Bottles:** Thoroughly wash the plastic bottles with soap and water to remove any residue. Rinse them well and let them dry completely. This is important to prevent any contamination that could harm your plants.
2. **Cut the Bottles:** This is the trickiest part, so take your time and be careful.
* Using your marker and measuring tape, mark a line around the bottle about 4-5 inches from the top. This will be the cutting line.
* Carefully cut along the marked line using your utility knife or scissors. You’ll essentially be creating a “lid” that can be removed and reattached.
* Repeat this process for all the bottles you plan to use.
3. **Create Drainage Holes:** Kohlrabi needs good drainage, so don’t skip this step!
* Using your drill or utility knife, carefully create several small drainage holes in the bottom of each bottle. I usually make about 5-6 holes, each about ¼ inch in diameter.
* Make sure the holes are evenly spaced to ensure proper drainage.
4. **Prepare the Hanging Mechanism:** Now, let’s create a way to hang our bottle gardens.
* On the “lid” portion of the bottle (the top part you cut off), drill or cut two small holes on opposite sides, near the cut edge. These holes will be used to thread the rope or twine through.
* Make sure the holes are large enough to accommodate your rope or twine, but not so large that the rope slips through easily.
Planting the Kohlrabi
Time to get our hands dirty and plant those kohlrabi!
1. **Add Drainage Layer:** Place a layer of small stones or gravel at the bottom of each bottle. This will further improve drainage and prevent the potting mix from clogging the drainage holes. I usually add about an inch or two of stones.
2. **Fill with Potting Mix:** Fill the bottles with your chosen potting mix, leaving about an inch or two of space at the top. Gently pat down the soil to remove any air pockets.
3. **Plant the Seeds or Seedlings:**
* **From Seeds:** Sow the kohlrabi seeds according to the instructions on the seed packet. Usually, this involves planting them about ½ inch deep and spacing them about 2-3 inches apart. You can always thin them out later if too many germinate.
* **From Seedlings:** Gently remove the kohlrabi seedlings from their containers and plant them in the bottles, making sure the top of the root ball is level with the surface of the potting mix. Space the seedlings about 4-6 inches apart.
4. **Water Thoroughly:** After planting, water the kohlrabi thoroughly until the water drains out of the drainage holes. This will help settle the soil and ensure the roots are properly hydrated.
Hanging the Bottles
Let’s get these mini-gardens hanging!
1. **Thread the Rope or Twine:** Take your rope or twine and thread it through the holes you created in the “lid” portion of the bottle. Tie a secure knot on each side to prevent the rope from slipping.
2. **Adjust the Length:** Adjust the length of the rope or twine to your desired hanging height. Make sure the bottles are hanging at a comfortable height for watering and harvesting.
3. **Hang the Bottles:** Find a suitable location to hang your kohlrabi bottle gardens. Choose a spot that receives at least 6 hours of sunlight per day. A balcony railing, patio overhang, or even a sturdy plant stand can work well.
4. **Secure the Bottles:** Make sure the bottles are securely hung and won’t be easily knocked down by wind or other disturbances. You may need to use additional rope or twine to secure them in place.
Caring for Your Hanging Kohlrabi Garden
Now that your kohlrabi is planted and hanging, it’s time to provide the care it needs to thrive.
1. **Watering:** Kohlrabi needs consistent moisture, but it doesn’t like to be waterlogged. Water your plants regularly, especially during hot and dry weather. Check the soil moisture by sticking your finger into the soil. If the top inch feels dry, it’s time to water.
2. **Fertilizing:** Kohlrabi is a heavy feeder, so it will benefit from regular fertilization. Use a balanced liquid fertilizer diluted to half strength every 2-3 weeks. Follow the instructions on the fertilizer label.
3. **Sunlight:** Ensure your kohlrabi plants receive at least 6 hours of sunlight per day. If you live in a very hot climate, you may need to provide some afternoon shade to prevent the plants from overheating.
4. **Pest Control:** Keep an eye out for common garden pests such as aphids, cabbage worms, and flea beetles. If you notice any pests, treat them promptly with an appropriate organic insecticide or insecticidal soap.
5. **Weeding:** Remove any weeds that may sprout in the bottles. Weeds can compete with your kohlrabi plants for nutrients and water.
6. **Rotating the Bottles:** To ensure even sunlight exposure, rotate the bottles periodically. This will help prevent the plants from leaning towards the sun.
Harvesting Your Kohlrabi
The best part! Harvesting your homegrown kohlrabi.
1. **Timing:** Kohlrabi is typically ready to harvest about 50-60 days after planting. The bulbs should be about 2-3 inches in diameter.
2. **Harvesting:** To harvest, simply cut the kohlrabi bulb from the stem using a sharp knife. You can also harvest the leaves, which are edible and can be used in salads or stir-fries.
3. **Enjoy!** Enjoy your fresh, homegrown kohlrabi in salads, slaws, stir-fries, or roasted as a side dish. It’s a delicious and nutritious addition to any meal.
Troubleshooting
Even with the best care, you might encounter a few challenges along the way. Here are some common problems and how to address them:
* **Yellowing Leaves:** This could be a sign of overwatering, underwatering, or nutrient deficiency. Check the soil moisture and adjust your watering accordingly. Fertilize with a balanced fertilizer to provide essential nutrients.
* **Slow Growth:** Slow growth can be caused by insufficient sunlight, poor soil, or pest infestations. Ensure your plants are receiving enough sunlight and fertilize regularly. Check for pests and treat them promptly.
* **Bolting (Premature Flowering):** Bolting can occur when kohlrabi is exposed to extreme temperatures or stress. Try to provide consistent growing conditions and avoid exposing your plants to extreme heat or cold.
* **Pest Infestations:** Regularly inspect your plants for pests and treat them promptly with an appropriate organic insecticide or insecticidal soap.
Tips for Success
* **Choose the Right Variety:** Select a kohlrabi variety that is well-suited to your climate and growing conditions.
* **Start with Healthy Seedlings:** If you’re using seedlings, choose healthy, vigorous plants from a reputable nursery.
* **Use Good Quality Potting Mix:** Don’t skimp on the potting
Conclusion
So, there you have it! Transforming discarded plastic bottles into a thriving vertical garden for your kohlrabi is not just a fun project; it’s a sustainable solution that brings fresh, homegrown produce right to your doorstep, even if you’re short on space. This DIY hanging kohlrabi bottle gardening method is a game-changer for urban gardeners, balcony enthusiasts, and anyone looking to add a touch of green to their lives while minimizing waste.
Why is this a must-try? Because it’s incredibly rewarding to nurture a plant from seed to harvest, knowing you’ve contributed to a greener planet in the process. Plus, the taste of freshly grown kohlrabi, crisp and slightly sweet, is simply unmatched by anything you can find in a store. Imagine adding it to your salads, stir-fries, or enjoying it raw as a healthy snack, all thanks to your own ingenuity and a few repurposed bottles.
But the beauty of this project lies in its adaptability. Feel free to experiment with different bottle sizes and configurations. You could create a cascading wall of kohlrabi, or even mix in other compatible herbs and vegetables like lettuce, spinach, or strawberries for a diverse and visually appealing vertical garden. Consider painting the bottles in vibrant colors to add a personal touch and protect the roots from excessive sunlight. You can also explore different growing mediums, such as coco coir or a mix of compost and perlite, to find what works best for your local climate and kohlrabi variety.
Don’t be afraid to get creative with your watering system either. While manual watering works perfectly well, you could explore setting up a simple drip irrigation system using recycled tubing and a timer to automate the process and ensure consistent moisture levels. This is especially helpful if you live in a hot or dry climate.
We wholeheartedly encourage you to embark on this DIY adventure. It’s a fantastic way to learn about gardening, reduce your environmental footprint, and enjoy the delicious rewards of your labor. And most importantly, we want to hear about your experience! Share your photos, tips, and challenges in the comments below. Let’s build a community of kohlrabi bottle gardeners and inspire others to embrace sustainable living. Your success story could be the inspiration someone else needs to start their own vertical garden. So, grab those bottles, get your hands dirty, and let’s grow some kohlrabi! This **DIY hanging kohlrabi bottle gardening** project is more than just a trend; it’s a step towards a more sustainable and flavorful future.
Frequently Asked Questions (FAQ)
What type of plastic bottles are best for hanging kohlrabi bottle gardening?
Ideally, you should use food-grade plastic bottles, such as those used for water, juice, or soda. These are generally made from PET (polyethylene terephthalate) or HDPE (high-density polyethylene), which are considered relatively safe for growing plants. Avoid using bottles that have contained harsh chemicals or cleaning products, as these could contaminate the soil and harm your kohlrabi. Make sure to thoroughly wash and rinse the bottles before using them. Also, consider the size of the bottle in relation to the mature size of your kohlrabi plant. Larger bottles will provide more room for root development.
How do I ensure proper drainage in my hanging kohlrabi bottles?
Proper drainage is crucial to prevent waterlogging and root rot. Before adding soil, create drainage holes in the bottom of each bottle. You can use a drill, a nail, or even a heated screwdriver to make these holes. A good rule of thumb is to have at least four to five holes, each about ¼ inch in diameter. You can also add a layer of gravel or small stones at the bottom of the bottle to further improve drainage. Monitor the soil moisture regularly and adjust your watering schedule accordingly.
What type of soil is best for growing kohlrabi in bottles?
Kohlrabi thrives in well-draining, fertile soil that is rich in organic matter. A good potting mix specifically designed for vegetables is an excellent choice. You can also create your own mix by combining equal parts of garden soil, compost, and perlite or vermiculite. The compost will provide essential nutrients, while the perlite or vermiculite will improve drainage and aeration. Avoid using heavy clay soil, as it can become waterlogged and hinder root growth.
How much sunlight does kohlrabi need when grown in hanging bottles?
Kohlrabi requires at least 6 hours of direct sunlight per day to thrive. Choose a location for your hanging bottles that receives ample sunlight throughout the day. If you live in a particularly hot climate, you may need to provide some afternoon shade to prevent the plants from overheating. You can also rotate the bottles periodically to ensure that all sides of the plant receive adequate sunlight.
How often should I water my hanging kohlrabi plants?
The frequency of watering will depend on several factors, including the weather, the type of soil, and the size of the bottle. As a general rule, water your kohlrabi plants when the top inch of soil feels dry to the touch. Avoid overwatering, as this can lead to root rot. During hot and dry weather, you may need to water daily, while during cooler or rainy periods, you may only need to water every few days. Check the soil moisture regularly and adjust your watering schedule accordingly.
How do I fertilize my hanging kohlrabi plants?
Kohlrabi is a heavy feeder and benefits from regular fertilization. You can use a balanced liquid fertilizer, such as a 10-10-10 or 20-20-20, diluted to half strength. Apply the fertilizer every two to three weeks, following the instructions on the product label. You can also amend the soil with compost or aged manure to provide a slow-release source of nutrients. Avoid over-fertilizing, as this can lead to excessive foliage growth and reduced bulb development.
How do I protect my kohlrabi plants from pests and diseases?
While hanging kohlrabi bottle gardening can minimize some pest issues, it’s still important to be vigilant. Common pests that may affect kohlrabi include aphids, cabbage worms, and flea beetles. You can control these pests by handpicking them off the plants, using insecticidal soap, or applying Bacillus thuringiensis (Bt), a natural bacterium that is effective against cabbage worms. To prevent diseases, ensure good air circulation around the plants and avoid overwatering. If you notice any signs of disease, such as yellowing leaves or spots, remove the affected leaves immediately and treat the plants with a fungicide if necessary.
When is the best time to harvest my kohlrabi?
Kohlrabi is typically ready to harvest about 50-60 days after planting. The bulbs should be about 2-3 inches in diameter. Harvest them when they are still young and tender, as they can become tough and woody if left to mature for too long. To harvest, simply cut the bulb from the stem just above the soil line. You can store kohlrabi in the refrigerator for several weeks.
Can I grow other vegetables in hanging bottles alongside kohlrabi?
Yes, you can definitely grow other vegetables in hanging bottles alongside kohlrabi. Good companion plants for kohlrabi include lettuce, spinach, radishes, and herbs like dill and chamomile. These plants can help to deter pests and improve the overall health of your kohlrabi plants. Avoid planting kohlrabi near members of the brassica family, such as broccoli, cauliflower, and cabbage, as they can compete for nutrients and attract similar pests.
What if I don’t have a sunny balcony or patio? Can I still try hanging kohlrabi bottle gardening?
Even if you don’t have a naturally sunny outdoor space, you can still enjoy hanging kohlrabi bottle gardening by using grow lights. LED grow lights are an energy-efficient option that can provide the necessary light for your plants to thrive. Position the grow lights about 12-18 inches above the plants and keep them on for 14-16 hours per day. You can also use a timer to automate the lighting schedule. With the help of grow lights, you can grow kohlrabi indoors year-round, regardless of the weather or the amount of natural sunlight available.
Leave a Comment