

Growing Swede and Rutabaga might sound like an old-fashioned pursuit, something your grandparents did, but trust me, these root vegetables are making a serious comeback! For generations, Swedes and Rutabagas have been a staple in colder climates, providing essential nutrients throughout the long winter months. Think hearty stews, creamy mashes, and even roasted delights – the possibilities are endless! But let’s be honest, the idea of cultivating these robust roots can feel a little daunting, right?
That’s where this DIY guide comes in! I’m here to demystify the process and show you that growing Swede and Rutabaga is not only achievable but also incredibly rewarding. Imagine harvesting your own fresh, flavorful vegetables, knowing exactly where they came from and what went into them. In a world increasingly concerned with food security and sustainability, taking control of your own food source is more important than ever. Plus, let’s face it, store-bought Swedes and Rutabagas can sometimes be a bit…bland. Growing your own allows you to select varieties with superior flavor and texture.
This article is packed with simple, effective tricks and hacks to help you succeed, even if you’re a complete beginner. We’ll cover everything from seed starting to pest control, ensuring you have a bountiful harvest. So, grab your gardening gloves, and let’s get started on this exciting journey of growing your own delicious Swedes and Rutabagas!
Growing Swede and Rutabaga: A DIY Guide for Bountiful Harvests
Alright, let’s get our hands dirty! Swedes and rutabagas, often confused but both delicious and nutritious root vegetables, are surprisingly easy to grow at home. I’m going to walk you through everything you need to know, from seed to table, to ensure you have a fantastic harvest.
Choosing Your Variety
Before we even think about planting, let’s talk varieties. This is important because different varieties have different characteristics, like size, disease resistance, and flavor.
* Swede (also known as Swedish Turnip or Turnip):
* ‘Marian’: A popular choice, known for its good flavor and disease resistance.
* ‘Best of All’: Another reliable variety, producing large, smooth roots.
* ‘Laurentian’: An early maturing variety, great if you’re in a shorter growing season.
* Rutabaga (also known as Swedish Turnip):
* ‘American Purple Top’: A classic rutabaga with a distinctive purple top and yellow flesh.
* ‘Joan’: A newer variety with improved disease resistance and a sweeter flavor.
* ‘Altasweet’: As the name suggests, this variety is known for its sweetness and fine texture.
I usually opt for ‘Marian’ swedes and ‘American Purple Top’ rutabagas because they’re readily available and have always given me great results. But feel free to experiment and find what works best for you!
Preparing the Soil
Swedes and rutabagas need well-drained, fertile soil to thrive. They prefer a slightly acidic to neutral pH (around 6.0 to 7.0). Here’s how I prepare my soil:
* Timing: Prepare the soil a few weeks before you plan to sow your seeds. This gives the soil time to settle.
* Clearing: Remove any weeds, rocks, and debris from the planting area. These can hinder root development.
* Improving Drainage: If your soil is heavy clay, amend it with plenty of organic matter, such as compost or well-rotted manure. This will improve drainage and aeration.
* Adding Nutrients: Swedes and rutabagas are heavy feeders, so incorporate a balanced fertilizer into the soil. I like to use a slow-release organic fertilizer. Follow the instructions on the fertilizer package for application rates.
* Tilling or Digging: Loosen the soil to a depth of at least 12 inches. This will allow the roots to grow easily. I usually use a garden fork to turn the soil.
* Raking: Rake the soil smooth to create a level planting surface.
Sowing the Seeds
Now for the fun part – planting!
1. Timing is Key: Swedes and rutabagas are cool-season crops, so the best time to sow seeds is in late spring or early summer for a fall harvest. Check your local frost dates to determine the ideal planting time for your region. I usually aim to sow about 12-14 weeks before the first expected frost.
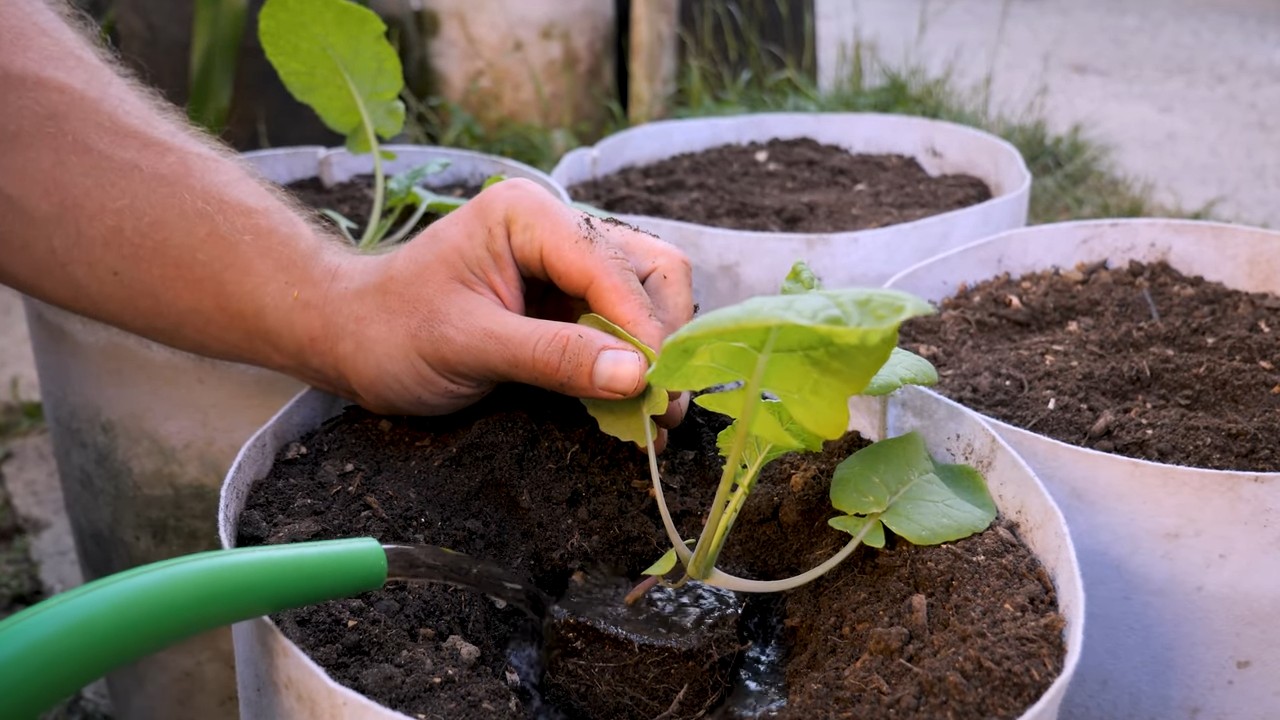
2. Direct Sowing: I prefer to direct sow the seeds directly into the garden bed. They don’t transplant well, so this avoids any unnecessary stress on the plants.
3. Creating Rows: Create shallow rows about 1/2 inch deep and 12-18 inches apart. You can use a garden hoe or your finger to make the rows.
4. Sowing Seeds: Sow the seeds thinly along the rows, spacing them about 1 inch apart. Don’t overcrowd them, as this will lead to competition for resources.
5. Covering Seeds: Gently cover the seeds with a thin layer of soil.
6. Watering: Water the soil thoroughly but gently, using a watering can or a hose with a gentle spray nozzle. Keep the soil consistently moist until the seeds germinate.
7. Marking Rows: Label your rows with the variety of swede or rutabaga you planted. This will help you keep track of what’s growing where.
Thinning Seedlings
Once the seedlings emerge (usually within 7-14 days), it’s crucial to thin them out. This gives the remaining plants enough space to grow and develop properly.
1. Timing: Thin the seedlings when they are about 2-3 inches tall and have their first true leaves.
2. Spacing: Thin the seedlings to a final spacing of about 6-8 inches apart for swedes and 8-10 inches apart for rutabagas.
3. Method: Gently pull out the unwanted seedlings, being careful not to disturb the roots of the remaining plants. You can also use scissors to snip off the seedlings at the soil level.
4. Replanting (Optional): If you have extra space, you can try transplanting the thinned seedlings to another area of the garden. However, be aware that they may not always survive the transplanting process.
Caring for Your Plants
Now that your seedlings are established, it’s time to provide them with the care they need to thrive.
* Watering: Swedes and rutabagas need consistent moisture, especially during dry periods. Water deeply and regularly, aiming for about 1 inch of water per week. Avoid overhead watering, as this can promote fungal diseases.
* Weeding: Keep the planting area free of weeds, as they compete with the swedes and rutabagas for nutrients and water. Hand-pull weeds regularly or use a hoe to cultivate the soil.
* Fertilizing: Side-dress the plants with a balanced fertilizer about 4-6 weeks after thinning. This will provide them with an extra boost of nutrients.
* Pest Control: Keep an eye out for common pests, such as aphids, flea beetles, and cabbage root flies. Use organic pest control methods, such as insecticidal soap or neem oil, to control infestations.
* Earthing Up: As the roots develop, you can “earth up” the soil around the base of the plants. This helps to support the roots and protect them from frost.
Dealing with Pests and Diseases
Even with the best care, pests and diseases can sometimes strike. Here’s what to watch out for and how to deal with them:
* Cabbage Root Fly: This is a common pest that can damage the roots of swedes and rutabagas. The larvae feed on the roots, causing the plants to wilt and die. To prevent cabbage root fly, use root collars around the base of the plants or apply a biological control agent, such as nematodes.
* Flea Beetles: These tiny beetles can create small holes in the leaves of swedes and rutabagas. They are most active in warm, dry weather. To control flea beetles, use row covers to protect the plants or spray them with insecticidal soap.
* Aphids: These small, sap-sucking insects can weaken plants and transmit diseases. To control aphids, spray the plants with insecticidal soap or release beneficial insects, such as ladybugs.
* Clubroot: This is a fungal disease that causes the roots to become swollen and distorted. To prevent clubroot, practice crop rotation and avoid planting swedes and rutabagas in the same area for several years. Also, ensure your soil pH is within the recommended range (6.0-7.0).
* Powdery Mildew: This fungal disease appears as a white, powdery coating on the leaves. To prevent powdery mildew, ensure good air circulation around the plants and avoid overhead watering. If powdery mildew does occur, spray the plants with a fungicide.
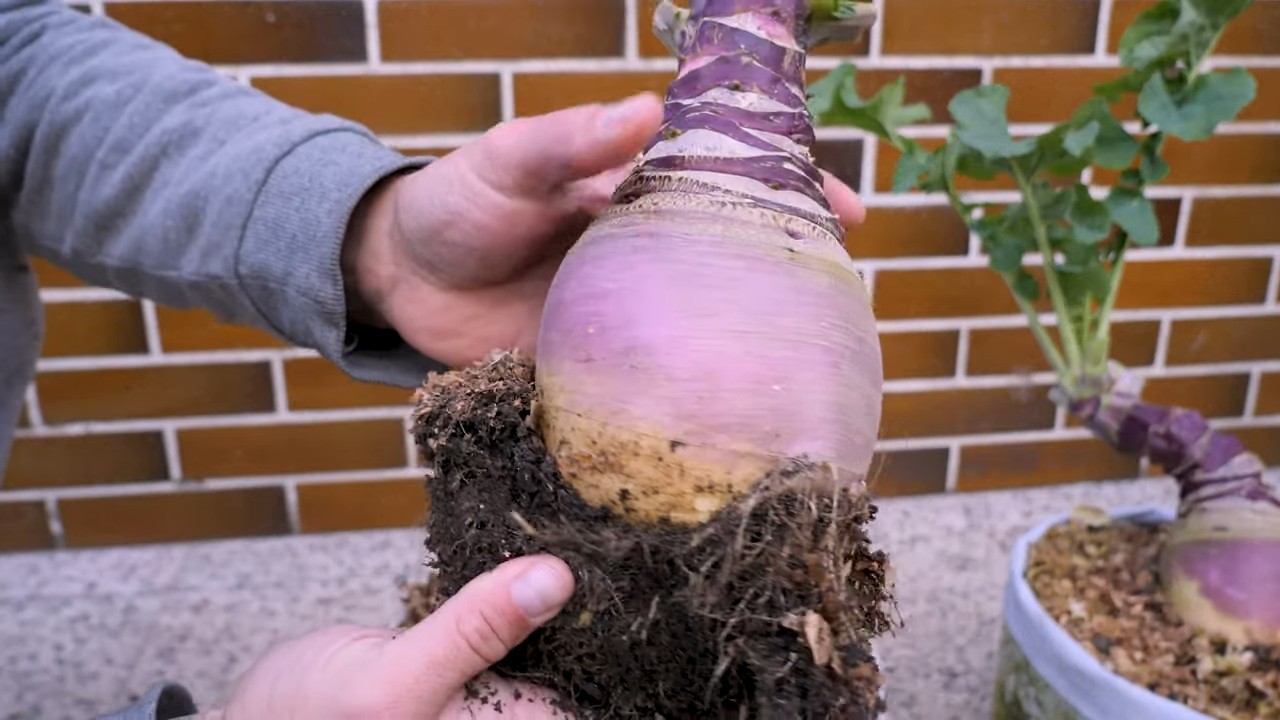
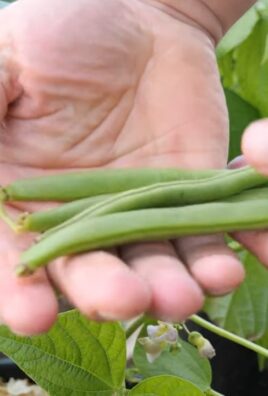
Harvesting Your Crop
The moment we’ve been waiting for! Harvesting is the most rewarding part of growing swedes and rutabagas.
1. Timing: Swedes and rutabagas are typically ready to harvest in the fall, about 3-4 months after sowing. The exact timing will depend on the variety and your local climate.
2. Size: Harvest the roots when they are about 4-6 inches in diameter. They should feel firm and heavy for their size.
3. Method: Loosen the soil around the roots with a garden fork. Gently pull the roots out of the ground, being careful not to damage them.
4. Cleaning: Brush off any excess soil from the roots.
5. Storing: Store the harvested roots in a cool, dark, and humid place, such as a root cellar or a refrigerator. They can be stored for several months if properly stored. I like to store mine in boxes filled with slightly damp sand or sawdust.
Enjoying Your Harvest
Now that you’ve harvested your swedes and rutabagas, it’s time to enjoy them! These versatile root vegetables can be used in a variety of dishes.
* Roasted: Roasting swedes and rutabagas brings out their natural sweetness. Simply peel and chop them into
Conclusion
So, there you have it! Mastering the art of growing swede and rutabaga at home is not only achievable but incredibly rewarding. We’ve walked you through the entire process, from seed selection to harvesting your own delicious, homegrown root vegetables. But why should you bother with this DIY endeavor?
Firstly, the taste difference is undeniable. Store-bought swedes and rutabagas often lack the vibrant flavor and sweetness that comes from freshly harvested produce. When you grow your own, you control the entire process, ensuring optimal growing conditions and harvesting at peak ripeness. This translates to a superior culinary experience. Imagine roasting your own swede and rutabaga with a drizzle of honey and herbs – the flavor will be unlike anything you’ve tasted before.
Secondly, growing your own swede and rutabaga is a sustainable and cost-effective choice. You’ll reduce your reliance on commercially grown produce, which often travels long distances and contributes to carbon emissions. Plus, you’ll save money in the long run, especially if you enjoy these vegetables regularly. Think of all the delicious soups, stews, and roasted dishes you can create with your abundant harvest!
Thirdly, it’s a fantastic way to connect with nature and learn about the growing process. Gardening is a therapeutic activity that can reduce stress and improve your overall well-being. There’s something deeply satisfying about nurturing a plant from seed to harvest and enjoying the fruits (or in this case, roots!) of your labor.
Ready to take your swede and rutabaga growing to the next level? Consider these variations:
* **Companion Planting:** Experiment with companion planting to deter pests and improve soil health. Marigolds, nasturtiums, and thyme are excellent choices for planting alongside your swedes and rutabagas.
* **Succession Planting:** Extend your harvest season by planting seeds every few weeks. This will ensure a continuous supply of fresh swedes and rutabagas throughout the fall and winter.
* **Different Varieties:** Explore different varieties of swede and rutabaga to find your favorites. ‘Marian’ and ‘Best of All’ are popular choices for swede, while ‘Laurentian’ is a well-regarded rutabaga variety.
* Soil Amendments: While we discussed general soil preparation, consider adding specific amendments based on your soil test results. Bone meal can provide extra phosphorus for root development, while composted manure adds essential nutrients and improves soil structure.
Don’t be intimidated by the prospect of growing your own swede and rutabaga. With a little planning and effort, you can enjoy a bountiful harvest of these nutritious and delicious vegetables. Remember to choose a sunny location, prepare your soil properly, and provide adequate water and nutrients. And most importantly, don’t be afraid to experiment and learn from your mistakes. Every gardener has their own unique experiences, and the journey is just as rewarding as the destination.
We encourage you to give this DIY trick a try and share your experiences with us! Let us know in the comments below how your swedes and rutabagas are growing, what challenges you’ve faced, and what tips you’ve discovered along the way. We’re eager to hear your stories and learn from your successes. Happy growing!
Frequently Asked Questions (FAQ)
What are the most common problems when growing swede and rutabaga, and how can I prevent them?
Several issues can arise when growing swede and rutabaga, but most are preventable with proper care. One common problem is clubroot, a soilborne disease that causes swollen and distorted roots. To prevent clubroot, ensure your soil is well-drained and has a pH of 6.5 or higher. Crop rotation is also crucial; avoid planting brassicas (like cabbage, broccoli, and cauliflower) in the same area for at least three years. Another common issue is flea beetles, tiny insects that chew small holes in the leaves. You can deter flea beetles by using row covers, applying diatomaceous earth, or planting trap crops like radishes. Root maggots can also be a problem; use row covers or apply beneficial nematodes to the soil to control them. Finally, ensure consistent watering to prevent bolting (premature flowering), which can make the roots tough and bitter.
How do I know when my swede and rutabaga are ready to harvest?
Knowing when to harvest is key to enjoying the best flavor and texture. Swedes and rutabagas are typically ready to harvest in the fall, about 90-100 days after planting. The size of the root is a good indicator; aim for roots that are about 4-6 inches in diameter. You can also check the top of the root near the soil surface; it should be firm and smooth. If you’re unsure, you can carefully dig up one root to check its size and maturity. The flavor improves after a light frost, as the cold temperatures convert starches into sugars. Harvest before the ground freezes solid, as this can damage the roots.
Can I grow swede and rutabaga in containers?
Yes, you can grow swede and rutabaga in containers, but you’ll need to choose a large container (at least 12 inches in diameter and depth) to accommodate the root growth. Use a well-draining potting mix and ensure the container has drainage holes. Container-grown swedes and rutabagas may require more frequent watering and fertilization than those grown in the ground. Choose a sunny location for your containers, and consider using a slow-release fertilizer to provide consistent nutrients. Keep in mind that container-grown plants may not reach the same size as those grown in the ground, but you can still enjoy a decent harvest.
What’s the best way to store swede and rutabaga after harvesting?
Proper storage is essential to keep your harvested swedes and rutabagas fresh and flavorful. The ideal storage conditions are cool, humid, and dark. A root cellar is perfect, but a refrigerator or unheated garage can also work. Before storing, remove any excess soil from the roots, but don’t wash them. Cut off the leafy tops, leaving about an inch of stem. Store the roots in perforated plastic bags or containers to maintain humidity. Check the roots periodically and remove any that show signs of spoilage. Under proper conditions, swedes and rutabagas can store for several months.
Are swede and rutabaga the same thing? What are the key differences?
While often confused, swede and rutabaga are distinct vegetables, though closely related. Rutabagas are generally larger and have a rougher skin than swedes. The flesh of a rutabaga is typically yellow, while swedes can have yellow or white flesh. In terms of taste, rutabagas have a slightly sweeter and more complex flavor than swedes. Swedes are also known as Swedish turnips or yellow turnips, while rutabagas are sometimes called Swedish turnips as well, adding to the confusion. Both vegetables are nutritious and versatile, but their subtle differences in flavor and texture make them suitable for different culinary applications. Rutabagas are often preferred for roasting and mashing, while swedes are commonly used in soups and stews.
How often should I water my swede and rutabaga plants?
Consistent watering is crucial for healthy swede and rutabaga growth. Aim to keep the soil consistently moist, but not waterlogged. Water deeply whenever the top inch of soil feels dry to the touch. The frequency of watering will depend on the weather conditions, soil type, and stage of plant growth. During hot, dry periods, you may need to water daily. Mulching around the plants can help retain moisture in the soil and reduce the need for frequent watering. Avoid overhead watering, as this can promote fungal diseases. Instead, water at the base of the plants.
What kind of fertilizer should I use for swede and rutabaga?
Swedes and rutabagas benefit from a balanced fertilizer that provides essential nutrients for root development and overall plant health. A fertilizer with an NPK ratio of 10-10-10 or 5-10-10 is a good choice. Apply the fertilizer at planting time, following the instructions on the package. You can also side-dress the plants with fertilizer a few weeks after they emerge, and again a few weeks before harvest. Organic options include composted manure, bone meal, and rock phosphate. Avoid over-fertilizing, as this can lead to excessive foliage growth at the expense of root development. Soil testing can help you determine the specific nutrient needs of your soil and guide your fertilizer choices.
Leave a Comment