

Coconut oil baking soda uses are more versatile than you might think! Have you ever looked at a cluttered cabinet full of cleaning supplies and thought, “There *has* to be a simpler way?” I know I have! For generations, resourceful individuals have sought natural, effective alternatives to harsh chemicals, and the combination of coconut oil and baking soda has emerged as a true powerhouse.
From ancient beauty rituals to modern-day DIY projects, both coconut oil and baking soda boast a rich history of practical applications. Baking soda, also known as sodium bicarbonate, has been used for centuries, with evidence suggesting its use in ancient Egypt. Coconut oil, prized for its moisturizing and antibacterial properties, has been a staple in tropical cultures for just as long.
But why should *you* care about coconut oil baking soda uses? Because this dynamic duo offers a safe, affordable, and eco-friendly solution for a multitude of everyday problems! Whether you’re looking to brighten your smile, gently exfoliate your skin, tackle stubborn stains around the house, or even create a soothing remedy for minor skin irritations, this article will unlock the secrets to harnessing the power of these two simple ingredients. Get ready to ditch the harsh chemicals and embrace a more natural, effective way of living!
DIY Natural Deodorant: Coconut Oil and Baking Soda Magic!
Hey there, fellow DIY enthusiasts! Are you tired of commercial deodorants packed with questionable chemicals? Do you dream of a natural, effective, and budget-friendly alternative? Well, you’ve come to the right place! I’m going to walk you through creating your very own coconut oil and baking soda deodorant. Trust me, once you try this, you might never go back to store-bought again!
This recipe is super simple, but it’s important to understand a few things before we dive in. Baking soda can be a bit irritating for some people, especially those with sensitive skin. We’ll talk about how to adjust the recipe to minimize irritation. Also, coconut oil melts at relatively low temperatures, so we’ll discuss how to keep your deodorant solid, especially during warmer months.
Understanding the Ingredients
Before we get started, let’s quickly chat about why these ingredients work:
* **Coconut Oil:** This is the base of our deodorant. It has natural antibacterial properties that help fight odor-causing bacteria. Plus, it’s moisturizing and smells divine!
* **Baking Soda:** This is the powerhouse ingredient that neutralizes odor. It’s alkaline, which helps to counteract the acidity of sweat.
* **Optional Essential Oils:** These add a pleasant scent and can also provide additional antibacterial or antifungal benefits. Lavender, tea tree, and lemon are popular choices.
* **Optional Arrowroot Powder/Cornstarch:** This helps absorb moisture and can make the deodorant less greasy. It also helps to dilute the baking soda, reducing the chance of irritation.
Gathering Your Supplies
Okay, let’s get organized! Here’s what you’ll need:
* 1/4 cup Coconut Oil (unrefined or refined, your choice!)
* 1/4 cup Baking Soda
* 2 tablespoons Arrowroot Powder or Cornstarch (optional, but highly recommended)
* 10-20 drops of Essential Oils (optional, but they smell amazing!)
* A small glass jar or container with a lid (for storing your deodorant)
* A mixing bowl
* A spoon or spatula
Making Your Deodorant: Step-by-Step Instructions
Alright, let’s get our hands dirty! Follow these steps carefully, and you’ll have your own natural deodorant in no time.
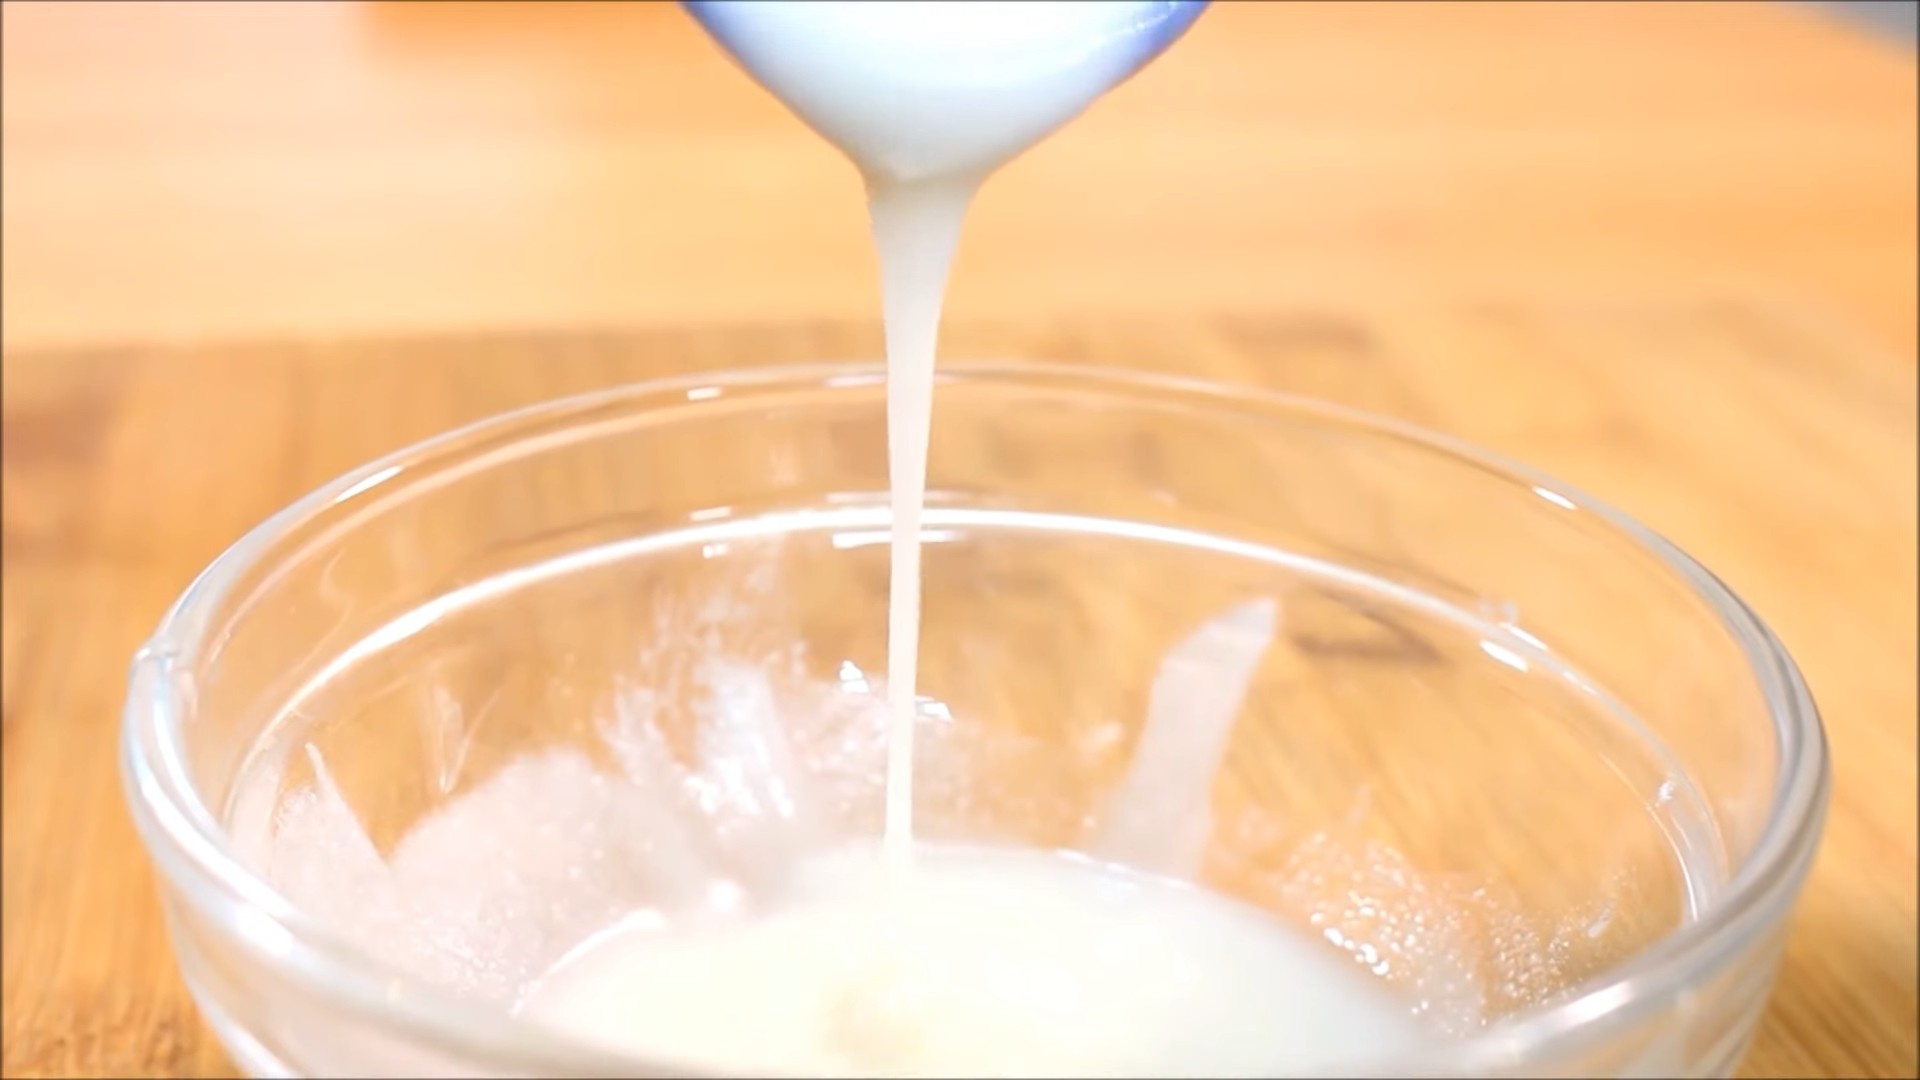
1. **Melt the Coconut Oil:** If your coconut oil is solid (which it probably is, unless you live in a tropical paradise!), you’ll need to melt it. You can do this in a couple of ways:
* **Microwave:** Place the coconut oil in a microwave-safe bowl and heat it in 15-second intervals, stirring in between, until it’s completely melted. Be careful not to overheat it!
* **Double Boiler:** This is my preferred method because it’s more gentle. Fill a saucepan with a couple of inches of water and bring it to a simmer. Place a heat-safe bowl on top of the saucepan, making sure the bottom of the bowl doesn’t touch the water. Add the coconut oil to the bowl and let it melt slowly, stirring occasionally.
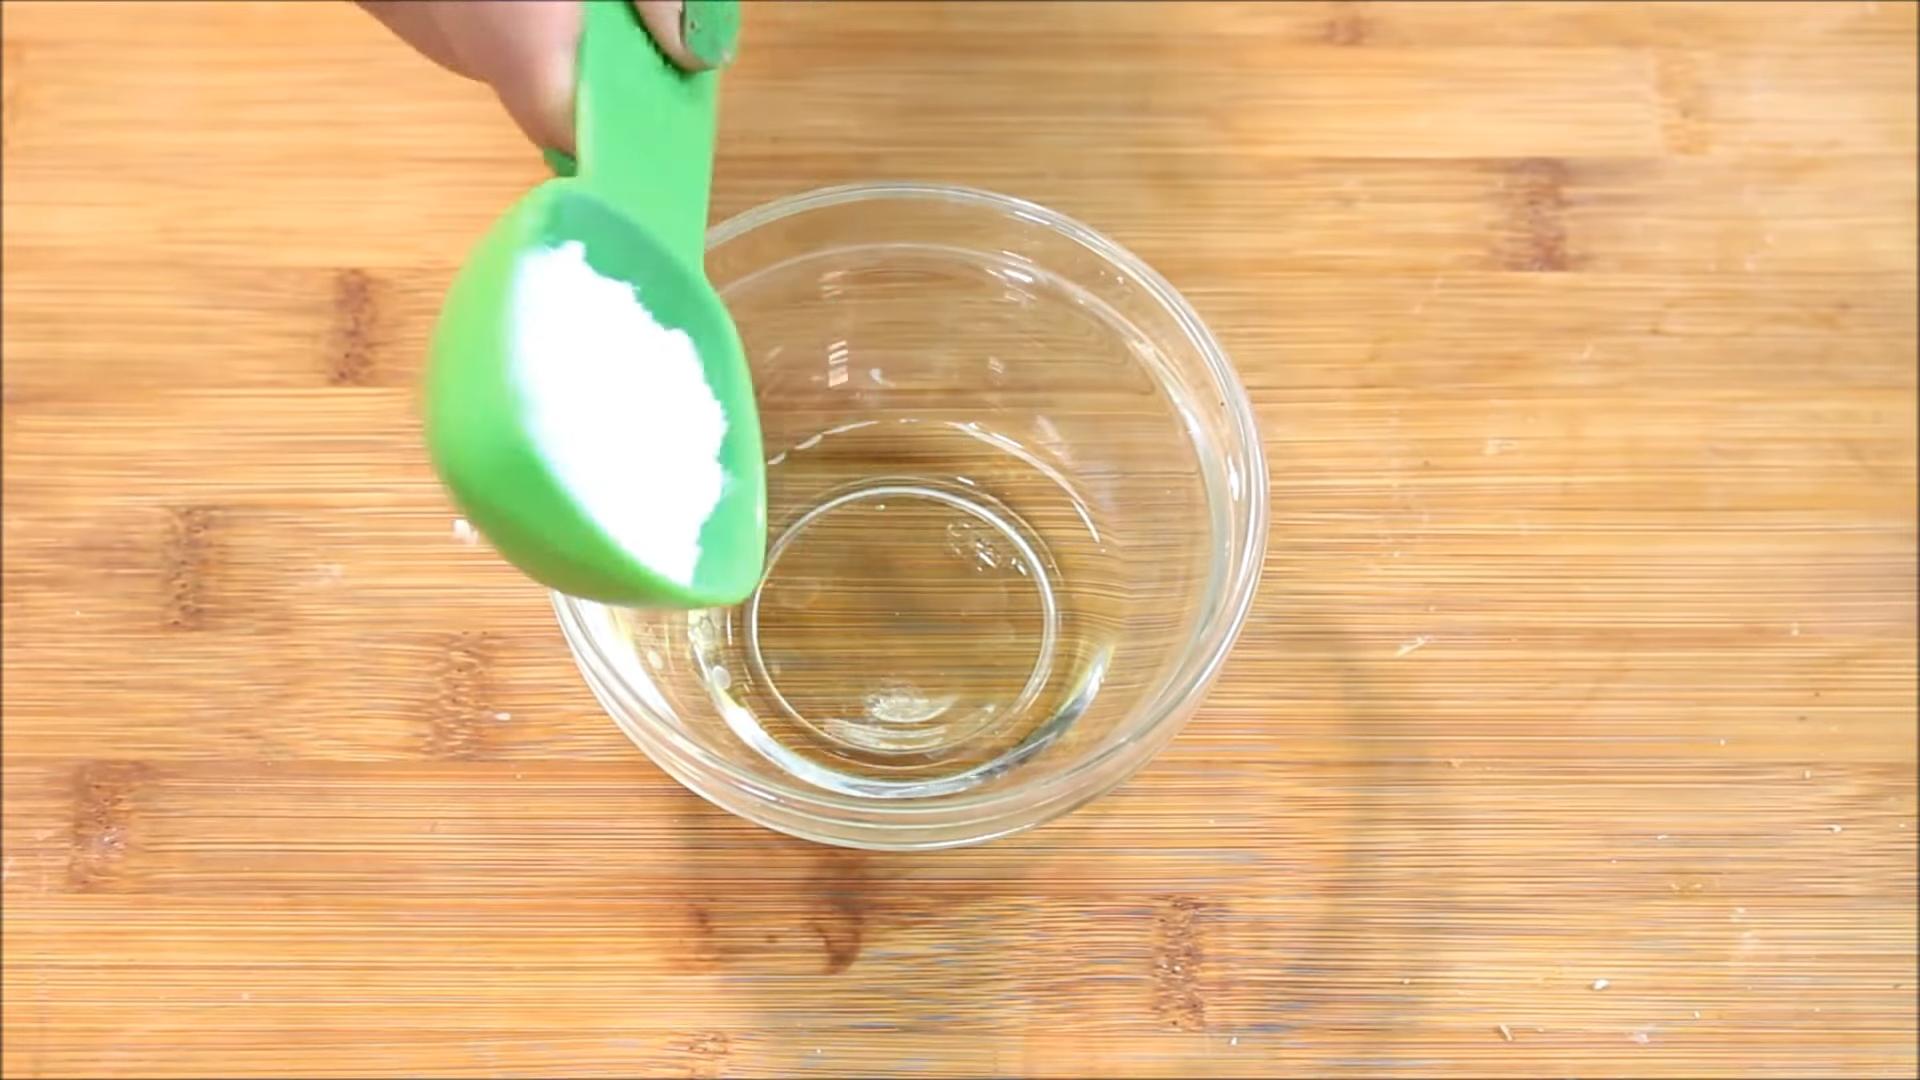
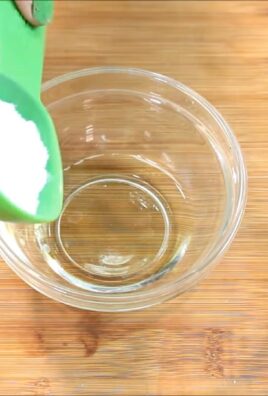
2. **Combine Dry Ingredients:** In your mixing bowl, combine the baking soda and arrowroot powder (or cornstarch, if you’re using it). Whisk them together to ensure they’re evenly distributed. This is important because clumps of baking soda can cause irritation.
3. **Mix Wet and Dry:** Slowly pour the melted coconut oil into the bowl with the dry ingredients. Stir constantly until everything is well combined and you have a smooth, creamy paste.
4. **Add Essential Oils (Optional):** If you’re using essential oils, now’s the time to add them. I usually start with 10 drops and then add more until I reach my desired scent strength. Remember to choose essential oils that are safe for topical use.
5. **Transfer to Container:** Pour or spoon the deodorant mixture into your glass jar or container.
6. **Solidify (If Necessary):** If your deodorant is still liquidy, you can pop it in the refrigerator for about 30 minutes to an hour to help it solidify. This is especially helpful during warmer months.
7. **Let it Set:** Allow the deodorant to fully solidify before using it. This usually takes a few hours in the refrigerator or overnight at room temperature.
Using Your Homemade Deodorant
Okay, your deodorant is ready! Here’s how to use it:
1. **Apply a Small Amount:** Use your fingers to scoop out a small amount of deodorant (about the size of a pea) and apply it to your clean, dry armpits.
2. **Rub it In:** Gently rub the deodorant into your skin until it’s fully absorbed.
3. **Wait a Few Minutes:** Allow the deodorant to dry completely before getting dressed. This will prevent it from staining your clothes.
Troubleshooting and Tips
Okay, so you’ve made your deodorant, but maybe you’re running into a few snags. Don’t worry, I’ve got you covered! Here are some common issues and how to fix them:
* **Irritation:** This is the most common problem. If you experience redness, itching, or burning, it’s likely due to the baking soda. Here’s what you can do:
* **Reduce Baking Soda:** Try reducing the amount of baking soda in your next batch. Start with half the amount (1/8 cup) and see if that helps.
* **Increase Arrowroot Powder/Cornstarch:** Adding more arrowroot powder or cornstarch can help dilute the baking soda and make it less irritating.
* **Try a Baking Soda-Free Version:** If you’re still experiencing irritation, you might need to try a baking soda-free recipe. There are plenty of alternatives out there that use ingredients like magnesium hydroxide or zinc oxide.
* **Apple Cider Vinegar Toner:** Some people find that applying a diluted apple cider vinegar toner to their armpits before applying deodorant helps to balance the pH and reduce irritation.
* **Deodorant is Too Hard:** If your deodorant is too hard to apply, try warming it up slightly before use. You can hold the container in your hands for a few minutes or run it under warm water. You can also add a little more coconut oil to your next batch to make it softer.
* **Deodorant is Too Soft/Melting:** If your deodorant is melting, especially during warmer months, try storing it in the refrigerator. You can also add a little more arrowroot powder or cornstarch to your next batch to help it solidify.
* **Not Effective Enough:** If you’re not finding that the deodorant is effective enough at controlling odor, try adding more baking soda (if you’re not experiencing irritation). You can also try using essential oils with strong antibacterial properties, such as tea tree or eucalyptus.
* **Staining Clothes:** While this deodorant is less likely to stain than some commercial deodorants, it’s still possible. To prevent staining, make sure you’re applying a small amount and allowing it to dry completely before getting dressed. You can also try wearing loose-fitting clothing.
Experimenting with Scents
One of the best things about making your own deodorant is that you can customize the scent to your liking! Here are some essential oil blend ideas to get you started:
* **Lavender and Tea Tree:** This is a classic combination that’s both calming and antibacterial.
* **Lemon and Grapefruit:** This blend is refreshing and energizing.
* **Cedarwood and Bergamot:** This is a warm and woodsy scent that’s perfect for men.
* **Rose and Geranium:** This is a floral and feminine scent.
* **Peppermint and Rosemary:** This blend is invigorating and helps to improve focus.
Remember to always use essential oils that are safe for topical use and to dilute them properly. A good rule of thumb is to use a 1-2% dilution rate, which means 1-2 drops of essential oil per teaspoon of carrier oil (in this case, coconut oil).
A Note on Detox
When you switch from commercial deodorant to a natural deodorant, you might experience a “detox” period. This is because your body is getting rid of the toxins that have been accumulating in your armpits. During this time, you might sweat more or experience a stronger odor. Don’t worry, this is normal and it will pass! Just keep using your natural deodorant and your body will eventually adjust.
Storage Tips
To keep your homemade deodorant fresh and effective, store it in a cool, dry place away from direct sunlight. If you live in a warm climate, you might want to store it in the refrigerator to prevent it from melting. Your deodorant should last for several months, as long as it’s stored properly.
Final Thoughts
Making your own coconut oil and baking soda deodorant is a fun, easy, and rewarding project. Not only will you be saving money, but you’ll also be avoiding harmful chemicals and taking control of your personal care routine. So go ahead, give it a try! I’m confident that you’ll love the results. And remember, don’t be afraid to experiment with different ingredients
Conclusion
So, there you have it! This simple yet incredibly effective DIY trick using coconut oil and baking soda is a game-changer for anyone looking for a natural and affordable alternative to conventional personal care products. We’ve explored how this dynamic duo can be harnessed for a multitude of uses, from gentle exfoliation to effective odor control. The beauty of this method lies not only in its simplicity and cost-effectiveness but also in its versatility.
Why is this a must-try? Because it empowers you to take control of the ingredients you put on your body. In a world saturated with products containing harsh chemicals and questionable additives, knowing exactly what you’re using is a powerful advantage. Coconut oil provides moisturizing and antimicrobial benefits, while baking soda offers gentle abrasive and deodorizing properties. Together, they create a synergistic effect that addresses a wide range of needs.
But don’t just take our word for it! We encourage you to experiment and find the applications that work best for you. Perhaps you’ll discover that adding a few drops of essential oil, like lavender or tea tree, enhances the experience and provides additional benefits. Maybe you’ll find that a slightly different ratio of coconut oil to baking soda suits your skin type better. The possibilities are endless!
Consider these variations to personalize your coconut oil baking soda experience:
* **For Sensitive Skin:** Use a finer grade of baking soda or reduce the amount used in the mixture. You can also add a soothing ingredient like aloe vera gel.
* **For Exfoliation:** Add a small amount of finely ground oats or sugar for a more intense exfoliating scrub.
* **For Deodorant:** Incorporate a few drops of tea tree oil or lavender oil for added antibacterial and fragrance benefits.
* **For Toothpaste:** Add a drop of peppermint essential oil for a refreshing flavor. Be sure to use a non-aluminum baking soda for oral care.
We are confident that once you experience the benefits of this DIY trick, you’ll be hooked. It’s a simple, sustainable, and effective way to care for your body without breaking the bank or exposing yourself to harmful chemicals.
So, go ahead, give it a try! We’re eager to hear about your experiences. Share your tips, variations, and success stories in the comments below. Let’s build a community of empowered individuals who are taking control of their personal care routines with the power of coconut oil and baking soda. Your feedback will not only help others discover the benefits of this amazing DIY trick but also inspire us to continue exploring and sharing natural and effective solutions for a healthier and happier life. Don’t be shy – let us know how it works for you! We believe in the power of shared knowledge and collective experience. Together, we can unlock the full potential of this simple yet transformative combination.
Frequently Asked Questions
Is it safe to use coconut oil and baking soda on my skin?
Generally, yes, it is safe for most people. However, it’s always a good idea to do a patch test first, especially if you have sensitive skin. Apply a small amount of the mixture to an inconspicuous area, like your inner arm, and wait 24 hours to see if any irritation occurs. If you experience redness, itching, or burning, discontinue use. Also, be mindful that baking soda is alkaline and can disrupt the skin’s natural pH balance if used excessively. Moderation is key.
What are the best uses for coconut oil and baking soda?
The versatility of this combination is one of its greatest strengths. Some of the most popular uses include:
* **Gentle Exfoliator:** The baking soda provides a mild abrasive action that helps to remove dead skin cells, leaving your skin feeling smoother and brighter.
* **Natural Deodorant:** Baking soda neutralizes odor-causing bacteria, while coconut oil provides moisturizing and antimicrobial benefits.
* **DIY Toothpaste:** While not a replacement for fluoride toothpaste, some people use this mixture as a natural alternative. Be sure to use a non-aluminum baking soda and add a drop of peppermint essential oil for flavor.
* **Acne Treatment:** The antimicrobial properties of coconut oil, combined with the exfoliating action of baking soda, can help to reduce inflammation and unclog pores.
* **Foot Scrub:** This mixture can be used to soften and exfoliate rough skin on your feet.
What is the best ratio of coconut oil to baking soda?
The ideal ratio depends on your skin type and the intended use. A good starting point is a 1:1 ratio (equal parts coconut oil and baking soda). For sensitive skin, you may want to use more coconut oil and less baking soda. For a more intense exfoliation, you can increase the amount of baking soda. Experiment to find what works best for you.
Can I use this mixture as a daily cleanser?
While some people use it as a daily cleanser, it’s generally not recommended for everyone. Baking soda can be abrasive and may disrupt the skin’s natural pH balance if used too frequently. It’s best to use it as an occasional exfoliator or spot treatment rather than a daily cleanser.
What type of coconut oil should I use?
It’s best to use unrefined, virgin coconut oil. This type of coconut oil is minimally processed and retains its natural nutrients and benefits. Avoid refined coconut oil, as it may contain additives and have a less pronounced coconut flavor and aroma.
Can I add essential oils to the mixture?
Yes, adding essential oils can enhance the benefits and fragrance of the mixture. Some popular choices include lavender oil (for calming and soothing), tea tree oil (for antibacterial and antifungal properties), and peppermint oil (for a refreshing scent). Be sure to use high-quality, therapeutic-grade essential oils and add them sparingly. A few drops are usually sufficient.
How should I store the coconut oil and baking soda mixture?
Store the mixture in an airtight container in a cool, dry place. Coconut oil can melt at warmer temperatures, so it’s best to keep it in a cool environment to maintain its consistency.
Is it safe to use coconut oil and baking soda as toothpaste?
While some people use this mixture as a natural toothpaste alternative, it’s important to be aware of the potential risks. Baking soda is abrasive and can potentially damage tooth enamel if used too frequently or vigorously. Additionally, this mixture does not contain fluoride, which is essential for preventing tooth decay. If you choose to use it as toothpaste, do so sparingly and consult with your dentist to ensure you are maintaining good oral hygiene.
Can I use this mixture on my hair?
While some people use coconut oil as a hair mask, baking soda is generally not recommended for use on hair. It can be too harsh and drying, especially for color-treated or damaged hair.
What if I experience irritation after using the mixture?
If you experience any irritation, such as redness, itching, or burning, discontinue use immediately. Wash the affected area with mild soap and water. If the irritation persists, consult with a dermatologist. You may be allergic to coconut oil or baking soda, or the mixture may be too harsh for your skin.

Leave a Comment