

Clean silver with salt? Absolutely! Are you tired of your beautiful silverware and cherished silver jewelry looking dull and tarnished? I know I am! It’s frustrating to see that once-gleaming shine fade away, especially when you’re prepping for a special occasion or simply want to enjoy the beauty of your silver pieces.
Silver has been prized for centuries, not just for its aesthetic appeal but also for its use in currency, religious artifacts, and even medicinal purposes. From ancient civilizations to modern-day homes, silver has held a special place in our lives. But its tendency to tarnish can be a real headache.
That’s where this amazing DIY trick comes in! Forget expensive silver polishes and harsh chemicals. I’m going to show you a simple, effective, and surprisingly easy way to clean silver with salt, using ingredients you probably already have in your kitchen. This method is not only budget-friendly but also gentler on your precious silver items. So, let’s dive in and restore that brilliant shine, bringing your silver back to its former glory!
DIY Silver Cleaning with Salt: A Sparkling Solution!
Hey there, fellow DIY enthusiasts! Are you tired of looking at your tarnished silver jewelry, silverware, or decorative items? Don’t rush out to buy expensive silver cleaners just yet! I’m going to show you a super easy and effective way to clean your silver using ingredients you probably already have in your kitchen: salt, baking soda, and aluminum foil. This method is not only budget-friendly but also surprisingly powerful. Let’s get started!
What You’ll Need
Before we dive in, let’s gather our supplies. This is a pretty simple setup, so you won’t need much:
* A glass or ceramic bowl (avoid using metal bowls)
* Aluminum foil
* 1 cup of boiling water
* 1 tablespoon of baking soda
* 1 tablespoon of salt (table salt works perfectly)
* A soft cloth or microfiber towel
* Tongs (optional, but recommended for handling hot items)
The Science Behind the Sparkle
Okay, before we get our hands dirty, let’s talk a little bit about why this method works. Tarnish on silver is actually silver sulfide, which forms when silver reacts with sulfur in the air. The aluminum foil acts as a sacrificial metal. When you combine it with the baking soda, salt, and hot water, you create an electrolytic reaction. This reaction transfers the sulfur from the silver sulfide back to the aluminum foil, effectively reversing the tarnishing process. Pretty cool, right?
Step-by-Step Instructions: Cleaning Your Silver
Alright, now for the fun part! Follow these steps carefully, and you’ll have your silver shining like new in no time.
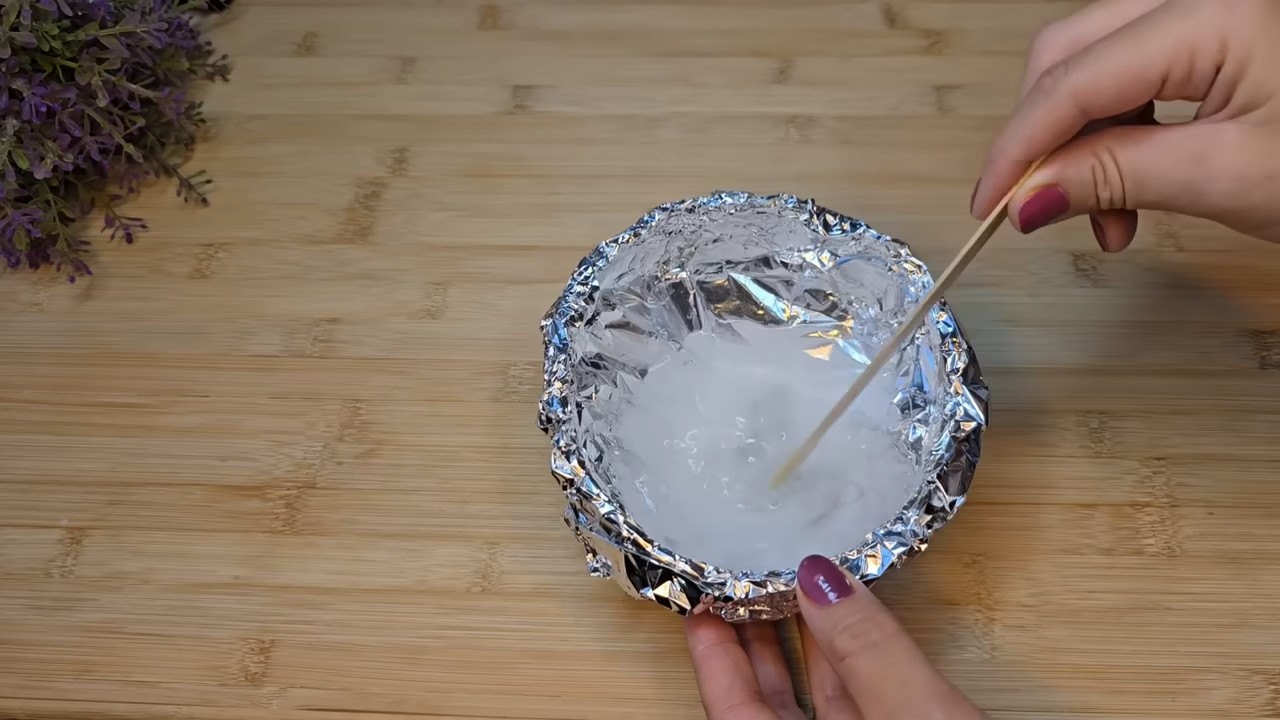
1. Prepare the Bowl: Line your glass or ceramic bowl completely with aluminum foil. Make sure the shiny side of the foil is facing up, as this is the side that will be in contact with the silver and the solution. The foil needs to cover the entire inside surface of the bowl.
2. Add the Baking Soda and Salt: Pour 1 tablespoon of baking soda and 1 tablespoon of salt into the foil-lined bowl. Don’t worry about mixing them just yet; we’ll take care of that in the next step.
3. Pour in the Boiling Water: Carefully pour 1 cup of boiling water into the bowl. Be extremely cautious when handling boiling water to avoid burns. The mixture will start to fizz and bubble as the baking soda and salt dissolve.
4. Submerge the Silver: Gently place your tarnished silver items into the bowl, making sure they are touching the aluminum foil. This is crucial for the electrolytic reaction to occur. If you have a lot of silver, you might need to do this in batches to ensure everything makes good contact with the foil. Use tongs to avoid burning yourself.
5. Wait and Watch: Let the silver sit in the solution for 5-10 minutes. The amount of time needed will depend on the severity of the tarnish. You should start to see the tarnish disappearing almost immediately. For heavily tarnished items, you might need to let them soak for a bit longer, up to 15-20 minutes. Keep an eye on the process and check the silver periodically.
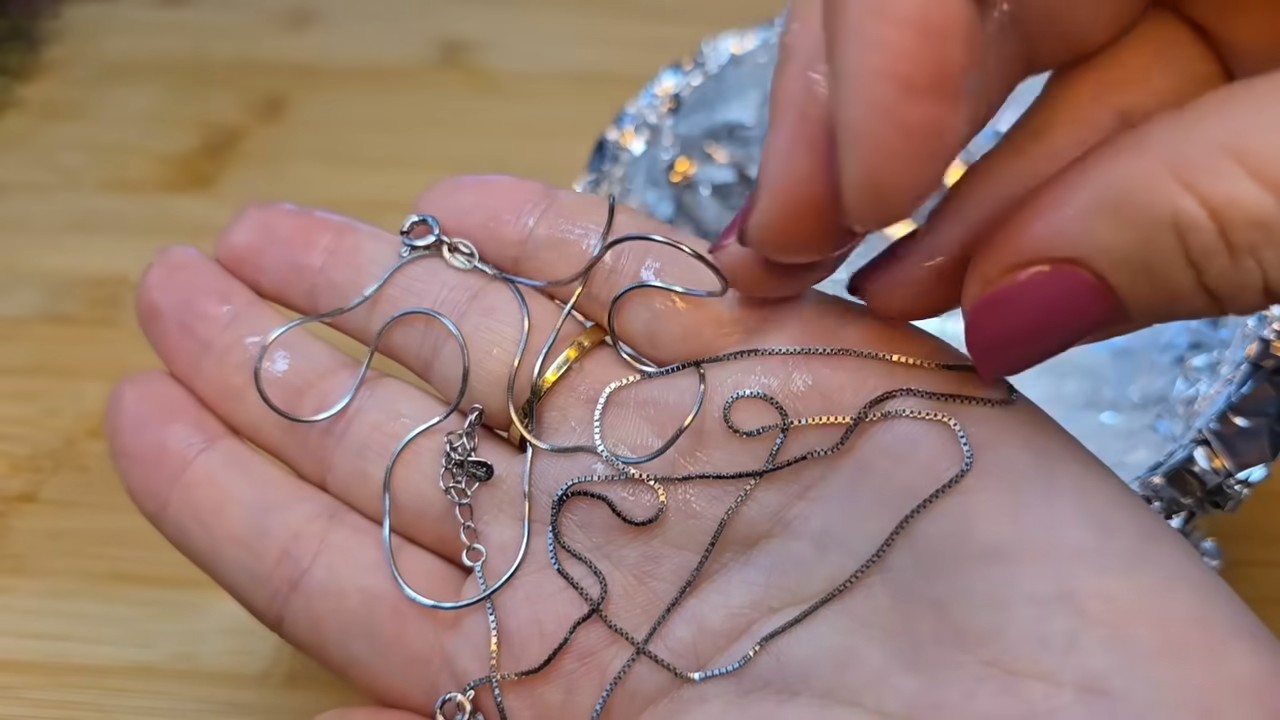
6. Remove and Rinse: Once the tarnish has disappeared (or significantly reduced), carefully remove the silver items from the bowl using tongs. Rinse them thoroughly under cool running water to remove any residue from the cleaning solution.
7. Dry and Polish: Use a soft cloth or microfiber towel to dry the silver items completely. For an extra shine, you can gently polish them with the cloth. This will remove any remaining water spots and bring out the luster of the silver.
Dealing with Stubborn Tarnish
Sometimes, the tarnish is particularly stubborn and doesn’t completely disappear after the first soak. Don’t worry; here are a few things you can try:
* Repeat the Process: If the tarnish is still visible, you can simply repeat the cleaning process. Prepare a fresh batch of the solution and soak the silver again.
* Increase the Concentration: For heavily tarnished items, you can try increasing the amount of baking soda and salt in the solution. Try using 2 tablespoons of each instead of 1.
* Direct Contact: Make sure the silver is making good contact with the aluminum foil. If necessary, reposition the items in the bowl to ensure maximum contact.
* Gentle Scrubbing: For particularly stubborn spots, you can try gently scrubbing the silver with a soft toothbrush and a paste made from baking soda and water. Be very careful not to scratch the silver.
Cleaning Silver Jewelry with Stones
If you’re cleaning silver jewelry that has stones, you need to be a little more careful. Some stones can be damaged by the cleaning solution. Here’s what I recommend:
* Avoid Soaking: Instead of soaking the entire piece of jewelry, try using a cotton swab dipped in the cleaning solution to gently clean the silver parts around the stones.
* Rinse Thoroughly: Make sure to rinse the jewelry very thoroughly after cleaning to remove any residue from the solution.
* Test First: If you’re unsure about how a particular stone will react to the cleaning solution, test it on a small, inconspicuous area first.
* Consider Professional Cleaning: For valuable or delicate jewelry, it’s always best to consult a professional jeweler for cleaning.
Important Considerations and Safety Tips
While this method is generally safe and effective, there are a few things to keep in mind:
* Avoid Metal Bowls: Never use a metal bowl for this cleaning method, as it can interfere with the electrolytic reaction.
* Handle Boiling Water with Care: Be extremely careful when handling boiling water to avoid burns. Use oven mitts or pot holders to protect your hands.
* Ventilation: While the fumes from this cleaning process are not toxic, it’s always a good idea to work in a well-ventilated area.
* Not for All Metals: This method is specifically designed for cleaning silver. It’s not suitable for cleaning other metals, such as gold or copper.
* Tarnish Prevention: To prevent your silver from tarnishing quickly, store it in airtight containers or bags when not in use. You can also place anti-tarnish strips in the containers to absorb sulfur and keep your silver shiny.
Why I Love This Method
I’ve tried many different silver cleaning methods over the years, and this one is by far my favorite. It’s simple, inexpensive, and incredibly effective. Plus, it’s a great way to avoid using harsh chemicals that can be harmful to the environment. I love that I can clean my silver jewelry and silverware with ingredients I already have in my pantry. It’s a win-win!
Troubleshooting
* Silver isn’t getting clean: Make sure the silver is touching the aluminum foil. The electrolytic reaction needs direct contact. Also, ensure the shiny side of the foil is facing up.
* Solution isn’t fizzing: Double-check that you’re using boiling water. The heat is essential for the reaction.
* Stones are looking dull: Some stones can be affected by the baking soda. Try cleaning around the stones with a damp cloth instead of submerging them.
* Foil is disintegrating: This is normal! The aluminum foil is doing its job by attracting the sulfur.
Beyond Silver: Other Uses for Baking Soda and Salt
While we’re on the topic of baking soda and salt, did you know they have tons of other uses around the house? Here are just a few:
* Cleaning your sink: Sprinkle baking soda in your sink and scrub with a damp sponge for a sparkling clean.
* Deodorizing your fridge: Place an open box of baking soda in your fridge to absorb odors.
* Unclogging drains: Pour baking soda down your drain, followed by vinegar, and then flush with hot water.
* Soothing sore throats: Gargle with warm salt water to relieve a sore throat.
* Cleaning your oven: Make a paste of baking soda and water and spread it inside your oven. Let it sit overnight, then scrub clean.
Final Thoughts
So there you have it! A simple, effective, and budget-friendly way to clean your silver using salt, baking soda, and aluminum foil. I hope you found this tutorial helpful. Now go forth and make your silver shine! And remember, a little bit of elbow grease (or in this case, electrolytic reaction) can go a long way. Happy cleaning!
Conclusion
So, there you have it! Cleaning silver with salt isn’t just a clever hack; it’s a game-changer for anyone who wants to keep their silverware, jewelry, and other silver items sparkling without resorting to harsh chemicals or expensive professional cleaning services. We’ve walked you through the simple steps, highlighting the ease and effectiveness of this method. But why is this DIY trick a must-try?
Firstly, it’s incredibly cost-effective. You likely already have salt, baking soda, and aluminum foil in your kitchen. No need to purchase specialized silver cleaners that can be pricey and filled with ingredients you can’t even pronounce. Secondly, it’s gentle on your silver. Unlike abrasive polishes that can scratch the surface, this method uses a chemical reaction to lift tarnish away, preserving the integrity and beauty of your precious items. Thirdly, it’s environmentally friendly. By using common household ingredients, you’re reducing your reliance on potentially harmful chemicals that can pollute waterways.
Beyond the basic method, there are a few variations you can explore to tailor the process to your specific needs. For instance, if you’re dealing with heavily tarnished silver, you can increase the amount of baking soda or salt in the solution. You can also try using distilled water instead of tap water for even better results, especially if you live in an area with hard water. For intricate silver pieces with hard-to-reach areas, consider using a soft-bristled brush, like an old toothbrush, to gently scrub away any remaining tarnish after the initial soak. Remember to always rinse thoroughly and dry completely to prevent water spots.
This method is particularly effective for cleaning silver jewelry. The gentle nature of the salt and baking soda solution makes it ideal for delicate pieces that might be damaged by harsher cleaning methods. Just be sure to avoid using this method on jewelry with gemstones, as some stones can be affected by the solution.
We understand that trying a new cleaning method can be a little daunting, but we’re confident that you’ll be amazed by the results. The transformation from dull, tarnished silver to gleaming, like-new condition is truly remarkable. The best part? You achieved it with simple ingredients and minimal effort.
Don’t just take our word for it, though. We wholeheartedly encourage you to try this DIY trick for cleaning silver with salt and see the magic for yourself. Once you’ve experienced the satisfaction of restoring your silver to its former glory, we’d love to hear about your experience. Share your before-and-after photos, tips, and any variations you tried in the comments below. Let’s build a community of silver-cleaning enthusiasts and help each other keep our treasured possessions looking their best! We are sure that you will find this method of cleaning silver with salt to be a valuable addition to your cleaning routine.
Frequently Asked Questions (FAQ)
Q: What kind of salt should I use?
A: Plain table salt works perfectly fine for cleaning silver. You don’t need to use fancy sea salt or kosher salt. The important thing is that it’s sodium chloride (NaCl). Iodized salt is also acceptable, although some people prefer non-iodized salt to avoid any potential staining, which is rare but possible.
Q: Can I use any type of aluminum foil?
A: Yes, any type of aluminum foil will work. The key is that the aluminum foil reacts with the tarnish (silver sulfide) to reverse the tarnishing process. It doesn’t matter if it’s heavy-duty or regular foil. Just make sure the silver is in contact with the foil during the cleaning process.
Q: How long should I soak the silver?
A: The soaking time depends on the severity of the tarnish. For lightly tarnished silver, 2-3 minutes might be sufficient. For heavily tarnished silver, you might need to soak it for up to 10-15 minutes. Check the silver periodically and remove it when the tarnish has disappeared. If the tarnish is particularly stubborn, you can try repeating the process with a fresh batch of solution.
Q: Will this method work on all types of silver?
A: This method is generally safe and effective for sterling silver, silver plate, and other silver alloys. However, it’s not recommended for items that have been treated with a special coating or finish, as the cleaning process could potentially damage the coating. Also, avoid using this method on jewelry with delicate gemstones, as some stones can be affected by the solution. Always test a small, inconspicuous area first if you’re unsure.
Q: Is it safe to use this method on antique silver?
A: While this method is generally gentle, it’s always best to exercise caution when cleaning antique silver. Antique silver often has a patina that some collectors value, and this method could potentially remove or alter that patina. If you’re concerned about preserving the patina, it’s best to consult with a professional silver restorer. If you choose to try this method, start with a very short soaking time and monitor the results closely.
Q: What if the tarnish doesn’t come off completely?
A: If the tarnish is particularly stubborn, there are a few things you can try. First, make sure the water is hot enough. The hotter the water, the more effective the cleaning process will be. Second, try increasing the amount of baking soda or salt in the solution. Third, you can gently scrub the silver with a soft-bristled brush after soaking it. Finally, you can repeat the soaking process with a fresh batch of solution.
Q: How do I prevent my silver from tarnishing in the future?
A: To prevent your silver from tarnishing, store it in a cool, dry place away from direct sunlight and humidity. You can also store it in tarnish-resistant bags or cloths, which are specially designed to absorb sulfur compounds that cause tarnish. Avoid exposing your silver to harsh chemicals, such as chlorine bleach, and wipe it down with a soft cloth after each use. Regular cleaning, even just a quick wipe-down, can also help prevent tarnish from building up.
Q: Can I clean multiple pieces of silver at once?
A: Yes, you can clean multiple pieces of silver at once, as long as they are all in contact with the aluminum foil and the solution. However, avoid overcrowding the container, as this can reduce the effectiveness of the cleaning process. If you have a large amount of silver to clean, it’s best to do it in batches.
Q: What should I do after cleaning the silver?
A: After cleaning the silver, rinse it thoroughly with clean water to remove any residue from the salt and baking soda solution. Then, dry it completely with a soft, lint-free cloth. Avoid air-drying the silver, as this can cause water spots. Once the silver is dry, you can polish it with a silver polishing cloth for an extra shine.
Q: Is there any silver that I should NOT clean with this method?
A: Yes, avoid cleaning items with gemstones, pearls, or other delicate materials using this method, as the solution could damage them. Also, do not use this method on oxidized silver where the oxidation is part of the design, as it will remove the intentional darkening. Always test an inconspicuous area first if you are unsure.
Leave a Comment