

Grow Chayote Small Spaces? Absolutely! Imagine harvesting fresh, vibrant chayote squash right from your own balcony or patio, even if you think you don’t have the room. It’s more achievable than you might believe, and I’m here to show you how!
Chayote, also known as mirliton or vegetable pear, has a fascinating history, deeply rooted in Mesoamerican cultures. For centuries, it’s been a staple in their diets, prized for its versatility and nutritional benefits. Now, you can bring a piece of that heritage to your own home, no matter how limited your space may be.
Let’s face it, many of us dream of having a sprawling garden, but reality often dictates otherwise. Apartment living, small yards, or simply a lack of time can make traditional gardening seem impossible. That’s where these DIY tricks and hacks come in! I’m going to share simple, effective methods to grow chayote small spaces, maximizing your yield without sacrificing precious square footage. Think vertical gardening, clever container choices, and strategic pruning – all designed to make chayote cultivation accessible to everyone.
Why is this important? Because fresh, homegrown produce is not only delicious but also incredibly rewarding. Plus, knowing exactly where your food comes from gives you peace of mind. So, let’s ditch the grocery store chayote and embark on this exciting gardening adventure together!
Growing Chayote Squash Vertically in Small Spaces: A DIY Guide
Hey there, fellow gardening enthusiasts! Dreaming of fresh, homegrown chayote squash but short on space? Don’t worry, I’ve got you covered! Chayote, also known as mirliton, is a vigorous vine that can produce a ton of delicious fruit, and with a little ingenuity, you can absolutely grow it even in the tiniest of gardens or on a balcony. This guide will walk you through building a vertical support system and nurturing your chayote vine for a bountiful harvest.
What You’ll Need:
Before we dive in, let’s gather our supplies. This is what I used, but feel free to adapt based on what you have available and your specific space:
* Chayote Squash: You’ll need one mature chayote fruit to start. Look for one that’s already sprouting – that’s a sign it’s ready to go!
* Large Container: A pot at least 24 inches in diameter and depth is ideal. The bigger, the better, as chayote roots need room to spread.
* Potting Mix: Use a well-draining potting mix rich in organic matter. I like to mix compost into mine for an extra boost.
* Vertical Support Structure: This is where the DIY magic happens! Here are a few options:
* Trellis: A sturdy trellis is a classic choice. Make sure it’s tall enough to accommodate the vine’s growth (6-8 feet is a good starting point).
* Arbor: If you have a bit more space, an arbor provides a beautiful and functional support.
* DIY PVC Pipe Structure: This is what I’ll be focusing on in this guide, as it’s cost-effective and customizable. You’ll need:
* PVC pipes (1-inch diameter is usually sufficient)
* PVC pipe connectors (tees, elbows, crosses, depending on your design)
* PVC pipe cutter or saw
* Measuring tape
* Drill (optional, for securing the structure)
* Zip ties or garden twine
* Gardening Gloves: Protect your hands!
* Watering Can or Hose: For keeping your chayote happy and hydrated.
* Fertilizer: A balanced fertilizer or compost tea will help your vine thrive.
Building Your DIY PVC Pipe Vertical Support
This is the heart of our small-space chayote growing system. I’ll walk you through creating a simple but effective PVC pipe structure. Remember, this is just a guideline – feel free to get creative and adapt the design to fit your space and preferences!
Step 1: Planning Your Design
Before you start cutting and connecting pipes, take some time to plan your structure. Consider these factors:
* Available Space: Measure the area where you’ll be placing the container and structure.
* Sunlight: Chayote needs at least 6-8 hours of sunlight per day. Position your structure accordingly.
* Desired Height: How tall do you want your structure to be? Remember, chayote vines can grow quite long.
* Stability: Make sure your structure is sturdy enough to support the weight of the vine and fruit.
I opted for a simple A-frame design, which is easy to build and provides good support. My structure is about 6 feet tall and 4 feet wide at the base.
Step 2: Cutting the PVC Pipes
Based on your design, measure and cut the PVC pipes to the required lengths. Here’s a breakdown of the cuts I made for my A-frame structure:
1. Four Legs: Cut four pieces of PVC pipe, each 6 feet long. These will be the main supports of the A-frame.
2. Crossbar: Cut one piece of PVC pipe, 4 feet long. This will connect the two A-frame halves at the top.
3. Base Supports: Cut two pieces of PVC pipe, each 4 feet long. These will connect the legs at the base for added stability.
4. Optional Braces: Cut additional shorter pieces (e.g., 1-2 feet long) to create diagonal braces for extra support.
Important Tip: When cutting PVC pipe, use a sharp PVC pipe cutter or saw for clean cuts. Wear safety glasses to protect your eyes from flying debris.
Step 3: Assembling the A-Frame
Now it’s time to put the pieces together!
1. Create the A-Frame Halves: Connect two of the 6-foot legs to a tee connector at the top. This will form the top of the “A.” Repeat for the other two legs.
2. Connect the Crossbar: Insert the 4-foot crossbar into the tee connectors at the top of the A-frame halves. This will join the two halves together.
3. Attach the Base Supports: Connect the 4-foot base supports to the legs using elbow connectors. This will create a rectangular base for the structure.
4. Add Optional Braces: If you’re using braces, attach them diagonally between the legs and the crossbar or base supports using tee connectors. This will significantly increase the structure’s stability.
Step 4: Securing the Structure (Optional)
For added stability, especially if you live in a windy area, you can secure the structure to the container or the ground.
1. Securing to the Container: Drill holes through the base of the PVC pipes and the sides of the container. Use screws or bolts to attach the structure to the container.
2. Securing to the Ground: Drive metal stakes into the ground near the base of the structure and attach the PVC pipes to the stakes using zip ties or garden twine.
Step 5: Adding Climbing Support
Chayote vines need something to grab onto as they grow. You can use zip ties or garden twine to create a climbing surface on your PVC pipe structure.
1. Create a Grid: Tie twine or zip ties horizontally and vertically across the PVC pipes, creating a grid pattern. The closer the grid, the easier it will be for the vine to climb.
2. Use Netting: You can also wrap the structure with plastic netting or chicken wire to provide a more continuous climbing surface.
Planting Your Chayote Squash
With your vertical support system in place, it’s time to plant your chayote!
Step 1: Preparing the Container
Fill your large container with well-draining potting mix. Leave a few inches of space at the top of the container.
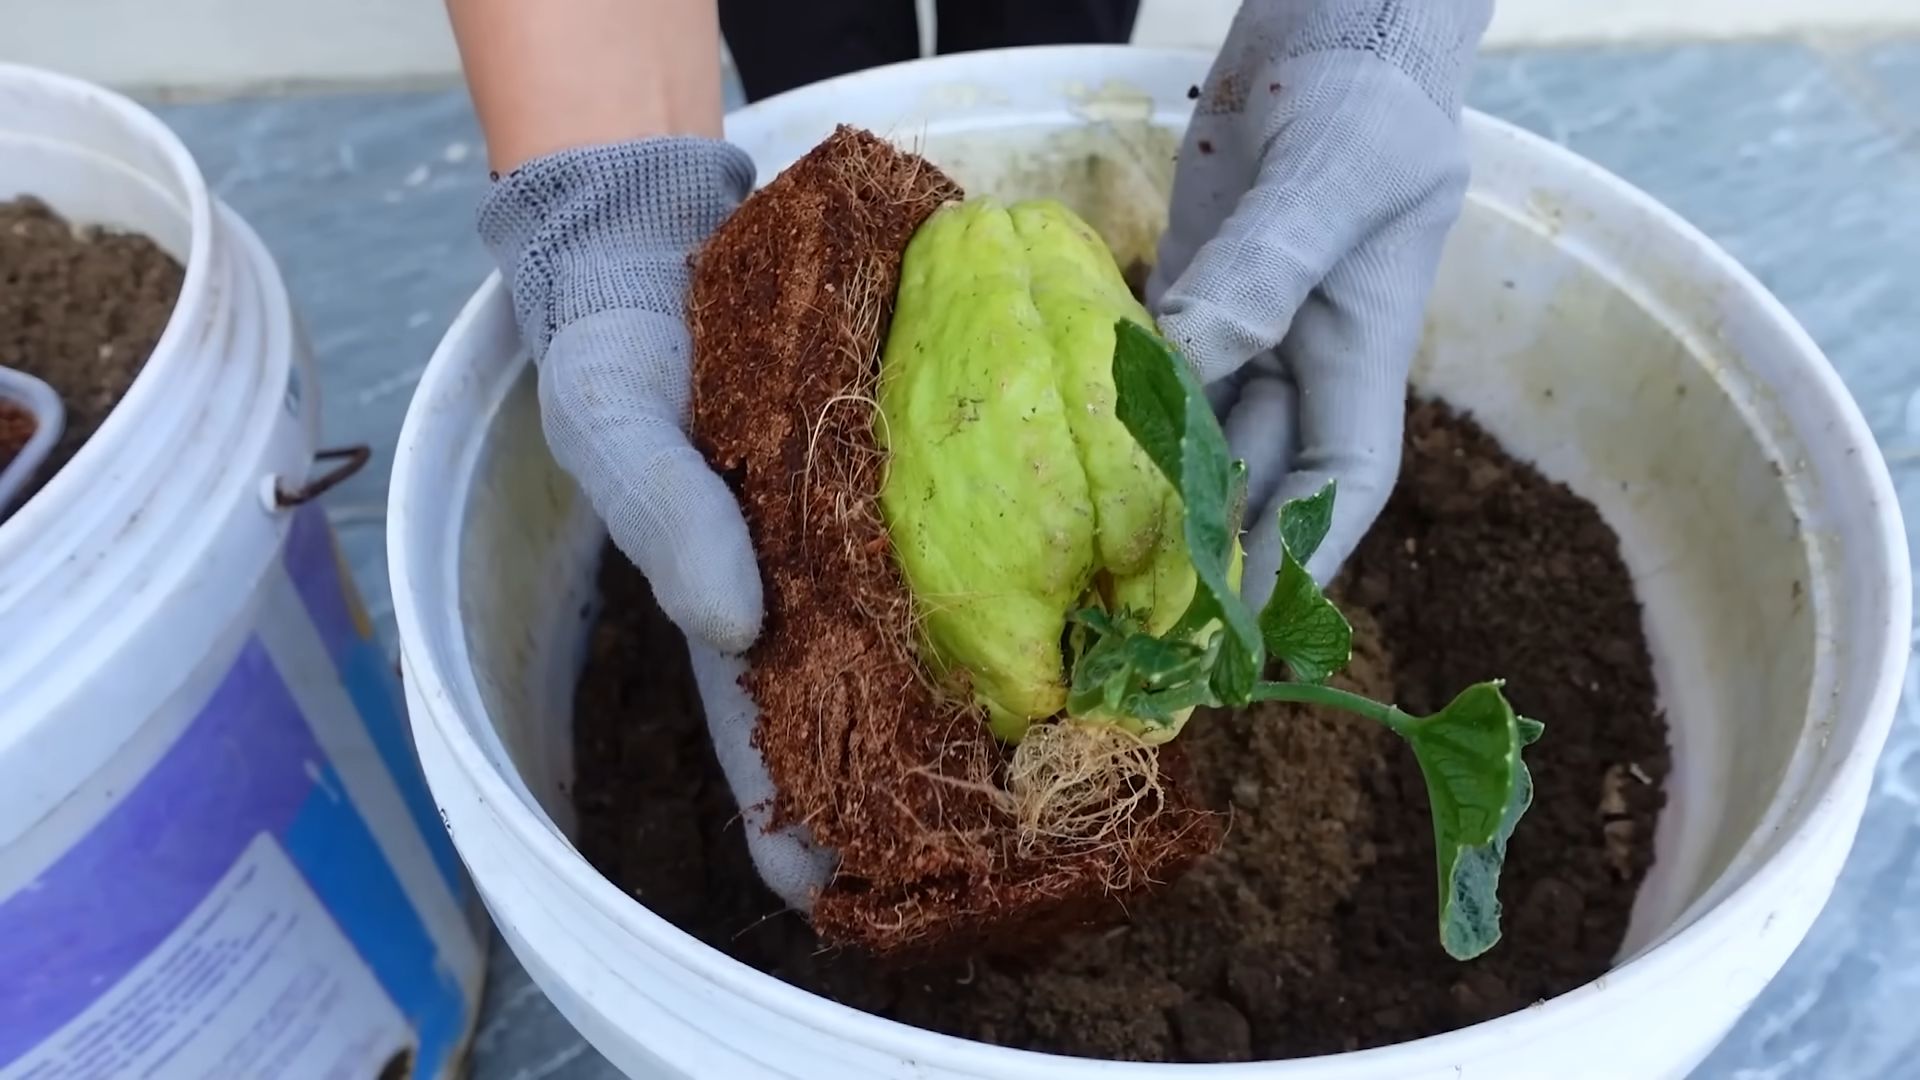
Step 2: Planting the Chayote
1. Position the Sprout: Lay the chayote squash horizontally on top of the potting mix, with the sprout facing upwards.
2. Cover Partially: Gently cover the squash with a thin layer of potting mix, leaving the sprout exposed. You don’t want to bury the entire fruit.
3. Water Thoroughly: Water the container thoroughly until water drains out of the bottom.
Step 3: Placing the Container
Position the container in a location that receives at least 6-8 hours of sunlight per day. Make sure the vertical support structure is close enough for the vine to reach.
Caring for Your Chayote Vine
Now that your chayote is planted, here’s how to keep it happy and healthy:
Watering
Chayote needs consistent moisture, especially during hot weather. Water deeply whenever the top inch of soil feels dry to the touch. Avoid overwatering, as this can lead to root rot.
Fertilizing
Feed your chayote vine every 2-3 weeks with a balanced fertilizer or compost tea. This will provide the nutrients it needs to grow and produce fruit.
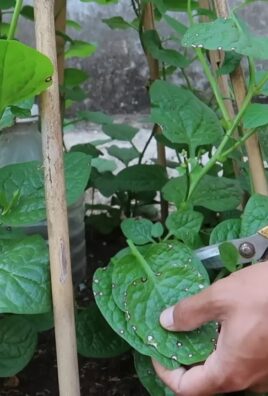
Pruning
Chayote vines can get quite long and unruly. Prune them regularly to keep them manageable and encourage fruit production. Remove any dead or diseased leaves and stems. You can also trim back the tips of the vines to encourage branching.
Training the Vine
As the vine grows, gently guide it onto the vertical support structure. Use zip ties or garden twine to secure the vine to the structure as needed.
Pest and Disease Control
Keep an eye out for pests and diseases. Common pests that affect chayote include aphids, spider mites, and squash bugs. Treat infestations with insecticidal soap or neem oil. Diseases can be prevented by providing good air circulation and avoiding overwatering.
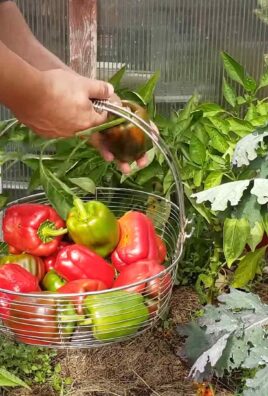
Harvesting Your Chayote Squash
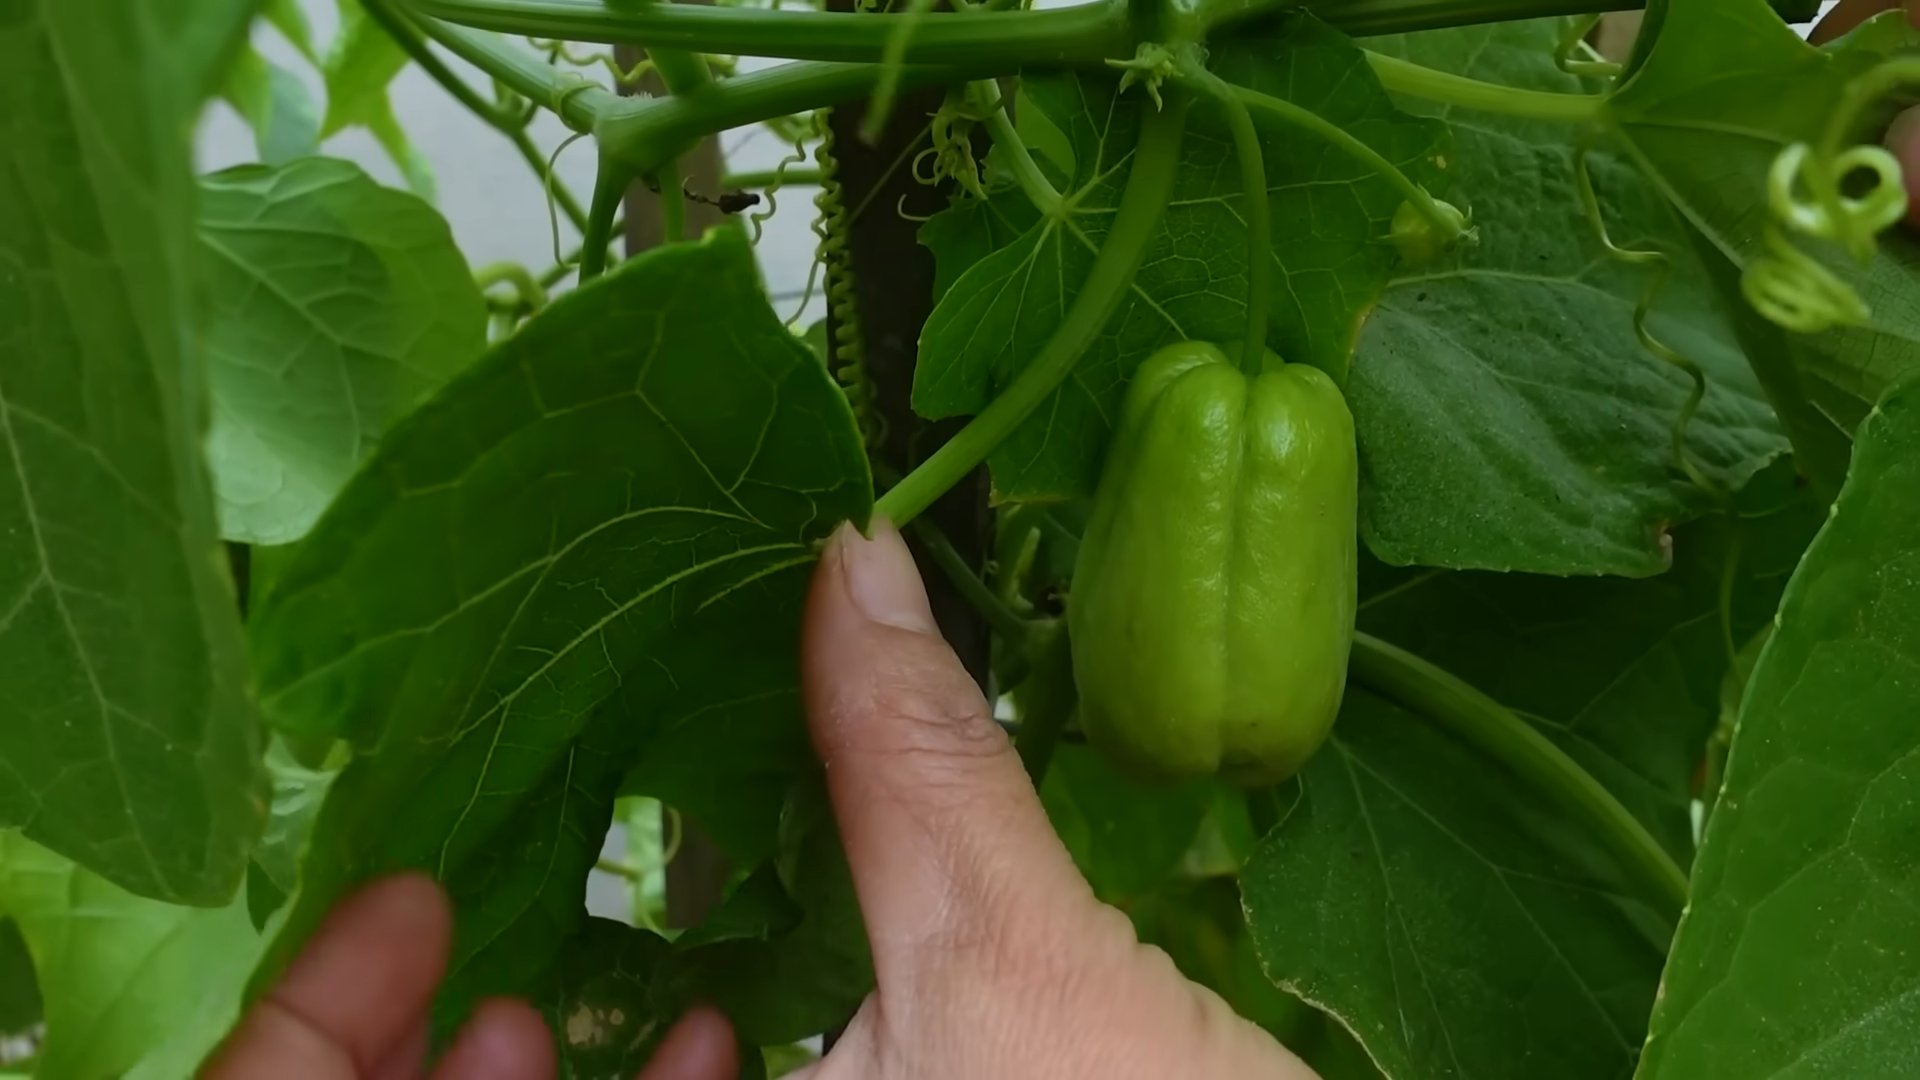
Chayote squash is typically ready to harvest in the fall, about 30-45 days after flowering. The fruits should be firm and light green in color.
1. Harvesting: Use a sharp knife or pruners to cut the squash from the vine.
2. Storage: Chayote squash can be stored in the refrigerator for several weeks.
And that’s it! With a little effort and creativity, you can
Conclusion
So, there you have it! Growing chayote in small spaces isn’t just a possibility; it’s a rewarding and surprisingly simple endeavor. We’ve walked through the steps, addressed the common concerns, and hopefully, ignited a spark of excitement for you to cultivate your own little chayote haven.
Why is this DIY trick a must-try? Because it empowers you to enjoy fresh, homegrown produce even when space is limited. Imagine the satisfaction of harvesting your own chayote squash, knowing you nurtured it from a tiny seed or sprout right in your own backyard, balcony, or even indoors. Beyond the delicious fruit, you’ll also gain a beautiful, verdant vine that can provide shade and visual appeal to your space. It’s a sustainable and fulfilling way to connect with nature, reduce your reliance on store-bought produce, and impress your friends and family with your green thumb.
But the beauty of this method lies in its adaptability. Feel free to experiment with different container sizes to see what works best for your specific space and the variety of chayote you’re growing. Consider using a self-watering container to minimize the need for frequent watering, especially during hot summer months. You can also explore different trellis designs to create a visually stunning and functional support system for your vine.
If you’re feeling adventurous, try growing chayote from different sources. You can purchase a whole chayote squash from the grocery store and sprout it, or you can obtain seeds or cuttings from a friend or local gardener. Each method offers a unique experience and can lead to slightly different results.
Don’t be afraid to get creative with your chayote cultivation. You can even try growing it indoors under grow lights if you live in a region with harsh winters. The possibilities are endless!
We wholeheartedly encourage you to embark on this chayote-growing journey. It’s a fantastic way to learn about plant propagation, connect with nature, and enjoy the delicious rewards of your labor. Remember to document your progress, take photos, and share your experiences with us and the wider gardening community. Your insights and tips can inspire others to embrace the joy of growing chayote in small spaces.
And most importantly, don’t be discouraged if you encounter challenges along the way. Gardening is a learning process, and every mistake is an opportunity to grow (pun intended!). With a little patience, persistence, and the guidance provided in this article, you’ll be well on your way to harvesting your own bountiful crop of chayote squash. So, grab your seeds, prepare your containers, and get ready to experience the magic of growing chayote in your own small space! We can’t wait to hear about your success!
FAQ
What is the best time of year to start growing chayote?
The best time to start growing chayote depends on your climate. In warmer regions with mild winters, you can start sprouting a chayote squash in late winter or early spring. This allows the plant to establish itself before the heat of summer arrives. In colder regions with shorter growing seasons, it’s best to start the sprouting process indoors about 6-8 weeks before the last expected frost. This gives the plant a head start and ensures that it has enough time to mature and produce fruit before the first frost of fall. Remember that chayote requires a long growing season, typically around 150 days, to produce a substantial harvest.
How much sunlight does chayote need?
Chayote vines thrive in full sun, requiring at least 6-8 hours of direct sunlight per day. Adequate sunlight is crucial for healthy growth, flowering, and fruit production. If you’re growing chayote indoors, supplement natural light with grow lights to ensure the plant receives sufficient illumination. Insufficient sunlight can lead to weak growth, reduced flowering, and smaller or fewer fruits.
What type of soil is best for growing chayote?
Chayote prefers well-draining, fertile soil that is rich in organic matter. A loamy soil with a slightly acidic to neutral pH (around 6.0 to 7.0) is ideal. Amend your soil with compost, aged manure, or other organic materials to improve its drainage, fertility, and water-holding capacity. Avoid heavy clay soils that can become waterlogged, as this can lead to root rot.
How often should I water my chayote plant?
Water your chayote plant regularly, especially during hot and dry weather. Keep the soil consistently moist but not waterlogged. Water deeply whenever the top inch of soil feels dry to the touch. Avoid overhead watering, as this can promote fungal diseases. Instead, water at the base of the plant, directing the water towards the roots. During periods of heavy rainfall, reduce watering frequency to prevent overwatering.
What kind of fertilizer should I use for chayote?
Chayote benefits from regular fertilization, especially during the growing season. Use a balanced fertilizer with equal amounts of nitrogen, phosphorus, and potassium (e.g., 10-10-10) or a fertilizer specifically formulated for vegetables. Apply the fertilizer according to the manufacturer’s instructions. You can also supplement with organic fertilizers such as compost tea, fish emulsion, or seaweed extract. Avoid over-fertilizing, as this can lead to excessive vegetative growth at the expense of fruit production.
How do I train my chayote vine to grow on a trellis?
Chayote vines are vigorous climbers and require a sturdy trellis or support structure to grow on. As the vine grows, gently guide the tendrils towards the trellis and encourage them to attach. You can use soft ties or clips to secure the vine to the trellis if needed. Prune the vine regularly to maintain its shape and prevent it from becoming too dense. Remove any dead or diseased leaves and stems.
How long does it take for chayote to produce fruit?
Chayote typically takes around 150 days from planting to produce mature fruit. However, the exact time can vary depending on the climate, growing conditions, and variety. In warmer regions with longer growing seasons, you may be able to harvest fruit sooner. Be patient and provide your plant with the proper care, and you’ll eventually be rewarded with a bountiful harvest.
How do I know when chayote is ripe?
Chayote is typically harvested when it is still young and tender, about 4-6 inches in length. The skin should be smooth and light green in color. Avoid harvesting chayote that is too large or has a tough skin, as it may be less flavorful. You can also test for ripeness by gently pressing on the fruit. If it feels firm and yields slightly to pressure, it is likely ripe.
Are there any pests or diseases that affect chayote?
Chayote is generally resistant to pests and diseases, but it can be susceptible to certain problems, such as aphids, spider mites, and powdery mildew. Inspect your plant regularly for signs of infestation or disease. If you notice any problems, take action promptly to control them. You can use organic pest control methods such as insecticidal soap, neem oil, or horticultural oil. For powdery mildew, improve air circulation around the plant and apply a fungicide if necessary.
Can I grow chayote in a container?
Yes, you can successfully grow chayote in a container, especially if you have limited space. Choose a large container that is at least 20 gallons in size to accommodate the plant’s extensive root system. Ensure that the container has drainage holes to prevent waterlogging. Use a well-draining potting mix that is rich in organic matter. Provide the plant with a sturdy trellis or support structure to climb on. Water and fertilize regularly, and protect the plant from extreme temperatures. Growing chayote in containers allows you to move the plant around as needed to provide optimal sunlight and protection from frost. This makes growing chayote in small spaces much easier.
Leave a Comment