

Grow Green Beans at Home – and unlock a world of fresh, flavorful possibilities right in your backyard! Imagine stepping outside and harvesting crisp, tender green beans whenever you crave them. No more trips to the grocery store for limp, overpriced produce. This isn’t just about convenience; it’s about connecting with nature, enjoying the fruits (or rather, vegetables!) of your labor, and knowing exactly where your food comes from.
The humble green bean has a rich history, cultivated for centuries across the globe. From its origins in South America to its adoption in European and Asian cuisines, the green bean has become a staple in countless diets. For generations, families have passed down secrets for cultivating the perfect bean crop, and now, I’m excited to share some of those time-tested tricks with you.
In today’s fast-paced world, many of us are seeking ways to simplify our lives and embrace a more sustainable lifestyle. Growing your own food, even on a small scale, is a fantastic way to achieve both. This DIY guide will provide you with simple, effective techniques to grow green beans at home, regardless of your gardening experience or the size of your space. Whether you have a sprawling garden or just a sunny balcony, you can enjoy the satisfaction of harvesting your own delicious green beans. Let’s get started!
Grow Green Beans at Home: A Beginner’s Guide
Hey there, fellow gardening enthusiasts! I’m so excited to share my experience with growing green beans at home. It’s surprisingly easy, incredibly rewarding, and you get the freshest, crispiest beans imaginable. Trust me, once you taste homegrown green beans, you’ll never go back to the store-bought kind.
This guide will walk you through everything you need to know, from choosing the right variety to harvesting your bounty. Let’s get our hands dirty!
Choosing Your Green Bean Variety
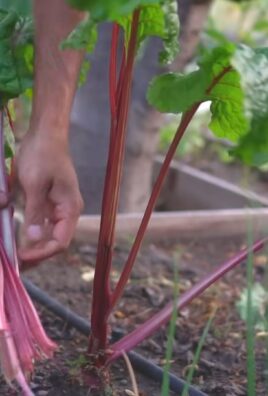
Before we dive into the nitty-gritty, let’s talk about bean varieties. There are two main types: bush beans and pole beans.
* Bush Beans: These are compact and don’t require any support. They’re perfect for smaller gardens or containers. They produce a large harvest all at once, which is great for canning or freezing.
* Pole Beans: These are vining beans that need a trellis or other support to climb. They produce beans over a longer period, giving you a steady supply throughout the season.
Here’s a quick rundown of some popular varieties:
* Bush Beans:
* Blue Lake Bush: A classic, reliable variety with excellent flavor.
* Contender: Early-maturing and very productive.
* Provider: Another early variety that’s known for its disease resistance.
* Pole Beans:
* Kentucky Wonder: A heirloom variety with a rich, beany flavor.
* Scarlet Runner: Beautiful red flowers and delicious beans. Plus, the flowers attract hummingbirds!
* Fortex: Long, slender beans with a delicate flavor.
I personally love growing Kentucky Wonder pole beans because they’re so prolific and the flavor is fantastic. But feel free to experiment and find your favorite!
Preparing Your Garden Bed
Green beans need at least 6-8 hours of sunlight per day and well-drained soil. Here’s how to get your garden bed ready:
1. Choose a Sunny Spot: Observe your garden throughout the day to identify the sunniest area.
2. Test Your Soil: A soil test will tell you the pH level and nutrient content of your soil. Green beans prefer a pH between 6.0 and 7.0. You can buy a soil testing kit at most garden centers or send a sample to your local extension office.
3. Amend the Soil: Based on your soil test results, amend the soil as needed. If your soil is too acidic, add lime. If it’s too alkaline, add sulfur. To improve drainage and fertility, mix in plenty of compost or well-rotted manure. I always add a generous amount of compost to my garden beds – it works wonders!
4. Clear the Area: Remove any weeds, rocks, or debris from the planting area.
5. Loosen the Soil: Use a garden fork or tiller to loosen the soil to a depth of at least 12 inches. This will allow the bean roots to grow easily.
6. Level the Surface: Rake the surface of the soil to create a smooth, even planting bed.
Planting Your Green Beans
Green beans are warm-season crops, so you’ll need to wait until the danger of frost has passed before planting. The soil temperature should be at least 60°F (16°C).
1. Check Your Last Frost Date: Find out the average last frost date for your area. You can usually find this information online or from your local extension office.
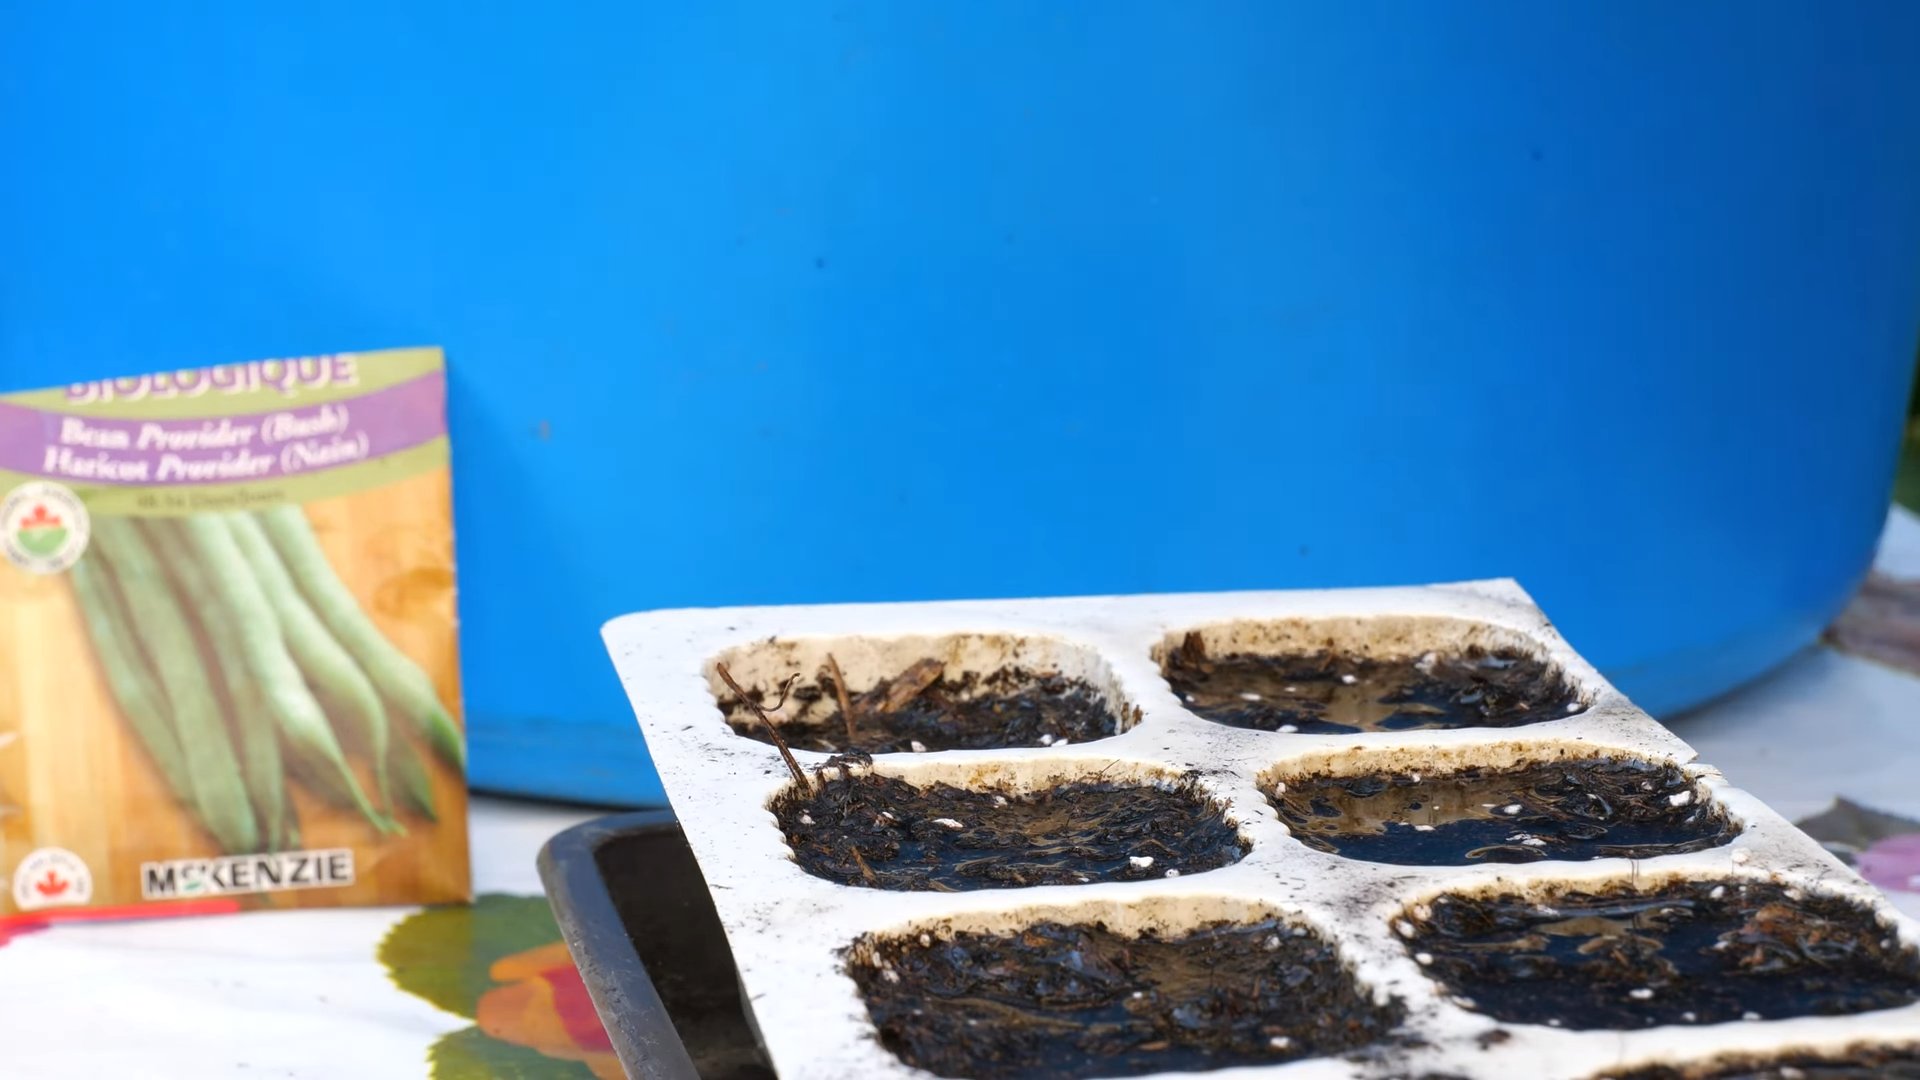
2. Sow Seeds Directly: Green beans don’t transplant well, so it’s best to sow the seeds directly into the garden.
3. Planting Bush Beans: Sow seeds 1 inch deep and 2-3 inches apart in rows that are 18-24 inches apart.
4. Planting Pole Beans: Sow seeds 1 inch deep and 4-6 inches apart at the base of your trellis or support structure.
5. Water Gently: Water the soil gently after planting to avoid disturbing the seeds.
6. Mark Your Rows: Label your rows with the variety of bean you planted and the date. This will help you keep track of your progress.
Building a Trellis for Pole Beans
If you’re growing pole beans, you’ll need to provide them with a trellis or other support to climb. There are many different ways to build a trellis, but here’s a simple and effective method:
1. Gather Your Materials: You’ll need:
* Two sturdy posts (6-8 feet tall)
* Heavy-duty wire or twine
* A hammer
* Wire cutters
2. Drive the Posts: Drive the posts into the ground at either end of your row of beans, spacing them about 6-8 feet apart. Make sure the posts are securely anchored in the ground.
3. Attach the Wire or Twine: Run the wire or twine horizontally between the posts, spacing the lines about 6-8 inches apart. Secure the wire or twine to the posts with staples or by tying knots.
4. Provide Vertical Supports: You can also add vertical supports by running wire or twine from the ground up to the horizontal lines. This will give the beans extra support as they climb.
I’ve also used bamboo poles tied together to create a teepee-style trellis, which looks really nice in the garden. Get creative and use whatever materials you have on hand!
Caring for Your Green Beans
Green beans are relatively easy to care for, but here are a few things to keep in mind:
1. Water Regularly: Green beans need consistent moisture, especially during flowering and pod development. Water deeply whenever the top inch of soil feels dry. Avoid overhead watering, as this can promote fungal diseases. I prefer to use a soaker hose or drip irrigation to water my beans.
2. Fertilize Sparingly: Green beans don’t need a lot of fertilizer. In fact, too much nitrogen can actually inhibit pod production. If your soil is poor, you can side-dress your beans with a balanced fertilizer (like 10-10-10) a few weeks after they emerge.
3. Weed Regularly: Keep the area around your beans free of weeds. Weeds c
Hey there, fellow gardening enthusiasts! I’m so excited to share my experience with growing green beans at home. It’s surprisingly easy, incredibly rewarding, and you get the freshest, crispiest beans imaginable. Trust me, once you taste homegrown green beans, you’ll never go back to the store-bought kind.
This guide will walk you through everything you need to know, from choosing the right variety to harvesting your bounty. Let’s get our hands dirty!
Choosing Your Green Bean Variety
Before we dive into the nitty-gritty, let’s talk about bean varieties. There are two main types: bush beans and pole beans.
* Bush Beans: These are compact and don’t require any support. They’re perfect for smaller gardens or containers. They produce a large harvest all at once, which is great for canning or freezing.
* Pole Beans: These are vining beans that need a trellis or other support to climb. They produce beans over a longer period, giving you a steady supply throughout the season.
Here’s a quick rundown of some popular varieties:
* Bush Beans:
* Blue Lake Bush: A classic, reliable variety with excellent flavor.
* Contender: Early-maturing and very productive.
* Provider: Another early variety that’s known for its disease resistance.
* Pole Beans:
* Kentucky Wonder: A heirloom variety with a rich, beany flavor.
* Scarlet Runner: Beautiful red flowers and delicious beans. Plus, the flowers attract hummingbirds!
* Fortex: Long, slender beans with a delicate flavor.
I personally love growing Kentucky Wonder pole beans because they’re so prolific and the flavor is fantastic. But feel free to experiment and find your favorite!
Preparing Your Garden Bed
Green beans need at least 6-8 hours of sunlight per day and well-drained soil. Here’s how to get your garden bed ready:
1. Choose a Sunny Spot: Observe your garden throughout the day to identify the sunniest area.
2. Test Your Soil: A soil test will tell you the pH level and nutrient content of your soil. Green beans prefer a pH between 6.0 and 7.0. You can buy a soil testing kit at most garden centers or send a sample to your local extension office.
3. Amend the Soil: Based on your soil test results, amend the soil as needed. If your soil is too acidic, add lime. If it’s too alkaline, add sulfur. To improve drainage and fertility, mix in plenty of compost or well-rotted manure. I always add a generous amount of compost to my garden beds – it works wonders!
4. Clear the Area: Remove any weeds, rocks, or debris from the planting area.
5. Loosen the Soil: Use a garden fork or tiller to loosen the soil to a depth of at least 12 inches. This will allow the bean roots to grow easily.
6. Level the Surface: Rake the surface of the soil to create a smooth, even planting bed.
Planting Your Green Beans
Green beans are warm-season crops, so you’ll need to wait until the danger of frost has passed before planting. The soil temperature should be at least 60°F (16°C).
1. Check Your Last Frost Date: Find out the average last frost date for your area. You can usually find this information online or from your local extension office.
2. Sow Seeds Directly: Green beans don’t transplant well, so it’s best to sow the seeds directly into the garden.
3. Planting Bush Beans: Sow seeds 1 inch deep and 2-3 inches apart in rows that are 18-24 inches apart.
4. Planting Pole Beans: Sow seeds 1 inch deep and 4-6 inches apart at the base of your trellis or support structure.
5. Water Gently: Water the soil gently after planting to avoid disturbing the seeds.
6. Mark Your Rows: Label your rows with the variety of bean you planted and the date. This will help you keep track of your progress.
Building a Trellis for Pole Beans
If you’re growing pole beans, you’ll need to provide them with a trellis or other support to climb. There are many different ways to build a trellis, but here’s a simple and effective method:
1. Gather Your Materials: You’ll need:
* Two sturdy posts (6-8 feet tall)
* Heavy-duty wire or twine
* A hammer
* Wire cutters
2. Drive the Posts: Drive the posts into the ground at either end of your row of beans, spacing them about 6-8 feet apart. Make sure the posts are securely anchored in the ground.
3. Attach the Wire or Twine: Run the wire or twine horizontally between the posts, spacing the lines about 6-8 inches apart. Secure the wire or twine to the posts with staples or by tying knots.
4. Provide Vertical Supports: You can also add vertical supports by running wire or twine from the ground up to the horizontal lines. This will give the beans extra support as they climb.
I’ve also used bamboo poles tied together to create a teepee-style trellis, which looks really nice in the garden. Get creative and use whatever materials you have on hand!
Caring for Your Green Beans
Green beans are relatively easy to care for, but here are a few things to keep in mind:
1. Water Regularly: Green beans need consistent moisture, especially during flowering and pod development. Water deeply whenever the top inch of soil feels dry. Avoid overhead watering, as this can promote fungal diseases. I prefer to use a soaker hose or drip irrigation to water my beans.
2. Fertilize Sparingly: Green beans don’t need a lot of fertilizer. In fact, too much nitrogen can actually inhibit pod production. If your soil is poor, you can side-dress your beans with a balanced fertilizer (like 10-10-10) a few weeks after they emerge.
3. Weed Regularly: Keep the area around your beans free of weeds. Weeds compete with the beans for water and nutrients. Hand-pull weeds carefully to avoid disturbing the bean roots.
4. Pest Control: Green beans can be susceptible to pests like aphids, bean beetles, and spider mites. Inspect your plants regularly for signs of infestation. You can usually control these pests with insecticidal soap or neem oil. I try to use organic pest control methods whenever possible.
5. Disease Prevention: To prevent fungal diseases, avoid overhead watering and ensure good air circulation around your plants. If you notice any signs of disease, such as yellowing leaves or spots on the pods, remove the affected plants immediately.
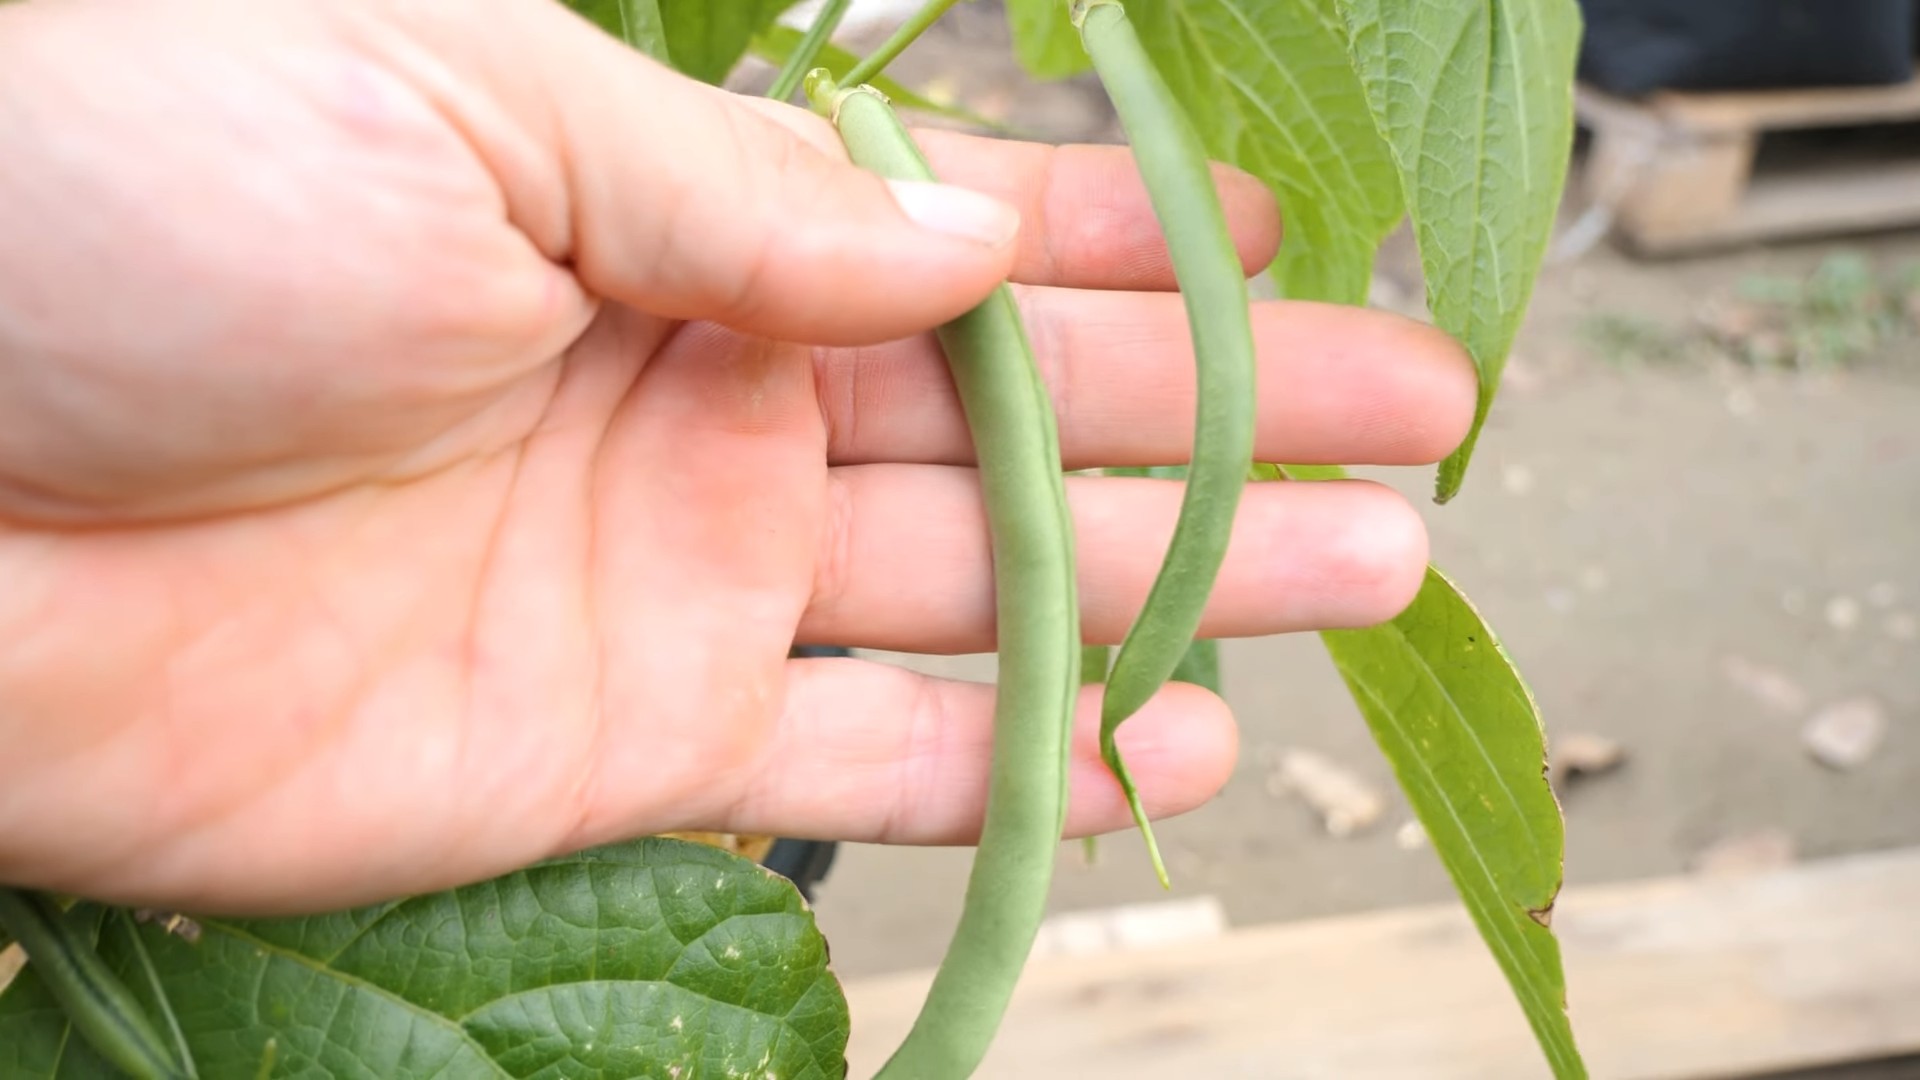
Harvesting Your Green Beans
The moment you’ve been waiting for! Green beans are usually ready to harvest about 50-60 days after planting.
1. Check for Readiness: The pods should be firm, crisp, and snap easily when bent. They should also be the right size for the variety you’re growing.
2. Harvest Regularly: Harvest your beans every few days to encourage continued production.
3. Pick Carefully: Gently snap the beans off the plant, being careful not to damage the stems or leaves.
4. Enjoy Your Harvest: Freshly harvested green beans are best eaten right away. You can also store them in the refrigerator for up to a week.
Dealing with Common Problems
Even with the best care, you might encounter some problems while growing green beans. Here are a few common issues and how to address them:
* Poor Germination: If your bean seeds aren’t germinating, it could be due to cold soil, poor quality seeds, or overwatering. Make sure the soil temperature is at least 60°F (16°C) before planting. Use fresh, high-quality seeds. And avoid overwatering the soil, as this can cause the seeds to rot.
* Yellowing Leaves: Yellowing leaves can be a sign of nutrient deficiency, disease, or pest infestation. Check your soil pH and nutrient levels. Inspect your plants for signs of pests or diseases.
* Lack of Pods: If your bean plants are growing well but not producing pods, it could be due to hot weather, poor pollination, or too much nitrogen fertilizer. Green beans prefer temperatures between 65°F and 80°F (18°C and 27°C). Avoid over-fertilizing with nitrogen.
* Bean Beetles: These pests can quickly defoliate your bean plants. Hand-pick the beetles off the plants or use insecticidal soap or neem oil.
Extending the Harvest
Want to enjoy fresh green beans all season long? Here are a few tips for extending your harvest
Conclusion
So, there you have it! Growing green beans at home is not only achievable, but it’s also incredibly rewarding. From the satisfying crunch of a freshly picked bean to the vibrant green hues brightening your dinner plate, the experience is truly unmatched. We’ve walked you through the process, highlighting the ease and simplicity of cultivating these delicious legumes right in your own backyard or even on your balcony.
Why is this DIY trick a must-try? Because it puts you in control. You know exactly what goes into your food – no pesticides, no questionable growing practices, just pure, homegrown goodness. Plus, it’s a fantastic way to connect with nature, teach children about where their food comes from, and reduce your carbon footprint. Think about the joy of serving a meal featuring green beans you nurtured from tiny seeds!
But the fun doesn’t stop there. Feel free to experiment with different varieties of green beans. Bush beans are perfect for smaller spaces and offer a concentrated harvest, while pole beans climb trellises and provide a continuous supply throughout the season. Consider trying heirloom varieties like ‘Kentucky Wonder’ for a unique flavor profile or ‘Purple Queen’ for a visually stunning addition to your garden. You can also explore companion planting. Marigolds deter pests, while nasturtiums attract aphids away from your precious green beans.
Don’t be afraid to get creative with your supports for pole beans! A simple bamboo teepee, a repurposed ladder, or even a decorative obelisk can add a touch of whimsy to your garden while providing the necessary structure for your beans to thrive.
And remember, the key to successful green bean cultivation lies in consistent watering, well-drained soil, and plenty of sunlight. Keep an eye out for common pests like aphids and bean beetles, and address them promptly with organic solutions like insecticidal soap or neem oil.
We are confident that you will enjoy the process of growing green beans at home. It’s a simple, satisfying, and delicious way to connect with nature and enjoy the fruits (or rather, vegetables!) of your labor.
So, grab some seeds, prepare your soil, and get ready to experience the joy of homegrown green beans. We encourage you to try this DIY trick and share your experiences with us! Let us know what varieties you’re growing, what challenges you’ve faced, and what delicious dishes you’ve created with your homegrown bounty. Share your photos and stories in the comments below – we can’t wait to see your green bean gardens flourish! Happy gardening!
Frequently Asked Questions (FAQ)
What is the best time of year to plant green beans?
The ideal time to plant green beans is after the last frost in spring, when the soil has warmed to at least 60°F (15°C). Green beans are sensitive to cold temperatures, so planting too early can stunt their growth or even kill them. In most regions, this means planting in late spring or early summer. For a continuous harvest, consider succession planting, sowing new seeds every two to three weeks throughout the growing season. This will ensure a steady supply of fresh green beans for your table. Check your local climate data for specific frost dates to determine the best planting time for your area.
How much sunlight do green beans need?
Green beans require at least six to eight hours of direct sunlight per day to thrive. Insufficient sunlight can lead to leggy growth, reduced yields, and increased susceptibility to diseases. Choose a planting location that receives full sun throughout the day. If you’re growing green beans in containers, make sure to place them in a sunny spot on your patio or balcony. If you live in a particularly hot climate, providing some afternoon shade can help prevent the plants from overheating.
What kind of soil is best for growing green beans?
Green beans prefer well-drained, fertile soil with a pH between 6.0 and 7.0. Amend your soil with compost or other organic matter to improve drainage and fertility. Avoid heavy clay soils, as they can become waterlogged and inhibit root growth. Before planting, loosen the soil to a depth of at least 12 inches to allow for proper root development. A soil test can help you determine the pH and nutrient levels of your soil and identify any amendments that may be needed.
How often should I water green beans?
Green beans need consistent moisture to produce a good harvest. Water deeply and regularly, especially during hot, dry weather. Aim to keep the soil consistently moist but not waterlogged. Water at the base of the plants to avoid wetting the foliage, which can increase the risk of fungal diseases. Mulching around the plants can help retain moisture and suppress weeds. A good rule of thumb is to water when the top inch of soil feels dry to the touch.
Do green beans need fertilizer?
While green beans don’t require heavy fertilization, providing them with a balanced fertilizer at planting time can help promote healthy growth. Choose a fertilizer that is relatively low in nitrogen, as excessive nitrogen can lead to lush foliage but fewer beans. A fertilizer with a higher phosphorus and potassium content is ideal. You can also side-dress your green beans with compost tea or fish emulsion every few weeks during the growing season. Avoid over-fertilizing, as this can damage the plants.
What are some common pests and diseases that affect green beans?
Common pests that affect green beans include aphids, bean beetles, and spider mites. Aphids can be controlled with insecticidal soap or neem oil. Bean beetles can be hand-picked or treated with Bacillus thuringiensis (Bt). Spider mites can be controlled with a strong spray of water or horticultural oil. Common diseases that affect green beans include powdery mildew, rust, and bean mosaic virus. Powdery mildew can be prevented by ensuring good air circulation and avoiding overhead watering. Rust can be treated with a fungicide. Bean mosaic virus is best prevented by using disease-resistant varieties.
How do I know when green beans are ready to harvest?
Green beans are typically ready to harvest about 50 to 60 days after planting. The beans should be firm, crisp, and snap easily when bent. Avoid letting the beans become too large or tough, as they will lose their flavor and texture. Harvest green beans regularly to encourage continued production. The more you pick, the more the plants will produce.
Can I grow green beans in containers?
Yes, green beans can be successfully grown in containers. Choose a container that is at least 12 inches deep and wide to allow for adequate root growth. Use a well-draining potting mix and provide the plants with plenty of sunlight and water. Bush bean varieties are generally better suited for container growing than pole bean varieties, as they require less space. If you’re growing pole beans in containers, provide them with a trellis or other support structure to climb on.
How do I save seeds from my green bean plants?
To save seeds from your green bean plants, allow some of the pods to mature fully on the vine. The pods will turn brown and dry out. Once the pods are completely dry, remove the seeds and store them in an airtight container in a cool, dry place. Be sure to label the container with the variety of green bean and the date of harvest. Only save seeds from open-pollinated varieties, as hybrid varieties will not produce true-to-type seeds.
Are there any companion plants that are beneficial for green beans?
Yes, several companion plants can benefit green beans. Marigolds deter pests, while nasturtiums attract aphids away from the green beans. Rosemary and thyme can also help repel pests. Corn provides a natural trellis for pole beans to climb on. Avoid planting green beans near onions or garlic, as they can inhibit growth.
Leave a Comment