

Grow Peas Indoors Successfully? Absolutely! Imagine harvesting fresh, sweet peas right from your windowsill, even when the snow is falling outside. It sounds like a dream, right? Well, it’s a dream that can easily become a reality with a few simple tricks and a little bit of know-how. For centuries, humans have cultivated peas, tracing back to ancient civilizations in the Middle East. They were initially grown for their dried seeds, but over time, we discovered the joy of eating the tender, green pods and sweet, juicy peas inside.
But why bother growing peas indoors? Well, for starters, it extends your growing season, allowing you to enjoy fresh peas much earlier than you would with outdoor planting. Plus, it’s a fantastic way to add a touch of green to your home and connect with nature, especially during those long winter months. I know I always feel a sense of accomplishment when I nurture a plant from seed to harvest, and growing peas indoors is no exception. It’s also a great solution for those with limited outdoor space or challenging climates.
This DIY guide will walk you through everything you need to grow peas indoors successfully, from selecting the right varieties to providing the perfect growing conditions. We’ll cover essential tips and tricks to ensure a bountiful harvest. So, grab your gardening gloves, and let’s get started on this exciting indoor gardening adventure!
Growing Peas Indoors: A Comprehensive DIY Guide
Hey there, fellow plant enthusiasts! Ever dreamt of enjoying fresh, homegrown peas even when the weather outside is frightful? Well, dream no more! I’m here to guide you through the surprisingly simple process of growing peas indoors. Trust me, it’s easier than you think, and the reward of snapping into a sweet, crunchy pea you nurtured yourself is absolutely worth it.
Choosing the Right Pea Variety
Before we dive into the nitty-gritty, let’s talk about pea varieties. Not all peas are created equal, especially when it comes to indoor growing. We need to choose varieties that are compact and don’t require extensive support. Here are my top recommendations:
* Dwarf Varieties: These are your best bet! Look for names like ‘Little Marvel,’ ‘Tom Thumb,’ or ‘Sugar Ann.’ They typically reach only 1-2 feet in height, making them perfect for containers.
* Bush Varieties: These are also a good option, growing in a bush-like form rather than vining. ‘Alaska’ is a popular bush variety that does well indoors.
* Avoid Vining Varieties: While you *can* technically grow vining varieties indoors, it requires a lot more effort and space. Varieties like ‘Sugar Snap’ or ‘Oregon Sugar Pod’ can grow quite tall and need substantial trellising. If you’re a beginner, stick with the dwarf or bush types.
Gathering Your Supplies
Okay, now that we’ve chosen our pea variety, let’s gather our supplies. Here’s what you’ll need:
* Pea Seeds: Obviously! Make sure you purchase seeds from a reputable source to ensure good germination rates.
* Containers: Choose containers that are at least 6 inches deep and wide. Peas have relatively shallow roots, but they still need enough space to grow. I prefer using plastic pots with drainage holes, but terracotta pots work too (just be mindful that they dry out faster).
* Potting Mix: Use a high-quality potting mix that’s well-draining. Avoid using garden soil, as it can become compacted and doesn’t provide adequate drainage. I like to use a mix specifically formulated for vegetables.
* Watering Can or Spray Bottle: For gentle watering.
* Grow Lights (Optional but Recommended): While peas can grow near a sunny window, grow lights will significantly improve their growth and yield, especially during the winter months.
* Small Trellis or Support (Optional): Even dwarf varieties can benefit from a little support, especially as they start producing pods. You can use small bamboo stakes, twigs, or even chopsticks.
* Seed Starting Tray (Optional): If you prefer to start your seeds indoors before transplanting them to larger containers.
Step-by-Step Planting Guide
Alright, let’s get our hands dirty! Here’s a step-by-step guide to planting your pea seeds:
1. Soak the Seeds (Optional but Recommended): Soaking your pea seeds in water for 24 hours before planting can significantly improve germination rates. Just place the seeds in a bowl of water and let them sit overnight.
2. Prepare Your Containers: Fill your containers with potting mix, leaving about an inch of space at the top. Gently pat down the soil to remove any air pockets.
3. Sow the Seeds: Make small holes about 1 inch deep and 2 inches apart. Place one or two seeds in each hole. If you’re using a seed starting tray, plant one seed per cell.
4. Cover the Seeds: Gently cover the seeds with potting mix and lightly pat down the soil.
5. Water Thoroughly: Water the soil thoroughly until it’s evenly moist but not soggy.
6. Provide Light and Warmth: Place your containers in a warm location with plenty of light. If you’re using grow lights, position them a few inches above the soil surface. The ideal temperature for germination is between 60-70°F (15-21°C).
Germination and Early Growth
Now comes the waiting game! Here’s what to expect during the germination and early growth stages:
* Germination: Pea seeds typically germinate within 7-14 days, depending on the temperature and moisture levels. Keep the soil consistently moist during this time.
* Thinning (If Necessary): If you planted two seeds per hole and both germinate, you’ll need to thin them out, keeping the strongest seedling. Gently snip off the weaker seedling at the soil line.
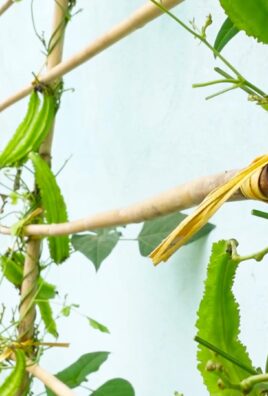
* Providing Support: Once your pea plants reach a few inches in height, you can start providing support. Insert small bamboo stakes or twigs into the soil near the plants and gently tie the stems to the supports with twine or plant ties.
* Watering: Water your pea plants regularly, keeping the soil consistently moist but not soggy. Avoid overwatering, as this can lead to root rot. Check the soil moisture by sticking your finger into the soil. If the top inch feels dry, it’s time to water.
* Fertilizing: Peas are relatively light feeders, but they can benefit from a light feeding of fertilizer every few weeks. Use a balanced liquid fertilizer diluted to half strength.
Light and Temperature Requirements
Light and temperature are crucial for successful indoor pea growing. Here’s what you need to know:
* Light: Peas need at least 6-8 hours of direct sunlight per day. If you don’t have a sunny window, grow lights are essential. Use full-spectrum LED grow lights for best results. Position the lights a few inches above the plants and adjust them as the plants grow.
* Temperature: Peas prefer cooler temperatures, ideally between 60-70°F (15-21°C). Avoid placing them near heat sources, such as radiators or vents.
Watering and Humidity
Proper watering and humidity levels are essential for healthy pea plants.
* Watering: Water your pea plants regularly, keeping the soil consistently moist but not soggy. Avoid overwatering, as this can lead to root rot. Check the soil moisture by sticking your finger into the soil. If the top inch feels dry, it’s time to water. Water at the base of the plant to avoid wetting the foliage, which can increase the risk of fungal diseases.
* Humidity: Peas prefer moderate humidity levels. If your indoor air is very dry, you can increase the humidity by placing a tray of water near the plants or using a humidifier.
Pest and Disease Management
While indoor pea plants are generally less susceptible to pests and diseases than outdoor plants, it’s still important to be vigilant.
* Common Pests: Aphids and spider mites are the most common pests that can affect indoor pea plants. Check your plants regularly for signs of infestation, such as small insects on the leaves or webbing. If you find pests, you can try washing them off with a strong stream of water or using insecticidal soap.
* Common Diseases: Powdery mildew and root rot are the most common diseases that can affect indoor pea plants. Powdery mildew is a fungal disease that causes a white, powdery coating on the leaves. To prevent powdery mildew, ensure good air circulation and avoid wetting the foliage. Root rot is caused by overwatering and poor drainage. To prevent root rot, use well-draining potting mix and avoid overwatering.
* Prevention is Key: The best way to prevent pests and diseases is to provide your pea plants with optimal growing conditions. This includes providing adequate light, water, and nutrients, as well as ensuring good air circulation.
Harvesting Your Peas
The moment we’ve all been waiting for! Here’s how to harvest your peas:
* Timing: The time it takes for peas to mature depends on the variety and growing conditions. Generally, you can expect to start harvesting peas about 60-70 days after planting.
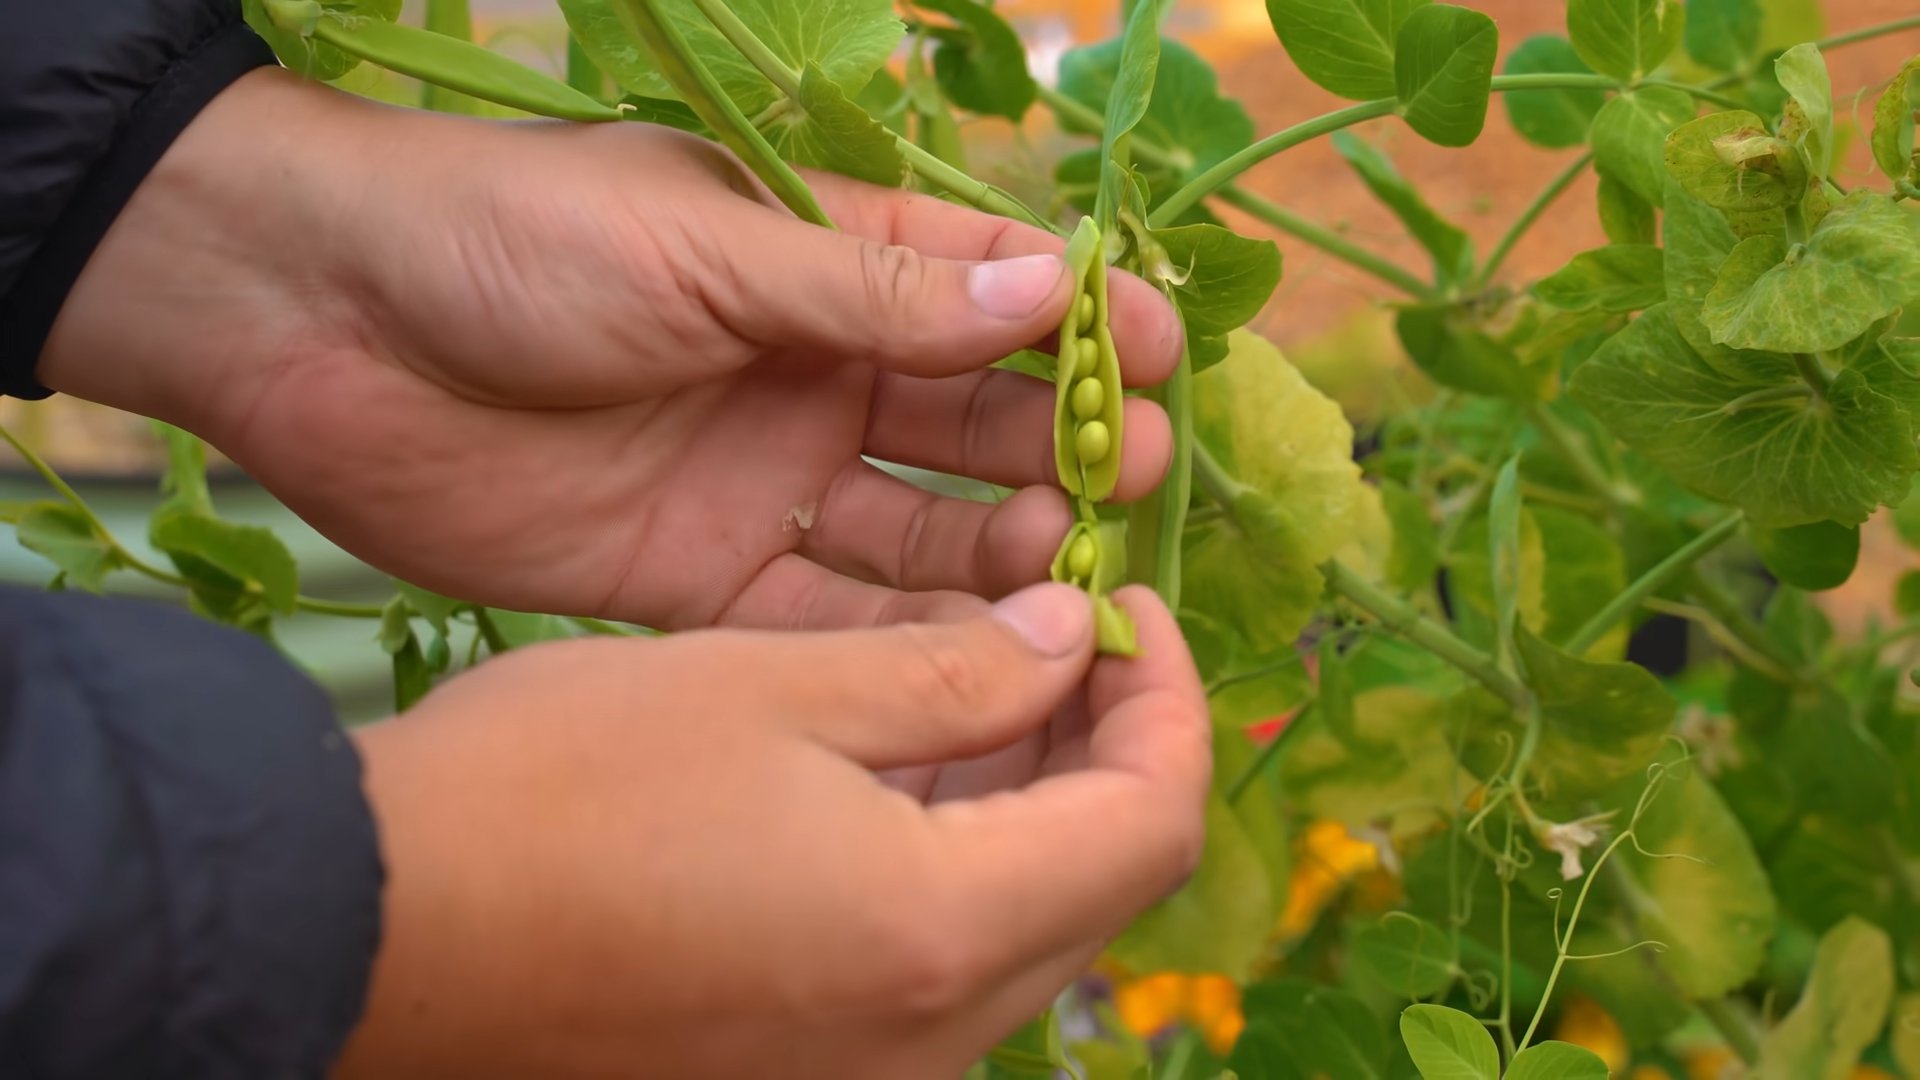
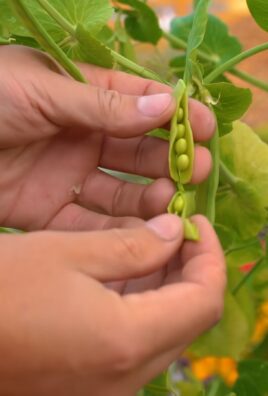
* Harvesting: Harvest your peas when the pods are plump and filled with peas. Snap peas can be harvested when the pods are still relatively flat, but the peas inside are starting to develop. Shelling peas should be harvested when the pods are fully rounded and the peas are large and well-formed.
* How to Harvest: Gently snap the pods off the plant, being careful not to damage the stems. Harvest regularly to encourage continued production.
* Enjoy! Enjoy your fresh, homegrown peas raw, cooked, or frozen for later use.
Troubleshooting Common Issues
Even with the best care, you might encounter some issues while growing peas indoors. Here are some common problems and how to fix them:
* Poor Germination: If your pea seeds aren’t germinating, make sure the soil is consistently moist and the temperature is warm enough. You can also try soaking the seeds in water for 24 hours before planting.
* Yellowing Leaves: Yellowing leaves can be a sign of overwatering, underwatering, or nutrient deficiency. Check the soil moisture and adjust your watering accordingly.

Conclusion
So, there you have it! Growing peas indoors successfully is not only achievable, but it’s also a rewarding experience that brings a touch of spring into your home, regardless of the season. We’ve walked through the essential steps, from selecting the right pea variety and providing adequate light to ensuring proper watering and support. This DIY trick is a must-try for several compelling reasons.
First and foremost, it extends the growing season, allowing you to enjoy fresh, homegrown peas long before (or after) you could typically harvest them outdoors. Imagine the satisfaction of adding sweet, crisp peas to your winter salads or spring stir-fries, all thanks to your indoor garden. Secondly, it offers a fantastic way to engage with nature, even when space is limited. Whether you live in an apartment, condo, or simply want to supplement your outdoor garden, indoor pea growing provides a tangible connection to the natural world. Finally, it’s a budget-friendly way to enjoy fresh produce. Store-bought peas can be expensive, especially out of season. Growing your own allows you to control the quality and cost, ensuring you have access to delicious, healthy peas whenever you crave them.
But the fun doesn’t stop there! Feel free to experiment with different pea varieties. Consider trying snow peas for their edible pods, sugar snap peas for their plump, juicy sweetness, or even dwarf varieties specifically bred for container gardening. You can also explore different support structures. While we suggested trellises or stakes, you could also use netting or even repurposed materials like branches or twigs for a more rustic look. Another variation is to try companion planting. Consider planting herbs like mint or rosemary alongside your peas to deter pests and enhance their flavor. You can also try planting radishes in the same container, as they mature quickly and can help break up the soil.
Don’t be afraid to get creative and personalize your indoor pea garden to suit your preferences and available space. The most important thing is to provide your peas with the basic necessities: ample light, consistent moisture, and adequate support.
We are confident that with a little effort and attention, you can enjoy a bountiful harvest of fresh, homegrown peas right in your own home. So, grab your seeds, gather your supplies, and get ready to embark on this exciting gardening adventure.
We encourage you to try this DIY trick and share your experience with us! Let us know what varieties you tried, what challenges you encountered, and what successes you celebrated. Share your photos and tips in the comments below. We can’t wait to hear about your indoor pea-growing journey! Happy gardening!
Frequently Asked Questions (FAQ)
1. What are the best pea varieties to grow indoors?
The best pea varieties for indoor growing are typically bush or dwarf varieties, as they don’t require as much vertical space as vining types. Some excellent choices include:
* ‘Little Marvel’: A classic dwarf variety that produces sweet, flavorful peas.
* ‘Sugar Ann’: An early-maturing snap pea variety that’s perfect for snacking.
* ‘Tom Thumb’: An ultra-compact variety that’s ideal for small containers.
* ‘Snowbird’: A snow pea variety that produces abundant, flat pods.
* ‘Patio Pride’: A bush pea variety specifically bred for container gardening.
When selecting your pea variety, consider your available space, desired flavor profile, and preferred pod type (e.g., shelling, snap, or snow).
2. How much light do indoor peas need?
Peas require a significant amount of light to thrive indoors. Ideally, they need at least 6-8 hours of direct sunlight per day. If you don’t have a sunny window, you’ll need to supplement with artificial lighting. Full-spectrum LED grow lights are an excellent option, as they provide the necessary wavelengths for healthy plant growth. Position the grow lights a few inches above the plants and adjust as they grow taller. Insufficient light can lead to leggy growth, reduced yields, and pale foliage.
3. What type of soil should I use for growing peas indoors?
Use a well-draining potting mix that’s rich in organic matter. Avoid using garden soil, as it can be too heavy and may contain pests or diseases. A good potting mix will provide adequate drainage, aeration, and nutrients for your pea plants. You can also amend the potting mix with compost or worm castings to further enhance its fertility.
4. How often should I water my indoor pea plants?
Water your pea plants regularly, keeping the soil consistently moist but not waterlogged. Check the soil moisture level daily and water when the top inch feels dry to the touch. Avoid overwatering, as this can lead to root rot. Ensure that your containers have drainage holes to allow excess water to escape. The frequency of watering will depend on factors such as temperature, humidity, and pot size.
5. Do indoor peas need support?
Yes, most pea varieties, especially vining types, require support to climb. Provide a trellis, stakes, netting, or other support structure for your pea plants to grow on. This will help to keep the plants upright, improve air circulation, and prevent the pods from touching the soil. You can purchase pre-made trellises or create your own using bamboo stakes, wire, or twine.
6. How do I fertilize my indoor pea plants?
Peas are relatively light feeders, but they will benefit from occasional fertilization. Use a balanced liquid fertilizer diluted to half strength every 2-3 weeks. Avoid over-fertilizing, as this can lead to excessive foliage growth at the expense of pod production. You can also amend the soil with compost or worm castings to provide a slow-release source of nutrients.
7. How long does it take for peas to mature indoors?
The time it takes for peas to mature indoors depends on the variety and growing conditions. Generally, it takes about 60-70 days from planting to harvest. However, some early-maturing varieties may be ready in as little as 50 days. Pay attention to the seed packet instructions for specific maturity times.
8. How do I know when my peas are ready to harvest?
Harvest your peas when the pods are plump and filled with peas. The pods should be firm and bright green. For snap peas, harvest when the pods are fully developed but still tender. For snow peas, harvest when the pods are flat and the peas are just beginning to develop. Regular harvesting will encourage the plants to produce more pods.
9. What are some common pests and diseases that affect indoor peas?
Common pests that can affect indoor peas include aphids, spider mites, and whiteflies. Regularly inspect your plants for signs of infestation and take action promptly. You can use insecticidal soap, neem oil, or other organic pest control methods to control these pests. Diseases that can affect indoor peas include powdery mildew and root rot. Ensure good air circulation and avoid overwatering to prevent these diseases.
10. Can I grow peas indoors year-round?
Yes, you can grow peas indoors year-round, provided you can provide them with adequate light and consistent temperatures. However, you may need to adjust your growing practices depending on the season. For example, you may need to provide supplemental lighting during the winter months and ensure good ventilation during the summer months. With proper care, you can enjoy fresh, homegrown peas all year long.
Leave a Comment