

Growing kale without a garden? Absolutely! Forget the sprawling backyard; I’m here to tell you that fresh, vibrant kale is totally achievable, even if your “garden” is just a sunny windowsill or a small balcony. For centuries, kale has been a nutritional powerhouse, gracing tables from peasant kitchens to royal feasts. Its hardy nature made it a staple crop, easily grown and providing essential vitamins and minerals, especially during colder months.
But let’s be honest, not everyone has the space or the time for a traditional garden. That’s where these clever DIY tricks come in! Imagine snipping fresh kale leaves for your morning smoothie, knowing you grew them yourself, right in your apartment. No more trips to the grocery store for wilted greens! This article is packed with simple, effective methods for growing kale without a garden, using readily available materials and minimal effort. I’ll show you how to transform containers, repurpose household items, and create the perfect environment for your kale to thrive, no matter how limited your space. So, ditch the garden envy and get ready to cultivate your own little kale oasis!
Growing Kale Indoors: A Beginner’s Guide to Leafy Greens in Your Kitchen
Hey there, fellow plant enthusiasts! So, you’re itching to grow some kale but don’t have a garden? No problem! I’m here to tell you that you can absolutely cultivate this nutritional powerhouse right inside your home. It’s easier than you think, and I’m going to walk you through every step. Get ready to enjoy fresh, homegrown kale, even without a backyard!
What You’ll Need
Before we dive in, let’s gather our supplies. Here’s a checklist of everything you’ll need to successfully grow kale indoors:
- Kale Seeds: Choose your favorite variety! Dwarf Blue Curled Vates and Red Russian are popular choices for indoor growing because they tend to stay smaller.
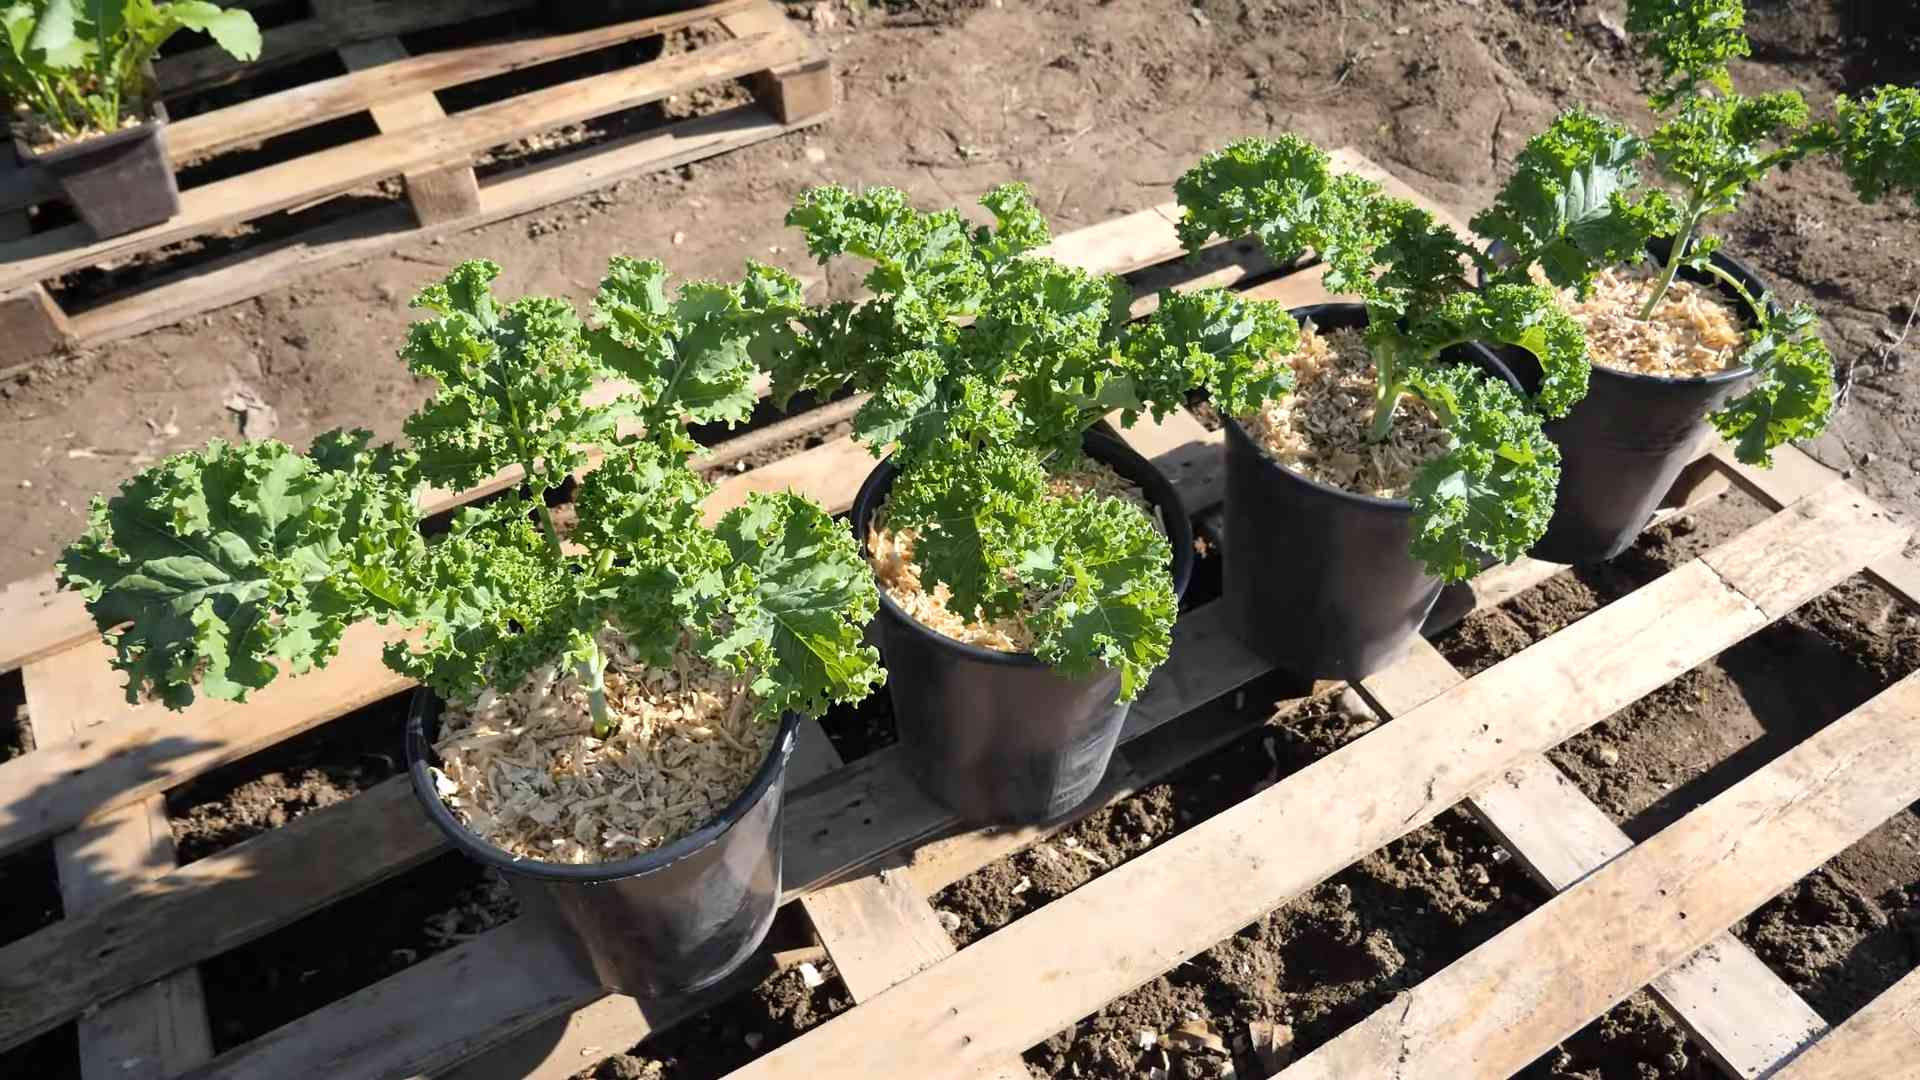
- Containers: You’ll need containers with drainage holes. I recommend starting with small pots (around 4 inches) for seedlings and then transplanting to larger pots (at least 8 inches) as they grow.
- Potting Mix: Use a high-quality potting mix that’s well-draining. Avoid garden soil, as it can compact and hinder growth.
- Grow Lights (Optional but Recommended): Kale needs a lot of light, so if you don’t have a sunny windowsill, grow lights are essential.
- Watering Can or Spray Bottle: For gentle watering.
- Fertilizer: A balanced liquid fertilizer (like 10-10-10) will provide the necessary nutrients.
- Seed Starting Tray (Optional): If you want to start a lot of seeds at once.
Phase 1: Starting Your Kale Seeds
This is where the magic begins! We’re going to get those tiny kale seeds to sprout and become little seedlings.
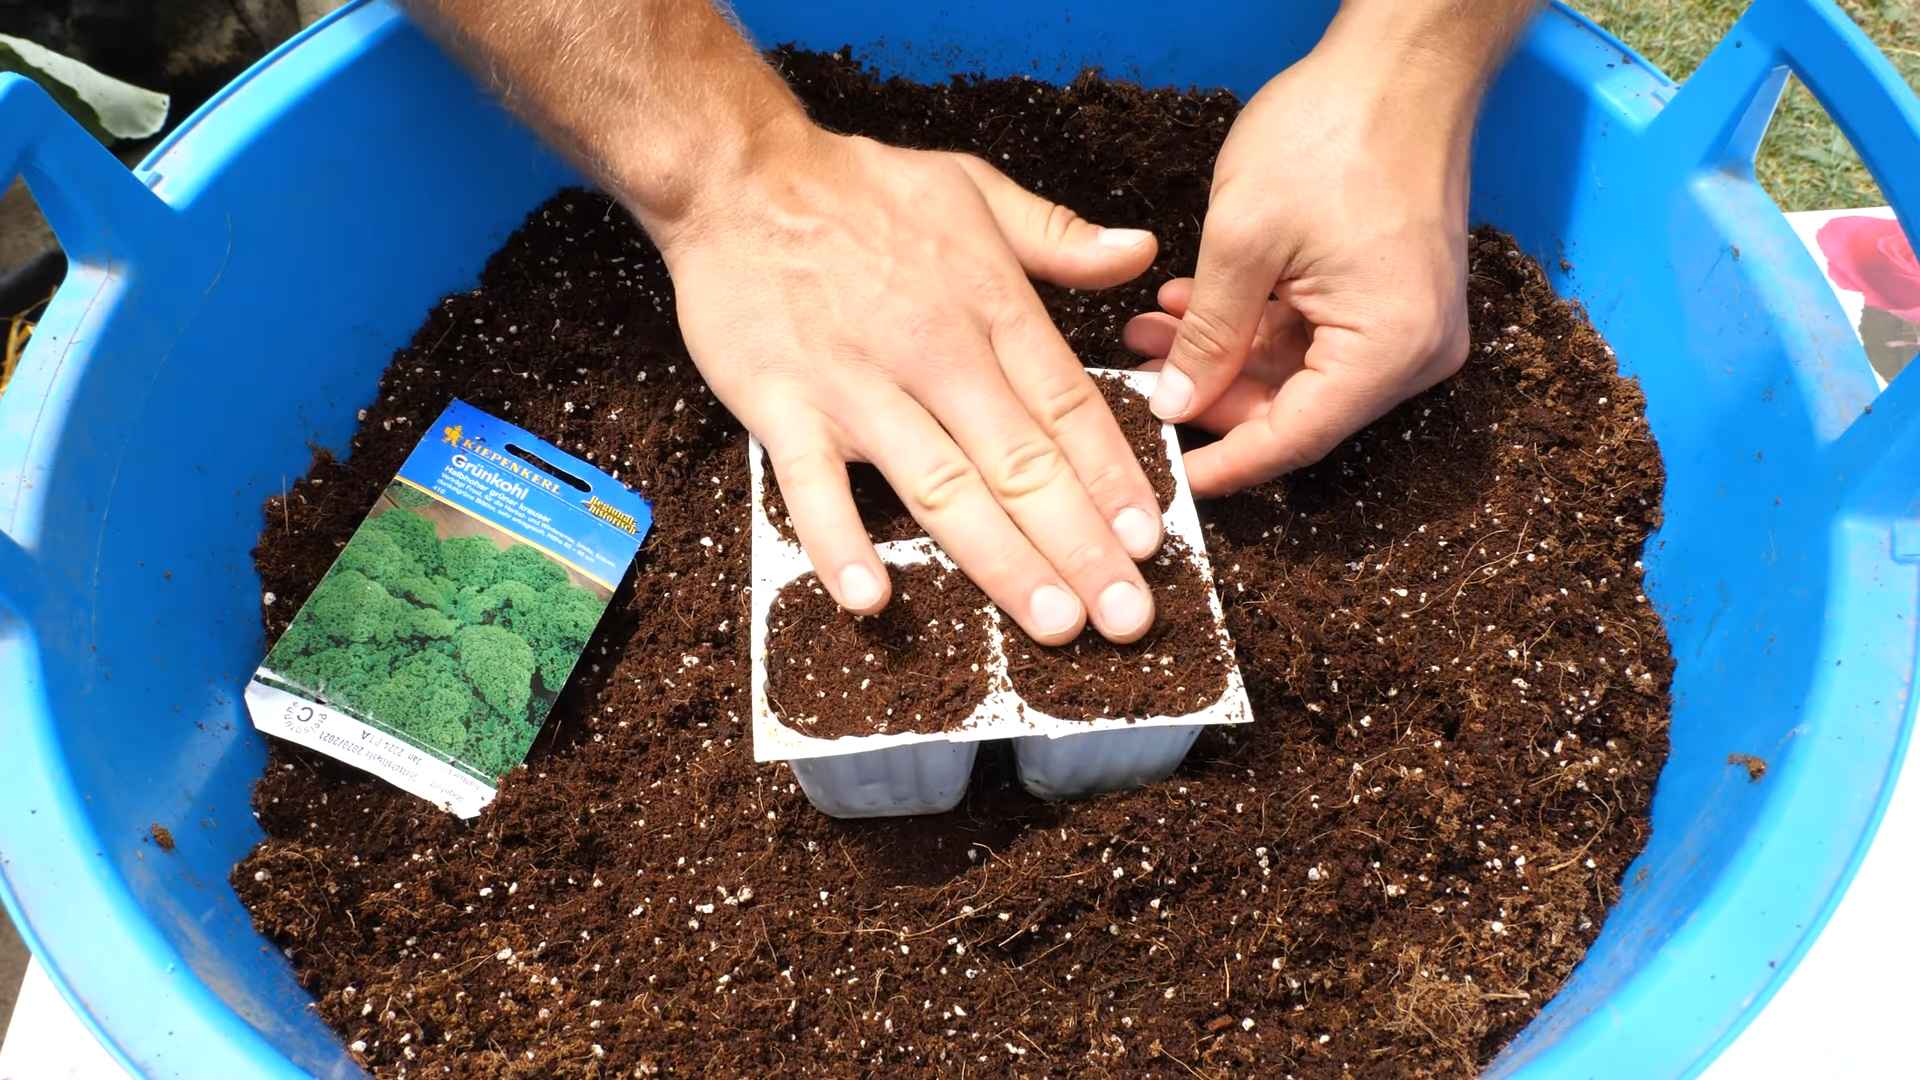
- Prepare Your Seed Starting Tray or Small Pots: Fill your seed starting tray or small pots with potting mix, leaving about half an inch of space at the top. Gently pat down the soil.
- Sow the Seeds: Sprinkle 2-3 kale seeds per cell or pot. Cover them with a thin layer (about ¼ inch) of potting mix.
- Water Gently: Use a spray bottle or watering can with a gentle nozzle to moisten the soil. You want it damp, not soggy.
- Provide Warmth and Light: Kale seeds germinate best in temperatures between 65-75°F (18-24°C). Place your seed starting tray or pots in a warm location. If you’re using grow lights, position them a few inches above the soil surface.
- Keep the Soil Moist: Check the soil daily and water as needed to keep it consistently moist. Don’t let it dry out!
- Wait for Germination: Kale seeds typically germinate in 5-10 days. Be patient!
Phase 2: Nurturing Your Kale Seedlings
Once your seeds have sprouted, it’s time to give those little seedlings some extra TLC.
- Thin the Seedlings: Once the seedlings have their first true leaves (the second set of leaves that appear after the initial seed leaves), thin them out, leaving only the strongest seedling in each cell or pot. Snip off the weaker seedlings at the soil line with scissors.
- Provide Adequate Light: Kale seedlings need at least 6 hours of direct sunlight per day. If you don’t have a sunny windowsill, use grow lights. Position the lights a few inches above the seedlings and adjust as they grow. I usually keep my grow lights on for about 14-16 hours a day.
- Water Regularly: Water the seedlings when the top inch of soil feels dry to the touch. Avoid overwatering, as this can lead to root rot.
- Fertilize Sparingly: Once the seedlings are a few weeks old, start fertilizing them with a diluted liquid fertilizer every 2-3 weeks. Follow the instructions on the fertilizer label. I usually use half the recommended strength.
Phase 3: Transplanting Your Kale
As your seedlings grow, they’ll need more space to thrive. It’s time to transplant them into larger pots.
- Choose Larger Pots: Select pots that are at least 8 inches in diameter. Make sure they have drainage holes.
- Prepare the Pots: Fill the larger pots with fresh potting mix, leaving about an inch of space at the top.
- Carefully Remove the Seedlings: Gently loosen the soil around the seedlings in their small pots. Carefully lift them out, being careful not to damage the roots.
- Transplant the Seedlings: Place each seedling in the center of a larger pot. Fill in around the roots with potting mix, gently patting it down.
- Water Thoroughly: Water the transplanted seedlings thoroughly.
- Provide Support (Optional): If your kale plants start to get tall and leggy, you can provide support with stakes or tomato cages.
Phase 4: Ongoing Care and Harvesting
Now that your kale is happily growing in its larger pot, it’s time to focus on ongoing care and, eventually, harvesting!
- Light: Continue to provide ample light, either from a sunny windowsill or grow lights. Kale needs at least 6 hours of direct sunlight per day.
- Watering: Water your kale plants when the top inch of soil feels dry to the touch. Avoid overwatering.
- Fertilizing: Continue to fertilize your kale plants every 2-3 weeks with a diluted liquid fertilizer.
- Temperature: Kale prefers cooler temperatures, ideally between 60-70°F (15-21°C). Avoid placing your plants near heat sources.
- Pest Control: Keep an eye out for pests like aphids, spider mites, and whiteflies. If you spot any, you can try spraying them with insecticidal soap or neem oil. I’ve found that a strong blast of water from the sink can also dislodge many pests.
- Harvesting: You can start harvesting kale leaves when they are about 4-6 inches long. Harvest the outer leaves first, leaving the inner leaves to continue growing. Simply snip off the leaves with scissors or a knife.
- Succession Planting: To ensure a continuous supply of kale, consider succession planting. Start new seeds every few weeks.
Troubleshooting Tips
Even with the best care, you might encounter a few challenges along the way. Here are some common problems and how to address them:
- Leggy Growth: If your kale plants are tall and spindly, they’re likely not getting enough light. Move them to a sunnier location or provide supplemental light with grow lights.
- Yellowing Leaves: Yellowing leaves can indicate overwatering, underwatering, or nutrient deficiencies. Check the soil moisture and adjust your watering accordingly. If the soil is consistently moist, you might be overwatering. If it’s dry, you need to water more often. Also, make sure you’re fertilizing regularly.
- Pest Infestations: As mentioned earlier, keep an eye out for pests. Insecticidal soap, neem oil, and a strong blast of water can help control infestations.
- Slow Growth: Slow growth can be caused by a variety of factors, including insufficient light, poor soil, or lack of nutrients. Make sure your kale plants are getting enough light, water, and fertilizer. You might also want to consider repotting them with fresh potting mix.
Choosing the Right Kale Variety
While you can grow almost any kale variety indoors, some are better suited than others. Here are a few of my favorites:
- Dwarf Blue Curled Vates: This is a compact variety that’s perfect for containers. It has a mild flavor and is very productive.
- Red Russian: This variety has beautiful red-veined leaves and a slightly sweeter flavor than other kales. It’s also relatively compact.
- Lacinato (Dinosaur Kale): While this variety can get quite large, you can still grow it indoors if you have a large enough container. It has dark green, bumpy leaves and a slightly nutty flavor.
Enjoying Your Homegrown Kale
Now for the best part – enjoying the fruits (or rather, leaves) of your labor! Freshly harvested kale is incredibly versatile. Here are just a few ideas:
- Salads: Massage kale leaves with olive oil and lemon juice to soften them before adding them to salads.
- Smoothies: Add a handful of kale to your favorite smoothie for a nutritional boost.
- Soups and Stews: Kale
Conclusion
So, there you have it! Growing kale without a garden is not only possible, it’s surprisingly simple and incredibly rewarding. We’ve walked you through the steps, from choosing the right container and soil to nurturing your leafy greens and harvesting your bounty. But why is this DIY trick a must-try?
Firstly, it democratizes access to fresh, healthy kale. No longer are you limited by the size of your yard or the availability of garden space. Even if you live in a small apartment with just a sunny balcony, you can enjoy the vibrant taste and nutritional benefits of homegrown kale. Imagine stepping outside your door and snipping off a handful of fresh leaves for your morning smoothie or a quick salad. That’s the power of container gardening.
Secondly, it’s a fantastic way to connect with nature and learn about the growing process. There’s something deeply satisfying about nurturing a plant from seed to harvest. It’s a mindful activity that can reduce stress and bring a sense of calm to your day. Plus, it’s a great educational opportunity for kids (and adults!) to learn about where their food comes from.
Thirdly, it’s incredibly cost-effective. Buying kale at the grocery store can add up, especially if you’re a regular consumer. By growing your own, you can significantly reduce your grocery bill and enjoy a constant supply of fresh, organic greens.
But the benefits don’t stop there. Container gardening allows for greater control over the growing environment. You can easily move your kale plants to follow the sun, protect them from harsh weather, and monitor them for pests and diseases. This means you can often achieve better results than you would in a traditional garden.
Ready to take your kale growing to the next level? Consider these variations:
* Experiment with different kale varieties: From curly kale to dinosaur kale (lacinato) to Russian kale, there’s a whole world of kale flavors and textures to explore. Try growing a few different varieties side-by-side to see which ones you prefer.
* Companion planting: Plant herbs like rosemary, sage, or thyme alongside your kale to deter pests and enhance the flavor of your greens. Marigolds are also a great choice for pest control.
* Succession planting: Plant new kale seeds every few weeks to ensure a continuous harvest throughout the growing season.
* Vertical gardening: If you’re short on space, consider using a vertical planter to grow your kale. This is a great way to maximize your growing area and add a touch of greenery to your balcony or patio.
* Hydroponics: For the adventurous gardener, try growing kale hydroponically. This method involves growing plants without soil, using a nutrient-rich water solution.Ultimately, the best way to learn is by doing. So, grab a container, some soil, and some kale seeds, and get started! Don’t be afraid to experiment and make mistakes. That’s all part of the learning process.
We’re confident that you’ll be amazed at how easy and rewarding it is to grow your own kale without a garden. We encourage you to try this DIY trick and share your experience with us. Post photos of your kale plants on social media using the hashtag #ContainerKale and let us know what you’ve learned. We can’t wait to see your green thumbs in action! Happy growing!
Frequently Asked Questions (FAQ)
What kind of container is best for growing kale?
The ideal container for growing kale should be at least 12 inches deep and 12 inches wide. This provides enough space for the roots to grow and spread. You can use plastic pots, terracotta pots, fabric pots, or even repurposed containers like buckets or tubs. Just make sure the container has drainage holes to prevent waterlogging. Dark-colored containers can heat up quickly in the sun, so opt for lighter colors or consider placing them in a shaded area during the hottest part of the day. Fabric pots are a great option as they allow for excellent drainage and aeration, promoting healthy root growth.
What type of soil should I use for container-grown kale?
Kale thrives in well-draining, nutrient-rich soil. Avoid using garden soil, as it can be too heavy and compacted for container gardening. Instead, opt for a high-quality potting mix specifically formulated for vegetables. You can also amend your potting mix with compost or other organic matter to improve its fertility and drainage. A good mix would be equal parts of potting soil, compost, and perlite or vermiculite. Perlite and vermiculite help to improve drainage and aeration, preventing the soil from becoming waterlogged.
How much sunlight does kale need?
Kale needs at least 6 hours of sunlight per day to thrive. Choose a location that receives full sun for most of the day. If you live in a hot climate, provide some afternoon shade to prevent the leaves from scorching. If you don’t have a sunny spot, you can supplement with grow lights. LED grow lights are a great option as they are energy-efficient and provide the full spectrum of light that plants need to grow.
How often should I water my kale plants?
Water your kale plants regularly, especially during hot, dry weather. The soil should be consistently moist but not waterlogged. Check the soil moisture by sticking your finger about an inch into the soil. If it feels dry, it’s time to water. Water deeply, allowing the water to drain out of the drainage holes. Avoid watering the leaves, as this can promote fungal diseases. Drip irrigation or soaker hoses are a great way to water kale plants efficiently and prevent water from splashing on the leaves.
How do I fertilize my kale plants?
Kale is a heavy feeder, so it needs regular fertilization to stay healthy and productive. Use a balanced fertilizer specifically formulated for vegetables. You can use a slow-release fertilizer at planting time, followed by liquid fertilizer every few weeks. Alternatively, you can use organic fertilizers like compost tea or fish emulsion. Follow the instructions on the fertilizer package carefully to avoid over-fertilizing. Over-fertilizing can lead to excessive leaf growth and reduced flavor.
What are some common pests and diseases that affect kale?
Common pests that affect kale include aphids, cabbage worms, flea beetles, and slugs. You can control these pests with organic methods like hand-picking, insecticidal soap, or neem oil. Row covers can also be used to protect your plants from pests. Common diseases that affect kale include powdery mildew, downy mildew, and black rot. Prevent these diseases by providing good air circulation, avoiding overhead watering, and removing any infected leaves.
When and how do I harvest kale?
You can start harvesting kale leaves when they are about 6-8 inches long. Harvest the outer leaves first, leaving the inner leaves to continue growing. You can harvest kale leaves continuously throughout the growing season. To harvest, simply snip off the leaves with a pair of scissors or garden shears. Avoid tearing the leaves, as this can damage the plant. Kale leaves are best eaten fresh, but they can also be stored in the refrigerator for up to a week.
Can I grow kale indoors?
Yes, you can grow kale indoors, but it requires a lot of light. You’ll need to provide at least 6 hours of direct sunlight per day or supplement with grow lights. Choose a sunny windowsill or set up a grow light system. Make sure the container has drainage holes and use a well-draining potting mix. Water regularly and fertilize every few weeks.
Is kale a cool-season crop?
Yes, kale is a cool-season crop, meaning it grows best in cooler temperatures. It can tolerate frost and even light snow. In fact, the flavor of kale often improves after a frost. You can plant kale in the spring or fall. In areas with mild winters, you can even grow kale throughout the winter.
Can I grow kale from seed?
Yes, you can easily grow kale from seed. Start seeds indoors 6-8 weeks before the last frost or direct sow them in the garden after the last frost. Sow seeds about 1/4 inch deep and keep the soil moist. Seedlings will emerge in about 7-10 days. Thin seedlings to about 12 inches apart.

Leave a Comment