

Growing Turnips in Containers might sound like a challenge, but trust me, it’s easier than you think! Have you ever dreamed of stepping outside your door and harvesting fresh, peppery turnips for a delicious salad or hearty stew? Well, dream no more! This DIY guide will unlock the secrets to cultivating these root vegetables right on your patio, balcony, or even a sunny windowsill.
Turnips have a rich history, dating back to ancient times, and have been a staple food source in many cultures. From the humble peasant’s fare to a symbol of resilience during times of scarcity, the turnip has proven its worth. But you don’t need acres of farmland to enjoy this versatile vegetable.
In today’s fast-paced world, access to fresh, healthy produce can be a struggle. That’s where growing turnips in containers comes in! This DIY trick offers a fantastic solution for urban dwellers, apartment residents, or anyone with limited garden space. Imagine the satisfaction of knowing exactly where your food comes from, free from harmful pesticides and bursting with flavor. Plus, it’s a fun and rewarding hobby that connects you with nature, even in the heart of the city. So, let’s dive in and discover how to grow your own delicious turnips, one container at a time!
Growing Turnips in Containers: A Beginner’s Guide
Hey there, fellow gardening enthusiasts! Ever thought about growing your own turnips but don’t have a sprawling garden? Well, I’m here to tell you that you absolutely can cultivate these root veggies in containers! It’s easier than you might think, and I’m going to walk you through every step of the process. Get ready to enjoy fresh, homegrown turnips straight from your patio or balcony!
Choosing the Right Container and Soil
First things first, let’s talk about the essentials: the container and the soil. These are crucial for a successful turnip harvest.
* Container Size: Turnips need room to grow downwards. I recommend a container that’s at least 12 inches deep and 12 inches in diameter. A larger container is always better, as it gives the roots more space to develop. You can even use a rectangular planter if you want to grow multiple turnips together.
* Drainage: This is non-negotiable! Make sure your container has drainage holes. Turnips hate soggy soil, and poor drainage can lead to root rot. If your container doesn’t have drainage holes, you can drill some yourself.
* Soil: Turnips thrive in well-draining, fertile soil. I like to use a mix of potting soil, compost, and perlite. The potting soil provides a good base, the compost adds nutrients, and the perlite improves drainage. Avoid using garden soil directly in your containers, as it can become compacted and doesn’t drain well.
Planting Your Turnip Seeds
Now for the fun part: planting the seeds!
1. Prepare the Soil: Fill your container with your chosen soil mix, leaving about an inch or two of space at the top. Gently pat down the soil to remove any large air pockets.
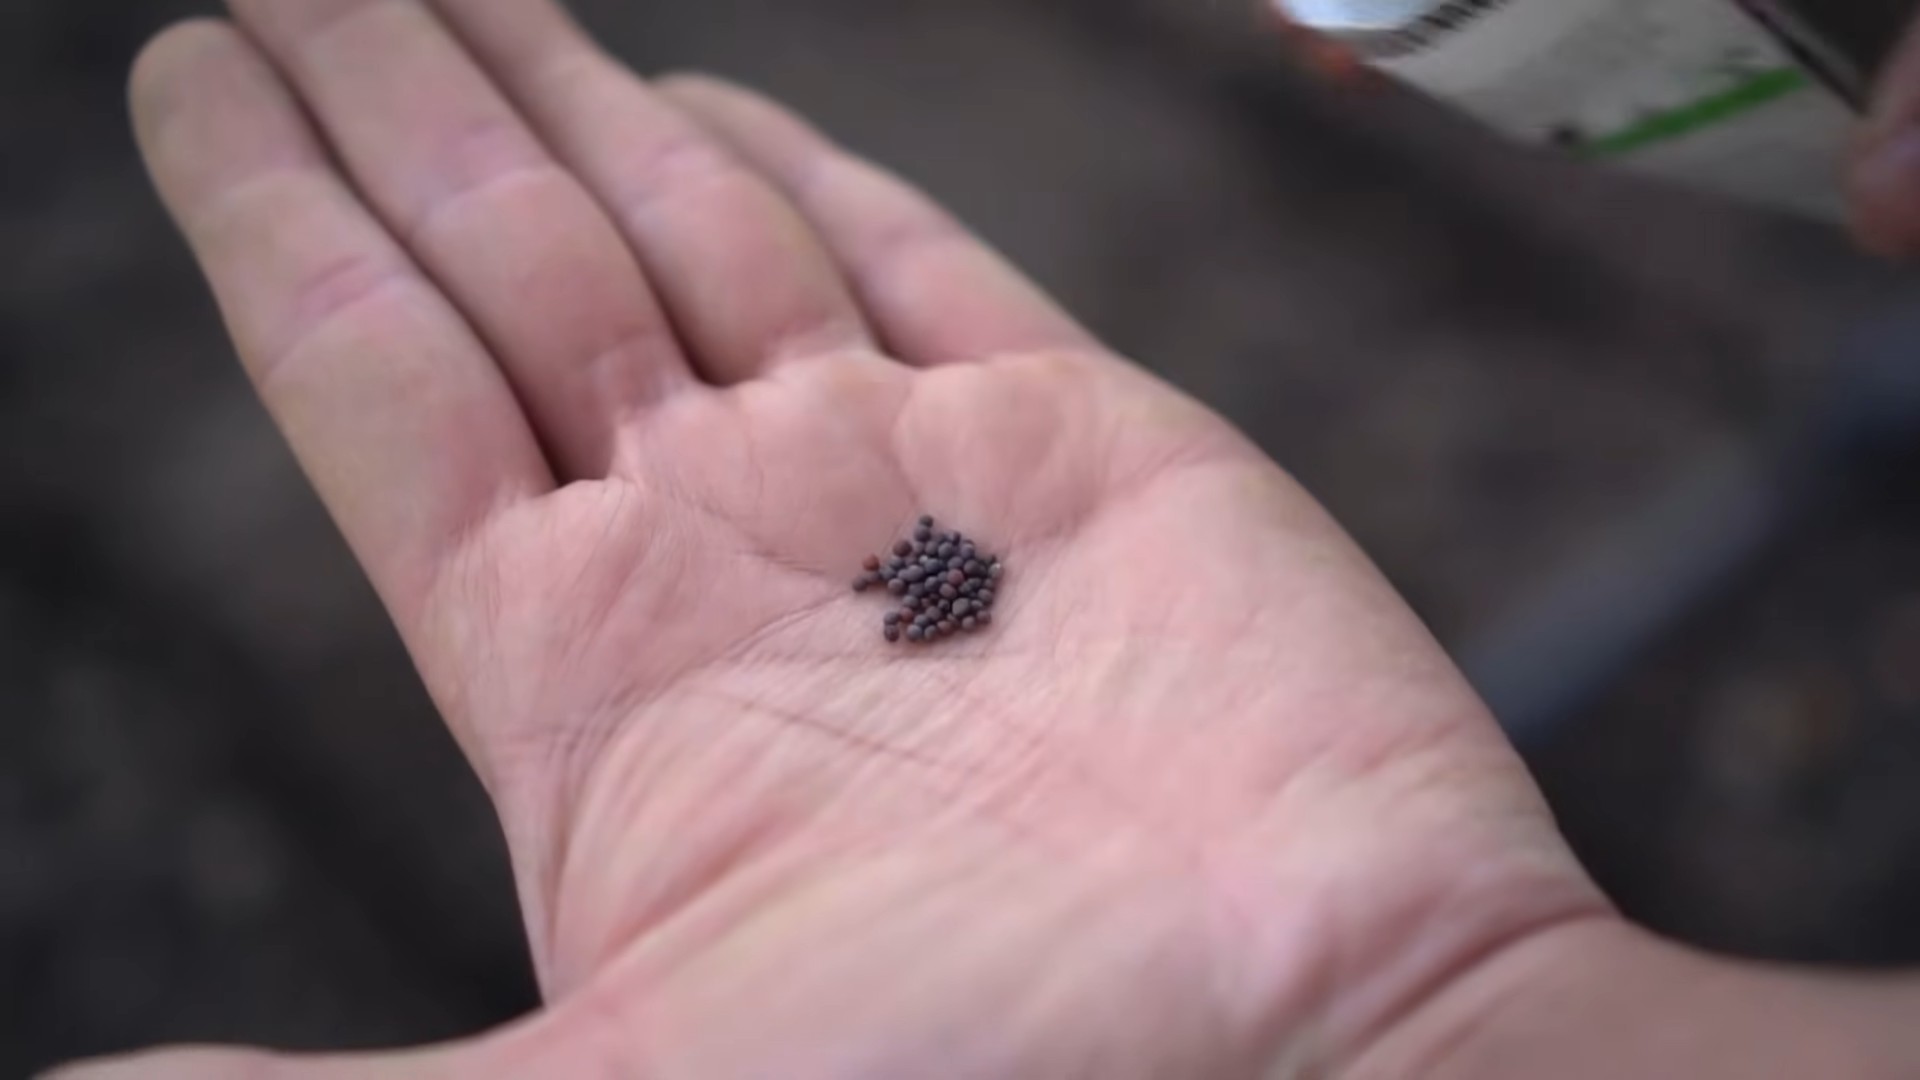
2. Sow the Seeds: Turnip seeds are small, so you don’t need to plant them too deep. I usually sow them about ½ inch deep and about 2 inches apart. If you’re using a larger container, you can plant more seeds, but make sure to thin them out later if they become too crowded.
3. Cover the Seeds: Lightly cover the seeds with soil.
4. Water Gently: Water the soil gently using a watering can or a hose with a gentle spray nozzle. You want to moisten the soil without disturbing the seeds.
5. Location, Location, Location: Place your container in a location that receives at least 6 hours of sunlight per day. Turnips need plenty of sunlight to grow properly. If you don’t have a sunny spot, you can use grow lights.
Caring for Your Turnip Plants
Once your seeds have sprouted, it’s time to provide them with the care they need to thrive.
1. Watering: Turnips need consistent moisture, but they don’t like to be waterlogged. I usually water them when the top inch of soil feels dry to the touch. During hot weather, you may need to water them more frequently.
2. Thinning: If your seedlings are too crowded, you’ll need to thin them out. This means removing some of the weaker seedlings to give the stronger ones more room to grow. I usually thin them when they’re about 2-3 inches tall, leaving about 4-6 inches between each plant. Don’t just pull them out! Gently snip them at the soil line to avoid disturbing the roots of the remaining plants.
3. Fertilizing: Turnips are heavy feeders, so they need regular fertilization. I like to use a balanced liquid fertilizer, such as a 10-10-10, diluted to half strength. Fertilize every 2-3 weeks. You can also amend the soil with compost tea.
4. Weeding: Keep your container free of weeds. Weeds can compete with your turnip plants for nutrients and water. Gently pull out any weeds that you see.
5. Pest Control: Keep an eye out for pests, such as aphids, flea beetles, and cabbage worms. If you notice any pests, you can try spraying them with insecticidal soap or neem oil. I prefer organic pest control methods whenever possible.
Harvesting Your Turnips
The moment you’ve been waiting for: harvesting your delicious, homegrown turnips!
1. Harvest Time: Turnips are typically ready to harvest in about 50-60 days, depending on the variety. You can harvest them when the roots are about 2-3 inches in diameter. Don’t let them get too large, as they can become tough and bitter.
2. Harvesting Technique: To harvest your turnips, gently loosen the soil around the roots with a trowel. Then, carefully pull the turnips out of the soil. If the soil is dry, you may need to water it beforehand to make it easier to pull them out.
3. Leafy Greens: Don’t forget about the turnip greens! They’re also edible and delicious. You can harvest them at any time during the growing season. Just snip off the outer leaves, leaving the inner leaves to continue growing.
4. Storage: Store your turnips in the refrigerator. They’ll keep for several weeks. You can also freeze them. To freeze turnips, blanch them in boiling water for 2-3 minutes, then cool them in ice water. Drain them well and store them in freezer bags.
Hey there, fellow gardening enthusiasts! Ever thought about growing your own turnips but don’t have a sprawling garden? Well, I’m here to tell you that you absolutely can cultivate these root veggies in containers! It’s easier than you might think, and I’m going to walk you through every step of the process. Get ready to enjoy fresh, homegrown turnips straight from your patio or balcony!
Choosing the Right Container and Soil
First things first, let’s talk about the essentials: the container and the soil. These are crucial for a successful turnip harvest.
* Container Size: Turnips need room to grow downwards. I recommend a container that’s at least 12 inches deep and 12 inches in diameter. A larger container is always better, as it gives the roots more space to develop. You can even use a rectangular planter if you want to grow multiple turnips together.
* Drainage: This is non-negotiable! Make sure your container has drainage holes. Turnips hate soggy soil, and poor drainage can lead to root rot. If your container doesn’t have drainage holes, you can drill some yourself.
* Soil: Turnips thrive in well-draining, fertile soil. I like to use a mix of potting soil, compost, and perlite. The potting soil provides a good base, the compost adds nutrients, and the perlite improves drainage. Avoid using garden soil directly in your containers, as it can become compacted and doesn’t drain well.
Planting Your Turnip Seeds
Now for the fun part: planting the seeds!
1. Prepare the Soil: Fill your container with your chosen soil mix, leaving about an inch or two of space at the top. Gently pat down the soil to remove any large air pockets.
2. Sow the Seeds: Turnip seeds are small, so you don’t need to plant them too deep. I usually sow them about ½ inch deep and about 2 inches apart. If you’re using a larger container, you can plant more seeds, but make sure to thin them out later if they become too crowded.
3. Cover the Seeds: Lightly cover the seeds with soil.
4. Water Gently: Water the soil gently using a watering can or a hose with a gentle spray nozzle. You want to moisten the soil without disturbing the seeds.
5. Location, Location, Location: Place your container in a location that receives at least 6 hours of sunlight per day. Turnips need plenty of sunlight to grow properly. If you don’t have a sunny spot, you can use grow lights.
Caring for Your Turnip Plants
Once your seeds have sprouted, it’s time to provide them with the care they need to thrive.
1. Watering: Turnips need consistent moisture, but they don’t like to be waterlogged. I usually water them when the top inch of soil feels dry to the touch. During hot weather, you may need to water them more frequently.
2. Thinning: If your seedlings are too crowded, you’ll need to thin them out. This means removing some of the weaker seedlings to give the stronger ones more room to grow. I usually thin them when they’re about 2-3 inches tall, leaving about 4-6 inches between each plant. Don’t just pull them out! Gently snip them at the soil line to avoid disturbing the roots of the remaining plants.
3. Fertilizing: Turnips are heavy feeders, so they need regular fertilization. I like to use a balanced liquid fertilizer, such as a 10-10-10, diluted to half strength. Fertilize every 2-3 weeks. You can also amend the soil with compost tea.
4. Weeding: Keep your container free of weeds. Weeds can compete with your turnip plants for nutrients and water. Gently pull out any weeds that you see.
5. Pest Control: Keep an eye out for pests, such as aphids, flea beetles, and cabbage worms. If you notice any pests, you can try spraying them with insecticidal soap or neem oil. I prefer organic pest control methods whenever possible.
Harvesting Your Turnips
The moment you’ve been waiting for: harvesting your delicious, homegrown turnips!
1. Harvest Time: Turnips are typically ready to harvest in about 50-60 days, depending on the variety. You can harvest them when the roots are about 2-3 inches in diameter. Don’t let them get too large, as they can become tough and bitter.
2. Harvesting Technique: To harvest your turnips, gently loosen the soil around the roots with a trowel. Then, carefully pull the turnips out of the soil. If the soil is dry, you may need to water it beforehand to make it easier to pull them out.
3. Leafy Greens: Don’t forget about the turnip greens! They’re also edible and delicious. You can harvest them at any time during the growing season. Just snip off the outer leaves, leaving the inner leaves to continue growing.
4. Storage: Store your turnips in the refrigerator. They’ll keep for several weeks. You can also freeze them. To freeze turnips, blanch them in boiling water for 2-3 minutes, then cool them in ice water. Drain them well and store them in freezer bags.
Troubleshooting
Even with the best care, you may encounter some problems while growing turnips. Here are a few common issues and how to address them:
* Root Rot: This is caused by overwatering or poor drainage. Make sure your container has drainage holes and avoid overwatering. If you suspect root rot, you can try transplanting your turnips to a new container with fresh soil.
* Pests: As mentioned earlier, turnips can be susceptible to pests. Regularly inspect your plants for signs of pests and take action promptly.
* Bolting: Bolting is when the plant prematurely flowers and goes to seed. This can happen if the weather is too hot or if the plants are stressed. To prevent bolting, try to keep the soil consistently moist and provide shade during hot weather. Choose bolt-resistant varieties.
* Small Roots: If your turnips are small, it could be due to a lack of nutrients, insufficient sunlight, or overcrowding. Make sure you’re fertilizing regularly, providing enough sunlight, and thinning out your plants as needed.
Choosing Turnip Varieties for Containers
Not all turnip varieties are created equal when it comes to container gardening. Some are better suited for smaller spaces than others. Here are a few of my favorites:
* ‘Tokyo Cross’: This is a fast-maturing variety that produces small, round turnips with a mild flavor. It’s perfect for container gardening.
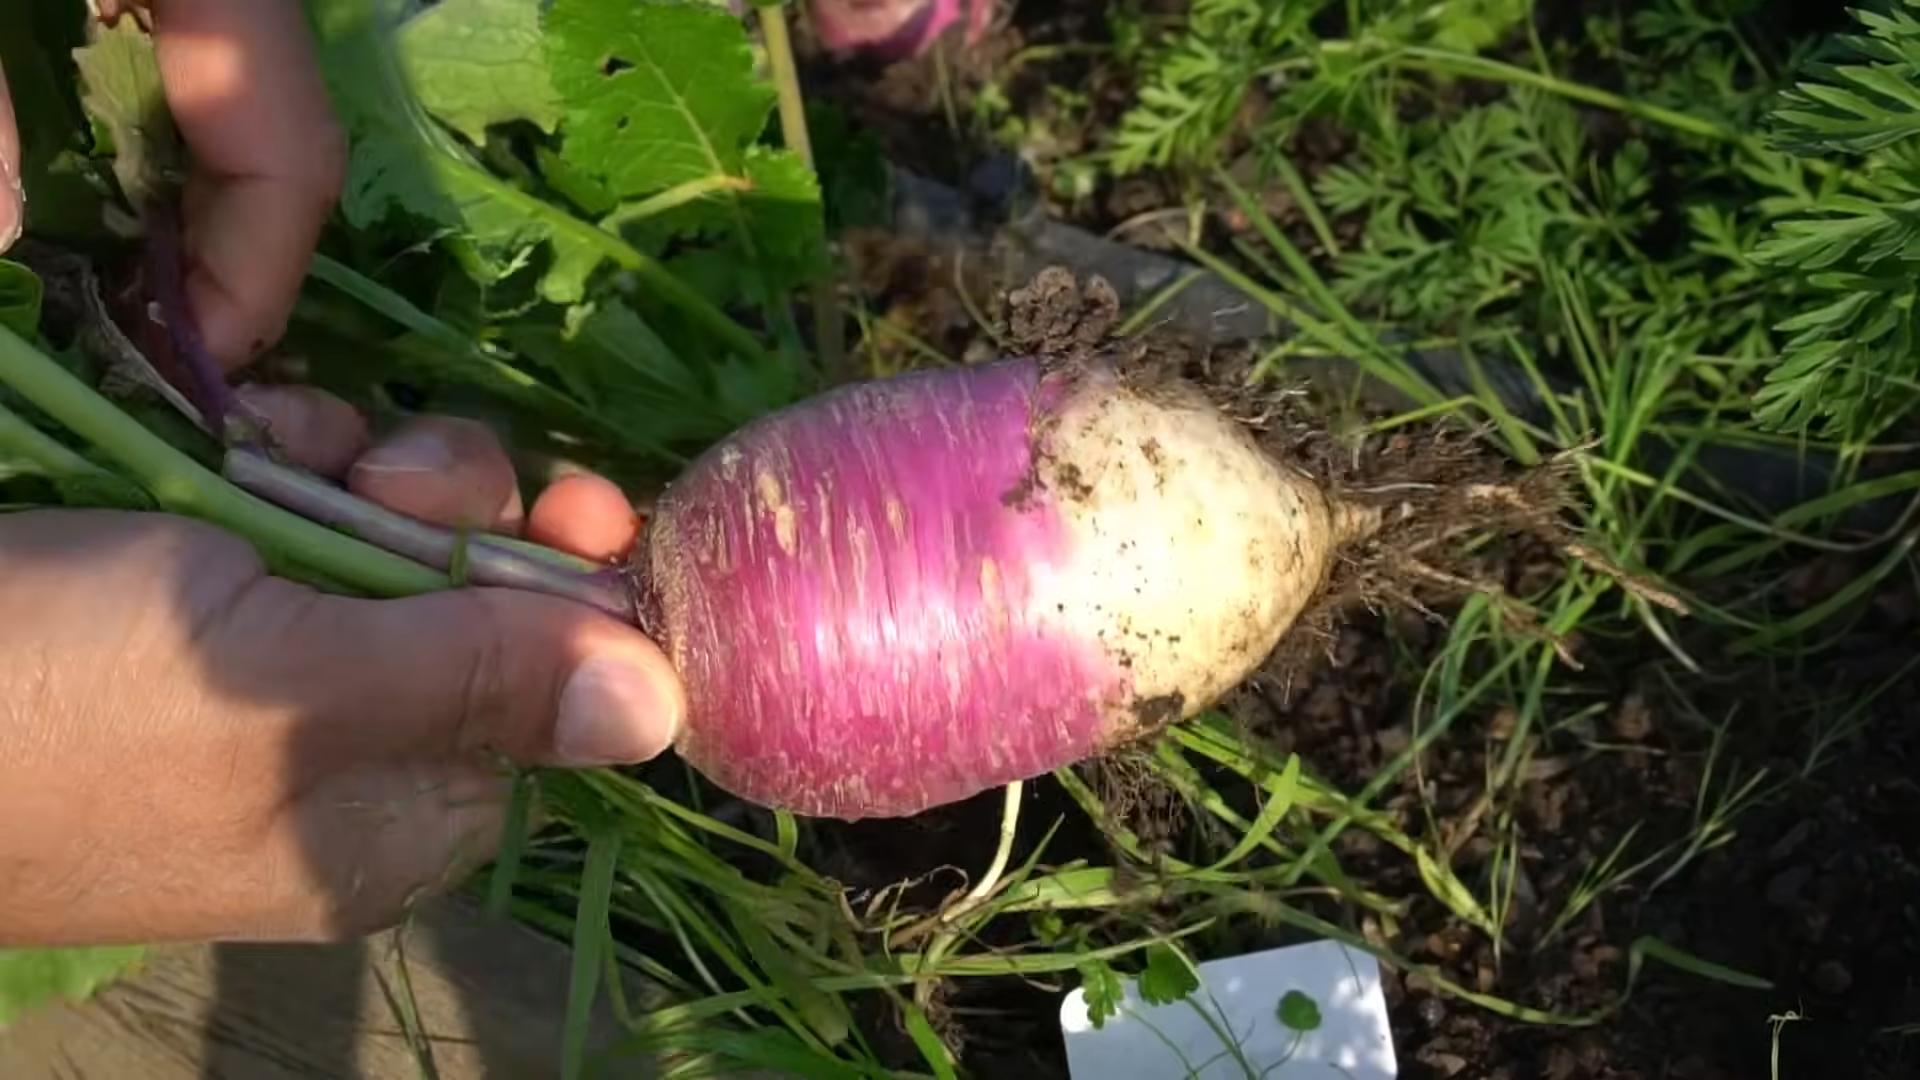
* ‘Purple Top White Globe’: This is a classic turnip variety with a purple top and a white bottom. It’s a bit larger than ‘Tokyo Cross,’ but it can still be grown successfully in containers.
* ‘Golden Ball’: This variety produces round, yellow turnips with a sweet flavor. It’s a good choice if you’re looking for something a little different.
* ‘Hakurei’: Technically a Japanese turnip, this variety is known for its sweet, mild flavor and crisp texture. It’s a great choice for eating raw in salads.
Enjoying Your Homegrown Turnips
Now that you’ve harvested your turnips, it’s time to enjoy the fruits (or rather, roots) of your labor! Turnips can be eaten raw, roasted, boiled, mashed, or added to soups and stews. The greens can be sautéed, steamed, or added to salads.
Here are a few of my favorite ways to enjoy homegrown turnips:
* Roasted Turnips: Toss turnips with olive oil, salt, pepper, and your favorite herbs, then roast them in the oven until they’re tender and slightly caramelized.
* Mashed Turnips: Boil turnips until they’re tender, then mash them with butter, milk, and salt.
* Turnip and Potato Soup: Add turnips to your favorite potato soup recipe for a boost of flavor and nutrients.
* Sautéed Turnip Greens: Sauté turnip greens with garlic, olive oil, and a pinch of red pepper flakes.
Growing turnips in containers is a rewarding experience that allows you to enjoy fresh, homegrown vegetables even if you don’t have a traditional garden. With a little bit of planning and care, you can have a bountiful harvest of delicious turnips right on your doorstep. Happy gardening!
Conclusion
So, there you have it! Growing turnips in containers is not only possible, it’s surprisingly rewarding. We’ve walked you through the entire process, from selecting the right container and soil to nurturing your little turnip sprouts into plump, delicious roots and vibrant greens. But why should you bother with this DIY project?
Simply put, growing your own turnips offers a level of freshness and control you just can’t get from store-bought produce. Imagine the satisfaction of harvesting crisp, sweet turnips just minutes before adding them to your favorite dish. Think of the vibrant, peppery greens you can toss into salads or sauté for a healthy side. And consider the sheer joy of connecting with nature, even in a small space.
Beyond the immediate gratification, container gardening allows you to overcome limitations like poor soil quality or limited garden space. Whether you have a sprawling backyard or a tiny balcony, you can enjoy the bounty of homegrown turnips. Plus, container gardening offers greater control over pests and diseases, allowing you to cultivate healthier, more flavorful vegetables.
But the benefits don’t stop there. Growing your own food is a sustainable practice that reduces your carbon footprint and promotes a healthier lifestyle. By choosing to grow your own turnips, you’re making a conscious decision to support local, sustainable agriculture, even if it’s just on a small scale.
Ready to take your turnip growing to the next level? Consider these variations:
* Succession Planting: Plant new seeds every few weeks to ensure a continuous harvest throughout the growing season.
* Companion Planting: Plant turnips alongside other vegetables like radishes, lettuce, or spinach to deter pests and improve soil health.
* Different Varieties: Experiment with different turnip varieties to find your favorites. ‘Purple Top White Globe’ is a classic choice, but ‘Golden Ball’ and ‘Tokyo Cross’ are also worth exploring.
* Turnip Greens Focus: If you’re primarily interested in the greens, choose varieties specifically bred for their foliage, such as ‘Seven Top’.
Ultimately, the best way to discover the joys of growing turnips in containers is to simply give it a try. Don’t be afraid to experiment, learn from your mistakes, and adapt the techniques to suit your specific environment and preferences.
We’re confident that you’ll find the experience both rewarding and delicious. So, grab a container, some soil, and a packet of turnip seeds, and get ready to embark on a flavorful adventure.
We’d love to hear about your experiences! Share your tips, tricks, and photos in the comments below. Let’s build a community of container turnip growers and inspire others to discover the joys of homegrown produce. Happy gardening!
Frequently Asked Questions (FAQ)
What is the best container size for growing turnips?
The ideal container size for growing turnips is at least 12 inches deep and 12 inches in diameter. This provides enough space for the roots to develop properly. However, if you’re planning on growing multiple turnips in the same container, you’ll want to increase the size accordingly. A good rule of thumb is to allow at least 6 inches of space between each plant. Larger containers, such as half-barrels or raised beds, can accommodate even more turnips and provide a more stable growing environment. Remember that adequate drainage is crucial, so ensure your container has drainage holes.
What type of soil is best for growing turnips in containers?
Turnips thrive in well-draining, fertile soil that is rich in organic matter. A good potting mix specifically formulated for vegetables is an excellent choice. You can also create your own mix by combining equal parts of compost, peat moss (or coconut coir), and perlite or vermiculite. Avoid using garden soil, as it can be too heavy and may contain pests or diseases. The ideal soil pH for turnips is between 6.0 and 6.8. You can test your soil pH with a simple soil testing kit and amend it accordingly if necessary.
How often should I water my container turnips?
Water your container turnips regularly, especially during hot, dry weather. The soil should be kept consistently moist but not waterlogged. Check the soil moisture by sticking your finger about an inch deep into the soil. If it feels dry, it’s time to water. Water deeply, allowing the water to drain out of the drainage holes. Avoid overhead watering, as this can promote fungal diseases. Instead, water at the base of the plants. During cooler weather, you may need to water less frequently.
How much sunlight do turnips need?
Turnips need at least 6 hours of direct sunlight per day to thrive. Choose a location for your container that receives plenty of sunlight. If you live in a hot climate, you may want to provide some afternoon shade to prevent the plants from overheating. If you don’t have a sunny location, you can supplement with grow lights.
When is the best time to plant turnips in containers?
Turnips are a cool-season crop, so the best time to plant them is in early spring or late summer/early fall. In spring, plant your seeds as soon as the soil is workable. In fall, plant your seeds about 4-6 weeks before the first expected frost. This will give the turnips enough time to mature before the weather gets too cold.
How long does it take for turnips to mature?
Turnips typically mature in 50-60 days, depending on the variety. You can harvest the roots when they are about 2-3 inches in diameter. The greens can be harvested at any time, but they are most tender when they are young.
What are some common pests and diseases that affect turnips?
Some common pests that affect turnips include aphids, flea beetles, and root maggots. Common diseases include powdery mildew and clubroot. To prevent pests and diseases, practice good sanitation, such as removing weeds and debris from around the plants. You can also use organic pest control methods, such as insecticidal soap or neem oil. If you suspect your plants have a disease, consult with your local garden center or extension office for advice.
Can I eat the turnip greens?
Yes, turnip greens are edible and nutritious. They are a good source of vitamins A, C, and K, as well as calcium and fiber. You can eat them raw in salads or cooked in a variety of dishes. To prepare turnip greens, wash them thoroughly and remove any tough stems. You can then sauté them, steam them, or add them to soups and stews.
How do I store turnips after harvesting?
To store turnips, remove the greens and wash the roots. Store them in a cool, dark, and humid place, such as a refrigerator or root cellar. They will keep for several weeks. Turnip greens can be stored in the refrigerator for a few days.
Can I grow turnips indoors?
While it’s possible to grow turnips indoors, it can be challenging to provide them with enough light and space. If you want to try growing turnips indoors, choose a sunny location and use grow lights to supplement the natural light. You’ll also need to use a large container and provide adequate drainage.
Leave a Comment