

Microgreen DIY Home Growing: Ever dreamt of having a tiny, vibrant, and incredibly nutritious garden right on your kitchen counter? I know I have! Forget sprawling acres and back-breaking labor; we’re talking about a miniature edible jungle bursting with flavor and vitamins, grown entirely by you, indoors. This isn’t just a trend; it’s a revolution in fresh, accessible food.
The concept of sprouting seeds for food has roots stretching back centuries, with evidence suggesting ancient civilizations like the Romans and Chinese utilized sprouted grains and legumes for their nutritional benefits. But the modern microgreen movement? That’s a relatively recent phenomenon, gaining popularity in the culinary world for its intense flavors and visual appeal. Chefs love them, and now, you can too!
Why should you embrace the world of Microgreen DIY Home Growing? Because it’s ridiculously easy, space-efficient, and provides a constant supply of fresh greens, even in the dead of winter. Imagine adding a peppery radish microgreen to your salad, a tangy sunflower sprout to your sandwich, or a vibrant beet microgreen to garnish your soup. Not only will your meals be bursting with flavor, but you’ll also be boosting your nutrient intake with these tiny powerhouses. Plus, let’s be honest, there’s something incredibly satisfying about nurturing life from a tiny seed to a delicious, edible plant. So, let’s dive into the simple steps to create your own thriving microgreen garden at home!
DIY Microgreen Magic: Grow Your Own Nutrient-Packed Goodness at Home!
Hey there, fellow food enthusiasts! I’m so excited to share my journey into the wonderful world of microgreens. These tiny powerhouses are packed with flavor and nutrients, and the best part? You can easily grow them yourself, right in your kitchen! Forget expensive grocery store prices – let’s get our hands dirty (well, not too dirty!) and create our own microgreen oasis.
What You’ll Need: The Microgreen Starter Kit
Before we dive in, let’s gather our supplies. Don’t worry, you probably have a lot of this stuff already!
* Seeds: This is the most important part! Choose organic, untreated seeds specifically labeled for microgreens. Popular options include broccoli, radish, sunflower, peas, kale, and arugula. I recommend starting with a few different varieties to see what you like best.
* Growing Trays: You’ll need two trays – one with drainage holes (the growing tray) and one without (the bottom tray). You can find these at garden centers or online. I often reuse plastic takeout containers, just make sure they’re clean and food-safe.
* Growing Medium: Options include seed starting mix, coco coir, or even paper towels. I personally prefer coco coir because it’s sustainable and holds moisture well.
* Spray Bottle: For misting the seeds and seedlings.
* Weight: Something to put on top of the seeds during germination. A book, a brick wrapped in plastic, or even another tray filled with something heavy will work.
* Light Source: A sunny windowsill or a grow light. Microgreens need light to thrive.
* Water: Filtered water is best.
Step-by-Step: From Seed to Sprout
Okay, let’s get growing! This process is surprisingly simple, and you’ll be amazed at how quickly you see results.
1. Prepare the Growing Tray: First, hydrate your growing medium. If you’re using coco coir, add water until it’s moist but not soggy. It should feel like a wrung-out sponge. Then, fill your growing tray (the one with drainage holes) with about 1-2 inches of the moistened growing medium. Gently level the surface.
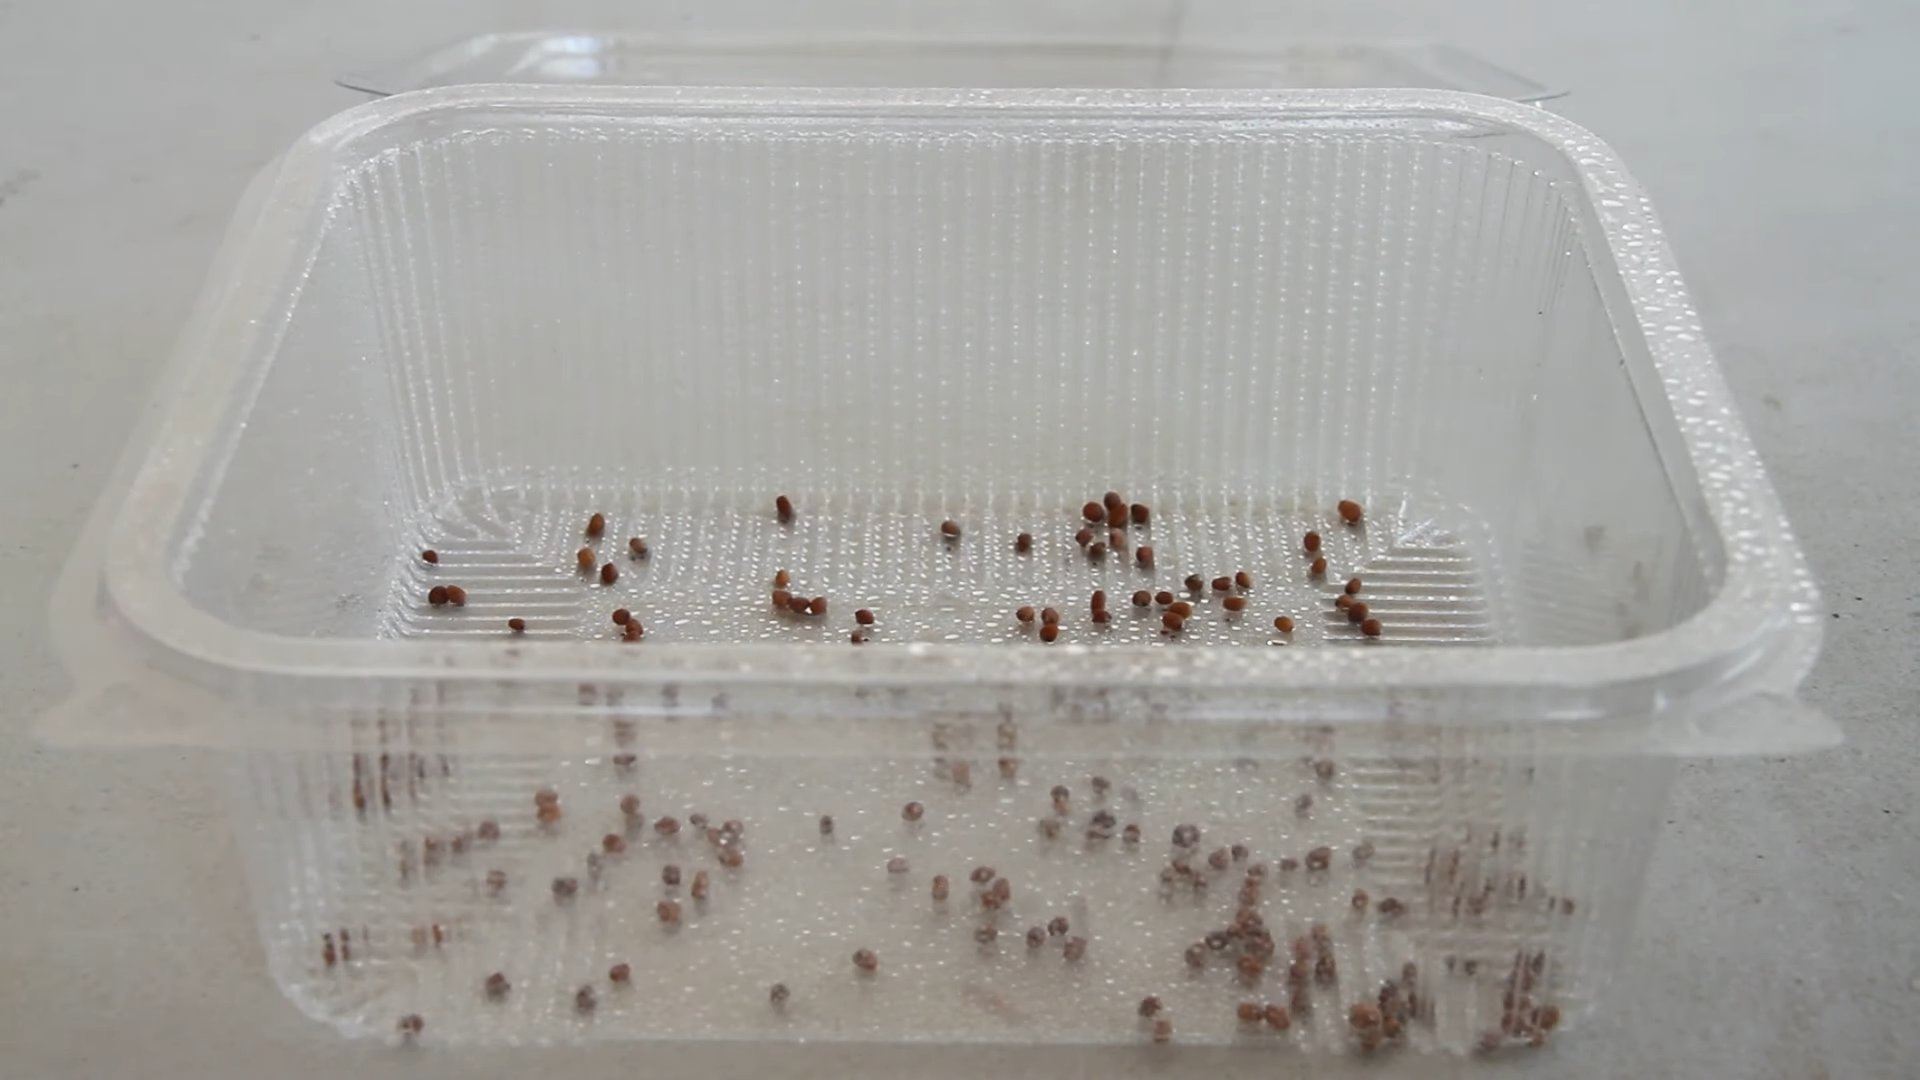
2. Sow the Seeds: Now comes the fun part! Sprinkle your seeds evenly over the surface of the growing medium. Don’t overcrowd them, but aim for a fairly dense layer. The seed packet should give you a good idea of how many seeds to use per tray. For smaller seeds like broccoli, I use a slightly denser layer than for larger seeds like sunflower.
3. Mist and Cover: Gently mist the seeds with water from your spray bottle. You want to make sure they’re thoroughly moistened but not swimming in water. Then, cover the tray with a lid or another tray to create a dark, humid environment. This is crucial for germination.
4. Weight it Down: Place a weight on top of the covered tray. This helps the seeds make good contact with the growing medium and encourages even germination. I usually use a book wrapped in plastic wrap to prevent moisture damage.
5. Germination Time: Now, patience is key! Place the tray in a dark, cool place (around 65-70°F is ideal) and let the seeds germinate. The germination time will vary depending on the type of seed. Check them daily and mist them if the growing medium seems dry. You’ll start to see sprouts within a few days.
6. Uncover and Introduce Light: Once the seeds have germinated and you see tiny sprouts emerging, remove the weight and the cover. Now it’s time to introduce light! Place the tray in a sunny windowsill or under a grow light. If using a grow light, position it a few inches above the seedlings.
7. Watering: Continue to mist the seedlings regularly, keeping the growing medium moist but not soggy. You can also water from the bottom by pouring water into the bottom tray (the one without drainage holes) and allowing the growing medium to absorb it. This helps prevent damping off, a fungal disease that can affect seedlings.
8. Rotate the Tray: If you’re using a windowsill, rotate the tray daily to ensure that the seedlings receive even light. This will prevent them from leaning towards the light source and becoming leggy.
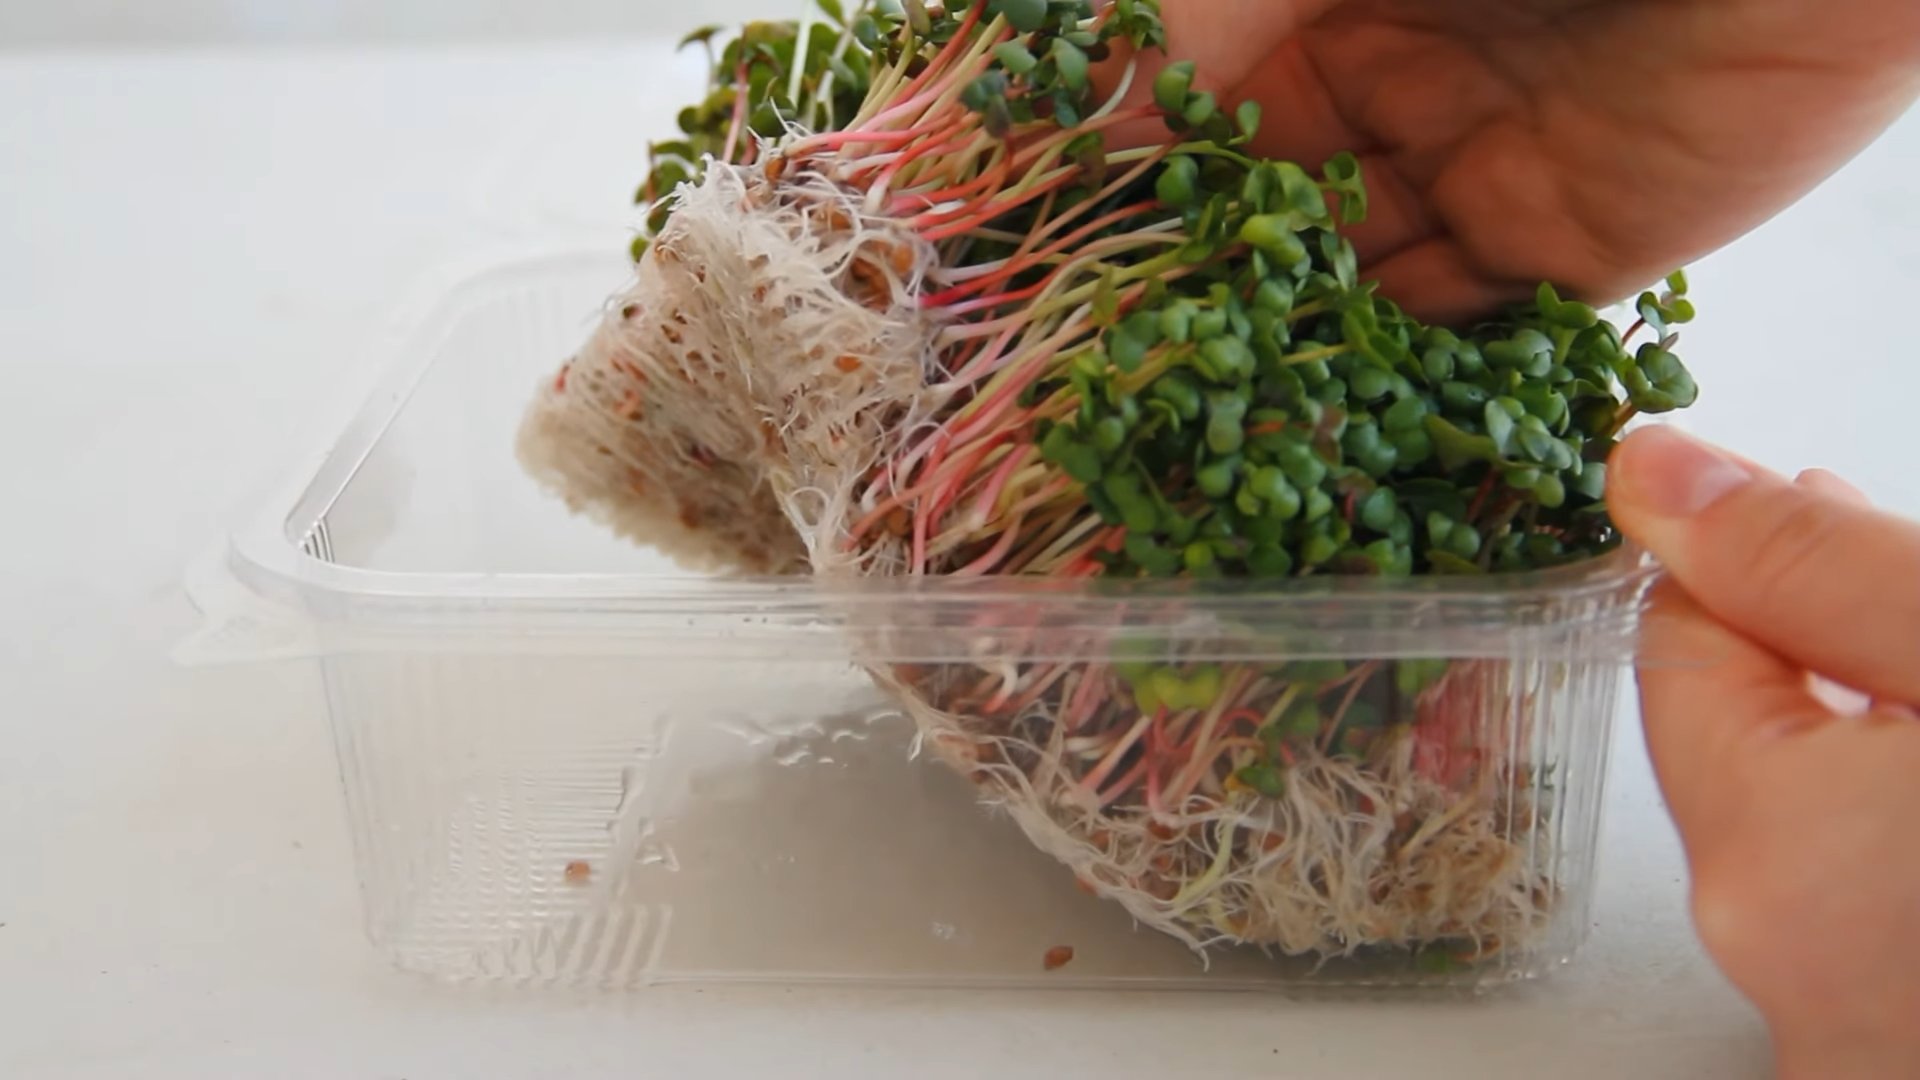
9. Harvest Time: Your microgreens are ready to harvest when they have developed their first set of true leaves (the leaves that appear after the initial seed leaves, called cotyledons). This usually takes about 7-14 days, depending on the variety.
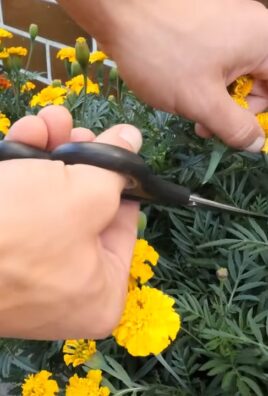
10. Harvesting: To harvest, use clean scissors or a sharp knife to cut the microgreens just above the growing medium. Rinse them gently and enjoy!
Troubleshooting: Common Microgreen Mishaps (and How to Fix Them!)
Even with the best intentions, things can sometimes go wrong. Here are a few common problems and how to solve them:
* Mold: Mold can be a problem if the growing medium is too wet or the air circulation is poor. To prevent mold, make sure you’re not overwatering, and provide good air circulation by using a small fan. If you see mold, remove the affected areas immediately. You can also try spraying the seedlings with a diluted solution of hydrogen peroxide.
* Leggy Seedlings: Leggy seedlings are tall and spindly, and they’re usually caused by insufficient light. Make sure your microgreens are getting enough light, either from a sunny windowsill or a grow light.
* Uneven Germination: Uneven germination can be caused by uneven watering, poor seed quality, or inconsistent temperatures. Make sure you’re watering evenly and using high-quality seeds. You can also try pre-soaking the seeds for a few hours before planting to improve germination rates.
* Damping Off: Damping off is a fungal disease that can cause seedlings to collapse and die. To prevent damping off, use a sterile growing medium, avoid overwatering, and provide good air circulation. If you see damping off, remove the affected seedlings immediately.
Seed Specific Tips
* Sunflower: Sunflower seeds need to be soaked for 8-12 hours before planting. They also benefit from being de-hulled after germination. This involves gently removing the seed hull from the leaves.
* Pea Shoots: Pea shoots also need to be soaked for 8-12 hours before planting. They can be a bit slow to germinate, so be patient.
* Radish: Radish microgreens are fast growers and have a spicy flavor. They don’t need to be soaked before planting.
* Broccoli: Broccoli microgreens are packed with nutrients and have a mild flavor. They don’t need to be soaked before planting.
Choosing the Right Seeds
The world of microgreen seeds is vast and exciting! Here’s a little guidance to help you pick the perfect varieties for your taste and needs:
* For Beginners: Radish, broccoli, and kale are excellent choices for beginners. They germinate quickly, are relatively easy to grow, and offer distinct flavors.
* For a Spicy Kick: Mustard, arugula, and radish microgreens deliver a delightful peppery punch.
* For a Mild Flavor: Sunflower, pea shoots, and broccoli microgreens offer a more subtle and versatile flavor profile.
* For a Nutritional Boost: Broccoli, kale, and red cabbage microgreens are packed with vitamins and antioxidants.
Important Note: Always choose seeds specifically labeled for microgreens or sprouting. These seeds are tested for pathogens and are safe to eat. Avoid using seeds intended for garden planting, as they may be treated with chemicals.
Harvesting and Storage Tips
Knowing when and how to harvest and store your microgreens is key to enjoying their freshness and flavor for as long as possible.
* Harvesting Time: As mentioned earlier, harvest your microgreens when they have developed their first set of true leaves. This is when they’ve reached their peak flavor and nutritional value.
* Harvesting Technique: Use sharp scissors or a knife to cut the microgreens just above the growing medium. Avoid pulling them out, as this can damage the roots and contaminate the greens.
* Washing: Gently rinse the harvested microgreens in cool water to remove any remaining growing medium.
* Drying: Pat the microgreens dry with a clean paper towel or use a salad spinner to remove excess water. This will help prevent them from becoming soggy and spoiling quickly.
* Storage: Store the dried microgreens in an airtight container lined with a paper towel in the refrigerator. They should stay fresh for up to a week.
Creative Ways to Use Your Homegrown Microgreens
Now that you have a bounty of fresh microgreens, it’s time to get creative in the kitchen! Here are some of my favorite ways to use them:
* Salads: Add microgreens to your salads for a boost of flavor, texture, and nutrients.
Conclusion
So, there you have it! Transforming your kitchen into a thriving microgreen farm is not only achievable but surprisingly simple and rewarding. We’ve walked you through the process, highlighting the ease and affordability of this DIY project. But why should you jump on the microgreen bandwagon?
The answer lies in the unparalleled freshness, concentrated nutrients, and delightful flavors you’ll unlock. Forget limp, store-bought greens that have traveled miles and lost their vitality. With your own home-grown microgreens, you’re guaranteed peak flavor and maximum nutritional benefit, harvested just moments before you enjoy them. Imagine adding a vibrant burst of radish microgreens to your salad, a peppery kick of arugula to your sandwich, or a delicate sweetness of sunflower shoots to your smoothie – all grown right on your windowsill.
Beyond the taste and health benefits, this DIY microgreen growing project is incredibly satisfying. There’s something truly special about nurturing life from seed to sprout, witnessing the rapid growth, and knowing you’ve created something delicious and nutritious with your own hands. It’s a small act of self-sufficiency that connects you to the natural world, even in the heart of the city.
But the beauty of this DIY approach is its adaptability. Feel free to experiment with different seed varieties. Try a spicy mix of mustard and cress, a colorful blend of beet and chard, or a mild and nutty combination of broccoli and kale. You can also adjust the growing medium to suit your preferences. While we’ve recommended coconut coir, you can also use potting soil, hemp mats, or even paper towels. The key is to ensure adequate moisture and drainage.
Don’t be afraid to get creative with your containers too! Upcycle old yogurt containers, plastic takeout boxes, or even egg cartons. Just make sure they have drainage holes. You can also experiment with different lighting conditions. While a sunny windowsill is ideal, you can also use a grow light for faster and more consistent growth, especially during the darker months.
And speaking of variations, consider adding a touch of organic liquid fertilizer to your watering routine after the first week of growth. This will provide your microgreens with an extra boost of nutrients and encourage even more robust growth. Just be sure to dilute the fertilizer according to the manufacturer’s instructions to avoid burning the delicate seedlings.
We’re confident that once you experience the joy of growing your own microgreens, you’ll be hooked. It’s a simple, affordable, and incredibly rewarding way to add fresh, healthy, and flavorful ingredients to your diet. So, what are you waiting for? Gather your supplies, follow our simple steps, and embark on your own microgreen adventure today!
We encourage you to try this microgreen DIY home growing method and share your experiences with us. Let us know what varieties you’ve tried, what challenges you’ve faced, and what successes you’ve celebrated. Share your photos and tips on social media using #DIYMicrogreens and inspire others to join the movement. We can’t wait to see what you create!
Frequently Asked Questions (FAQ)
What exactly are microgreens, and why are they so good for you?
Microgreens are essentially baby vegetable greens, harvested just after the cotyledon leaves (the first leaves to emerge from the seed) have developed and sometimes with the emergence of the first true leaves. They are typically 1-3 inches tall and packed with concentrated nutrients, often containing higher levels of vitamins, minerals, and antioxidants than their mature counterparts. This is because the plant is channeling all its energy into these first few leaves. They are also incredibly flavorful, offering a wide range of tastes from sweet and mild to spicy and peppery, depending on the variety.
How long does it take to grow microgreens at home?
One of the best things about growing microgreens is their rapid growth cycle. Most varieties are ready to harvest in just 7-14 days, making them a quick and easy way to add fresh greens to your diet. The exact time will vary depending on the specific variety, the growing conditions (temperature, light, humidity), and the quality of the seeds.
What kind of seeds can I use to grow microgreens?
You can use a wide variety of seeds to grow microgreens, including vegetables, herbs, and even some flowers. Popular choices include broccoli, kale, radish, arugula, mustard, sunflower, pea shoots, cilantro, basil, and beet. It’s important to use seeds that are specifically labeled for sprouting or microgreens, as these are typically untreated and safe for consumption. Avoid using seeds that have been treated with fungicides or other chemicals.
Do I need special equipment to grow microgreens?
No, you don’t need any special or expensive equipment to grow microgreens at home. As our guide demonstrates, you can easily get started with just a few basic supplies, such as a container, growing medium (coconut coir, potting soil, etc.), seeds, and a spray bottle. A sunny windowsill is ideal for providing light, but you can also use a grow light if needed.
How much light do microgreens need?
Microgreens need adequate light to grow properly. A sunny windowsill that receives at least 4-6 hours of direct sunlight per day is ideal. If you don’t have a sunny windowsill, you can use a grow light to supplement or replace natural light. Position the grow light a few inches above the microgreens and keep it on for 12-16 hours per day.
How often should I water my microgreens?
Microgreens need to be kept consistently moist, but not waterlogged. Water them gently with a spray bottle once or twice a day, or as needed, to keep the growing medium damp. Avoid overwatering, as this can lead to mold or fungal growth. The best way to check if your microgreens need watering is to feel the growing medium. If it feels dry to the touch, it’s time to water.
How do I harvest microgreens?
Harvest your microgreens when they are 1-3 inches tall and have developed their cotyledon leaves and sometimes their first true leaves. Use sharp scissors or a knife to cut the stems just above the growing medium. Wash the microgreens gently before using them.
How long do harvested microgreens last?
Harvested microgreens are best used immediately for optimal flavor and nutrition. However, you can store them in the refrigerator for up to a week. To store them, gently pat them dry with a paper towel and place them in a sealed container or plastic bag.
What if my microgreens get moldy?
Mold growth is usually caused by overwatering or poor ventilation. If you notice mold on your microgreens, remove the affected areas immediately. Improve ventilation by increasing airflow around the container. Reduce watering frequency and ensure proper drainage. If the mold is widespread, it’s best to discard the entire batch and start over. To prevent mold growth, use a clean container and growing medium, avoid overwatering, and ensure good ventilation.
Can I reuse the growing medium?
It’s generally not recommended to reuse the growing medium after harvesting microgreens, as it may contain residual seeds, roots, and potentially harmful microorganisms. It’s best to start with fresh growing medium for each batch of microgreens.
Are there any microgreens I should avoid growing?
While most microgreens are safe to eat, there are a few exceptions. Avoid growing microgreens from plants in the nightshade family (tomatoes, peppers, eggplants), as their leaves can contain toxic alkaloids. Also, avoid growing microgreens from beans, as they can contain toxins that are only deactivated by cooking. Always research the specific variety before growing it as a microgreen to ensure it’s safe for consumption.
Can I grow microgreens outdoors?
Yes, you can grow microgreens outdoors, but you’ll need to protect them from extreme weather conditions, such as direct sunlight, heavy rain, and frost. Choose a sheltered location with partial shade and ensure adequate drainage. You may also need to protect them from pests, such as birds and insects.
What are some creative ways to use microgreens?
Microgreens are incredibly versatile and can be used in a wide variety of dishes. Add them to salads, sandwiches, wraps, soups, smoothies, omelets, and stir-fries. Use them as a garnish for appetizers, entrees, and desserts. Sprinkle them on top of pizzas, tacos, and avocado toast. Get creative and experiment with different combinations to discover your favorite ways to enjoy these nutritious and flavorful greens. They are also a great addition to pet food, especially for birds and reptiles.

Leave a Comment