

Dish Soap Alcohol Cleaning Hacks: Unlock the secrets to a sparkling clean home with these simple, yet incredibly effective DIY solutions! Are you tired of spending a fortune on harsh chemical cleaners that leave behind lingering odors and potential health hazards? I know I was! That’s why I dove headfirst into the world of homemade cleaning remedies, and let me tell you, the results have been astonishing.
The beauty of using dish soap and alcohol for cleaning isn’t just about saving money; it’s about embracing a more sustainable and mindful approach to maintaining your living space. Think about it – for generations, resourceful homemakers have relied on simple, readily available ingredients to keep their homes clean and fresh. While the specific combination of dish soap and alcohol might be a more modern twist, the underlying principle of using natural, effective solutions is deeply rooted in our history.
But why this particular combination? Well, dish soap is a fantastic degreaser and dirt remover, while alcohol acts as a powerful disinfectant and helps to evaporate quickly, leaving surfaces streak-free. Together, they form a dynamic duo that can tackle everything from grimy kitchen counters to stubborn bathroom stains. In this article, I’m going to share my favorite dish soap alcohol cleaning hacks that will revolutionize your cleaning routine and leave your home sparkling clean, naturally!
DIY Streak-Free Window Cleaner: Dish Soap and Alcohol Magic!
Okay, friends, let’s talk about windows. We all love natural light flooding into our homes, but those streaks and smudges? Not so much. Store-bought window cleaners can be expensive and often leave behind a weird film. That’s why I’m going to share my secret weapon: a homemade window cleaner using just two ingredients you probably already have – dish soap and rubbing alcohol! Trust me, this stuff is amazing, and it’s incredibly budget-friendly.
Why This Works (The Science-y Bit!)
Before we dive in, let’s quickly understand why this combination is so effective. Rubbing alcohol (isopropyl alcohol) is a fantastic solvent. It helps dissolve grease, grime, and those stubborn hard water spots that cling to your windows. It also evaporates quickly, which is key to avoiding streaks. Dish soap, on the other hand, acts as a surfactant. This means it reduces the surface tension of the water, allowing it to spread evenly across the glass and lift away dirt. The combination is a powerhouse for clean, sparkling windows!
What You’ll Need
Here’s a list of everything you’ll need to create this чудо-cleaner:
* Spray bottle (a clean, empty one, of course!)
* Rubbing alcohol (70% or 91% isopropyl alcohol works best)
* Dish soap (I prefer a clear, unscented variety to avoid any residue or dyes)
* Distilled water (tap water is okay, but distilled water will minimize mineral deposits)
* Microfiber cloths (these are essential for streak-free results!)
* Optional: A small funnel (makes pouring easier)
* Optional: Gloves (if you have sensitive skin)
Mixing the Magic Potion: Step-by-Step Instructions
Now for the fun part! Let’s get mixing.
1. Prepare Your Spray Bottle: Make sure your spray bottle is clean and dry. Any residue inside could contaminate your cleaner and leave streaks. Rinse it out thoroughly with hot water and let it air dry completely.
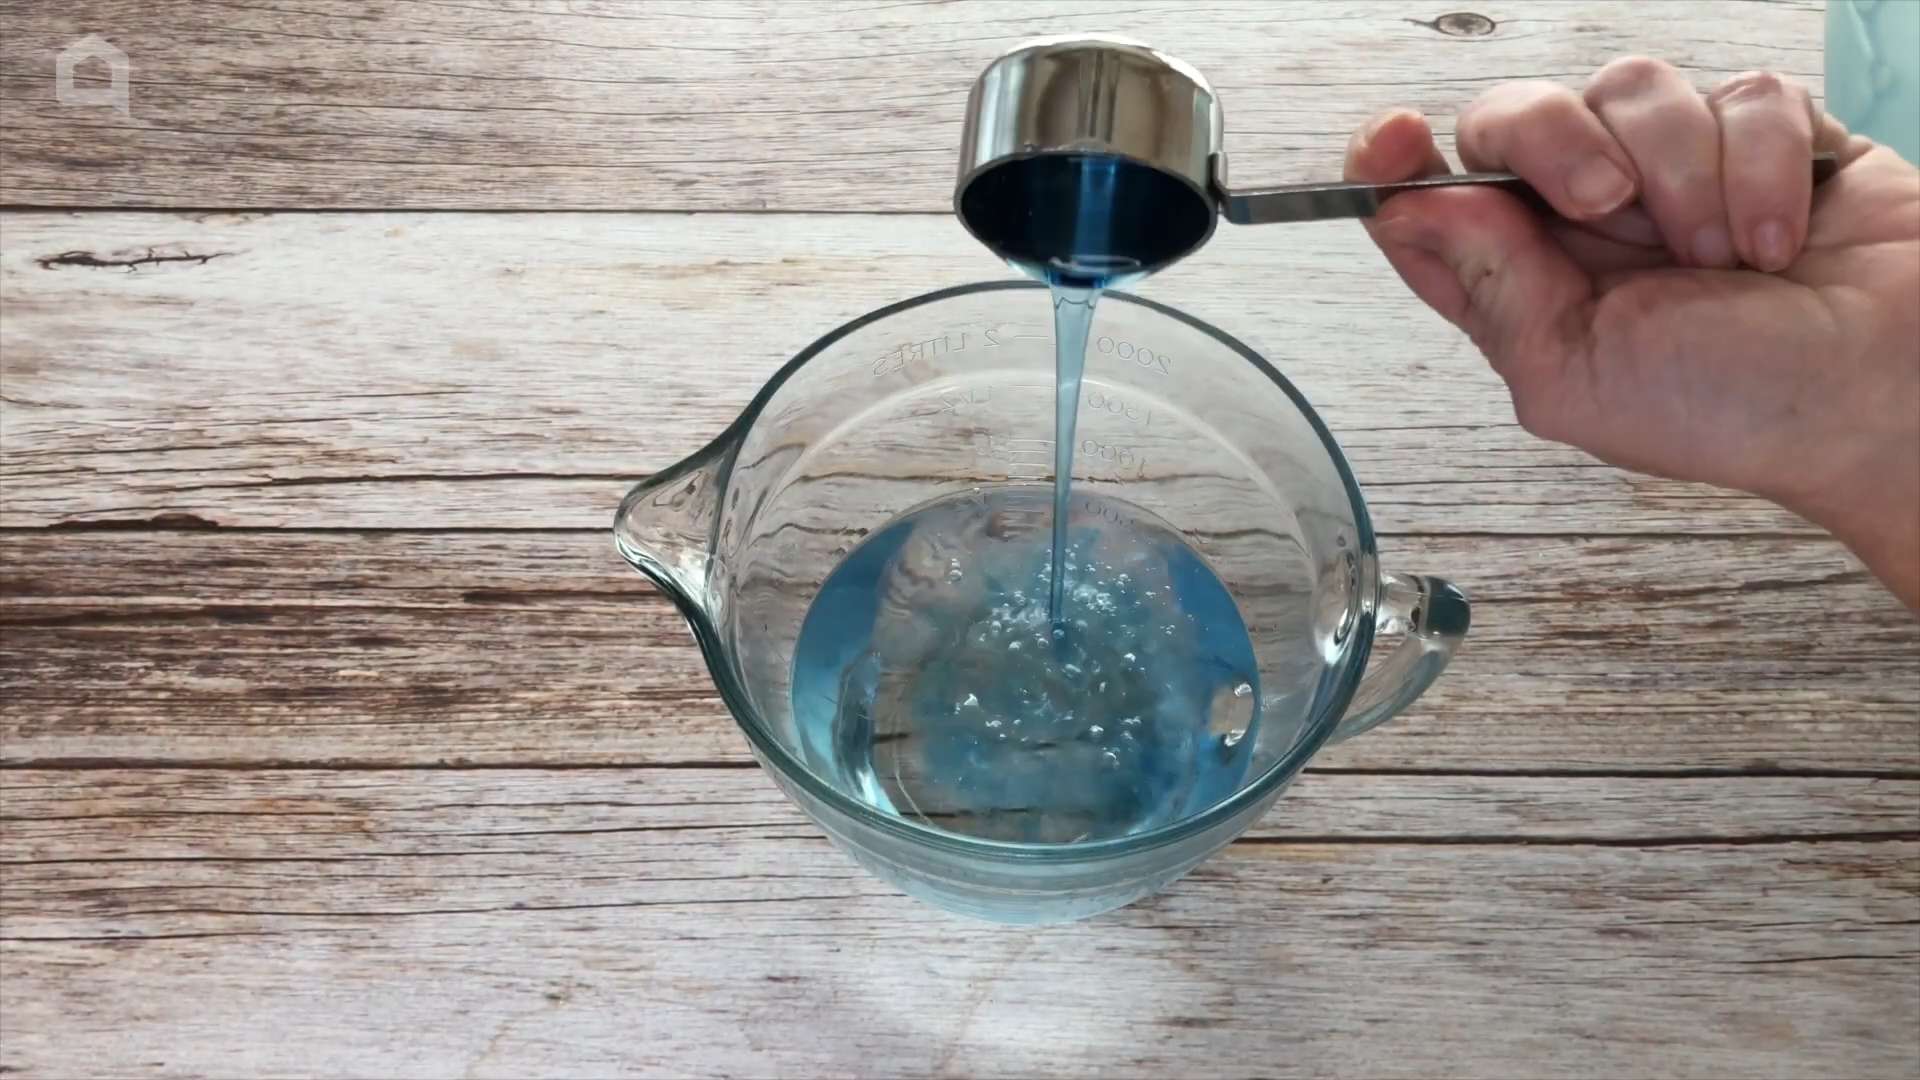
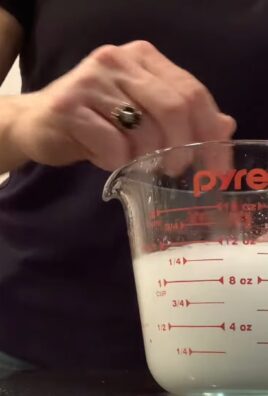
2. Add the Rubbing Alcohol: Pour 1 cup of rubbing alcohol into your spray bottle. Using a funnel can help prevent spills.
3. Add the Dish Soap: This is where you need to be careful. You only need a tiny amount of dish soap. I recommend starting with just 1 teaspoon. Too much soap will leave a residue and create streaks, which is exactly what we’re trying to avoid!
4. Top it Off with Water: Fill the rest of the spray bottle with distilled water. Leave a little bit of space at the top to allow for shaking.
5. Shake it Up! Secure the spray nozzle and gently shake the bottle to combine all the ingredients. Don’t shake it too vigorously, as this can create excessive bubbles.
6. Label Your Bottle: It’s always a good idea to label your homemade cleaners. Write “Window Cleaner” and the date on the bottle so you know what it is and when you made it.
Cleaning Your Windows Like a Pro: The Application Process
Okay, you’ve got your чудо-cleaner ready to go. Now let’s get those windows sparkling!
1. Prepare Your Windows: Before you start spraying, give your windows a quick once-over to remove any loose dirt, dust, or cobwebs. You can use a brush, a vacuum cleaner with a brush attachment, or even just a dry cloth.
2. Spray Sparingly: Lightly mist the window surface with your homemade cleaner. Don’t over-saturate the glass. A little goes a long way!
3. Wipe with a Microfiber Cloth: Immediately wipe the window with a clean, dry microfiber cloth. Use overlapping strokes to ensure you cover the entire surface.
4. Buff to a Shine: If you notice any streaks, use a fresh, dry microfiber cloth to buff the window until it’s crystal clear. This is the key to achieving that streak-free finish!
5. Tackle Tough Spots: For stubborn spots or grime, spray the area again and let the cleaner sit for a minute or two before wiping. You may need to scrub gently with your microfiber cloth.
6. Repeat as Needed: If your windows are particularly dirty, you may need to repeat the cleaning process.
Tips and Tricks for Sparkling Windows
Here are a few extra tips to help you achieve the best results:
* Choose the Right Time: Avoid cleaning your windows on a hot, sunny day. The cleaner will evaporate too quickly, leaving streaks behind. The best time to clean windows is on a cloudy day or in the early morning or late afternoon.
* Use Two Buckets: If you’re cleaning a lot of windows, consider using two buckets of water. One for rinsing your microfiber cloths and one for clean water. This will help prevent you from spreading dirt and grime around.
* Wash Your Microfiber Cloths Regularly: Dirty microfiber cloths will leave streaks. Wash them in hot water with a mild detergent and avoid using fabric softener, as it can leave a residue.
* Clean Your Window Screens: Don’t forget to clean your window screens! Dirty screens will make your windows look dirty, even after you’ve cleaned them. You can use a brush or a vacuum cleaner to remove dust and debris. For a deeper clean, wash them with soap and water.
* Test in an Inconspicuous Area: Before cleaning your entire window, test the cleaner in a small, inconspicuous area to make sure it doesn’t damage the surface. This is especially important if you have tinted windows or special coatings.
* Don’t Forget the Edges: Pay attention to the edges of your windows, where dirt and grime tend to accumulate. Use a cotton swab or a small brush to clean these areas.
* Clean Interior Windows First: Start by cleaning your interior windows, as they tend to be less dirty than exterior windows. This will help you get a feel for the cleaning process and avoid wasting cleaner on heavily soiled surfaces.
* Vinegar Boost: For extra cleaning power, especially on hard water stains, you can add 1/4 cup of white vinegar to the mixture. Vinegar is a natural cleaner and disinfectant.
* Adjust the Soap: If you’re still seeing streaks, even after buffing, try reducing the amount of dish soap you’re using. Sometimes, even a tiny bit too much can cause problems.
* Different Cloths for Different Stages: Consider using one slightly damp microfiber cloth for the initial wipe and a completely dry one for buffing. This can help remove more dirt and prevent streaks.
* Squeegee Option: For large windows or glass doors, you can use a squeegee after spraying the cleaner. Overlap each stroke slightly and wipe the squeegee blade clean after each pass. This can help you achieve a professional-looking finish.
Cleaning Other Surfaces
This чудо-cleaner isn’t just for windows! You can also use it to clean other glass surfaces, such as:
* Mirrors
* Glass shower doors
* Glass tables
* Car windows
Just be sure to test it in an inconspicuous area first, especially on delicate surfaces.
Safety First!
While this homemade cleaner is generally safe, it’s always a good idea to take a few precautions:
* Keep out of reach of children and pets.
* Avoid contact with eyes. If contact occurs, rinse thoroughly with water.
* Do not ingest.
* Use in a well-ventilated area.
Troubleshooting: Why Are My Windows Still Streaky?
If you’re still struggling with streaks, here are a few common culprits:
* Too much dish soap: This is the most common cause of streaks. Reduce the amount of soap you’re using.
* Dirty microfiber cloths: Use clean, dry microfiber cloths.
* Hard water: Use distilled water instead of tap water.
* Cleaning in direct sunlight: Clean your windows on a cloudy day or in the early morning or late afternoon.
* Residue from previous cleaners: Thoroughly clean your windows with soap and water before using this homemade cleaner.
Final Thoughts
I hope you found this DIY window cleaner tutorial helpful! With just a few simple ingredients and a little elbow grease, you can achieve sparkling, streak-free windows without breaking the bank. Give it a try and let me know how it works for you! Happy cleaning!

Conclusion
So, there you have it! This simple yet incredibly effective dish soap and alcohol cleaning hack is a game-changer for anyone looking to streamline their cleaning routine and achieve sparkling results without harsh chemicals or breaking the bank. We’ve explored how this dynamic duo tackles everything from stubborn grease and grime to everyday messes, leaving surfaces clean, sanitized, and streak-free.
But why is this DIY cleaning solution a must-try? It boils down to several key factors: its simplicity, affordability, effectiveness, and eco-friendliness. You likely already have dish soap and rubbing alcohol in your home, making this a readily available solution. The cost is minimal compared to commercial cleaners, and the results speak for themselves. Plus, by opting for a homemade solution, you’re reducing your reliance on potentially harmful chemicals and contributing to a healthier environment.
Beyond the basic formula, there’s plenty of room for customization. For a refreshing scent, add a few drops of your favorite essential oil, such as lemon, lavender, or tea tree. Lemon oil, in particular, is known for its degreasing properties, making it a fantastic addition to the mix. If you’re dealing with particularly stubborn stains, consider increasing the concentration of alcohol slightly. However, always test the solution on an inconspicuous area first to ensure it doesn’t damage the surface.
Another variation involves using different types of dish soap. While any dish soap will work, those specifically designed for grease-cutting will provide the best results. Experiment with different brands to find one that you prefer. You can also adjust the ratio of dish soap to alcohol depending on the specific cleaning task. For lighter cleaning, a lower concentration of dish soap may suffice. For tougher jobs, a slightly higher concentration may be necessary.
This dish soap and alcohol cleaning hack isn’t just about cleaning; it’s about empowering you to take control of your cleaning routine and create a healthier, more sustainable home. It’s about simplifying your life and achieving exceptional results with minimal effort and expense.
We’re confident that once you try this DIY cleaning solution, you’ll be amazed by its versatility and effectiveness. It’s a simple, affordable, and eco-friendly way to tackle a wide range of cleaning tasks around your home.
So, what are you waiting for? Give this dish soap and alcohol cleaning hack a try today! We encourage you to experiment with different variations and find what works best for you. And most importantly, we want to hear about your experience! Share your tips, tricks, and success stories in the comments below. Let’s build a community of DIY cleaning enthusiasts and help each other create cleaner, healthier homes. We are eager to hear how this simple solution has transformed your cleaning routine. Your feedback is invaluable and will help us refine and improve this guide for others. Happy cleaning!
Frequently Asked Questions (FAQ)
What type of alcohol should I use?
Isopropyl alcohol (rubbing alcohol) is the recommended type of alcohol for this cleaning hack. Look for a concentration of 70% or higher for optimal disinfecting properties. While higher concentrations like 90% or 99% are available, they evaporate more quickly, which may reduce their contact time with surfaces and slightly diminish their effectiveness as disinfectants. 70% isopropyl alcohol strikes a good balance between disinfecting power and evaporation rate. Avoid using denatured alcohol or other types of alcohol not intended for cleaning, as they may contain additives that could leave residue or damage surfaces.
What type of dish soap is best?
Any dish soap will work, but dish soaps specifically formulated for grease-cutting are generally the most effective. These soaps contain enzymes and surfactants that are designed to break down grease and grime more efficiently. Experiment with different brands to find one that you prefer. Some popular options include Dawn, Palmolive, and Ajax. Consider using a clear dish soap to avoid any potential staining, especially on light-colored surfaces.
Can I use this cleaning solution on all surfaces?
While this cleaning solution is generally safe for most surfaces, it’s always a good idea to test it on an inconspicuous area first, especially on delicate or sensitive materials. Avoid using it on porous surfaces like unfinished wood, as the alcohol can penetrate and potentially damage the finish. Be cautious when using it on painted surfaces, as the alcohol can sometimes soften or dull the paint. Always wipe the surface dry after cleaning to prevent any water spots or residue. If you are unsure about a particular surface, consult the manufacturer’s instructions or test the solution in a hidden area.
How do I store the cleaning solution?
Store the cleaning solution in a clean, airtight spray bottle. Label the bottle clearly to avoid any confusion. Keep it out of reach of children and pets. Store it in a cool, dry place away from direct sunlight and heat. The solution should remain effective for several months if stored properly. If you notice any changes in color, odor, or consistency, discard the solution and make a fresh batch.
Is this cleaning solution safe for pets and children?
While this cleaning solution is generally considered safer than many commercial cleaners, it’s still important to take precautions when using it around pets and children. Keep the solution out of their reach and avoid spraying it directly on them. Ensure that surfaces are completely dry before allowing pets or children to come into contact with them. If pets or children ingest the solution, contact a veterinarian or poison control center immediately. As with any cleaning product, it’s always best to err on the side of caution and take steps to minimize any potential risks.
Can I add essential oils to this cleaning solution?
Yes, adding essential oils can enhance the cleaning power and scent of this DIY solution. Lemon, tea tree, lavender, and eucalyptus oils are popular choices due to their antibacterial and antifungal properties. Add a few drops of your favorite essential oil to the mixture and shake well before using. Be mindful of the potential for allergic reactions, especially if you have sensitive skin or allergies. Always test the solution on an inconspicuous area first to ensure that the essential oil doesn’t damage the surface.
How often should I make a fresh batch of this cleaning solution?
While the cleaning solution can remain effective for several months if stored properly, it’s generally recommended to make a fresh batch every few weeks to ensure optimal cleaning power and prevent any potential contamination. Over time, the alcohol may evaporate slightly, reducing the effectiveness of the solution. Making a fresh batch is quick and easy, so it’s a good practice to maintain the quality of your cleaning solution.
What are some other uses for this cleaning solution?
Besides general cleaning, this dish soap and alcohol cleaning hack can be used for a variety of other purposes, including:
* Cleaning mirrors and windows: It leaves them streak-free and sparkling.
* Sanitizing kitchen counters and cutting boards: It helps to kill bacteria and germs.
* Cleaning bathroom fixtures: It removes soap scum and water spots.
* Spot cleaning carpets and upholstery: It can help to remove stains and spills.
* Cleaning electronics: Use it sparingly on a microfiber cloth to clean screens and keyboards.
What if the solution leaves streaks?
Streaking can occur if too much dish soap is used or if the surface is not wiped dry properly. Try reducing the amount of dish soap in the mixture or using a clean, dry microfiber cloth to wipe the surface after cleaning. Ensure that the cloth is lint-free to avoid leaving any residue. You can also try diluting the solution with a bit of water to reduce the concentration of dish soap.
Can I use this to clean my phone screen?
Yes, you can use this solution to clean your phone screen, but with extreme caution. Never spray the solution directly onto the phone. Instead, lightly dampen a microfiber cloth with the solution and gently wipe the screen. Avoid getting any liquid into the phone’s ports or openings. Immediately dry the screen with a clean, dry microfiber cloth. This method can help remove fingerprints and smudges, but always prioritize safety and avoid over-saturating the cloth.
Leave a Comment