

Grow Peanuts in Buckets? Absolutely! Imagine harvesting a bounty of fresh, homegrown peanuts right from your patio or balcony. Forget those sprawling peanut farms; we’re bringing the fun and flavor of peanut cultivation to your doorstep with this easy and rewarding DIY project. For centuries, peanuts have been a staple food in many cultures, from South America, where they originated, to Asia and Africa. They’re not just delicious; they’re packed with protein and healthy fats.
But why grow peanuts in buckets, you ask? Well, many of us don’t have the space for a traditional garden, or perhaps our soil isn’t ideal for peanut cultivation. That’s where this clever hack comes in! Growing peanuts in buckets allows you to control the soil quality, manage pests more easily, and even move your plants to the sunniest spot. Plus, it’s a fantastic way to get kids involved in gardening and teach them about where their food comes from. I’m excited to share my tried-and-true method for a successful peanut harvest, even in the smallest of spaces. Let’s get started and turn those buckets into peanut powerhouses!
Grow Your Own Peanuts in Buckets: A Beginner’s Guide
Hey there, fellow gardening enthusiasts! Ever thought about growing your own peanuts? It might sound a little crazy, especially if you don’t live in a traditional peanut-growing region, but trust me, it’s totally doable, and even *fun*, to grow peanuts in buckets. I’ve done it myself, and I’m here to share my secrets to success. Get ready to enjoy fresh, homegrown peanuts right from your patio!
Why Grow Peanuts in Buckets?
Before we dive into the how-to, let’s talk about why growing peanuts in buckets is such a great idea:
* Space Saving: Perfect for small spaces like balconies, patios, or even indoors with enough sunlight.
* Control: You have complete control over the soil quality, watering, and pest management.
* Mobility: You can easily move your peanut plants to chase the sun or protect them from harsh weather.
* Unique Experience: It’s a fascinating and rewarding gardening project that’s sure to impress your friends and family.
* Early Harvest: In some climates, you can start your peanuts indoors and get a head start on the growing season.
What You’ll Need
Okay, let’s gather our supplies. Here’s what you’ll need to get started:
* Peanut Seeds: Raw, unsalted peanuts from a reputable source. Avoid roasted peanuts, as they won’t germinate. Virginia or Valencia varieties are generally recommended for container growing.
* Buckets: 5-gallon buckets are ideal. Make sure they have drainage holes at the bottom.
* Potting Mix: A well-draining potting mix is crucial. Avoid using garden soil, as it can become compacted in containers.
* Water: Access to a reliable water source.
* Sunlight: Peanuts need at least 6-8 hours of direct sunlight per day.
* Optional:
* Peat moss or coco coir to improve drainage.
* Organic fertilizer specifically formulated for legumes.
* A small shovel or trowel.
* Gloves (optional, but recommended).
Step-by-Step Instructions: Planting Your Peanuts
Alright, let’s get our hands dirty! Here’s how to plant your peanut seeds in buckets:
1. Soak the Peanuts: To help speed up germination, soak your peanut seeds in lukewarm water for 24 hours. This will soften the shells and encourage sprouting.
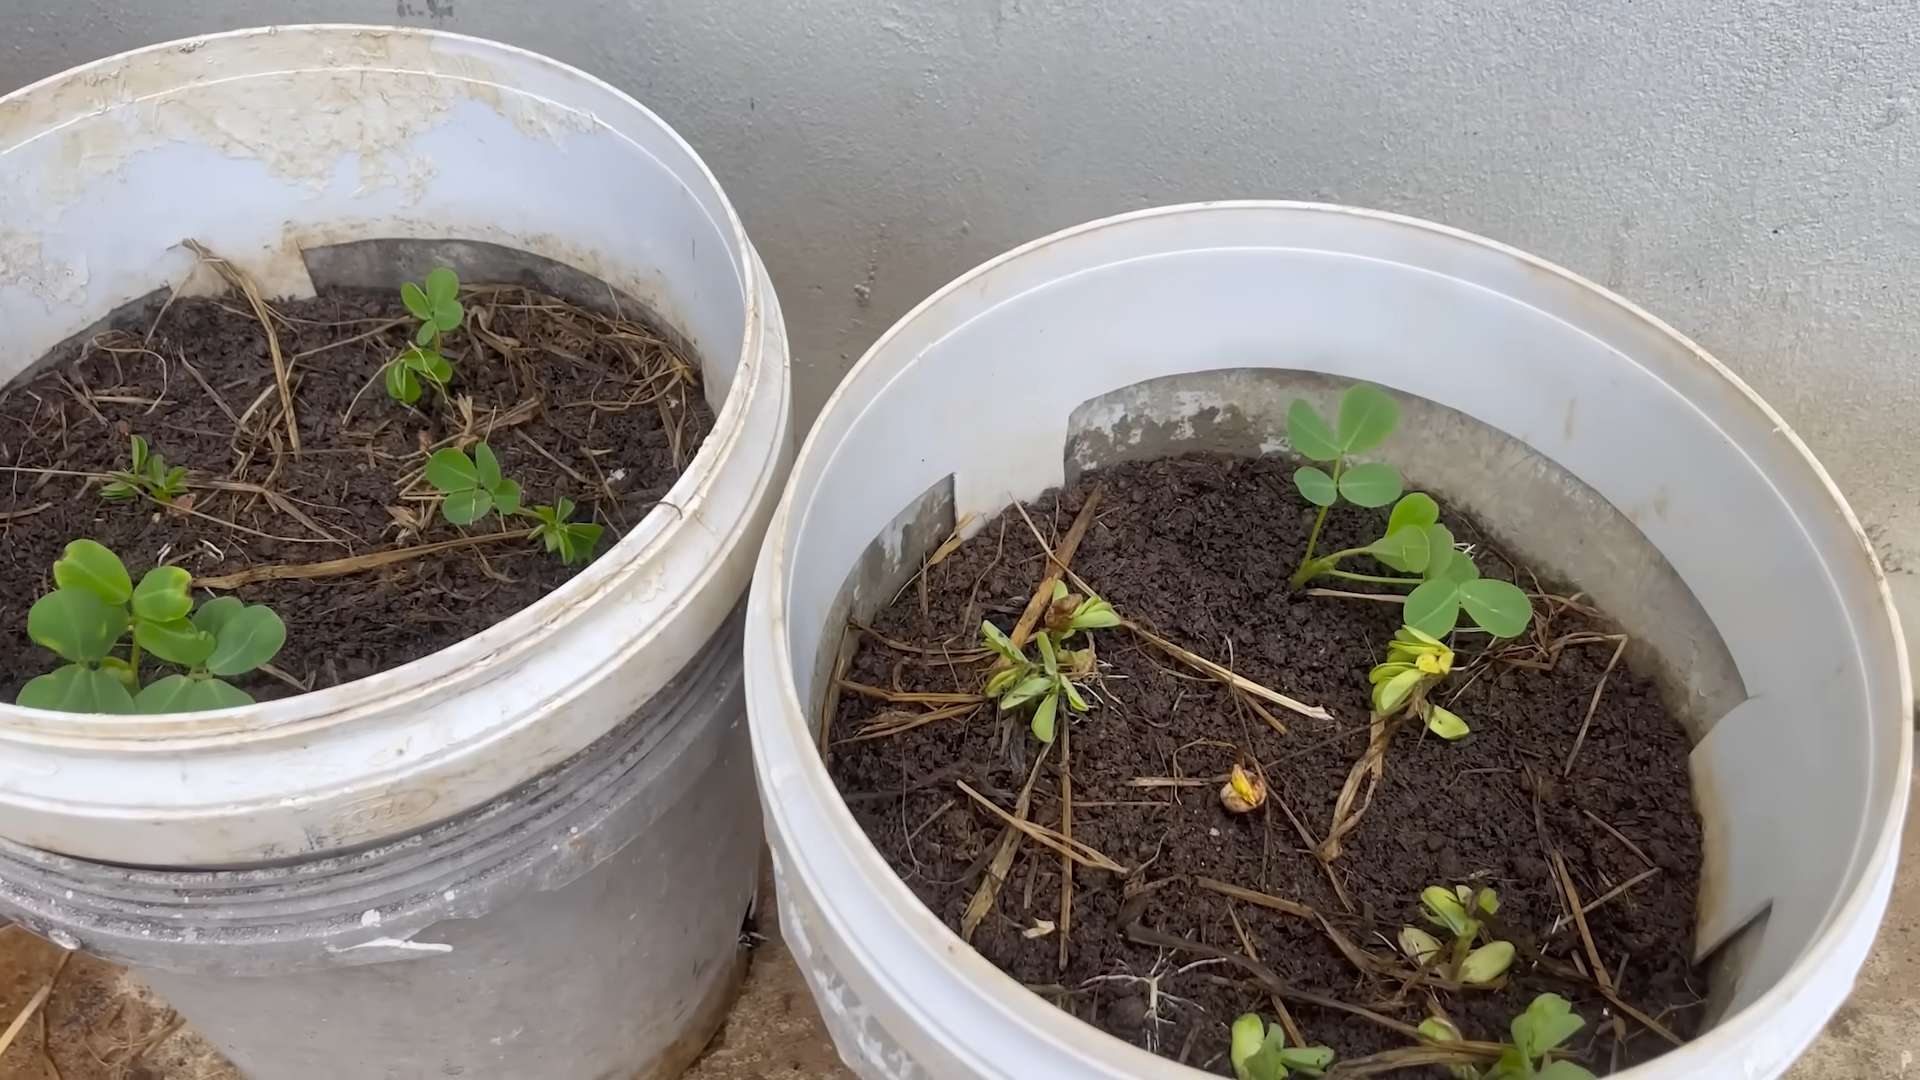
2. Prepare the Buckets: Ensure your buckets have adequate drainage holes. If not, drill a few holes in the bottom. Then, fill each bucket with your well-draining potting mix, leaving about 2-3 inches of space at the top.
3. Plant the Seeds: Plant 2-3 peanut seeds per bucket, about 1-2 inches deep. Space them evenly around the center of the bucket.
4. Water Thoroughly: Gently water the soil until it’s moist but not soggy. Avoid overwatering, as this can cause the seeds to rot.
5. Find a Sunny Spot: Place your buckets in a location that receives at least 6-8 hours of direct sunlight per day. A south-facing patio or balcony is usually ideal.
6. Be Patient: Germination can take anywhere from 7-14 days, depending on the temperature and moisture levels. Keep the soil consistently moist during this time.
Caring for Your Peanut Plants
Once your peanut plants have sprouted, it’s time to provide them with the care they need to thrive.
1. Watering: Water your peanut plants regularly, especially during hot, dry weather. The soil should be consistently moist but not waterlogged. Check the soil moisture by sticking your finger about an inch deep. If it feels dry, it’s time to water.
2. Fertilizing: Peanuts are legumes, which means they can fix nitrogen from the air. However, they still benefit from occasional fertilization. Use an organic fertilizer specifically formulated for legumes, following the instructions on the package. Avoid over-fertilizing, as this can lead to excessive foliage growth and fewer peanuts.
3. Hilling: As your peanut plants grow, they will produce “pegs” that grow downwards from the plant into the soil. These pegs are where the peanuts will develop. To encourage peanut production, gently hill the soil around the base of the plants every few weeks. This will provide the pegs with more soil to grow into.
4. Weeding: Keep your buckets free of weeds, as they can compete with your peanut plants for nutrients and water. Hand-pull any weeds that appear.
5. Pest Control: Keep an eye out for pests such as aphids, spider mites, and caterpillars. If you notice any pests, treat them with an organic insecticide such as neem oil or insecticidal soap.
Harvesting Your Peanuts
The most exciting part! Harvesting your peanuts is a rewarding experience. Here’s how to know when it’s time to harvest and how to do it:
1. Timing: Peanuts typically take about 120-150 days to mature, depending on the variety and growing conditions. A good indicator that it’s time to harvest is when the foliage starts to turn yellow and the lower leaves begin to die back.
2. Testing: Before harvesting all of your peanuts, dig up a test plant to check the maturity of the peanuts. The peanut shells should be well-formed and the kernels should be plump and fully developed.
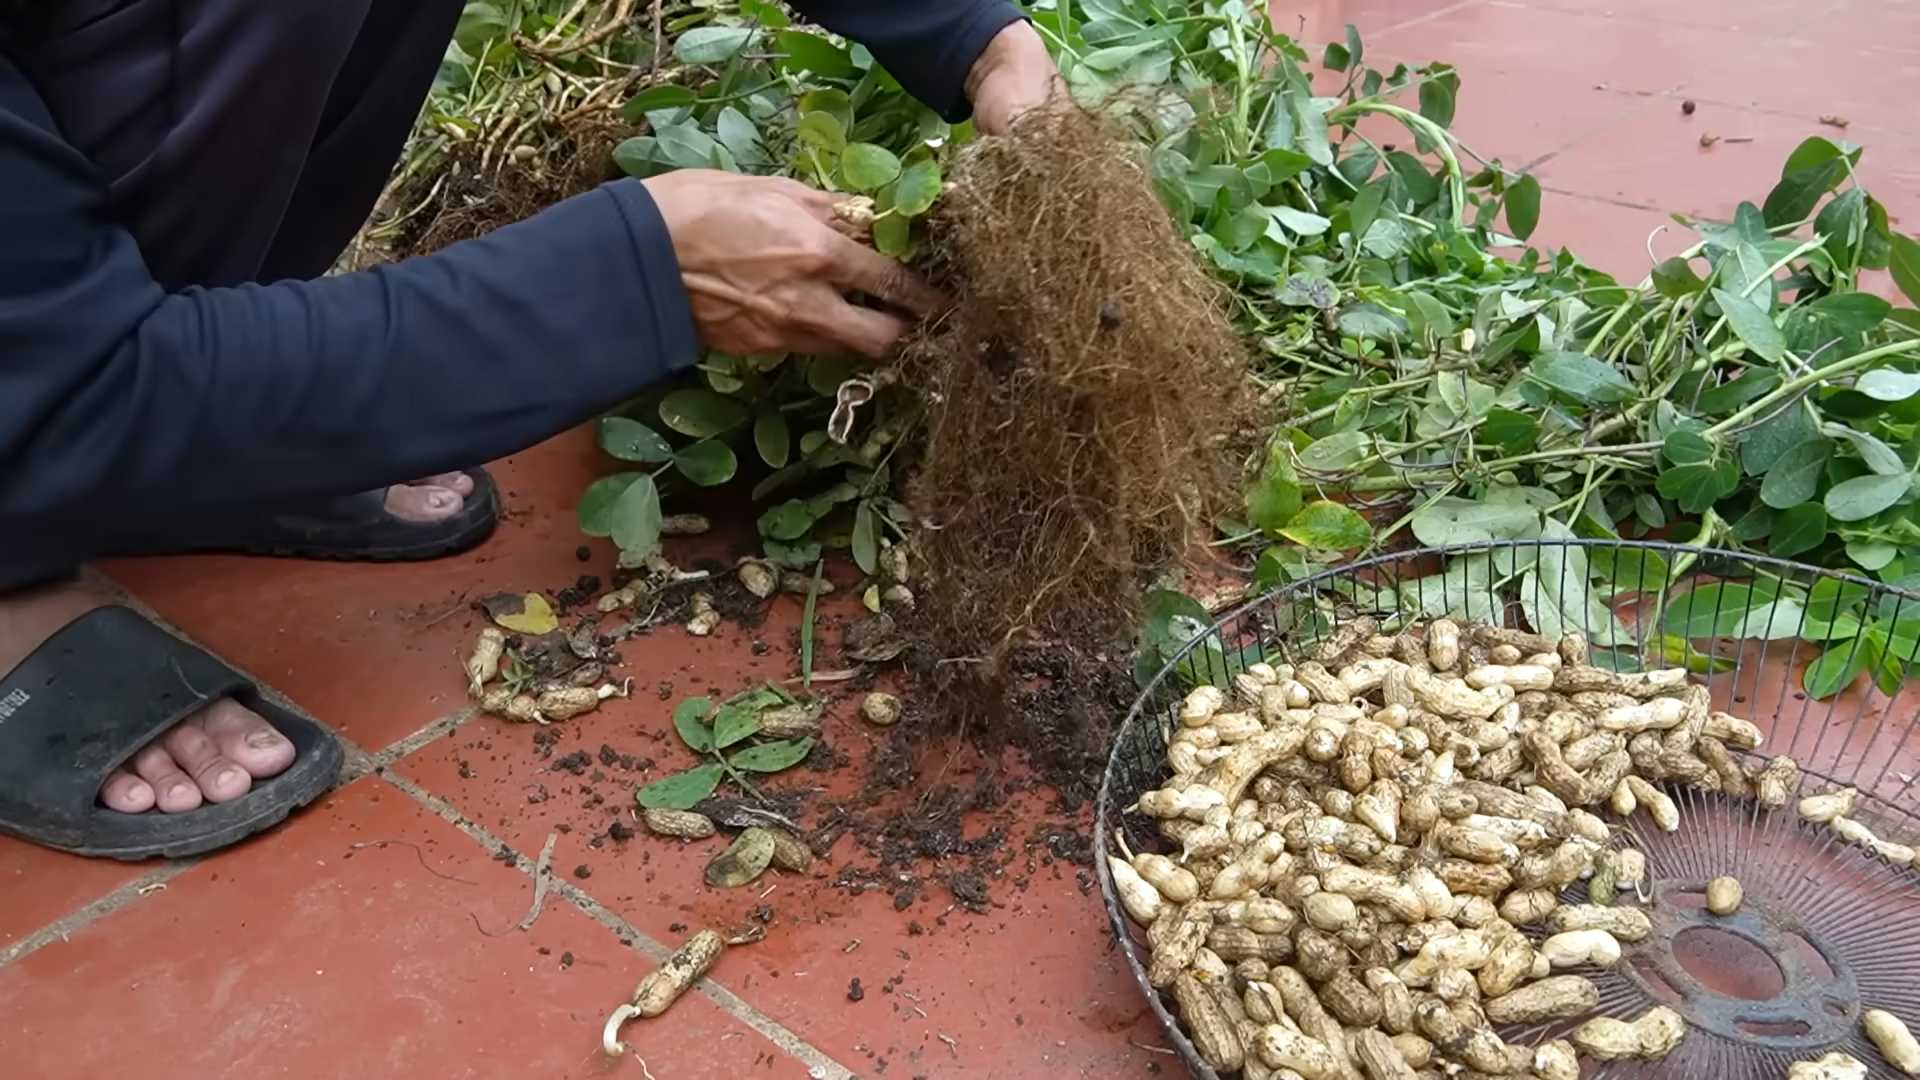
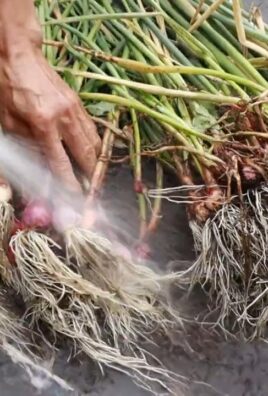
3. Harvesting: To harvest your peanuts, gently pull the entire plant out of the bucket. Shake off any excess soil.
4. Curing: After harvesting, you’ll need to cure your peanuts to dry them out and improve their flavor. Hang the entire plant upside down in a well-ventilated area for 2-4 weeks. You can also spread the peanuts out on a screen or tray to dry.
5. Storage: Once the peanuts are fully cured, you can store them in a cool, dry place for several months. You can store them in their shells or shell them and store the kernels in an airtight container.
Troubleshooting
Even with the best care, you might encounter some challenges along the way. Here are some common problems and how to fix them:
* Poor Germination: If your peanut seeds don’t germinate, make sure they are fresh and viable. Also, ensure the soil is consistently moist but not waterlogged.
* Yellowing Leaves: Yellowing leaves can be a sign of nutrient deficiency. Try fertilizing your plants with an organic fertilizer specifically formulated for legumes.
* Lack of Peanuts: If your plants are growing well but not producing peanuts, it could be due to a lack of pollination. Peanuts are self-pollinating, but you can help them along by gently shaking the plants to release pollen.
* Pest Infestations: Regularly inspect your plants for pests and treat them promptly with an organic insecticide.
Tips for Success
Here are a few extra tips to help you grow the best peanuts possible:
* Choose the Right Variety: Virginia and Valencia peanut varieties are generally recommended for container growing.
* Use High-Quality Potting Mix: A well-draining potting mix is essential for healthy peanut growth.
* Provide Plenty of Sunlight: Peanuts need at least 6-8 hours of direct sunlight per day.
* Water Regularly: Keep the soil consistently moist but not waterlogged.
* Fertilize Sparingly: Use an organic fertilizer specifically formulated for legumes, following the instructions on the package.
* Be Patient: Peanuts take time to mature, so don’t get discouraged if you don’t see results right away.
Enjoy Your Homegrown Peanuts!
Growing peanuts in buckets is a fun and rewarding gardening project that anyone can do. With a little bit of care and attention, you can enjoy fresh, homegrown peanuts right from your patio. So, what are you waiting for? Get started today! I hope you found this guide helpful, and happy gardening!
Conclusion
So, there you have it! Growing peanuts in buckets is not just a quirky gardening experiment; it’s a genuinely rewarding and surprisingly accessible way to enjoy fresh, homegrown peanuts, even if you’re short on space or live in an area with less-than-ideal soil. We’ve walked you through the entire process, from selecting the right bucket and soil to planting, nurturing, and finally, harvesting your very own peanut crop.
Why is this DIY trick a must-try? Because it democratizes peanut cultivation! No longer is this delicious legume limited to large-scale farms in specific climates. With a few simple supplies and a little patience, you can experience the unique satisfaction of pulling peanut pods straight from the earth – or, in this case, from your bucket! The taste of freshly harvested peanuts is unlike anything you’ll find in a store; it’s sweeter, nuttier, and bursting with flavor. Plus, it’s a fantastic conversation starter and a fun project to share with kids, teaching them about the life cycle of plants and the origins of their food.
But the benefits extend beyond just taste and education. Growing your own peanuts is also a sustainable choice. You’re reducing your carbon footprint by eliminating the transportation and packaging associated with store-bought peanuts. You’re also in control of the growing process, ensuring that your peanuts are free from harmful pesticides and chemicals.
Ready to take your peanut growing to the next level? Consider these variations:
* Experiment with different peanut varieties: There are several types of peanuts, each with its own unique flavor and growth characteristics. Try Virginia peanuts for large, flavorful nuts, or Spanish peanuts for smaller, sweeter ones.
* Add companion plants: Marigolds, basil, and other herbs can help deter pests and improve the overall health of your peanut plants.
* Get creative with your bucket setup: Use decorative pots or even repurpose old containers to add a touch of personality to your peanut garden.
Ultimately, the best way to discover the joys of growing peanuts in buckets is to simply give it a try. Don’t be afraid to experiment, learn from your mistakes, and adapt the process to suit your own unique circumstances. The rewards – a bountiful harvest of delicious, homegrown peanuts – are well worth the effort.
We’re confident that you’ll find this DIY project to be both enjoyable and rewarding. So, grab a bucket, some peanut seeds, and get ready to experience the magic of growing your own peanuts!
And now, we want to hear from you! Have you tried growing peanuts in buckets before? What tips and tricks have you learned along the way? Share your experiences, photos, and questions in the comments below. Let’s create a community of bucket peanut growers and learn from each other! We can’t wait to see your peanut-growing success stories!
Frequently Asked Questions (FAQ)
Q: What kind of bucket is best for growing peanuts?
A: The ideal bucket size is at least 5 gallons, but 10-gallon buckets are even better as they provide more room for the peanut plants to develop their root systems and produce a larger yield. Make sure the bucket has drainage holes at the bottom to prevent waterlogging, which can lead to root rot. Plastic buckets are commonly used and readily available, but you can also use metal or even fabric pots as long as they provide adequate drainage. Dark-colored buckets can heat up quickly in direct sunlight, so consider using lighter colors or placing the bucket in a partially shaded area.
Q: What type of soil should I use for growing peanuts in buckets?
A: Peanuts thrive in well-draining, sandy loam soil. Avoid heavy clay soils, as they can become compacted and hinder the development of the peanut pods. You can purchase a pre-mixed potting mix specifically designed for vegetables, or you can create your own mix by combining equal parts of garden soil, compost, and sand or perlite. The compost will provide essential nutrients, while the sand or perlite will improve drainage. Ensure the soil is slightly acidic to neutral, with a pH between 6.0 and 7.0.
Q: How many peanut seeds should I plant in each bucket?
A: Plant 3-4 peanut seeds per bucket, spacing them evenly around the center. Once the seedlings emerge and have developed a few sets of true leaves, thin them out to the strongest one or two plants per bucket. This will ensure that each plant has enough space and resources to grow and produce a good yield. Overcrowding can lead to smaller peanuts and increased susceptibility to diseases.
Q: How often should I water my peanut plants in buckets?
A: Water your peanut plants regularly, especially during hot and dry weather. The soil should be kept consistently moist but not waterlogged. Water deeply whenever the top inch of soil feels dry to the touch. Avoid overhead watering, as this can increase the risk of fungal diseases. Instead, water at the base of the plant, directing the water towards the roots. During periods of heavy rain, you may need to reduce watering frequency to prevent the soil from becoming waterlogged.
Q: How much sunlight do peanut plants need?
A: Peanut plants require at least 6-8 hours of direct sunlight per day to thrive. Choose a location for your buckets that receives plenty of sunlight throughout the day. If you live in an area with intense summer heat, you may need to provide some afternoon shade to prevent the plants from scorching. Insufficient sunlight can lead to stunted growth and reduced peanut production.
Q: When is the best time to harvest peanuts grown in buckets?
A: Peanuts typically take 120-150 days to mature, depending on the variety and growing conditions. The best time to harvest is when the foliage begins to yellow and the peanut pods are mature. To check for maturity, dig up a few pods and examine the inside of the shells. The shells should be well-formed and the kernels should be plump and fully developed. If the kernels are still small and the shells are thin, the peanuts are not yet ready for harvest.
Q: How do I harvest peanuts from buckets?
A: Harvesting peanuts from buckets is relatively easy. Simply tip the bucket over and gently pull the entire plant out of the soil. Shake off any excess soil and then carefully remove the peanut pods from the roots. Be careful not to damage the pods during the harvesting process.
Q: How do I cure and store my homegrown peanuts?
A: After harvesting, cure the peanuts by spreading them out in a single layer on a screen or tray in a well-ventilated area for 1-2 weeks. This will allow the peanuts to dry properly and prevent mold growth. Once the peanuts are fully cured, you can store them in an airtight container in a cool, dry place. Shelled peanuts can be stored in the refrigerator or freezer for longer shelf life.
Q: Can I grow peanuts in buckets indoors?
A: While it’s possible to grow peanuts in buckets indoors, it can be challenging to provide them with the necessary sunlight and growing conditions. You’ll need to use grow lights to supplement natural sunlight and ensure that the plants receive at least 12-14 hours of light per day. You’ll also need to provide adequate ventilation and humidity control. Growing peanuts outdoors in buckets is generally easier and more successful.
Q: Are there any common pests or diseases that affect peanut plants grown in buckets?
A: Peanut plants can be susceptible to various pests and diseases, including aphids, spider mites, leaf spot, and root rot. Regularly inspect your plants for signs of infestation or disease. If you notice any problems, take action promptly to prevent them from spreading. You can use organic pest control methods, such as insecticidal soap or neem oil, to control aphids and spider mites. To prevent leaf spot and root rot, ensure that the soil is well-draining and avoid overwatering.
Leave a Comment