

Growing Celery Indoors might seem like a challenge reserved for seasoned gardeners, but trust me, it’s totally achievable, even if you’re just starting out! Have you ever bought a bunch of celery, used a few stalks, and watched the rest wilt away in your fridge? I know I have, countless times! That’s where this DIY guide comes in. We’re going to unlock the secrets to regrowing celery from those leftover bases, right in your own home.
Celery, with its crisp texture and refreshing flavor, has been cultivated for centuries. Originating in the Mediterranean region, it was initially valued for its medicinal properties before becoming a culinary staple. Now, imagine having a constant supply of fresh celery, ready whenever you need it, without even leaving your kitchen!
In today’s world, where sustainability and reducing food waste are more important than ever, learning how to regrow vegetables like celery is a game-changer. Not only will you save money, but you’ll also reduce your environmental footprint. Plus, it’s incredibly rewarding to watch something grow from what would otherwise be discarded. So, let’s dive into these simple yet effective home gardening tricks and learn how easy growing celery indoors can be. Get ready to impress your friends and family with your newfound green thumb!
Growing Celery Indoors: A Beginner’s Guide
Hey there, fellow plant enthusiasts! Ever thought about growing your own celery indoors? It’s totally doable, and honestly, there’s something incredibly satisfying about snipping off fresh stalks for your soup or snacks right from your kitchen. I’m going to walk you through the whole process, from rescuing a celery heart from the grocery store to harvesting your very own homegrown stalks. Let’s get started!
Choosing Your Celery and Preparing the Base
First things first, you need a celery heart. Head to your local grocery store and pick out a celery bunch that looks healthy and firm. The base, where the stalks are connected, is what we’re after.
* Look for a healthy base: Choose a celery bunch with a firm, tightly packed base. Avoid any that are slimy, brown, or look like they’re starting to rot.
* Freshness matters: The fresher the celery, the better the chances of it regrowing.
* Organic is a plus: While not essential, organic celery might be less likely to have been treated with growth inhibitors.
Now, let’s prepare that base!
1. Cut off the stalks: Using a sharp knife, cut off all the celery stalks about 2 inches from the base. Don’t throw those stalks away! You can use them for cooking, juicing, or snacking.
2. Prepare a shallow dish: Find a shallow dish or bowl. A pie plate or a plastic container lid works perfectly.
3. Add water: Fill the dish with about an inch of water. Make sure the water is clean and at room temperature.
4. Place the celery base: Place the celery base, cut-side up, in the dish of water. The bottom of the base should be submerged in the water.
5. Find a sunny spot: Place the dish in a bright, sunny location. A windowsill that gets plenty of sunlight is ideal. If you don’t have a sunny spot, you can use a grow light.
6. Change the water regularly: Change the water every day or two to prevent bacteria growth and keep the celery base hydrated.
Watching it Grow: Initial Rooting and Sprouting
This is where the magic happens! Over the next few days, you should start to see some changes.
* Root development: Within a few days to a week, you should notice small roots starting to grow from the bottom of the celery base. This is a great sign!
* Sprout emergence: At the same time, you should also see small, pale green sprouts emerging from the center of the celery base. These are the new celery stalks starting to grow.
* Patience is key: Don’t get discouraged if you don’t see results immediately. Sometimes it takes a little longer for the celery to start growing. Just keep the water fresh and the base in a sunny spot.
1. Observe the roots: Keep an eye on the roots. You want them to be at least an inch or two long before you transplant the celery.
2. Monitor the sprouts: Watch the sprouts grow. They should start to look more like tiny celery stalks.
3. Maintain water levels: Make sure the water level stays consistent. The bottom of the celery base should always be submerged.
4. Rotate the base: If you’re using a windowsill, rotate the celery base every day or two to ensure that all sides get equal sunlight. This will help prevent the sprouts from leaning towards the light.
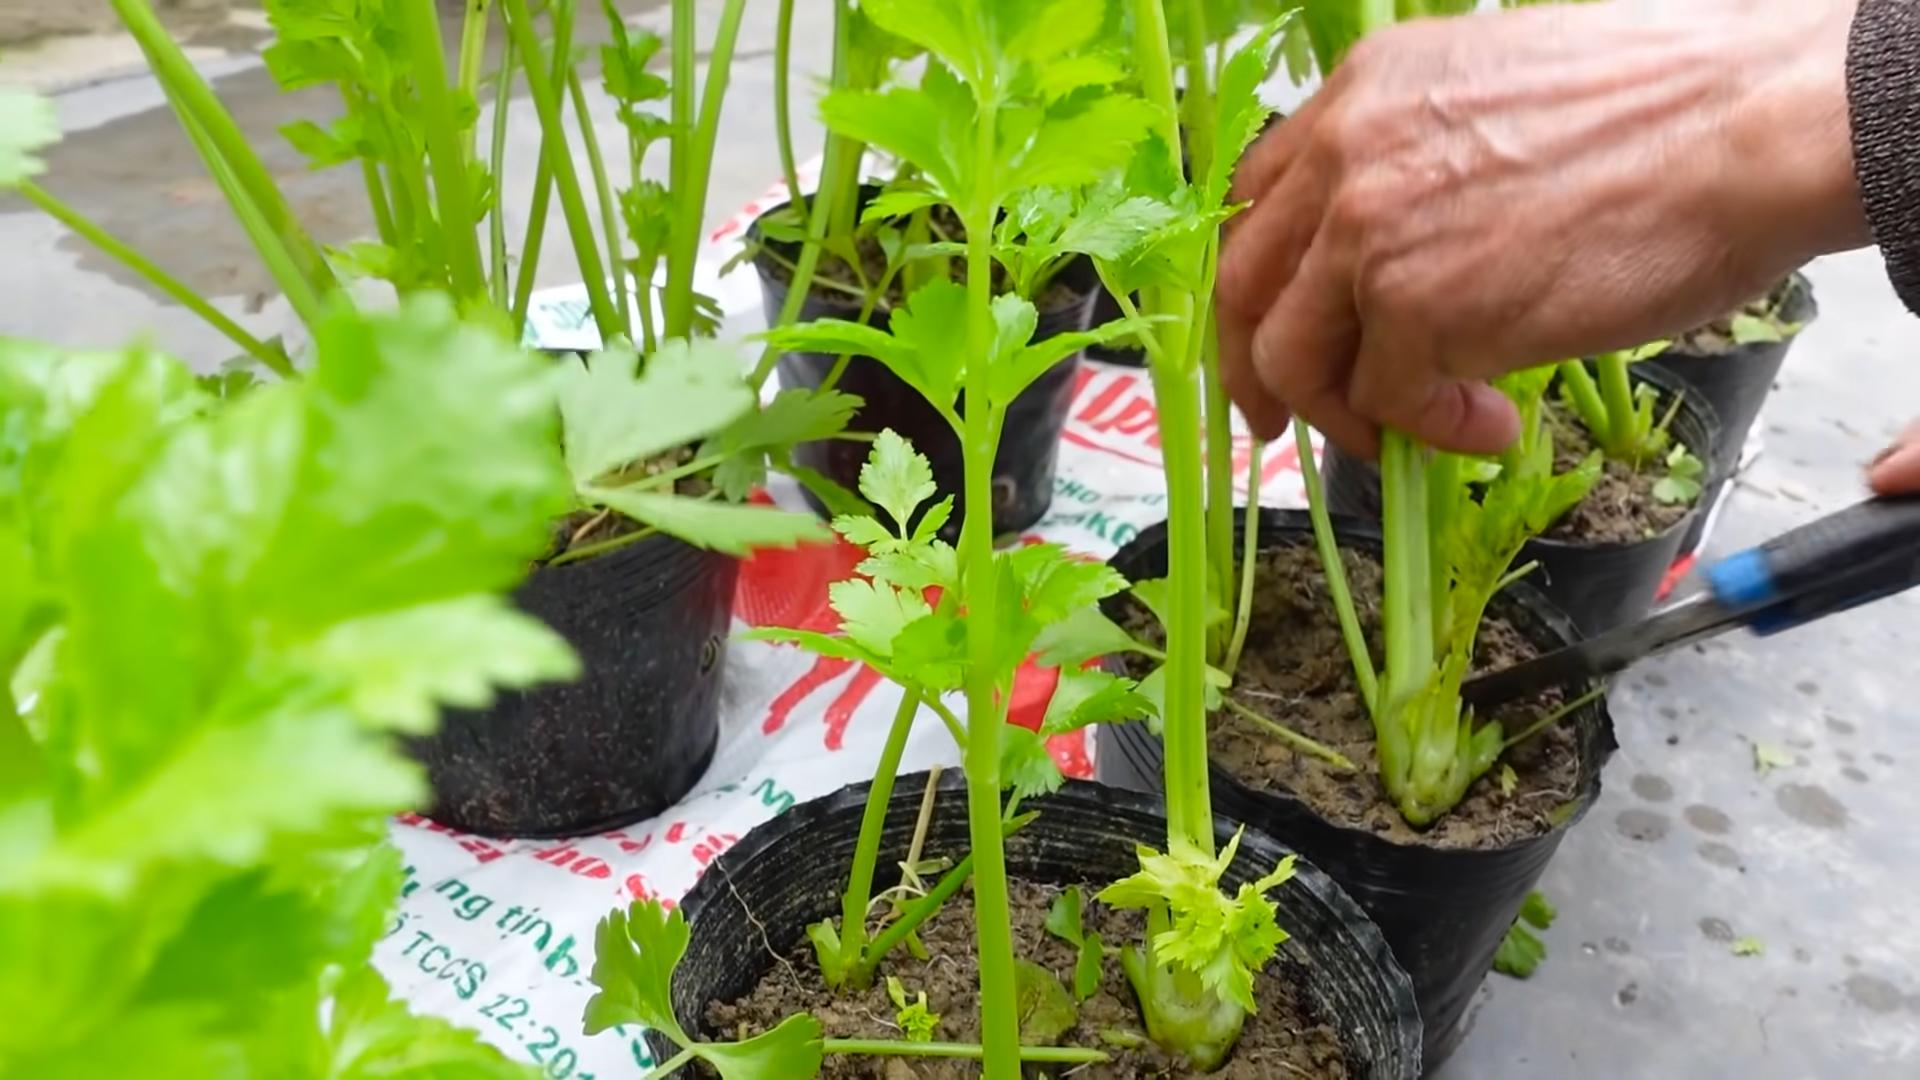
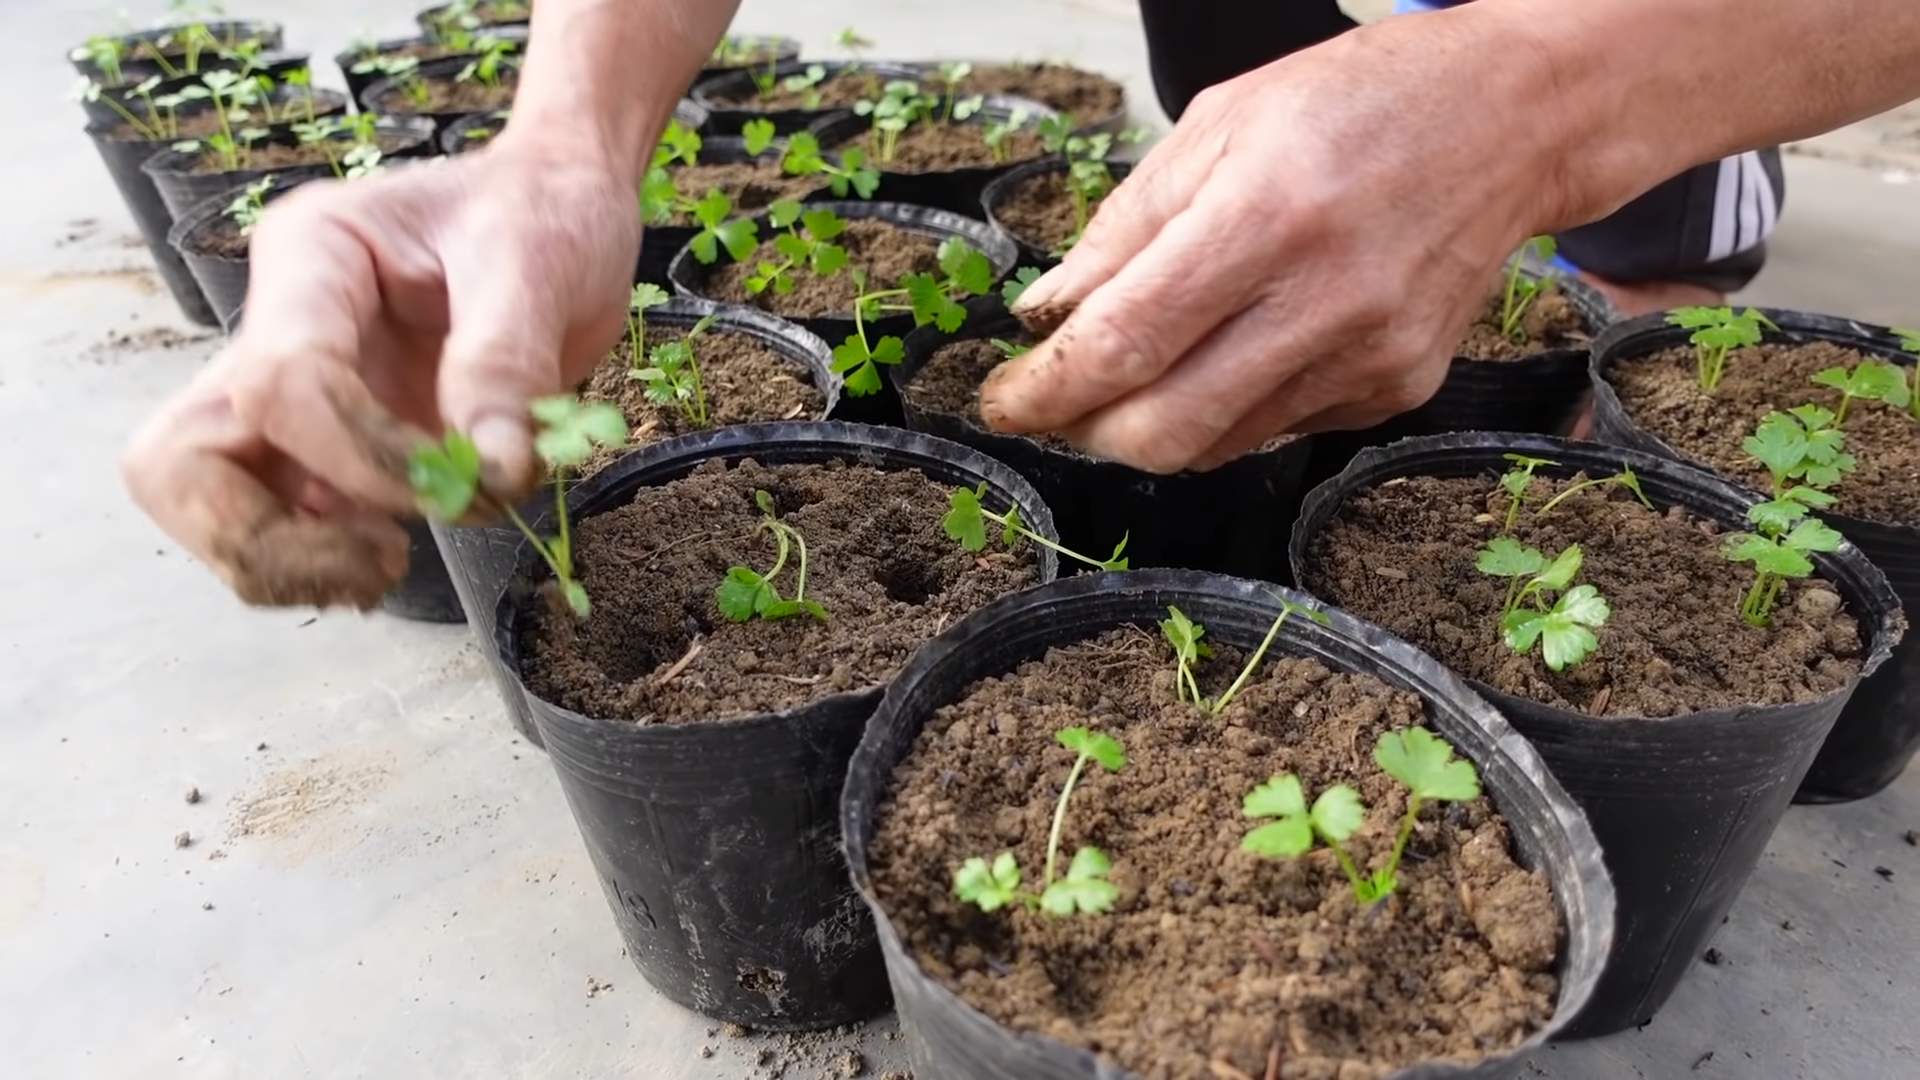
Transplanting to Soil: Giving Your Celery a Home
Once the roots are well-developed and the sprouts are growing nicely, it’s time to transplant your celery to soil. This will give it the nutrients it needs to grow into a full-sized plant.
* Choosing the right pot: Select a pot that is at least 6 inches in diameter and 8 inches deep. Celery needs room for its roots to grow.
* Selecting the right soil: Use a well-draining potting mix. A mix of potting soil, compost, and perlite is ideal.
* Gentle handling: Be very careful when handling the celery base to avoid damaging the roots or sprouts.
1. Prepare the pot: Fill the pot with the potting mix, leaving about an inch of space at the top.
2. Make a hole: Dig a hole in the center of the pot that is large enough to accommodate the celery base and its roots.
3. Carefully remove the celery base: Gently lift the celery base out of the water dish. Be careful not to break the roots.
4. Place the celery base in the hole: Place the celery base in the hole, making sure that the top of the base is level with the soil surface.
5. Fill in the hole: Gently fill in the hole around the celery base with potting mix.
6. Water thoroughly: Water the soil thoroughly until water drains out of the bottom of the pot.
7. Place in a sunny location: Place the pot in a bright, sunny location.
Caring for Your Indoor Celery Plant
Now that your celery is planted in soil, it’s important to provide it with the right care to help it thrive.
* Watering: Celery needs consistent moisture. Water the plant whenever the top inch of soil feels dry to the touch. Avoid overwatering, as this can lead to root rot.
* Fertilizing: Feed your celery plant with a balanced liquid fertilizer every two weeks. Follow the instructions on the fertilizer package.
* Sunlight: Celery needs at least 6 hours of sunlight per day. If you don’t have a sunny spot, use a grow light.
* Temperature: Celery prefers temperatures between 60掳F and 70掳F (15掳C and 21掳C).
* Humidity: Celery likes humidity. If your home is dry, you can increase the humidity around the plant by placing a tray of water near it or using a humidifier.
1. Check the soil moisture: Stick your finger into the soil to check the moisture level. If the top inch feels dry, it’s time to water.
2. Water deeply: When you water, water deeply until water drains out of the bottom of the pot.
3. Fertilize regularly: Feed your celery plant with a balanced liquid fertilizer every two weeks.
4. Provide adequate sunlight: Make sure your celery plant gets at least 6 hours of sunlight per day.
5. Maintain a comfortable temperature: Keep the temperature around your celery plant between 60掳F and 70掳F (15掳C and 21掳C).
6. Increase humidity if needed: If your home is dry, increase the humidity around your celery plant.
7. Watch for pests: Keep an eye out for pests, such as aphids or spider mites. If you see any pests, treat them with an insecticidal soap or neem oil.
Harvesting Your Homegrown Celery
After a few months of care, your celery plant should be ready to harvest.
* When to harvest: You can start harvesting celery stalks when they are about 6-8 inches long.
* How to harvest: Use a sharp knife to cut off the outer stalks near the base of the plant. Leave the inner stalks to continue growing.
* Continuous harvest: You can continue to harvest celery stalks from the same plant for several months.
1. Choose the stalks: Select the outer stalks that are at least 6-8 inches long.
2. Cut the stalks: Use a sharp knife to cut off the stalks near the base of the plant.
3. Enjoy your harvest: Wash the celery stalks and enjoy them in salads, soups, or as a snack.
4. Continue caring for the plant: Continue to water, fertilize, and provide sunlight to the plant to encourage further growth.
Troubleshooting Common Issues
Even with the best care, you might encounter some issues while growing celery indoors. Here are some common problems and how to fix them:
* Yellowing leaves: Yellowing leaves can be a sign of overwatering, underwatering, or nutrient deficiency. Check the soil moisture and adjust your watering schedule accordingly. Fertilize the plant with a balanced liquid fertilizer.
* Slow growth: Slow growth can be caused by insufficient sunlight, low temperatures, or nutrient deficiency. Make sure the plant is getting enough sunlight and keep the temperature between 60掳F and 70掳F (15掳C and 21掳C). Fertilize the plant with a balanced liquid fertilizer.
* Pests: Celery can be susceptible to pests, such as aphids or spider mites. Treat the plant with an insecticidal soap or neem oil.
* Root rot: Root rot is caused by overwatering. Make sure the soil is
Conclusion
So, there you have it! Growing celery indoors might seem like a challenge, but with a little patience and the right approach, you can enjoy fresh, crisp celery right from your own home. This DIY trick isn’t just about saving money; it’s about connecting with your food, reducing your environmental footprint, and experiencing the satisfaction of nurturing something from start to finish.
Why is this a must-try? Because store-bought celery, while convenient, often lacks the vibrant flavor and freshness of homegrown. Plus, you have complete control over the growing process, ensuring your celery is free from harmful pesticides and chemicals. Imagine the taste difference in your soups, salads, and snacks!
But the benefits extend beyond just taste and health. Growing celery indoors is a fantastic way to add a touch of green to your living space, especially during the colder months when outdoor gardening is limited. It’s a rewarding hobby that can bring a sense of calm and accomplishment.
Looking for variations? Consider experimenting with different celery varieties. ‘Utah Tall’ is a classic choice, but you might also try ‘Golden Self-Blanching’ for a milder flavor. You can also adjust the growing medium to suit your preferences. While we’ve focused on using water for the initial regrowth, you can eventually transplant your celery into a pot filled with a well-draining potting mix enriched with compost for continued growth and larger stalks. Another fun variation is to try growing celery from the base of organic celery, as this ensures you’re starting with a plant that hasn’t been treated with synthetic chemicals.
Don’t be afraid to get creative with your setup! If you don’t have a sunny windowsill, consider using a grow light to provide the necessary illumination. You can also experiment with different containers to find what works best for your space.
Ultimately, the success of growing celery indoors depends on your dedication and willingness to learn. Observe your plants closely, adjust your watering and lighting as needed, and don’t be discouraged if you encounter a few bumps along the way. Every gardener, even experienced ones, faces challenges. The key is to learn from your mistakes and keep experimenting.
We wholeheartedly encourage you to give this DIY trick a try. It’s a simple, affordable, and rewarding way to bring a little bit of the garden indoors. And most importantly, we want to hear about your experience! Share your photos, tips, and challenges in the comments below. Let’s create a community of indoor celery growers and learn from each other. Your insights could help someone else succeed in their own celery-growing journey. So, grab a celery stalk, get started, and let the growing begin! Embrace the joy of growing celery indoors and discover the delicious rewards that await.
Frequently Asked Questions (FAQ)
1. How long does it take to regrow celery from a base?
The initial regrowth phase, where you see new leaves sprouting from the celery base in water, typically takes about 1-2 weeks. However, for the celery to grow into a substantial plant with usable stalks, it can take several months. Patience is key! The speed of growth will also depend on factors like light, temperature, and nutrient availability. Remember that indoor-grown celery might not reach the same size as commercially grown celery.
2. What kind of water should I use to regrow celery?
Tap water is generally fine, but it’s best to let it sit out for 24 hours to allow chlorine to dissipate. Alternatively, you can use filtered water. Avoid using distilled water, as it lacks the minerals that plants need. Change the water every 1-2 days to prevent bacterial growth and keep the celery base healthy.
3. How much sunlight does celery need when growing indoors?
Celery needs at least 6 hours of sunlight per day. A south-facing windowsill is ideal. If you don’t have enough natural light, supplement with a grow light. Position the grow light about 6-12 inches above the celery plant. LED grow lights are energy-efficient and produce less heat than traditional incandescent bulbs.
4. What kind of soil should I use if I transplant the celery to a pot?
Use a well-draining potting mix that is rich in organic matter. A mixture of equal parts potting soil, compost, and perlite or vermiculite works well. The compost provides nutrients, while the perlite or vermiculite improves drainage. Avoid using garden soil, as it can be too heavy and may contain pests or diseases.
5. How often should I water celery after transplanting it to soil?
Keep the soil consistently moist, but not waterlogged. Water when the top inch of soil feels dry to the touch. Overwatering can lead to root rot, so ensure the pot has drainage holes. During the warmer months, you may need to water more frequently.
6. Can I fertilize my indoor celery plant?
Yes, fertilizing can help your celery plant grow stronger and produce larger stalks. Use a balanced liquid fertilizer diluted to half strength every 2-3 weeks. Look for a fertilizer with an NPK ratio of around 10-10-10 or 20-20-20. Avoid over-fertilizing, as this can burn the roots.
7. What are some common problems when growing celery indoors, and how can I fix them?
Some common problems include:
* **Yellowing leaves:** This can be caused by overwatering, underwatering, or nutrient deficiency. Adjust your watering schedule and consider fertilizing.
* **Leggy growth:** This is usually due to insufficient light. Move your celery plant to a sunnier location or use a grow light.
* **Pests:** Aphids and spider mites can sometimes infest indoor plants. Wash the leaves with soapy water or use an insecticidal soap.
* **Root rot:** This is caused by overwatering. Ensure the pot has drainage holes and allow the soil to dry out slightly between waterings.
8. Can I eat the celery leaves?
Yes, celery leaves are edible and have a stronger flavor than the stalks. They can be used in soups, salads, or as a garnish.
9. How do I harvest celery that I’ve grown indoors?
You can harvest individual stalks as needed, starting with the outer stalks. Alternatively, you can harvest the entire plant by cutting it off at the base.
10. Is growing celery indoors worth the effort?
Absolutely! While it may require some patience and attention, the reward of enjoying fresh, homegrown celery is well worth the effort. Plus, it’s a fun and educational activity that can connect you with your food and the natural world. The taste difference between homegrown and store-bought celery is significant, and you’ll have the satisfaction of knowing exactly where your food came from and how it was grown. So, give growing celery indoors a try 鈥?you might be surprised at how much you enjoy it!


Leave a Comment