

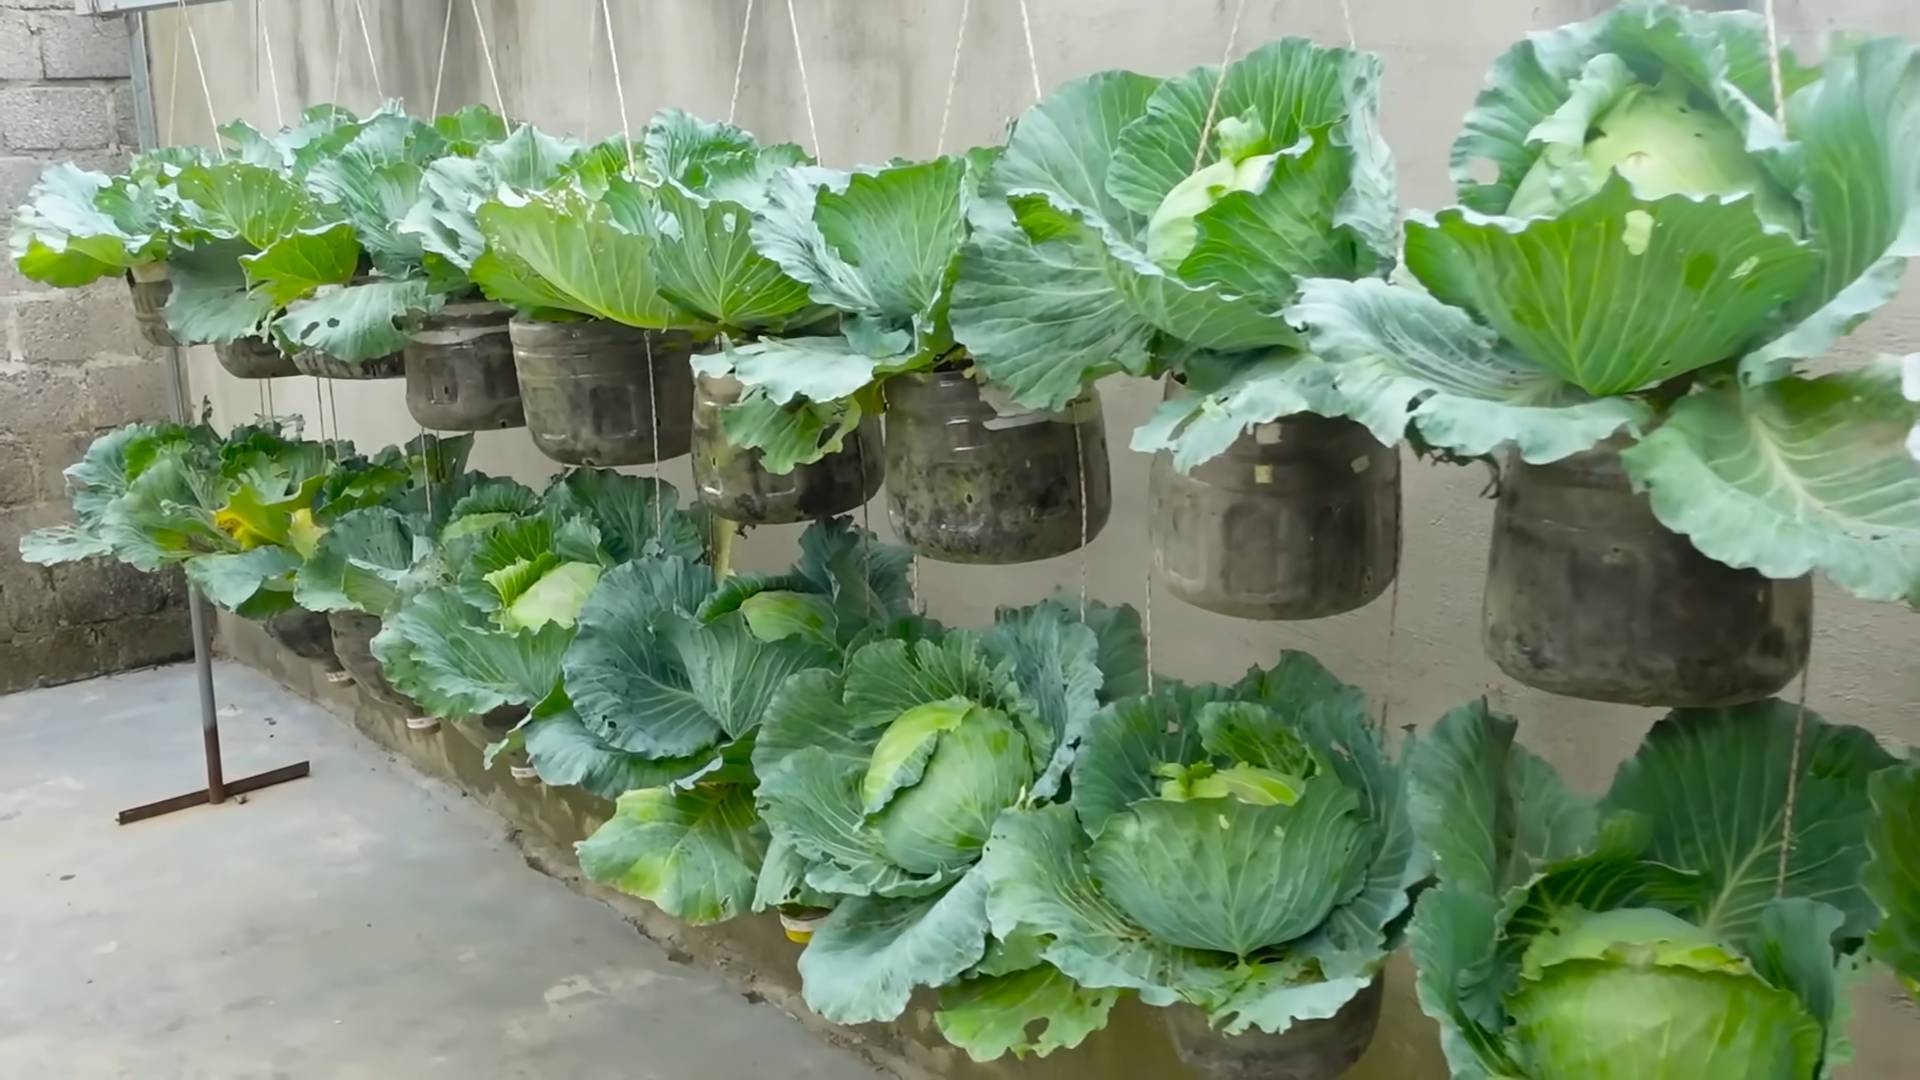
Growing Cabbage in Bottles? Sounds crazy, right? But trust me, this quirky DIY project is about to revolutionize your small-space gardening game! Forget sprawling garden beds and endless weeding; we’re taking cabbage cultivation vertical and miniature.
For centuries, cabbage has been a staple in diets across the globe, from sauerkraut in Germany to kimchi in Korea. While traditionally grown in fields, innovative gardeners are constantly seeking new ways to cultivate this nutritious vegetable, especially in urban environments where space is a premium. This method is a modern twist on a classic crop!
Let’s face it, not everyone has a sprawling backyard to dedicate to a vegetable garden. Apartment dwellers, balcony gardeners, and even those with limited mobility often miss out on the joy of growing their own food. That’s where this growing cabbage in bottles trick comes in. It’s a fantastic way to recycle plastic, save space, and enjoy fresh, homegrown cabbage, all while adding a unique and eye-catching element to your home. I’m excited to show you how to do it!
Growing Cabbage in Bottles: A Fun and Space-Saving DIY Project!
Hey there, fellow gardening enthusiasts! Are you short on space but still dreaming of fresh, homegrown cabbage? Well, I’ve got a fantastic solution for you: growing cabbage in bottles! It’s a surprisingly effective and visually appealing way to cultivate these leafy greens, even if you only have a balcony or a small patio. I’ve tried this myself, and I’m excited to share my experience and guide you through the process.
Why Grow Cabbage in Bottles?
Before we dive in, let’s talk about why this method is so cool:
* Space-Saving: Bottles take up minimal space compared to traditional garden beds. Perfect for urban gardeners!
* Upcycling: Give those plastic bottles a new life instead of sending them to the landfill.
* Pest Control: Elevated bottles can help deter some ground-dwelling pests.
* Unique Aesthetic: A wall or structure adorned with cabbage-filled bottles is definitely a conversation starter!
* Easy Monitoring: It’s easier to keep an eye on the soil moisture and plant health in individual bottles.
Materials You’ll Need
Okay, let’s gather our supplies. Here’s what you’ll need to get started:
* Plastic Bottles: I recommend using 2-liter soda bottles or similar sizes. Make sure they’re clean and have their labels removed. The number of bottles depends on how many cabbage plants you want to grow.
* Cabbage Seeds or Seedlings: Choose your favorite cabbage variety! I’ve had good luck with early varieties like ‘Golden Acre’ or ‘Early Jersey Wakefield’ because they mature relatively quickly.
* Potting Mix: Use a high-quality potting mix that drains well. Avoid using garden soil, as it can become compacted in the bottles.
* Drill or Sharp Knife: For creating drainage holes in the bottles.
* Scissors or Utility Knife: For cutting the bottles.
* Hanging System (Optional): If you want to hang your bottles, you’ll need rope, wire, or a similar material. You might also need hooks or a sturdy structure to hang them from.
* Watering Can or Hose: For watering your cabbage plants.
* Fertilizer (Optional): A balanced liquid fertilizer can help boost growth.
* Gloves: To protect your hands.
Preparing the Bottles
This is a crucial step, so pay close attention!
1. Clean the Bottles: Thoroughly wash the bottles with soap and water to remove any residue. Rinse them well and let them dry completely.
2. Cut the Bottles: There are a couple of ways to cut the bottles, depending on whether you want to hang them or place them on a surface.
* For Hanging Bottles: Cut a rectangular opening on one side of the bottle, leaving the top and bottom intact. This will create a “window” for the cabbage to grow out of. Make sure the opening is large enough to accommodate the mature cabbage head. I usually cut an opening that’s about 4-6 inches wide and 6-8 inches tall.
* For Surface-Standing Bottles: Cut the bottle in half horizontally. You’ll use the bottom half as the container. You can discard the top half or use it as a mini-greenhouse cover for seedlings.
3. Drill Drainage Holes: This is super important! Drill several drainage holes in the bottom of each bottle. This will prevent the soil from becoming waterlogged, which can lead to root rot. I usually drill about 4-6 holes, each about 1/4 inch in diameter.
4. (Optional) Reinforce the Hanging Bottles: If you’re hanging the bottles, you might want to reinforce the cut edges with duct tape or strong packing tape to prevent them from tearing.
Planting Your Cabbage
Now for the fun part!
1. Fill the Bottles with Potting Mix: Fill each bottle with potting mix, leaving about an inch of space at the top. Gently press down on the soil to remove any air pockets.
2. Sow Seeds or Transplant Seedlings:
* From Seed: Sow 2-3 cabbage seeds in the center of each bottle, about 1/4 inch deep. Cover the seeds with soil and gently water.
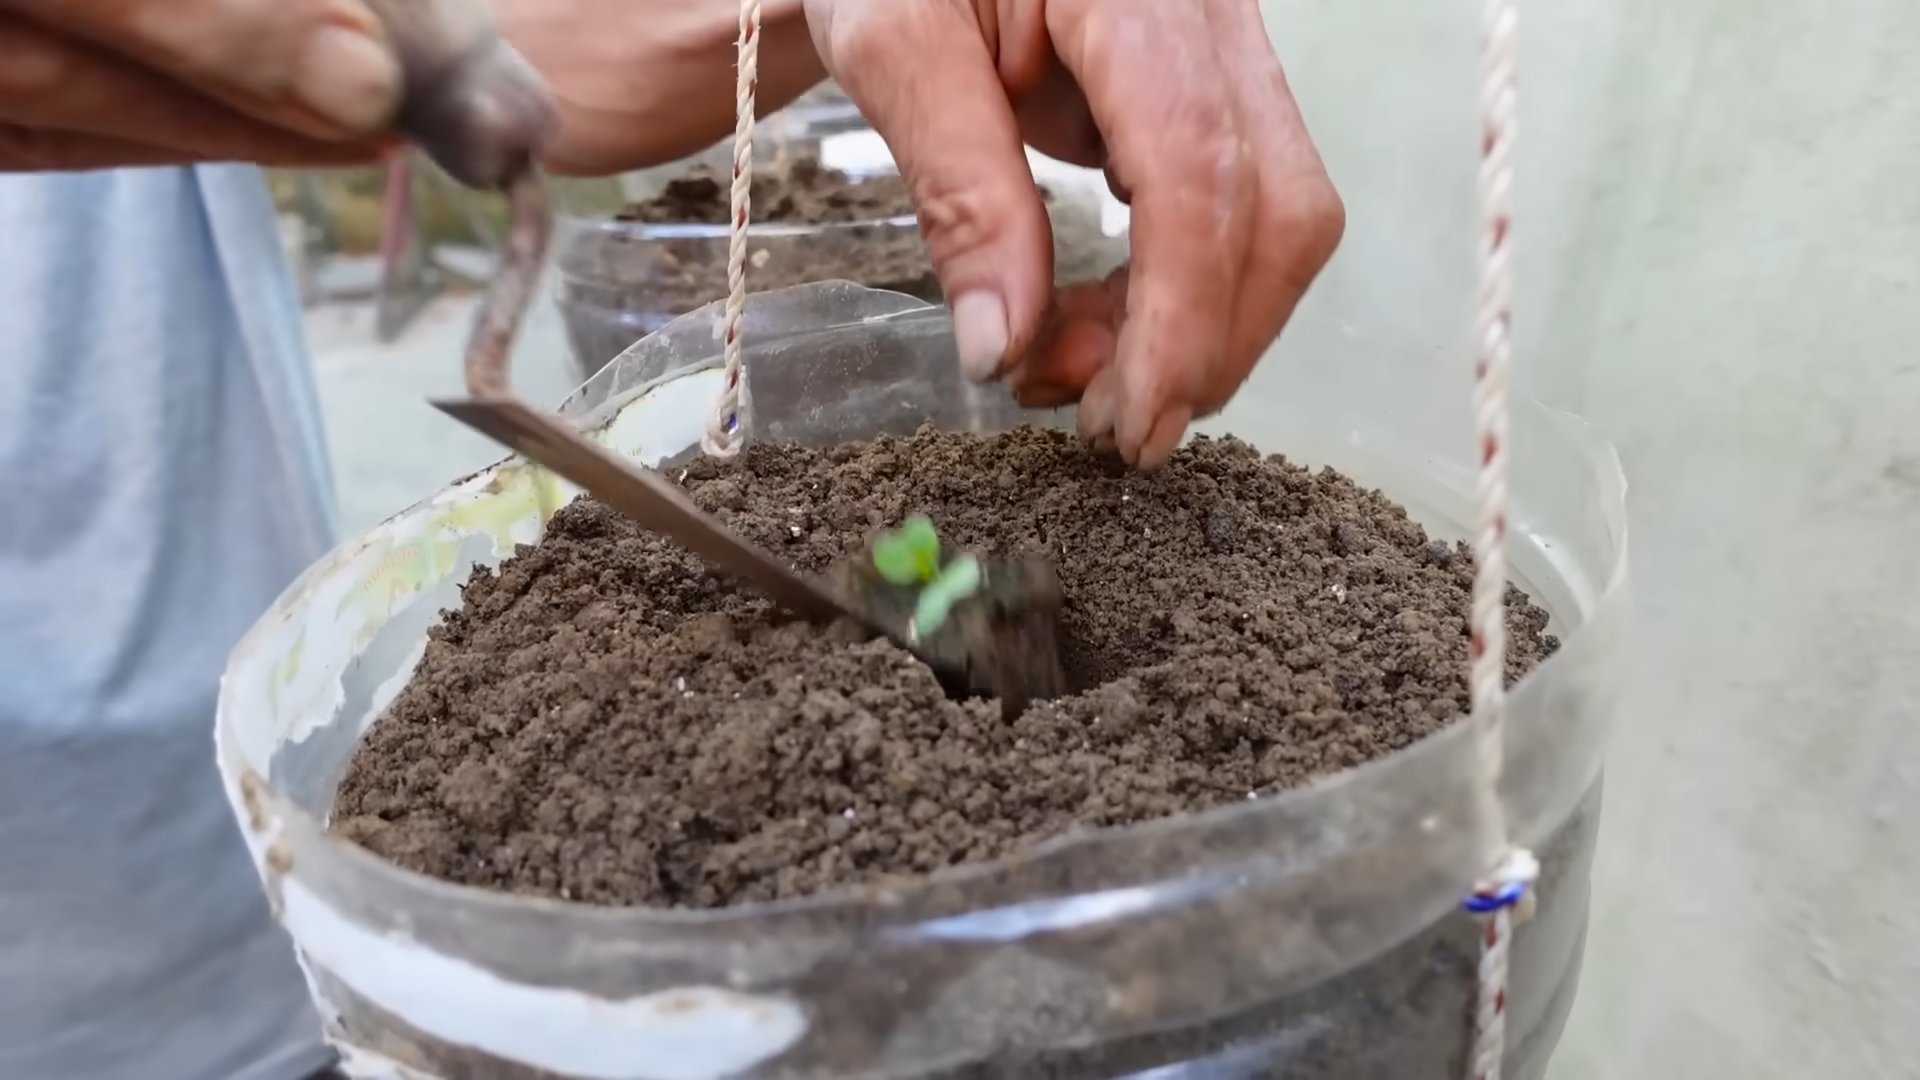
* From Seedlings: Carefully remove the seedlings from their containers and gently loosen the roots. Dig a small hole in the center of each bottle and place the seedling in the hole. Backfill with soil and gently water.
3. Water Thoroughly: Water the bottles thoroughly until water drains out of the drainage holes. This will help settle the soil and ensure that the roots are well-hydrated.
Caring for Your Cabbage Plants
Cabbage plants need consistent care to thrive. Here’s what you need to do:
1. Sunlight: Cabbage needs at least 6 hours of sunlight per day. Place your bottles in a sunny location. If you don’t have enough natural sunlight, you can supplement with grow lights.
2. Watering: Water regularly, especially during hot, dry weather. Check the soil moisture by sticking your finger into the soil. If the top inch of soil feels dry, it’s time to water. Avoid overwatering, as this can lead to root rot.
3. Fertilizing: Feed your cabbage plants with a balanced liquid fertilizer every 2-3 weeks. Follow the instructions on the fertilizer label. I like to use a fertilizer that’s high in nitrogen, as this promotes leafy growth.
4. Pest Control: Keep an eye out for pests like cabbage worms, aphids, and slugs. You can handpick pests off the plants, use insecticidal soap, or apply a natural pesticide like neem oil. I’ve found that covering the plants with netting can also help prevent pest infestations.
5. Weeding: Remove any weeds that may grow in the bottles. Weeds can compete with the cabbage plants for nutrients and water.
6. Support (Optional): As the cabbage heads grow larger, they may become heavy and cause the bottles to tip over (especially if they are hanging). You can provide support by tying the bottles to a sturdy structure or by placing them in a container that will hold them upright.
Harvesting Your Cabbage
The moment we’ve all been waiting for!
1. Check for Maturity: Cabbage is typically ready to harvest when the heads are firm and compact. The size of the head will depend on the variety you’re growing.
2. Harvesting: Use a sharp knife to cut the cabbage head from the stem, leaving a few outer leaves intact.
3. Enjoy Your Harvest: Enjoy your fresh, homegrown cabbage in salads, slaws, soups, or any other dish you like!
Troubleshooting
Even with the best care, you might encounter some problems. Here are a few common issues and how to address them:
* Yellowing Leaves: This could be a sign of overwatering, underwatering, or nutrient deficiency. Check the soil moisture and adjust your watering schedule accordingly. Fertilize the plants with a balanced fertilizer.
* Stunted Growth: This could be caused by insufficient sunlight, poor soil, or pest infestations. Make sure the plants are getting enough sunlight and that the soil is well-draining and nutrient-rich. Check for pests and take appropriate action.
* Root Rot: This is caused by overwatering and poor drainage. Make sure the bottles have adequate drainage holes and avoid overwatering. If you suspect root rot, you can try transplanting the cabbage plants into fresh soil.
* Pest Infestations: Regularly inspect your plants for pests and take action as soon as you notice them. Handpicking pests, using insecticidal soap, or applying neem oil can help control infestations.
Tips for Success
Here are a few extra tips to help you succeed with growing cabbage in bottles:
* Choose the Right Variety: Select a cabbage variety that is well-suited to your climate and growing conditions. Early varieties are a good choice for bottle gardening, as they mature relatively quickly.
* Start with Healthy Seedlings: If you’re using seedlings, choose healthy, vigorous plants from a reputable nursery.
* Use High-Quality Potting Mix: Don’t skimp on the potting mix! Use a high-quality mix that drains well and provides adequate nutrients.
* Water Regularly: Cabbage plants need consistent moisture, so water regularly, especially during hot, dry weather.
* Fertilize Regularly: Feed your cabbage plants with a balanced fertilizer every 2-3 weeks to promote healthy growth.
* Protect from Pests: Keep an eye out for pests and take action as soon as you notice them.
* Be Patient: Growing cabbage takes time and patience. Don’t get discouraged if you don’t see results immediately. With proper care, you’ll be harvesting
Conclusion
So, there you have it! Growing cabbage in bottles might sound unconventional, but it’s a surprisingly effective and rewarding method, especially for urban gardeners, those with limited space, or anyone looking to add a touch of whimsy to their gardening endeavors. This DIY trick isn’t just about novelty; it’s about maximizing your yield, protecting your plants from pests, and creating a visually appealing garden feature.
Why is this a must-try? Because it addresses several common gardening challenges simultaneously. It minimizes soil-borne diseases by elevating the cabbage, it deters slugs and snails that often feast on young seedlings, and it allows for better control over watering and fertilization. Plus, the bottles act as mini-greenhouses, providing a warmer microclimate that can extend your growing season, particularly in cooler regions.
But the beauty of this method lies in its adaptability. Feel free to experiment with different types of bottles. While 2-liter soda bottles are a great starting point, you can also use larger water jugs or even repurposed glass bottles for a more rustic aesthetic. Just ensure the bottles are clean and have adequate drainage holes.
Consider the variety of cabbage you choose as well. Smaller, more compact varieties like ‘Golden Acre’ or ‘Dwarf Blue Vates’ are particularly well-suited for bottle gardening. You can also try growing other leafy greens like lettuce or spinach using the same technique. The possibilities are endless!
Don’t be afraid to get creative with your setup. You can hang the bottles from a balcony railing, arrange them on a sunny windowsill, or even create a vertical garden wall. The key is to provide adequate sunlight and support for the growing plants.
We understand that venturing into new gardening techniques can be a bit daunting, but we wholeheartedly encourage you to give this DIY trick a try. The satisfaction of harvesting your own homegrown cabbage from repurposed bottles is truly unparalleled. It’s a sustainable, space-saving, and incredibly rewarding experience.
And most importantly, we want to hear about your experiences! Share your photos, tips, and challenges in the comments below. Let’s build a community of bottle cabbage growers and learn from each other. Did you find a particular bottle type worked best? Did you encounter any unexpected challenges? Your insights can help others succeed and inspire even more people to embrace this innovative gardening method. So, grab some bottles, some soil, and some cabbage seeds, and get ready to embark on a unique and fulfilling gardening adventure. Happy growing! Remember, successful cabbage growing is within your reach, even in the most unexpected of containers!
Frequently Asked Questions (FAQ)
What type of bottles are best for growing cabbage?
The most commonly used and readily available bottles are 2-liter soda bottles. They are lightweight, durable, and provide enough space for a small to medium-sized cabbage head to develop. However, you can also use larger water jugs (gallon size or larger) for larger cabbage varieties or if you want to grow multiple smaller plants in one container. Glass bottles can also be used, but be cautious as they can become heavy and may break more easily. Regardless of the material, ensure the bottles are thoroughly cleaned before use to remove any residue that could harm the plants. Also, make sure the bottles are opaque or semi-opaque to prevent algae growth inside the bottle. Clear bottles can be wrapped with burlap or painted on the outside to block sunlight.
How do I prepare the bottles for planting?
First, thoroughly clean the bottles with soap and water to remove any residue. Then, cut a large opening in the side of the bottle, large enough to easily plant and harvest the cabbage. The size of the opening will depend on the size of the bottle and the variety of cabbage you are growing. Next, drill or poke several drainage holes in the bottom of the bottle to prevent waterlogging. Good drainage is crucial for healthy cabbage growth. Finally, consider adding a layer of gravel or small stones to the bottom of the bottle to further improve drainage.
What type of soil should I use?
Use a well-draining potting mix that is rich in organic matter. A mix of compost, peat moss, and perlite is ideal. Avoid using garden soil, as it can be too heavy and may not drain well in a container. You can also add slow-release fertilizer to the potting mix to provide the cabbage plants with essential nutrients throughout the growing season. Consider testing the pH of your soil; cabbage prefers a slightly acidic to neutral pH (around 6.0 to 7.0).
How often should I water the cabbage plants in bottles?
Water regularly, keeping the soil consistently moist but not waterlogged. The frequency of watering will depend on the weather conditions and the size of the bottle. Check the soil moisture level daily by sticking your finger into the soil. If the top inch of soil feels dry, it’s time to water. Water deeply, allowing the water to drain out of the drainage holes. Avoid overhead watering, as this can lead to fungal diseases.
How much sunlight do cabbage plants need?
Cabbage plants need at least 6 hours of direct sunlight per day. Choose a sunny location for your bottle garden. If you live in a hot climate, provide some afternoon shade to prevent the plants from overheating. If you don’t have enough natural sunlight, you can supplement with grow lights.
How do I fertilize cabbage plants in bottles?
Cabbage plants are heavy feeders and require regular fertilization. Use a balanced fertilizer (e.g., 10-10-10) every 2-3 weeks. You can also use organic fertilizers like compost tea or fish emulsion. Follow the instructions on the fertilizer package carefully. Avoid over-fertilizing, as this can burn the roots of the plants.
How do I protect cabbage plants from pests and diseases?
Monitor your plants regularly for pests and diseases. Common cabbage pests include cabbage worms, aphids, and flea beetles. You can control these pests with insecticidal soap, neem oil, or by handpicking them off the plants. To prevent diseases, ensure good air circulation around the plants and avoid overhead watering. If you notice any signs of disease, remove the affected leaves immediately.
How long does it take to grow cabbage in bottles?
The time it takes to grow cabbage in bottles depends on the variety of cabbage and the growing conditions. Generally, it takes about 60-90 days from transplanting to harvest. You can start harvesting when the cabbage head is firm and the desired size.
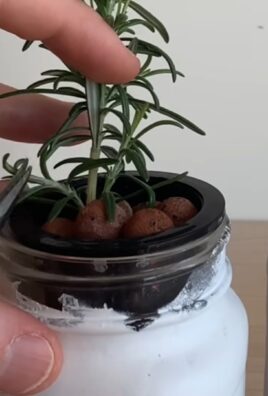
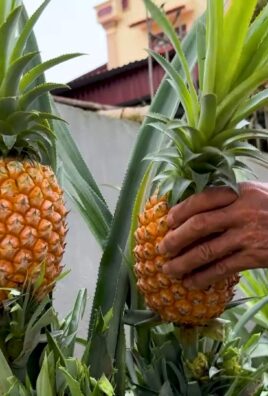
Can I grow other vegetables in bottles using this method?
Yes, you can grow other leafy greens and herbs in bottles using this method. Lettuce, spinach, kale, and herbs like basil and parsley are all good candidates. Choose varieties that are compact and well-suited for container gardening.
What if my cabbage plant outgrows the bottle?
If your cabbage plant outgrows the bottle, you can either transplant it to a larger container or harvest it early. If you choose to transplant, be careful not to damage the roots. Water the plant thoroughly after transplanting.
Leave a Comment