

Backyard Melon Growing Easy? Absolutely! Imagine biting into a juicy, sun-ripened melon, bursting with flavor, knowing you grew it yourself, right in your backyard. Sounds like a dream, doesn’t it? Well, it doesn’t have to be! For centuries, melons have been cultivated across the globe, from the ancient Egyptians who revered them to the vibrant markets of Asia where they symbolize prosperity. But you don’t need to be a pharaoh or a seasoned farmer to enjoy the sweet rewards of homegrown melons.
Many people shy away from growing melons, thinking it’s too difficult or requires vast amounts of space. But I’m here to tell you that with a few clever tricks and DIY hacks, backyard melon growing easy is totally achievable, even in smaller gardens or containers. This article is your guide to unlocking the secrets of successful melon cultivation. We’ll cover everything from choosing the right varieties for your climate to creating the perfect growing environment and warding off common pests.
Why do you need these DIY tricks? Because store-bought melons often lack the intense flavor and sweetness of homegrown ones. Plus, you’ll know exactly what went into growing your melons, avoiding harmful pesticides and ensuring a truly organic treat. Get ready to transform your backyard into a melon oasis and impress your friends and family with your green thumb! Let’s get started!
Grow Delicious Melons in Your Backyard: A Simple DIY Guide
Hey there, fellow gardening enthusiasts! Ever dreamt of biting into a juicy, homegrown melon, bursting with flavor that store-bought ones just can’t match? Well, dream no more! Growing melons in your backyard is totally achievable, even if you’re a beginner. I’m going to walk you through everything you need to know to cultivate your own sweet melon patch. Let’s get started!
Choosing the Right Melon Variety
First things first, you need to decide what kind of melon you want to grow. There are so many delicious options! Here’s a quick rundown of some popular choices:
* Watermelons: These are the classic summer treat! Look for varieties like ‘Sugar Baby’ (small and early), ‘Crimson Sweet’ (large and flavorful), or ‘Yellow Doll’ (yellow flesh, super sweet).
* Cantaloupes: These have that distinctive netted rind and orange flesh. ‘Athena’ and ‘Hales Best Jumbo’ are reliable choices.
* Honeydew Melons: Known for their smooth, pale green rind and sweet, light green flesh. ‘Honeycrisp’ is a popular variety.
* Specialty Melons: Don’t be afraid to experiment! Try growing Galia melons (sweet and aromatic), Charentais melons (French heirloom, intensely flavorful), or even Armenian cucumbers (technically a melon, tastes like a cucumber!).
When choosing your variety, consider your climate and the length of your growing season. Some melons need a longer, hotter summer than others. Check the seed packet or plant label for specific recommendations.
Preparing Your Melon Patch
Melons are sun-loving, hungry plants, so proper site preparation is key to success.
* Sunlight: Melons need at least 6-8 hours of direct sunlight per day. Choose a spot in your yard that gets plenty of sunshine.
* Soil: Melons thrive in well-drained, fertile soil. Amend your soil with plenty of compost or well-rotted manure before planting. This will improve drainage, add nutrients, and help retain moisture.
* Space: Melons need plenty of space to spread out. Watermelons, in particular, can take up a lot of room. Allow at least 3-4 feet between plants, and 6-8 feet between rows. Cantaloupes and honeydews can be planted a bit closer, about 2-3 feet apart.
* Soil Testing: Ideally, get your soil tested to determine its pH and nutrient levels. Melons prefer a slightly acidic soil pH of 6.0-6.8. If your soil is too alkaline, you can amend it with sulfur. If it’s lacking in nutrients, add a balanced fertilizer.
Starting Your Melon Seeds (Indoors or Outdoors)
You have two options for starting your melon seeds: indoors or directly in the garden.
* Starting Seeds Indoors: This is a good option if you have a short growing season or want to get a head start. Start your seeds about 4-6 weeks before the last expected frost.
1. Sow Seeds: Fill seed trays or small pots with seed-starting mix. Sow the seeds about 1 inch deep.
2. Water Gently: Water the soil gently to moisten it, but don’t overwater.
3. Provide Warmth: Melons need warm temperatures to germinate. Use a heat mat to keep the soil temperature around 80-85°F (27-29°C).
4. Provide Light: Once the seedlings emerge, provide them with plenty of light. A sunny windowsill or grow lights will work well.
5. Harden Off: Before transplanting your seedlings outdoors, you’ll need to “harden them off.” This means gradually exposing them to outdoor conditions over a period of 1-2 weeks. Start by placing them outside for a few hours each day, gradually increasing the amount of time they spend outdoors.
* Direct Sowing: If you have a long growing season, you can direct sow your melon seeds in the garden. Wait until the soil has warmed up to at least 70°F (21°C).
1. Prepare the Soil: Prepare the soil as described above.
2. Sow Seeds: Sow the seeds about 1 inch deep, spacing them according to the recommendations for your chosen variety.
3. Water Gently: Water the soil gently to moisten it.
4. Thin Seedlings: Once the seedlings emerge, thin them to the strongest plant per spacing.
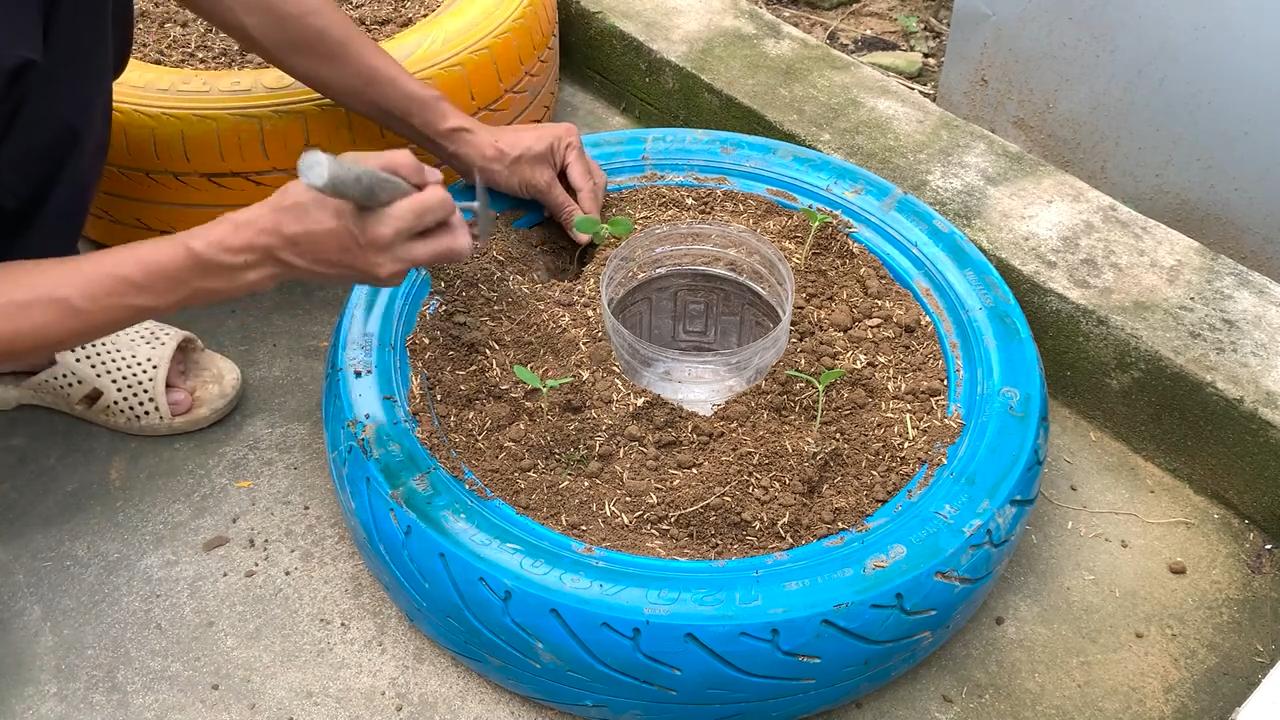
Transplanting Melon Seedlings (If Starting Indoors)
Once your seedlings have been hardened off and the danger of frost has passed, it’s time to transplant them into the garden.
1. Choose a Cloudy Day: Transplanting on a cloudy day will help prevent the seedlings from getting stressed.
2. Dig Holes: Dig holes that are slightly larger than the root balls of your seedlings.
3. Gently Remove Seedlings: Gently remove the seedlings from their pots, being careful not to damage the roots.
4. Place Seedlings in Holes: Place the seedlings in the holes, making sure the top of the root ball is level with the soil surface.
5. Fill Holes: Fill the holes with soil and gently firm the soil around the seedlings.
6. Water Thoroughly: Water the seedlings thoroughly after transplanting.
Caring for Your Melon Plants
Once your melon plants are in the ground, they’ll need regular care to thrive.
* Watering: Melons need consistent moisture, especially during fruit development. Water deeply and regularly, especially during dry spells. Avoid overhead watering, as this can promote fungal diseases. Drip irrigation is a great option for melons.
* Fertilizing: Feed your melon plants with a balanced fertilizer every 2-3 weeks. You can also side-dress them with compost or well-rotted manure.
* Weeding: Keep your melon patch free of weeds, which can compete with the plants for nutrients and water. Mulching can help suppress weeds and retain moisture.
* Pest Control: Keep an eye out for common melon pests, such as aphids, squash bugs, and cucumber beetles. Handpick pests or use insecticidal soap or neem oil to control them.
* Disease Control: Melons are susceptible to fungal diseases, such as powdery mildew and downy mildew. Prevent these diseases by providing good air circulation, avoiding overhead watering, and applying a fungicide if necessary.
* Pollination: Melons need to be pollinated in order to produce fruit. Bees are the primary pollinators of melons. Attract bees to your garden by planting flowers that they love. If you’re not seeing many bees, you can hand-pollinate your melon flowers.
1. Identify Male and Female Flowers: Male flowers have a long, thin stem, while female flowers have a small, immature fruit at the base of the flower.
2. Transfer Pollen: Use a small paintbrush or cotton swab to transfer pollen from the male flower to the female flower.
3. Repeat Daily: Repeat this process daily until the female flowers are pollinated.
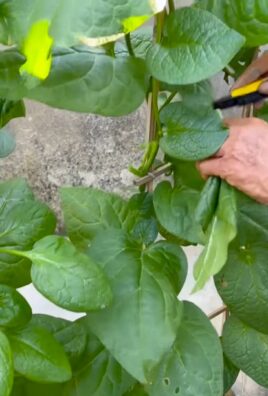
Supporting Your Melon Vines
As your melon vines grow, they may need some support to keep the fruit off the ground. This is especially important for larger melons like watermelons.
* Trellising: You can train your melon vines to grow up a trellis. This will save space and keep the fruit off the ground.
* Slings: For larger melons, you can use slings made of fabric or netting to support the fruit. Tie the slings to the trellis or a sturdy stake.
* Mulching: Mulching around the plants will help keep the fruit clean and prevent it from rotting.
Harvesting Your Melons
Knowing when to harvest your melons can be tricky, but here are some general guidelines:
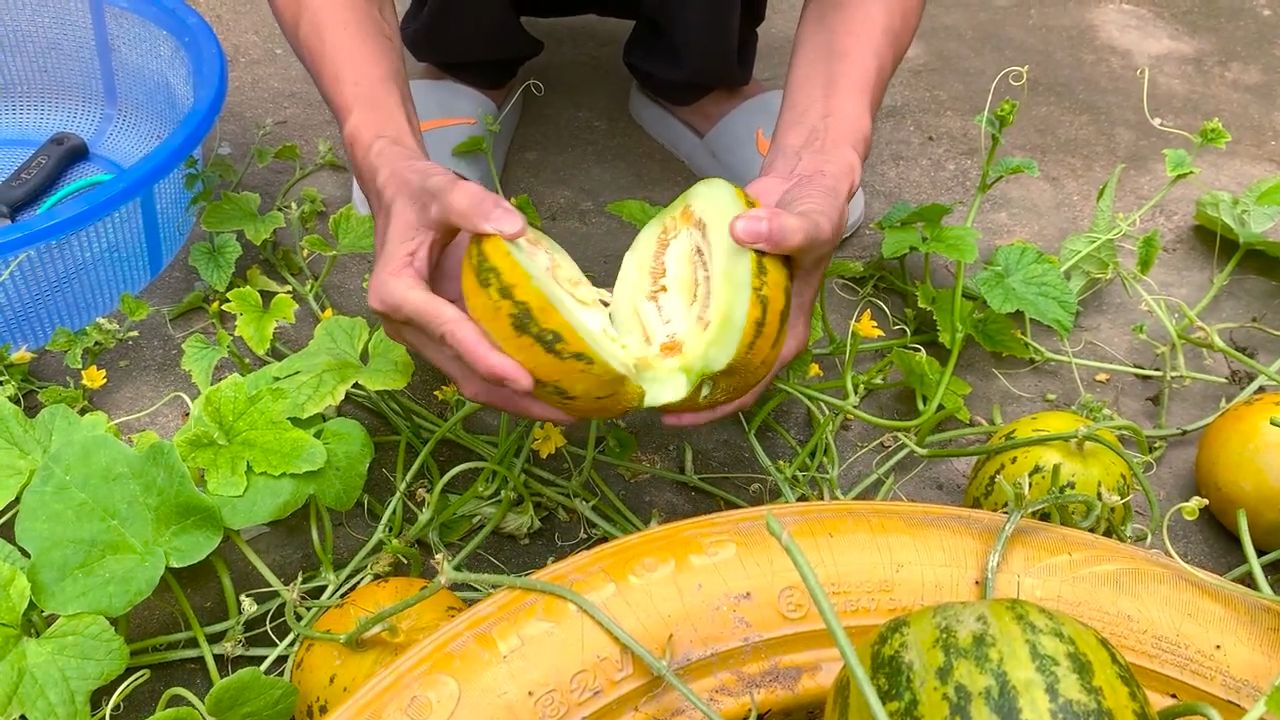
* Watermelons: Look for a dull rind, a dry tendril near the stem, and a hollow sound when you thump the melon. The spot where the melon rests on the ground should also be yellow.
* Cantaloupes: The melon should slip easily from the vine when it’s ripe. It should also have a sweet aroma.
* Honeydew Melons: The melon should have a slightly waxy feel and a sweet aroma. The blossom end should be slightly soft.
Once you’ve harvested your melons, store them in a cool, dry place. They’ll continue to ripen for a few days after harvest.
Enjoying Your Homegrown Melons
The best part of growing your own melons is, of course, enjoying the fruits of your labor! Slice them up and eat them fresh, add them to salads, or use them to make smoothies or desserts. There’s nothing quite like the taste of a homegrown melon!
Troubleshooting Tips:
*
Conclusion
So, there you have it! Mastering the art of backyard melon growing doesn’t require acres of land or a green thumb blessed by the gardening gods. It’s about understanding a few key principles, implementing some clever DIY tricks, and most importantly, giving it a try. This method, focusing on maximizing space and sunlight, is a game-changer for anyone dreaming of vine-ripened sweetness straight from their own garden.
Why is this DIY approach a must-try? Because it democratizes melon growing. It empowers even apartment dwellers with a sunny balcony to cultivate their own juicy cantaloupes or watermelons. It transforms small, underutilized spaces into thriving edible landscapes. And, let’s be honest, there’s nothing quite like the satisfaction of biting into a melon you nurtured from seed to fruit. The flavor is simply unmatched by anything you can buy in a store.
But don’t stop there! Experimentation is key to unlocking your garden’s full potential. Consider these variations to tailor the method to your specific needs and preferences:
* **Vertical Growing:** If space is truly limited, explore vertical gardening techniques. Train your melon vines up trellises or sturdy netting. This not only saves space but also improves air circulation, reducing the risk of fungal diseases.
* **Companion Planting:** Introduce companion plants to your melon patch. Marigolds deter pests, while basil can improve the flavor of your melons. Research which plants thrive alongside melons in your region.
* **Grafting:** For advanced gardeners, grafting melon plants onto more vigorous rootstocks can significantly boost yields and disease resistance. This technique requires some skill but can be well worth the effort.
* **Different Melon Varieties:** Don’t limit yourself to just one type of melon. Experiment with different varieties to discover your favorites. Consider factors like size, sweetness, and disease resistance when choosing your seeds. Try growing smaller personal sized melons if you have limited space.
* **Soil Amendments:** Regularly amend your soil with compost and other organic matter to provide your melon plants with the nutrients they need to thrive. A well-nourished plant is a productive plant.
We are confident that with a little effort and these DIY tips, you’ll be enjoying delicious, homegrown melons in no time. The key is to start small, observe your plants carefully, and adapt your approach as needed.
Now, we want to hear from you! Have you tried growing melons in your backyard using these techniques? What challenges did you face? What successes did you achieve? Share your experiences, tips, and photos in the comments below. Let’s create a community of backyard melon growers and learn from each other. Your insights could inspire someone else to embark on their own melon-growing adventure! So get out there, get your hands dirty, and get ready to savor the sweet taste of success. Happy **backyard melon growing**!
FAQ
What is the best time to start melon seeds indoors?
The ideal time to start melon seeds indoors is typically 4-6 weeks before the last expected frost in your area. This allows the seedlings to develop a strong root system before being transplanted outdoors. Consult your local weather data or gardening resources to determine the average last frost date for your region. Starting too early can result in leggy, weak seedlings that struggle to adapt to outdoor conditions. Starting too late may shorten your growing season and reduce your overall yield.
How much sunlight do melons need?
Melons are sun-loving plants and require at least 6-8 hours of direct sunlight per day to thrive. Insufficient sunlight can lead to stunted growth, poor fruit development, and reduced sweetness. Choose a planting location that receives full sun throughout the day. If you live in a particularly hot climate, some afternoon shade may be beneficial to prevent sunburn on the fruits.
What kind of soil is best for growing melons?
Melons prefer well-drained, fertile soil that is rich in organic matter. The ideal soil pH is between 6.0 and 6.8. Before planting, amend your soil with compost, aged manure, or other organic materials to improve drainage, fertility, and water retention. Avoid heavy clay soils, as they can become waterlogged and inhibit root growth. If you have clay soil, consider growing your melons in raised beds or containers.
How often should I water my melon plants?
Melons require consistent watering, especially during fruit development. Water deeply and regularly, aiming to keep the soil consistently moist but not waterlogged. The frequency of watering will depend on factors such as weather conditions, soil type, and plant size. As a general rule, water when the top inch of soil feels dry to the touch. Avoid overhead watering, as this can increase the risk of fungal diseases. Drip irrigation or soaker hoses are excellent options for delivering water directly to the roots.
How do I know when my melons are ripe?
Determining when a melon is ripe can be tricky, as different varieties have different indicators. However, here are some general guidelines:
* **Cantaloupes:** Look for a change in color from green to tan or yellow. The stem should easily slip from the vine with a gentle tug. The melon should also have a sweet, fragrant aroma.
* **Watermelons:** Thump the melon. A ripe watermelon will have a deep, hollow sound. The underside of the melon (where it rests on the ground) should be creamy yellow. The tendril closest to the melon should be brown and dry.
* **Honeydew Melons:** The skin should turn from green to a creamy yellow color. The melon should feel slightly soft at the blossom end.
Remember that these are just general guidelines, and it’s best to research the specific characteristics of the variety you are growing.
How can I protect my melons from pests and diseases?
Several pests and diseases can affect melon plants. Common pests include aphids, squash bugs, and cucumber beetles. Common diseases include powdery mildew, fusarium wilt, and anthracnose. Here are some tips for protecting your melons:
* **Choose disease-resistant varieties:** Select melon varieties that are known to be resistant to common diseases in your area.
* **Practice crop rotation:** Avoid planting melons in the same location year after year.
* **Maintain good air circulation:** Space your plants adequately to allow for good air circulation, which can help prevent fungal diseases.
* **Remove weeds:** Weeds can harbor pests and diseases, so keep your garden free of weeds.
* **Use insecticidal soap or neem oil:** These organic insecticides can be effective against many common pests.
* **Apply fungicides:** If necessary, apply fungicides to control fungal diseases. Choose fungicides that are specifically labeled for use on melons.
* **Use row covers:** Row covers can protect young plants from pests and diseases.
Can I grow melons in containers?
Yes, you can grow melons in containers, but you will need to choose a large container (at least 20 gallons) and provide adequate support for the vines. Dwarf or bush varieties of melons are best suited for container growing. Use a high-quality potting mix and fertilize regularly. Be sure to provide adequate water and sunlight.
How do I pollinate my melon flowers?
Melons have separate male and female flowers. The female flowers have a small fruit at the base of the flower. If pollination does not occur, the female flower will wither and die. Bees are the primary pollinators of melons. To attract bees to your garden, plant flowering herbs and vegetables nearby. If you are not seeing enough bee activity, you can hand-pollinate your melon flowers. To hand-pollinate, use a small paintbrush to transfer pollen from the male flower to the female flower.
What are some good companion plants for melons?
Good companion plants for melons include marigolds, basil, nasturtiums, and radishes. Marigolds deter pests, while basil can improve the flavor of your melons. Nasturtiums attract beneficial insects, and radishes can help to break up the soil. Avoid planting melons near potatoes or other members of the nightshade family, as they can compete for nutrients.
Leave a Comment