

Clean Microwave with Vinegar: Are you tired of staring into a microwave splattered with yesterday’s lunch, dreading the scrubbing session that awaits? I know I am! Let’s face it, cleaning the microwave is one of those chores we all put off, but it doesn’t have to be a dreaded task. In fact, I’m going to show you a super simple, surprisingly effective DIY trick that will have your microwave sparkling in minutes, using just vinegar and water.
Vinegar, a staple in kitchens for centuries, has been used for far more than just flavoring food. Historically, it’s been a go-to cleaning agent, thanks to its natural disinfecting and deodorizing properties. Our grandmothers knew the power of vinegar, and now we’re bringing that wisdom back to tackle modern messes!
Why is this DIY trick so essential? Because a clean microwave isn’t just about aesthetics; it’s about hygiene. Those food splatters can harbor bacteria and even affect the taste of your food. Plus, a clean microwave operates more efficiently. So, ditch the harsh chemicals and complicated cleaning routines. I’m going to show you how to clean microwave with vinegar, a natural, affordable, and incredibly easy solution that will leave your microwave fresh and ready for your next culinary adventure. Get ready to say goodbye to microwave grime and hello to a sparkling clean appliance!
DIY Microwave Cleaning with Vinegar: A Sparkling Clean in Minutes!
Hey there, fellow DIY enthusiasts! Are you tired of staring into your microwave and seeing a Jackson Pollock painting of splattered food? I know I was! That’s why I’m sharing my super simple, incredibly effective method for cleaning your microwave using just vinegar and water. Trust me, it’s a game-changer, and you probably already have everything you need!
What You’ll Need:
Before we dive in, let’s gather our supplies. This is a low-effort project, so the list is short and sweet:
* A microwave-safe bowl (glass or ceramic works best)
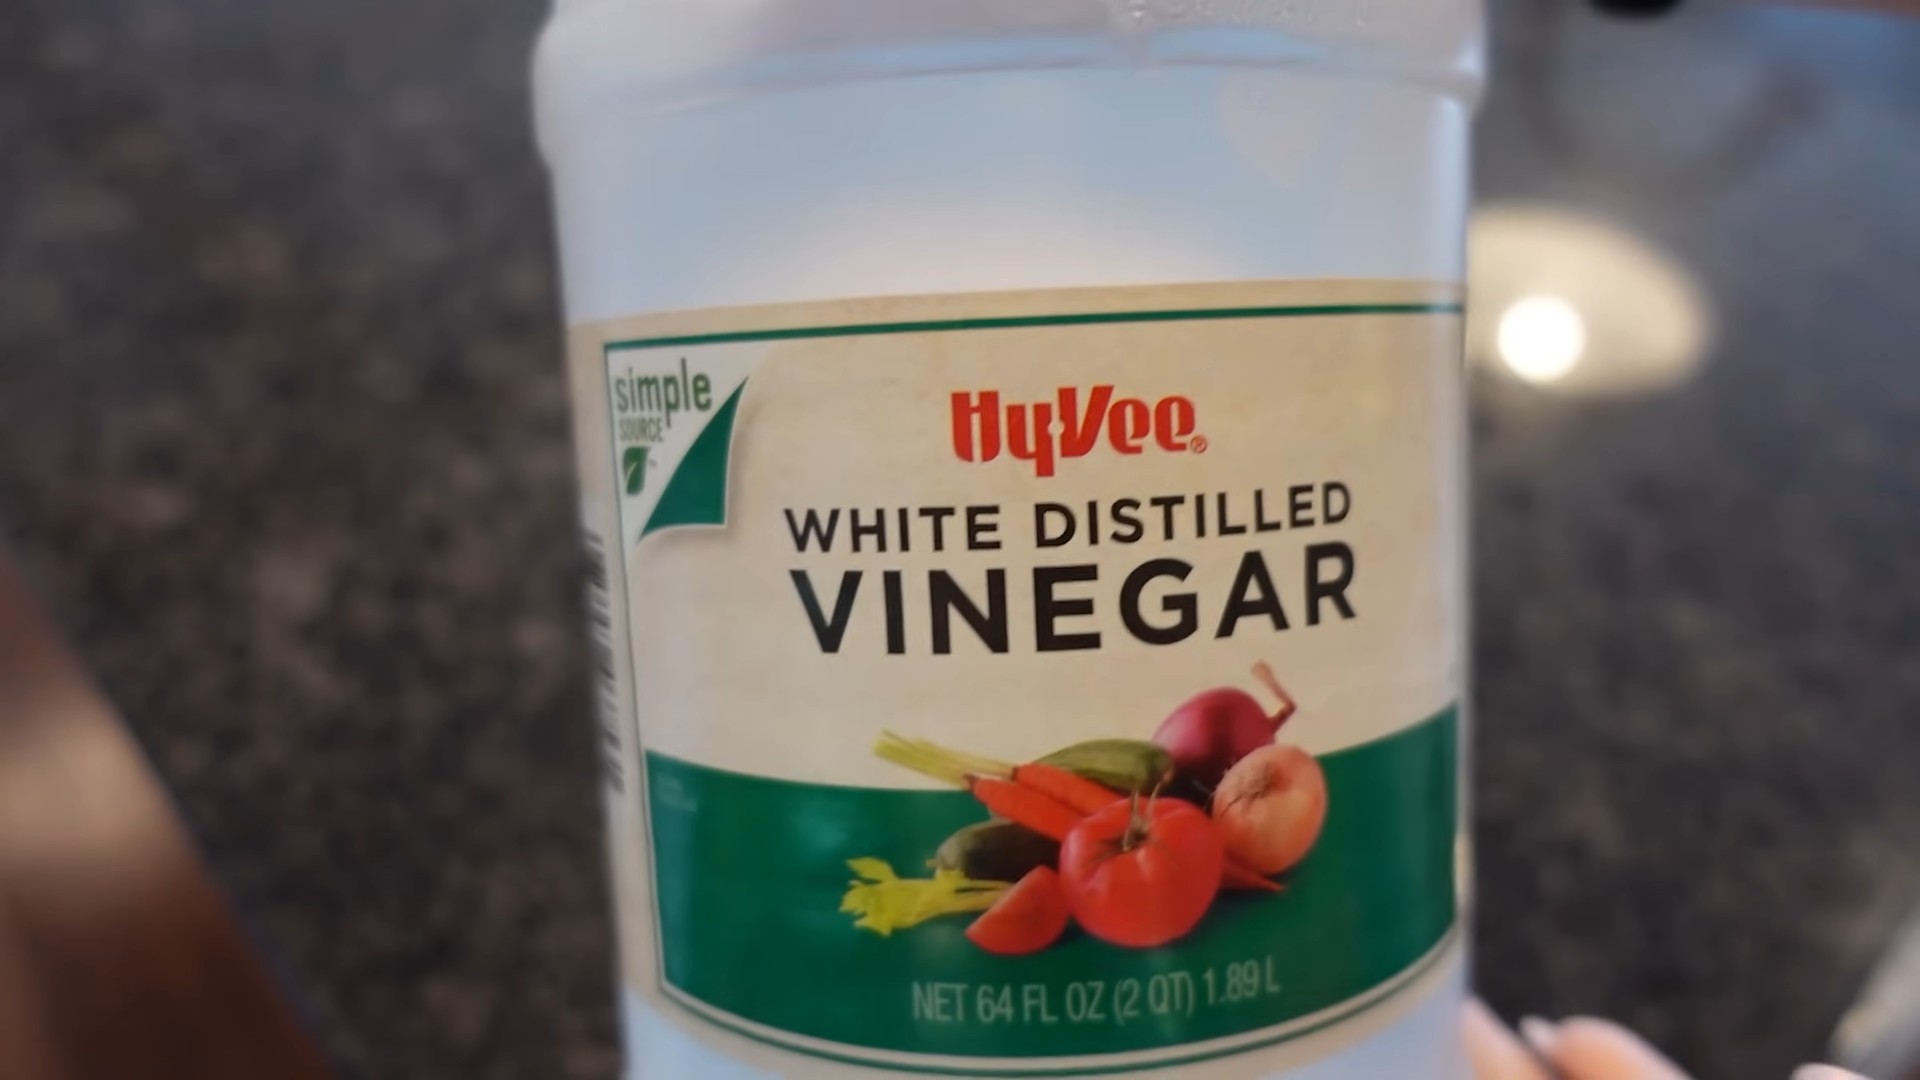
* White vinegar (the star of the show!)
* Water (tap water is perfectly fine)
* A clean sponge or cloth
* Oven mitts or pot holders (safety first!)
The Magic Ratio: Vinegar to Water
The key to this method is the right ratio of vinegar to water. I’ve found that a 1:1 ratio works wonders. So, for example, you’ll use:
* 1 cup of white vinegar
* 1 cup of water
You can adjust the amount depending on the size of your bowl, but always keep that 1:1 ratio in mind.
Step-by-Step Instructions:
Alright, let’s get this microwave sparkling!
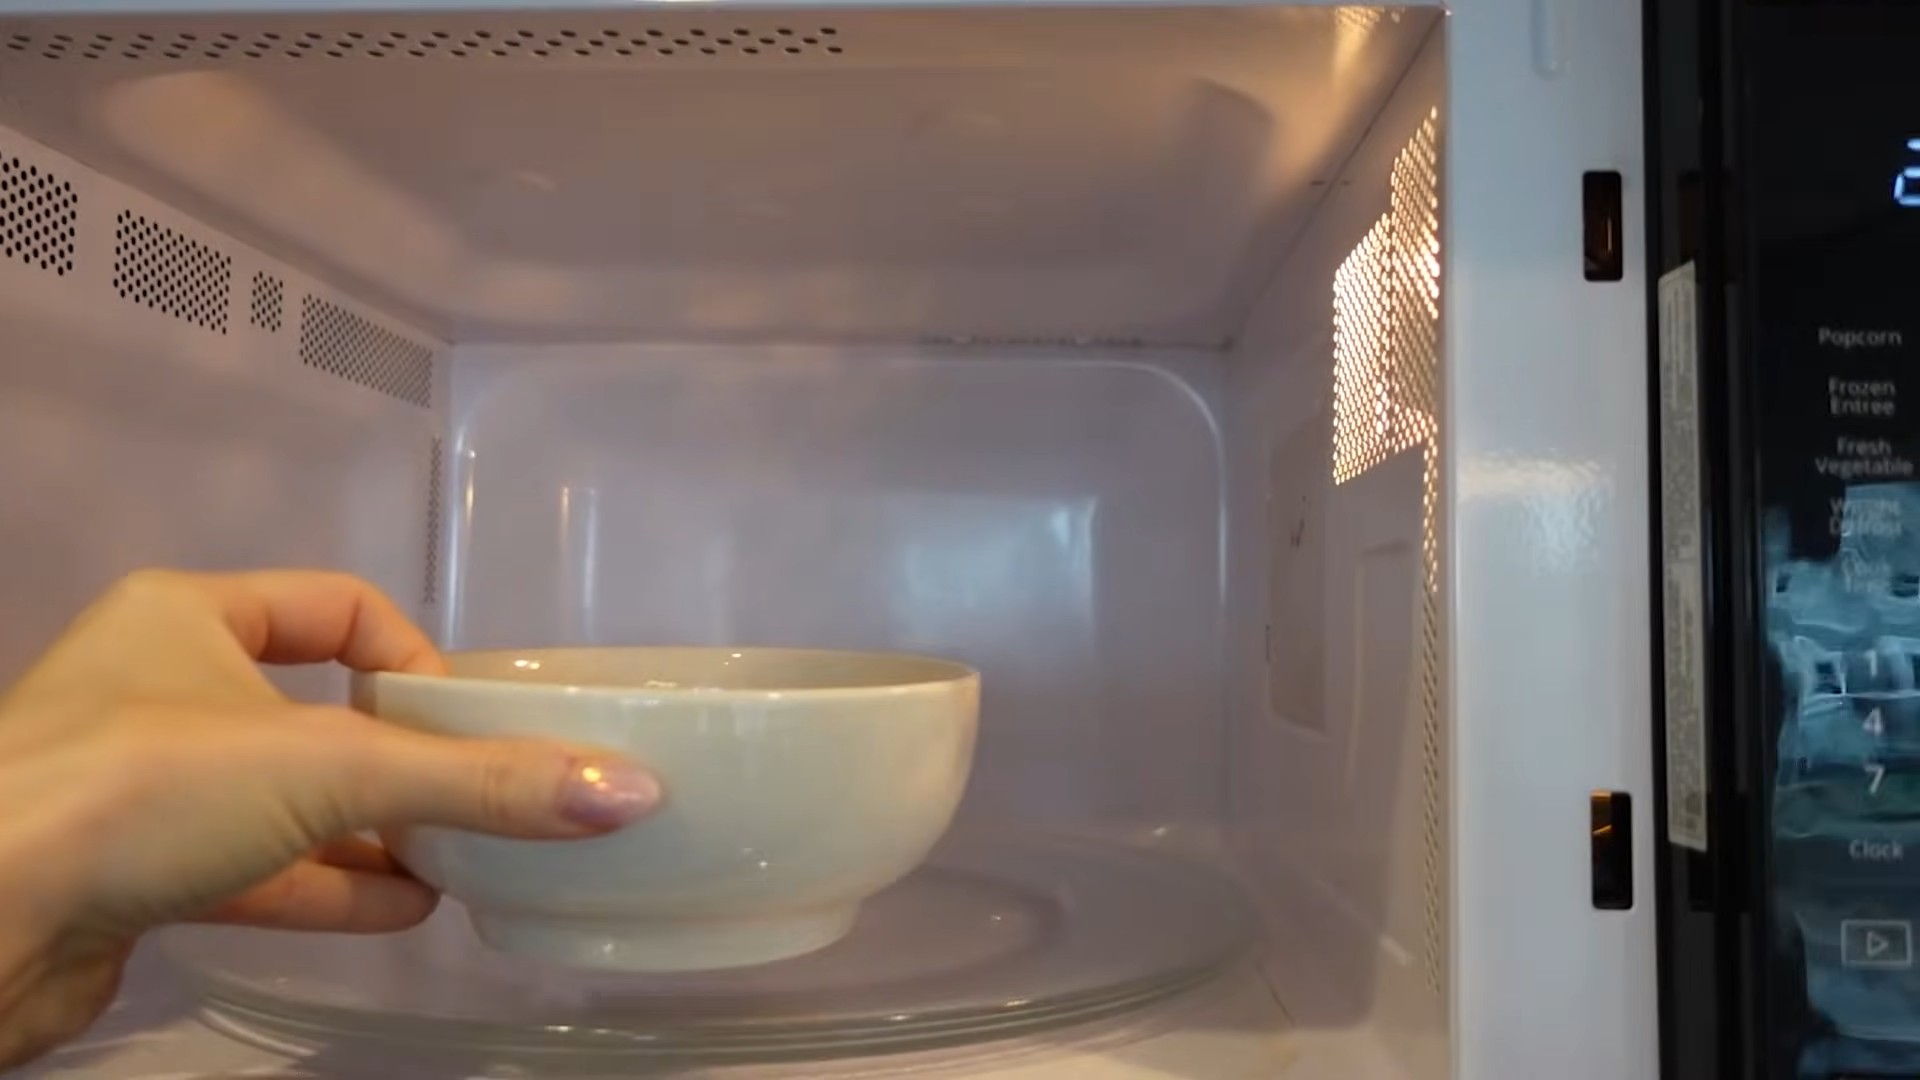
1. Prepare the Vinegar Solution: Pour the vinegar and water into your microwave-safe bowl. Give it a little swirl to mix them together. Nothing fancy needed here!
2. Microwave the Solution: Place the bowl inside your microwave. Now, this is where the magic happens. Set the microwave to high for 3-5 minutes. The goal is to bring the solution to a rolling boil. You’ll see steam building up inside the microwave 鈥?that’s exactly what we want!
Important Note: The exact time will depend on your microwave’s power. Start with 3 minutes and add more time in 30-second increments if needed. You want a good amount of steam, but you don’t want the solution to boil over.
3. Let it Steam: Once the microwave stops, DO NOT OPEN THE DOOR IMMEDIATELY! This is crucial. Let the steam work its magic for another 3-5 minutes. The steam will loosen all the dried-on food splatters, making them much easier to wipe away. I usually let it sit for the full 5 minutes for maximum effectiveness.
4. Carefully Remove the Bowl: Using your oven mitts or pot holders (remember, safety first!), carefully remove the bowl from the microwave. The bowl and the liquid inside will be hot, so be extra cautious.
5. Wipe Down the Interior: Now for the satisfying part! Take your clean sponge or cloth and wipe down the interior of the microwave. You’ll be amazed at how easily the loosened food particles come off. Pay attention to the top, bottom, sides, and door.
Pro Tip: For stubborn spots, you can dip your sponge or cloth into the remaining vinegar solution in the bowl. The warm vinegar will help break down those tough stains.
6. Clean the Turntable and Roller Ring: Remove the turntable and roller ring from the microwave. Wash them with warm, soapy water. Rinse them thoroughly and dry them before placing them back in the microwave.
7. Wipe Down the Exterior: Don’t forget the outside of your microwave! Use a clean, damp cloth to wipe down the exterior, including the door handle and control panel.
8. Admire Your Sparkling Clean Microwave! Step back and admire your handiwork! Your microwave should now be clean, fresh, and ready for its next culinary adventure.
Dealing with Stubborn Stains:
Sometimes, even with the steam treatment, you might encounter some particularly stubborn stains. Don’t worry, I’ve got a few tricks up my sleeve!
* Baking Soda Paste: Make a paste of baking soda and water. Apply the paste to the stubborn stain and let it sit for a few minutes. Then, gently scrub with a sponge or cloth. The baking soda acts as a mild abrasive to help lift the stain.
* Lemon Juice: Lemon juice is another natural cleaning agent that can help break down grease and grime. Cut a lemon in half and squeeze the juice into a small bowl. Dip your sponge or cloth into the lemon juice and scrub the stain. You can also microwave the lemon halves in a bowl of water for a similar steaming effect as the vinegar.
* Magic Eraser: For really tough stains, a Magic Eraser can be your best friend. Just be careful not to scrub too hard, as it can scratch the surface of the microwave.
Preventing Future Splatters:
Okay, so now that your microwave is sparkling clean, let’s talk about preventing future messes. Here are a few tips to keep your microwave cleaner for longer:
* Use Microwave-Safe Covers: Invest in some microwave-safe covers or splatter guards. These will prevent food from splattering all over the inside of your microwave.
* Cover Food with Paper Towels: If you don’t have a microwave-safe cover, you can use a paper towel to cover your food. This will help contain splatters.
* Vent Food Properly: When microwaving food with a skin or peel (like potatoes or apples), be sure to pierce it with a fork before cooking. This will allow steam to escape and prevent explosions.
* Clean Up Spills Immediately: The sooner you clean up a spill, the easier it will be to remove. Don’t let spills sit and harden 鈥?wipe them up as soon as they happen.
* Regular Cleaning: Make it a habit to clean your microwave regularly, even if it doesn’t look particularly dirty. A quick wipe-down once a week can prevent build-up and keep your microwave looking its best.
Why Vinegar Works So Well:
You might be wondering why vinegar is such a cleaning powerhouse. Here’s the science behind it:
* Acetic Acid: Vinegar contains acetic acid, which is a mild acid that can dissolve grease, grime, and mineral deposits.
* Steam Power: The steam created when you microwave the vinegar solution helps to loosen dried-on food particles, making them easier to wipe away.
* Deodorizing Properties: Vinegar also has deodorizing properties, so it can help to eliminate unpleasant odors from your microwave.
Safety Precautions:
While this method is generally safe, it’s important to take a few precautions:
* Use Oven Mitts or Pot Holders: Always use oven mitts or pot holders when handling hot bowls or dishes.
* Be Careful with Steam: Be careful when opening the microwave door after steaming. The steam can be hot and can cause burns.
* Ventilate the Area: If you’re sensitive to the smell of vinegar, open a window or turn on the exhaust fan to ventilate the area.
* Don’t Use Metal: Never use metal bowls or utensils in the microwave.
Troubleshooting:
* Still Smells Like Vinegar? Don’t worry, the vinegar smell will dissipate quickly. You can leave the microwave door open for a few minutes to help air it out. You can also place a small bowl of baking soda inside the microwave to absorb any lingering odors.
* Food Still Stuck? If you have some particularly stubborn food particles that won’t come off, try using a baking soda paste or lemon juice as described above. You can also try microwaving the vinegar solution for a longer period of time.
* Microwave Still Dirty? If your microwave is still dirty after trying this method, you may need to repeat the process. Sometimes, it takes a couple of tries to get rid of all the grime.
Alternative Cleaning Solutions:
While I swear by the vinegar method, there are other options you can try:
* Lemon Water: As mentioned earlier, microwaving lemon water can also help to loosen food particles and deodorize your microwave.
* Baking Soda: You can also use a baking soda solution to clean your microwave. Mix a few tablespoons of baking soda with water and use a sponge or cloth to wipe down the interior.
* Commercial Microwave Cleaners: If you prefer to use a commercial microwave cleaner, be sure to follow the instructions on the label carefully.
Final Thoughts:
Cleaning your microwave with vinegar is a simple, effective, and eco-friendly way to keep it sparkling clean. It’s a task that can be done in just a few minutes, and it will make a big difference in the overall cleanliness of your kitchen. So, ditch the harsh chemicals and give this method a try. I promise you won’t be disappointed! Happy cleaning!
Conclusion
So, there you have it! A sparkling clean microwave, achieved with nothing more than vinegar and a little bit of elbow grease (or, more accurately, the power of steam!). This simple, all-natural microwave cleaning with vinegar method is not only incredibly effective at loosening stubborn splatters and grime, but it’s also a budget-friendly and environmentally conscious alternative to harsh chemical cleaners. Think about all the money you’ll save on specialized cleaning products, and the peace of mind knowing you’re not introducing potentially harmful chemicals into your food preparation area.
But the benefits don’t stop there. Beyond the obvious cleanliness, this method also helps to deodorize your microwave, leaving it smelling fresh and clean. No more lingering odors from last week’s popcorn or that forgotten container of leftovers! It’s a quick and easy way to maintain a hygienic and pleasant cooking environment.
Why is this DIY trick a must-try? Because it’s simple, safe, effective, and affordable. It requires minimal effort and uses readily available ingredients. It’s a win-win situation for your microwave, your wallet, and the environment.
Looking for variations? You can add a few drops of your favorite essential oil (lemon, orange, or grapefruit work particularly well) to the vinegar and water mixture for an extra boost of freshness. Alternatively, if you’re dealing with particularly stubborn grime, try adding a tablespoon of baking soda to the bowl along with the vinegar and water. The baking soda will act as a gentle abrasive, helping to scrub away even the most baked-on messes. You can also experiment with different types of vinegar. While white vinegar is the most common and readily available, apple cider vinegar can also be used and may leave a slightly sweeter scent.
Ready to give it a try? We highly encourage you to try this simple yet effective method for cleaning your microwave. It’s a game-changer! Once you’ve experienced the satisfaction of a sparkling clean microwave achieved with just vinegar, you’ll never go back to harsh chemical cleaners again.
Don’t just take our word for it, though. Try it out for yourself and see the amazing results firsthand. We’re confident that you’ll be impressed. And once you’ve successfully cleaned your microwave using this method, we’d love to hear about your experience! Share your before-and-after photos, tips, and variations in the comments below. Let’s create a community of clean microwave enthusiasts! We are eager to learn from your experiences and see how this simple trick has worked for you. Your feedback will help others discover the power of vinegar for a cleaner, healthier kitchen. So go ahead, give it a try, and let us know what you think! We can’t wait to hear from you!
FAQ
Frequently Asked Questions About Cleaning Your Microwave with Vinegar
Q: What kind of vinegar should I use?
A: White vinegar is the most commonly recommended type of vinegar for cleaning, as it’s inexpensive, readily available, and effective at cutting through grease and grime. However, you can also use apple cider vinegar if you prefer. It may leave a slightly sweeter scent. Avoid using flavored vinegars, as they may leave an undesirable residue or odor in your microwave.
Q: How much vinegar and water should I use?
A: A good starting point is a 1:1 ratio of vinegar to water. For example, you can use 1/2 cup of vinegar and 1/2 cup of water in a microwave-safe bowl. If your microwave is particularly dirty, you can increase the amount of vinegar slightly.
Q: How long should I microwave the vinegar and water mixture?
A: Microwave the mixture on high for 3-5 minutes, or until the solution comes to a rolling boil and the microwave is filled with steam. The steam is what loosens the grime and makes it easy to wipe away.
Q: Is it safe to microwave vinegar?
A: Yes, it is generally safe to microwave vinegar. Vinegar is a natural substance and does not produce harmful fumes when heated. However, it’s always a good idea to ensure your microwave is well-ventilated and to avoid inhaling the steam directly.
Q: What if the grime is still stuck after microwaving?
A: If the grime is particularly stubborn, let the vinegar and water mixture sit in the microwave for a few more minutes after microwaving to allow the steam to further loosen the debris. Then, carefully wipe down the interior with a clean sponge or cloth. You may need to scrub a bit harder in some areas. For extra tough spots, try making a paste of baking soda and water and applying it to the area before wiping.
Q: Will the vinegar leave a strong smell in my microwave?
A: Vinegar does have a distinct smell, but it typically dissipates quickly after cleaning. To help eliminate any lingering odor, you can leave the microwave door open for a few minutes after wiping it down. You can also place a bowl of baking soda in the microwave overnight to absorb any remaining odors. Adding a few drops of essential oil to the vinegar and water mixture can also help to mask the vinegar smell.
Q: Can I use this method to clean the outside of my microwave?
A: Yes, you can use a diluted vinegar solution to clean the outside of your microwave. Mix equal parts vinegar and water in a spray bottle, spray the solution onto a clean cloth, and wipe down the exterior surfaces. Avoid spraying the solution directly into the microwave’s vents or electrical components.
Q: How often should I clean my microwave with vinegar?
A: The frequency of cleaning depends on how often you use your microwave and how messy it gets. As a general guideline, cleaning your microwave with vinegar every 1-2 weeks is a good way to maintain a clean and hygienic cooking environment. If you notice spills or splatters, clean them up immediately to prevent them from hardening and becoming more difficult to remove.
Q: Can I use this method to clean other appliances?
A: While this method is specifically designed for cleaning microwaves, vinegar is a versatile cleaning agent that can be used on a variety of other appliances and surfaces. However, it’s always a good idea to test the solution on a small, inconspicuous area first to ensure it doesn’t damage the surface. Avoid using vinegar on delicate surfaces such as marble or granite.
Q: What if I don’t have vinegar? Can I use something else?
A: While vinegar is the most recommended and effective option, you can try using lemon juice as an alternative. Lemon juice has similar cleaning properties to vinegar and can also help to deodorize your microwave. Use the same method as with vinegar, substituting lemon juice for vinegar in the water mixture.
Q: Is this method safe for all types of microwaves?
A: This method is generally safe for most types of microwaves. However, it’s always a good idea to consult your microwave’s user manual for specific cleaning instructions and recommendations. If you have any concerns, you can test the solution on a small, inconspicuous area of the microwave before cleaning the entire interior.
Q: What are the benefits of using vinegar to clean my microwave compared to commercial cleaners?
A: Using vinegar offers several advantages over commercial cleaners. It’s a natural, non-toxic alternative that’s safe for your family and the environment. It’s also much more affordable than specialized cleaning products. Additionally, vinegar is effective at cutting through grease and grime without leaving behind harsh chemical residues. By choosing microwave cleaning with vinegar, you’re making a conscious decision to prioritize your health and the planet.

Leave a Comment