

Clean Wooden Cutting Board: Is your trusty wooden cutting board starting to look a little… less than appetizing? Don’t worry, you’re not alone! We’ve all been there. That beautiful, natural surface that once gleamed with promise is now sporting knife marks, lingering odors, and maybe even a few questionable stains. But before you resign it to the back of the cupboard, hold on! This isn’t the end of the line for your beloved board.
For centuries, wooden cutting boards have been a kitchen staple, prized for their durability, natural antibacterial properties, and the warm, rustic charm they bring to our cooking spaces. Think about it – generations of families have prepped meals on these very surfaces, passing down recipes and traditions along with the well-worn wood. But unlike their modern plastic counterparts, wooden cutting boards require a little extra TLC to keep them in tip-top shape.
Let’s face it, nobody wants to chop vegetables on a surface teeming with bacteria or that smells faintly of last week’s garlic. That’s why I’m so excited to share my favorite DIY tricks and hacks for how to clean wooden cutting board effectively and naturally. These simple methods will not only sanitize your board but also help to restore its natural beauty and extend its lifespan. Get ready to say goodbye to lingering odors and hello to a fresh, clean, and ready-to-use cutting board! I promise, with these easy steps, you’ll be amazed at how simple it is to keep your wooden cutting board looking and performing its best.
DIY: Reviving Your Beloved Wooden Cutting Board
Hey there, fellow DIY enthusiasts! I’m so excited to share this project with you. We’re going to breathe new life into your tired, scratched, and maybe even a little smelly wooden cutting board. Don’t throw it away! With a little elbow grease and a few simple ingredients, you can restore it to its former glory and keep it sanitary for years to come. I promise, it’s easier than you think, and the satisfaction of using a beautifully restored cutting board is totally worth it.
What You’ll Need: Your Arsenal of Restoration
Before we dive in, let’s gather our supplies. This is a pretty straightforward project, so you probably have most of these items already.
* Coarse Sandpaper (80-120 grit): This is our heavy hitter for removing deep scratches and imperfections.
* Medium Sandpaper (150-180 grit): We’ll use this to smooth out the marks left by the coarse sandpaper.
* Fine Sandpaper (220+ grit): This is for the final smoothing, giving your board a silky-smooth finish. I usually go for 220 or even 320 grit.
* Food-Grade Mineral Oil: This is essential for rehydrating and protecting the wood. Don’t use cooking oils like olive oil, as they can go rancid.
* Beeswax (Optional): Adding beeswax to the mineral oil creates a protective barrier that repels water and stains. You can buy beeswax pellets or a block.
* Clean Rags or Paper Towels: For wiping away sawdust and applying the oil/wax mixture.
* A Scraper or Putty Knife (Optional): Helpful for removing stubborn debris or old finishes.
* A Double Boiler or Heat-Safe Bowl and Saucepan (If using beeswax): For melting the beeswax.
* A Well-Ventilated Area: Sanding creates dust, so work in a garage, workshop, or outdoors.
* Safety Glasses and a Dust Mask: Protect your eyes and lungs from sawdust.
* Lemon and Salt (For cleaning): A natural way to disinfect and deodorize the board.
Phase 1: Sanding Away the Years
This is the most labor-intensive part, but trust me, it’s crucial for a beautiful result. We’re essentially removing the damaged surface and creating a fresh canvas.
1. Prepare Your Workspace: Lay down a drop cloth or some old newspapers to protect your work surface. Put on your safety glasses and dust mask.
2. Initial Inspection: Take a good look at your cutting board. Identify the areas with the most scratches, stains, or knife marks. This will help you focus your sanding efforts.
3. Coarse Sanding: Starting with the 80-120 grit sandpaper, begin sanding with the grain of the wood. Apply firm, even pressure. Don’t press too hard, let the sandpaper do the work. Focus on removing the deepest imperfections. Overlap each pass slightly to ensure even sanding. Sand both sides of the board.
4. Wipe Away Sawdust: After the initial sanding, use a clean rag or paper towel to thoroughly wipe away all the sawdust. This will allow you to see your progress and identify any areas that need more attention.
5. Medium Sanding: Switch to the 150-180 grit sandpaper. Repeat the sanding process, again working with the grain of the wood. This step will smooth out the marks left by the coarse sandpaper. Remember to sand both sides.
6. Wipe Away Sawdust (Again!): Wipe away the sawdust again. It’s important to keep the surface clean for optimal sanding.
7. Fine Sanding: Now, use the 220+ grit sandpaper for the final smoothing. This will give your cutting board a silky-smooth finish. Sand with the grain, using light pressure. Sand both sides.
8. Final Wipe Down: Give the cutting board a final, thorough wipe down to remove all traces of sawdust. You can even use a slightly damp cloth to pick up any remaining particles. Let the board dry completely before moving on to the next phase.
Phase 2: Cleaning and Disinfecting
Before we rehydrate the wood, let’s give it a good cleaning to remove any lingering bacteria or odors.
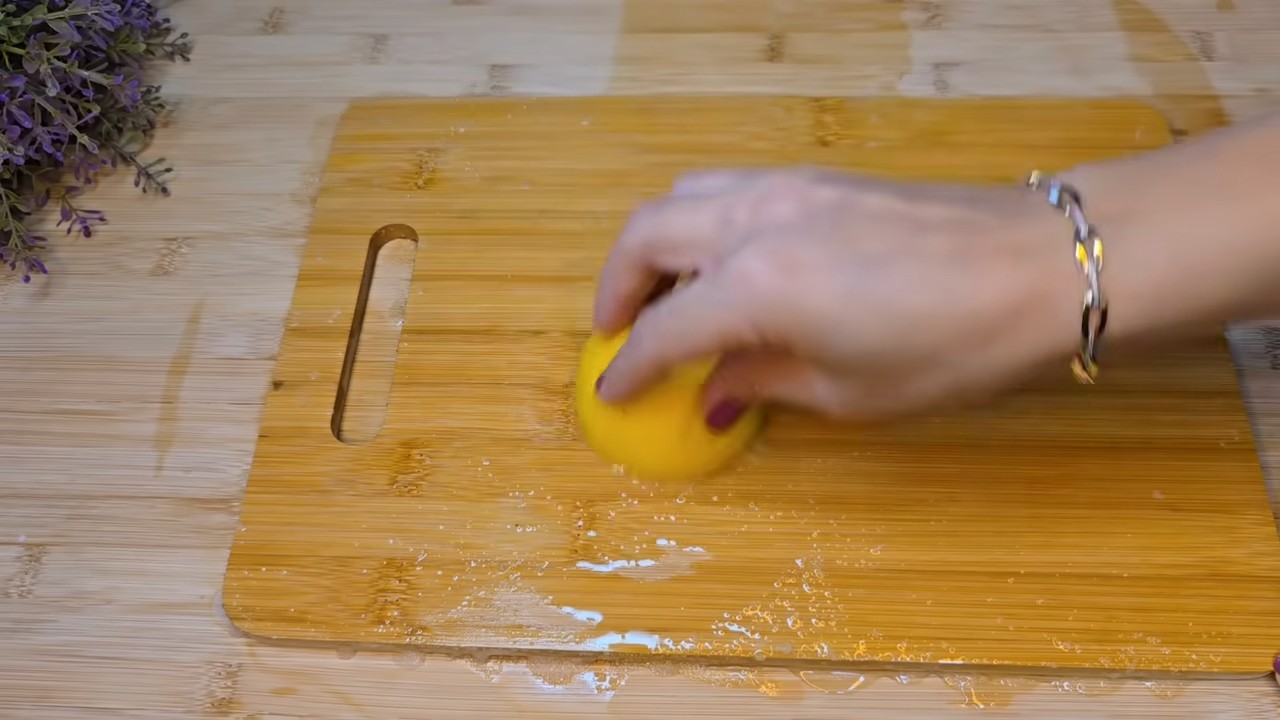
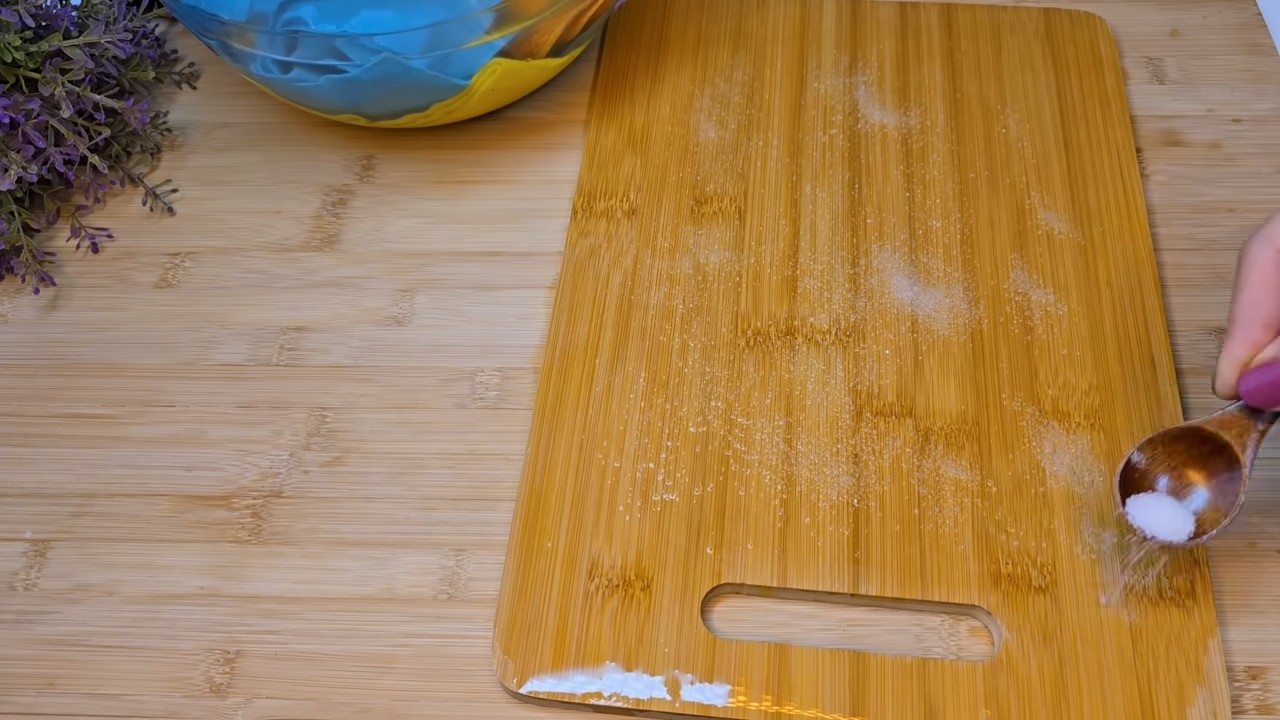
1. Lemon and Salt Scrub: Cut a lemon in half. Sprinkle a generous amount of coarse salt over the surface of the cutting board.
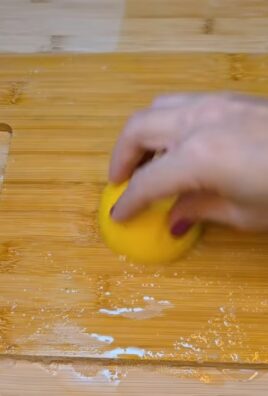
2. Scrub-a-dub-dub: Use the cut side of the lemon to scrub the salt into the wood. Apply firm pressure and work in a circular motion. The lemon juice acts as a natural disinfectant, while the salt helps to scrub away any remaining debris and odors.
3. Rinse Thoroughly: Rinse the cutting board thoroughly with warm water. Make sure to remove all traces of salt and lemon juice.
4. Dry Completely: Pat the cutting board dry with a clean towel. Allow it to air dry completely before moving on to the next phase. This is crucial to prevent mold growth.
Phase 3: Rehydrating and Protecting the Wood
Now for the fun part! We’re going to nourish the wood with mineral oil and, optionally, a beeswax finish. This will protect it from moisture, prevent cracking, and keep it looking beautiful.
1. Warm the Mineral Oil (Optional): Warming the mineral oil slightly can help it penetrate the wood more effectively. You can do this by placing the bottle of mineral oil in a bowl of warm water for a few minutes. Don’t overheat it!
2. Apply Mineral Oil: Pour a generous amount of mineral oil onto the surface of the cutting board. Use a clean rag or paper towel to spread the oil evenly over the entire surface, working it into the wood grain. Don’t be shy! The wood will soak up the oil like a sponge.
3. Let it Soak: Allow the mineral oil to soak into the wood for at least a few hours, or even overnight. The longer it soaks, the better. You’ll notice the wood darkening as it absorbs the oil.
4. Apply More Oil (If Needed): After the initial soaking, check the cutting board. If it looks dry in any areas, apply more mineral oil. Repeat the soaking process until the wood is fully saturated.
5. Wipe Away Excess Oil: Once the wood is fully saturated, use a clean rag or paper towel to wipe away any excess oil. You don’t want the surface to be sticky or greasy.
6. (Optional) Prepare the Beeswax Mixture: If you’re using beeswax, melt it in a double boiler or heat-safe bowl set over a saucepan of simmering water. Use approximately 1 part beeswax to 4 parts mineral oil. Stir until the beeswax is completely melted and the mixture is smooth. Let it cool slightly before applying.
7. (Optional) Apply Beeswax Mixture: Using a clean rag or paper towel, apply a thin layer of the beeswax mixture to the surface of the cutting board. Work it into the wood grain.
8. (Optional) Buff the Surface: After the beeswax mixture has cooled and hardened slightly, use a clean, dry rag to buff the surface of the cutting board. This will create a smooth, protective finish.
9. Cure Time: Allow the cutting board to cure for at least 24 hours before using it. This will give the oil and/or beeswax mixture time to fully penetrate and harden.
Maintaining Your Restored Cutting Board
Now that you’ve put in all this effort, you’ll want to keep your cutting board in tip-top shape. Here are a few tips:
* Wash After Each Use: Wash your cutting board with warm, soapy water after each use. Avoid using harsh detergents or placing it in the dishwasher, as this can dry out the wood.
* Dry Thoroughly: Always dry your cutting board thoroughly after washing it. Stand it on its side to allow air to circulate.
* Regular Oiling: Re-oil your cutting board every few weeks, or whenever it starts to look dry. This will keep the wood hydrated and prevent cracking.
* Sanitize Regularly: Sanitize your cutting board regularly with a lemon and salt scrub, or a solution of vinegar and water.
* Avoid Cutting Raw Meat and Poultry: If possible, use a separate cutting board for raw meat and poultry to prevent cross-contamination.
* Store Properly: Store your cutting board in a dry, well-ventilated area. Avoid storing it in a damp or humid environment.
And that’s it! You’ve successfully restored your wooden cutting board. Now you can enjoy using it for years to come, knowing that you’ve given it a new lease on life. Happy cooking!
Conclusion
So, there you have it! A simple, effective, and surprisingly satisfying way to breathe new life into your beloved wooden cutting board. We’ve walked you through the process of cleaning and revitalizing your board using readily available ingredients, avoiding harsh chemicals and expensive treatments. This isn’t just about aesthetics; it’s about maintaining a hygienic and safe surface for food preparation, ensuring your culinary creations start on the right foot.
Why is this DIY trick a must-try? Because it’s more than just cleaning; it’s an investment in the longevity of your cutting board. Think about it: your wooden cutting board is a workhorse in the kitchen, enduring countless chops, slices, and dicing sessions. Over time, it naturally accumulates stains, odors, and even microscopic bacteria. Regular cleaning with soap and water is essential, but it doesn’t always penetrate deep enough to truly sanitize and restore the wood. Our method, using the power of lemon and salt, acts as a natural disinfectant and abrasive, gently lifting away grime and neutralizing unpleasant smells. The oiling step then replenishes the wood’s natural moisture, preventing it from drying out and cracking.
But the benefits extend beyond hygiene and durability. A well-maintained cutting board is simply more enjoyable to use. It provides a smooth, stable surface for chopping, making food preparation easier and more efficient. Plus, a clean and beautiful cutting board adds a touch of rustic charm to your kitchen.
Looking for variations? Absolutely! For a deeper clean, you can add a tablespoon of baking soda to the salt and lemon mixture. Baking soda is a natural deodorizer and can help to lift stubborn stains. If you’re dealing with particularly strong odors, such as garlic or onion, try rubbing the cut side of an apple or potato over the board after cleaning. These fruits contain enzymes that can help to neutralize odors.
As for the oil, while mineral oil is the most commonly recommended choice due to its food-safe properties, you can also experiment with other food-grade oils, such as coconut oil (refined, to avoid a strong coconut scent) or walnut oil (if you’re not allergic to nuts). Just be sure to choose an oil that won’t go rancid easily.
We wholeheartedly encourage you to try this DIY method for cleaning your wooden cutting board. It’s a simple, affordable, and effective way to keep your kitchen clean and your cutting board in top condition. Don’t just take our word for it – experience the difference for yourself!
Once you’ve given it a try, we’d love to hear about your experience. Share your before-and-after photos, your tips and tricks, and any variations you’ve discovered in the comments below. Let’s create a community of clean cutting board enthusiasts! Your feedback will not only help other readers but also inspire us to continue sharing valuable DIY solutions. Remember, a clean cutting board is a happy cutting board, and a happy cutting board leads to happy cooking! So go ahead, give your wooden cutting board the TLC it deserves. You’ll be amazed at the results. Mastering the art of how to clean wooden cutting board is a skill that will serve you well for years to come.
Frequently Asked Questions (FAQ)
Q: How often should I clean my wooden cutting board using this method?
A: The frequency depends on how often you use your cutting board. For daily use, we recommend a deep clean with lemon and salt once a week. For less frequent use, every two weeks should suffice. However, always wash your cutting board with soap and water after each use to remove food particles and prevent bacterial growth. The oiling step should be done more frequently, ideally after each deep clean or whenever the wood starts to look dry.
Q: Can I use this method on all types of wooden cutting boards?
A: This method is generally safe for most types of wooden cutting boards, including those made from maple, walnut, cherry, and bamboo. However, if you have a particularly delicate or antique cutting board, it’s always best to test the method on a small, inconspicuous area first to ensure it doesn’t damage the wood. Avoid using this method on cutting boards with intricate inlays or decorative finishes, as the salt and lemon could potentially damage them.
Q: What kind of salt should I use?
A: Coarse salt, such as kosher salt or sea salt, is ideal for this method. The larger granules provide a gentle abrasive action that helps to scrub away stains and debris. Avoid using fine table salt, as it may dissolve too quickly and not provide enough scrubbing power.
Q: What if I don’t have lemons? Can I use something else?
A: While lemons are preferred due to their acidity and pleasant scent, you can substitute them with white vinegar. Vinegar is also a natural disinfectant and can help to remove stains and odors. Use the same amount of vinegar as you would lemon juice. However, be aware that vinegar has a stronger odor than lemon, so you may want to rinse the cutting board thoroughly after cleaning.
Q: How do I know if my cutting board is properly oiled?
A: A properly oiled cutting board will have a slightly sheen and will feel smooth to the touch. The wood should not appear dry or cracked. To test if your cutting board needs oiling, sprinkle a few drops of water on the surface. If the water beads up, the board is adequately oiled. If the water soaks in quickly, it’s time to re-oil.
Q: Can I put my wooden cutting board in the dishwasher?
A: Absolutely not! Dishwashers are extremely harsh on wooden cutting boards. The high heat and strong detergents can cause the wood to warp, crack, and dry out. Always hand-wash your wooden cutting board with soap and water.
Q: My cutting board has deep knife marks. Can this method remove them?
A: While this method can help to clean and sanitize knife marks, it won’t remove them completely. Deep knife marks can harbor bacteria and are difficult to clean. For heavily scarred cutting boards, you may need to sand down the surface to remove the marks. Use a fine-grit sandpaper and sand in the direction of the wood grain. After sanding, be sure to clean and oil the cutting board as described above.
Q: How do I store my wooden cutting board?
A: Store your wooden cutting board in a dry, well-ventilated area. Avoid storing it in a damp or humid environment, as this can promote mold growth. You can store it flat on a shelf or upright in a cutting board rack.
Q: My cutting board smells like garlic/onions even after cleaning. What can I do?
A: Stubborn odors can be tricky to remove. Try making a paste of baking soda and water and applying it to the affected area. Let it sit for several hours or overnight, then rinse thoroughly. You can also try rubbing the cut side of an apple or potato over the board, as mentioned earlier. In extreme cases, you may need to sand down the surface to remove the odor.
Q: What type of oil is best for my wooden cutting board?
A: Mineral oil is the most commonly recommended oil for wooden cutting boards because it is food-safe, odorless, and tasteless. It also doesn’t go rancid easily. Other options include coconut oil (refined) and walnut oil (if you don’t have nut allergies). Avoid using vegetable oils like olive oil or canola oil, as they can go rancid and leave a sticky residue. Always choose a food-grade oil specifically designed for cutting boards or butcher blocks.


Leave a Comment