

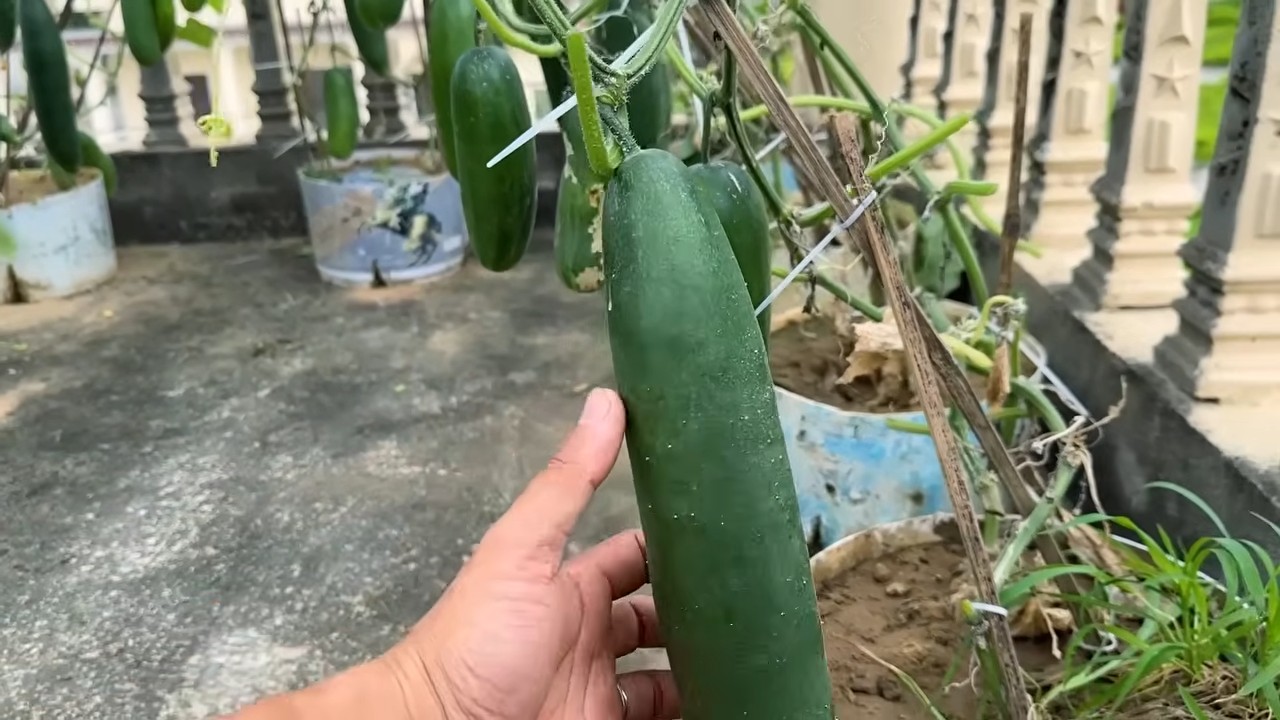
Cucumber Growing Tips: Ever dream of strolling into your backyard and plucking a crisp, refreshing cucumber straight from the vine? I know I have! There’s something incredibly satisfying about growing your own food, and cucumbers are surprisingly easy to cultivate with a few clever tricks up your sleeve. Forget those bland, store-bought cucumbers – imagine the vibrant flavor and satisfying crunch of a homegrown beauty!
Cucumbers have a rich history, dating back thousands of years to ancient India. They’ve been enjoyed by cultures around the world, from the Romans who prized them for their medicinal properties to the Egyptians who believed they symbolized fertility. Today, cucumbers remain a staple in salads, pickles, and refreshing drinks.
But let’s face it, sometimes growing cucumbers can feel like a challenge. Pests, diseases, and inconsistent watering can all sabotage your efforts. That’s where these DIY tricks and hacks come in! I’m going to share my favorite cucumber growing tips that will help you maximize your yield, minimize problems, and enjoy a bountiful harvest. Whether you’re a seasoned gardener or just starting out, these simple techniques will transform your cucumber growing experience. Get ready to impress your friends and family with the juiciest, most flavorful cucumbers they’ve ever tasted!
Growing Water Spinach (Kangkong) at Home: A DIY Guide
Hey there, fellow gardening enthusiasts! I’m so excited to share my experience growing water spinach, also known as kangkong or ong choy, right in my own backyard. It’s surprisingly easy, incredibly rewarding, and provides a constant supply of fresh, delicious greens for stir-fries, soups, and salads. This guide will walk you through every step, from choosing the right container to harvesting your bounty. Let’s get started!
What You’ll Need
Before we dive in, let’s gather all the necessary supplies. Here’s a checklist to make sure you’re prepared:
* Water Spinach Seeds or Cuttings: You can find seeds online or at your local garden center. Cuttings can be obtained from a friend who already grows water spinach or sometimes even from Asian grocery stores (look for stems with nodes).
* A Large Container: A plastic tub, a large pot, or even a repurposed container will work. Aim for something at least 12 inches deep and wide.
* Potting Soil: A good quality potting mix is essential for healthy growth.
* Water: Obviously! You’ll need a consistent supply of water, as water spinach loves moisture.
* Fertilizer (Optional): A balanced liquid fertilizer can boost growth, but it’s not strictly necessary.
* Sunlight: Water spinach needs at least 6 hours of sunlight per day.
* Gardening Gloves: To keep your hands clean.
* Watering Can or Hose: For easy watering.
* Scissors or Pruning Shears: For harvesting.
Choosing Your Growing Method: Seeds vs. Cuttings
You have two main options for starting your water spinach: seeds or cuttings. Both are relatively straightforward, but I’ll explain the pros and cons of each.
* Seeds: Starting from seeds takes a bit longer, but it’s a great way to ensure you have a healthy, disease-free plant. You’ll need to germinate the seeds before planting them.
* Cuttings: Using cuttings is faster, as you’re essentially skipping the germination stage. However, make sure the cuttings are healthy and free from any signs of disease.
Germinating Water Spinach Seeds (If Using Seeds)
If you’re starting from seeds, germination is the first crucial step. Here’s how I do it:
1. Soak the Seeds: Place the water spinach seeds in a bowl of warm water and let them soak for 24 hours. This helps soften the seed coat and encourages germination.
2. Prepare a Seed Tray or Small Pots: Fill a seed tray or small pots with moist potting mix.
3. Sow the Seeds: Sow the seeds about 1/2 inch deep in the soil. Space them about an inch apart.
4. Cover and Water: Gently cover the seeds with soil and water them thoroughly.
5. Create a Humid Environment: Cover the seed tray or pots with a plastic bag or clear plastic wrap to create a humid environment. This helps retain moisture and promotes germination.
6. Place in a Warm Location: Place the seed tray or pots in a warm location with indirect sunlight.
7. Monitor and Water: Check the soil moisture daily and water as needed to keep it consistently moist.
8. Wait for Germination: The seeds should germinate in about 7-14 days. Once the seedlings emerge, remove the plastic covering.
Preparing Cuttings (If Using Cuttings)
If you’re using cuttings, here’s how to prepare them:
1. Select Healthy Cuttings: Choose cuttings that are about 6-8 inches long and have several nodes (the points where leaves grow).
2. Remove Lower Leaves: Remove the leaves from the bottom 2-3 inches of the cutting. This will encourage root growth.
3. Rooting in Water (Optional): You can root the cuttings in water before planting them in soil. Place the cuttings in a glass of water, ensuring that the nodes are submerged. Change the water every 1-2 days. Roots should start to appear in about a week.
4. Plant Directly in Soil: Alternatively, you can plant the cuttings directly into the soil. This method works well if the cuttings are fresh and healthy.
Planting Your Water Spinach
Now that you have your seedlings or cuttings ready, it’s time to plant them in your container.
1. Prepare the Container: Fill your container with potting mix, leaving about an inch of space at the top.
2. Create Planting Holes: Make small holes in the soil, spaced about 4-6 inches apart.
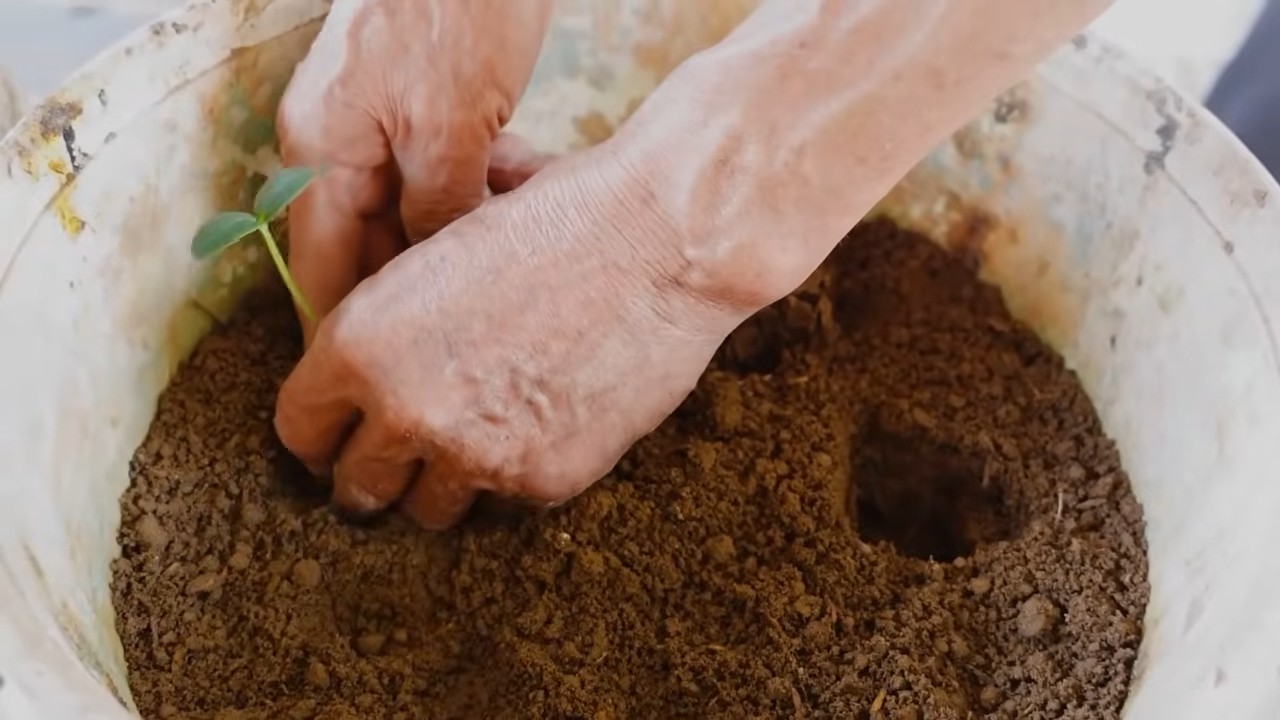
3. Plant the Seedlings or Cuttings: Gently remove the seedlings from the seed tray or pots and plant them in the holes. If you’re using cuttings, insert the bottom 2-3 inches of the cutting into the soil.
4. Water Thoroughly: Water the plants thoroughly after planting.
5. Mulch (Optional): Add a layer of mulch around the plants to help retain moisture and suppress weeds.
Caring for Your Water Spinach
Water spinach is relatively low-maintenance, but here are a few key things to keep in mind:
* Watering: Water spinach loves water, so keep the soil consistently moist. Water deeply whenever the top inch of soil feels dry. In hot weather, you may need to water daily.
* Sunlight: Ensure your water spinach receives at least 6 hours of sunlight per day.
* Fertilizing (Optional): If you want to boost growth, fertilize your water spinach every 2-3 weeks with a balanced liquid fertilizer. Follow the instructions on the fertilizer label.
* Weeding: Keep the container free from weeds.
* Pest Control: Water spinach is generally pest-resistant, but keep an eye out for aphids or other common garden pests. If you spot any pests, treat them with an organic insecticide or insecticidal soap.
Harvesting Your Water Spinach
The best part of growing water spinach is harvesting your own fresh greens!
1. When to Harvest: You can start harvesting your water spinach about 4-6 weeks after planting. The stems should be about 8-12 inches long.
2. How to Harvest: Use scissors or pruning shears to cut the stems about 4-6 inches from the base of the plant. This will encourage new growth.
3. Harvest Regularly: Harvest your water spinach regularly to encourage continuous production.
4. Enjoy Your Harvest: Wash the harvested stems thoroughly and use them in your favorite recipes. Water spinach is delicious in stir-fries, soups, salads, and more.
Troubleshooting
Even with the best care, you might encounter a few challenges. Here are some common issues and how to address them:
* Yellowing Leaves: This could be a sign of overwatering or nutrient deficiency. Make sure the soil is well-draining and consider fertilizing with a balanced fertilizer.
* Slow Growth: This could be due to insufficient sunlight or lack of nutrients. Ensure your water spinach is getting enough sunlight and fertilize regularly.
* Pests: Inspect your plants regularly for pests and treat them promptly with an organic insecticide or insecticidal soap.
Tips for Success
Here are a few extra tips to help you succeed in growing water spinach at home:
* Choose the Right Location: Select a location that receives plenty of sunlight and is sheltered from strong winds.
* Use Good Quality Potting Mix: A good quality potting mix will provide the nutrients your water spinach needs to thrive.
* Water Regularly: Water spinach loves water, so keep the soil consistently moist.
* Harvest Regularly: Harvesting regularly will encourage continuous production.
* Experiment: Don’t be afraid to experiment with different growing methods and fertilizers to find what works best for you.
Enjoying Your Homegrown Water Spinach
Growing water spinach at home is a rewarding experience that provides you with a constant supply of fresh, delicious greens. I hope this guide has been helpful and inspires you to start your own water spinach garden. Happy gardening!
Conclusion
So, there you have it! These simple yet effective DIY cucumber growing tips are your secret weapon for a bountiful harvest of crisp, delicious cucumbers right in your own backyard. Forget relying solely on store-bought produce, often lacking the vibrant flavor and satisfying crunch of homegrown varieties. This isn’t just about saving money; it’s about experiencing the joy of nurturing life from seed to table and enjoying the unparalleled taste of freshly picked cucumbers.
Why is this a must-try? Because it empowers you to take control of your food source, ensuring you’re consuming cucumbers free from unwanted chemicals and pesticides. Plus, the satisfaction of harvesting your own vegetables is an experience that’s hard to beat. Imagine the pride you’ll feel serving a salad made entirely with ingredients you cultivated yourself!
But the fun doesn’t stop there! Feel free to experiment with different cucumber varieties. Try pickling cucumbers for homemade pickles, slicing cucumbers for refreshing salads, or even English cucumbers for a milder flavor. You can also explore companion planting, pairing your cucumbers with beneficial herbs and flowers like basil, marigolds, or nasturtiums to deter pests and attract pollinators. Consider vertical gardening techniques, using trellises or cages, to maximize space and improve air circulation around your plants, reducing the risk of fungal diseases.
Don’t be afraid to adapt these tips to your specific climate and growing conditions. If you live in a particularly hot region, provide extra shade during the hottest part of the day. If your soil is heavy clay, amend it with plenty of organic matter to improve drainage. The key is to observe your plants closely and adjust your approach as needed.
We’re confident that these DIY cucumber growing tips will transform your gardening experience. They’re easy to implement, cost-effective, and yield impressive results. So, grab your seeds, prepare your soil, and get ready to enjoy a summer filled with delicious, homegrown cucumbers.
We encourage you to try these tips and share your experiences with us! Let us know what works best for you, what challenges you encounter, and any variations you discover along the way. Your feedback will help us refine these tips and make them even more valuable for other gardeners. Share your photos and stories on our social media channels using #DIYCucumberGrowing and let’s build a community of thriving cucumber growers together! Happy gardening!
Frequently Asked Questions (FAQ)
What is the best time to plant cucumbers?
The ideal time to plant cucumbers is after the last frost when the soil has warmed to at least 60°F (15°C). Cucumbers are warm-season vegetables and are sensitive to cold temperatures. Planting too early can stunt their growth or even kill them. In most regions, this is typically late spring or early summer. You can start seeds indoors 3-4 weeks before the last frost to get a head start, but be sure to harden them off gradually before transplanting them outdoors.
How much sunlight do cucumbers need?
Cucumbers require at least 6-8 hours of direct sunlight per day to thrive. Choose a sunny location in your garden where they will receive ample sunlight throughout the day. If you live in a particularly hot climate, providing some afternoon shade can help prevent the plants from overheating. Insufficient sunlight can result in poor fruit production and leggy growth.
What kind of soil is best for growing cucumbers?
Cucumbers prefer well-drained, fertile soil that is rich in organic matter. The ideal soil pH is between 6.0 and 7.0. Before planting, amend your soil with compost, aged manure, or other organic materials to improve its fertility and drainage. Avoid heavy clay soils, as they can become waterlogged and inhibit root growth. If you have clay soil, consider growing cucumbers in raised beds or containers.
How often should I water my cucumber plants?
Cucumbers need consistent moisture to produce healthy fruits. Water deeply and regularly, especially during hot, dry weather. Aim to keep the soil consistently moist but not waterlogged. A good rule of thumb is to water when the top inch of soil feels dry to the touch. Mulching around the plants can help retain moisture and suppress weeds. Drip irrigation or soaker hoses are excellent options for delivering water directly to the roots.
What are some common cucumber pests and diseases?
Cucumbers are susceptible to several pests and diseases, including cucumber beetles, squash bugs, aphids, powdery mildew, and downy mildew. Regularly inspect your plants for signs of infestation or disease. Use organic pest control methods, such as insecticidal soap or neem oil, to control pests. To prevent diseases, ensure good air circulation around the plants, avoid overhead watering, and choose disease-resistant varieties. Crop rotation can also help reduce the risk of soilborne diseases.
How do I know when my cucumbers are ready to harvest?
Cucumbers are typically ready to harvest 50-70 days after planting, depending on the variety. Harvest them when they are the desired size and color. Pickling cucumbers should be harvested when they are small and firm, while slicing cucumbers can be harvested when they are larger and have a deep green color. Overripe cucumbers can become bitter and seedy. Harvest regularly to encourage continued fruit production.
Can I grow cucumbers in containers?
Yes, cucumbers can be successfully grown in containers, especially bush varieties. Choose a large container that is at least 12 inches in diameter and 12 inches deep. Use a well-draining potting mix and provide adequate support for the vines. Container-grown cucumbers may require more frequent watering and fertilization than those grown in the ground. Place the container in a sunny location and monitor the plants closely for pests and diseases.
What is companion planting for cucumbers?
Companion planting involves growing different plants together to benefit each other. Some good companion plants for cucumbers include basil, marigolds, nasturtiums, dill, and oregano. Basil repels cucumber beetles and aphids, while marigolds deter nematodes and other soil pests. Nasturtiums attract beneficial insects that prey on cucumber pests. Dill attracts pollinators and repels cabbage moths. Oregano repels many common garden pests. Avoid planting cucumbers near aromatic herbs like sage, as they can inhibit growth.
How can I prevent my cucumbers from becoming bitter?
Cucumber bitterness is often caused by stress factors such as inconsistent watering, high temperatures, or poor soil fertility. To prevent bitterness, ensure that your cucumber plants receive consistent moisture, adequate sunlight, and fertile soil. Choose varieties that are less prone to bitterness. Harvest cucumbers when they are young and tender, as bitterness tends to increase with age.
What are the benefits of using a trellis for cucumbers?
Using a trellis for cucumbers offers several benefits. It improves air circulation around the plants, reducing the risk of fungal diseases. It also maximizes space in your garden, allowing you to grow more cucumbers in a smaller area. Trellising makes it easier to harvest the cucumbers and keeps the fruits off the ground, preventing them from rotting or becoming infested with pests. Vertical gardening also makes it easier to spot and manage pests and diseases.


Leave a Comment