

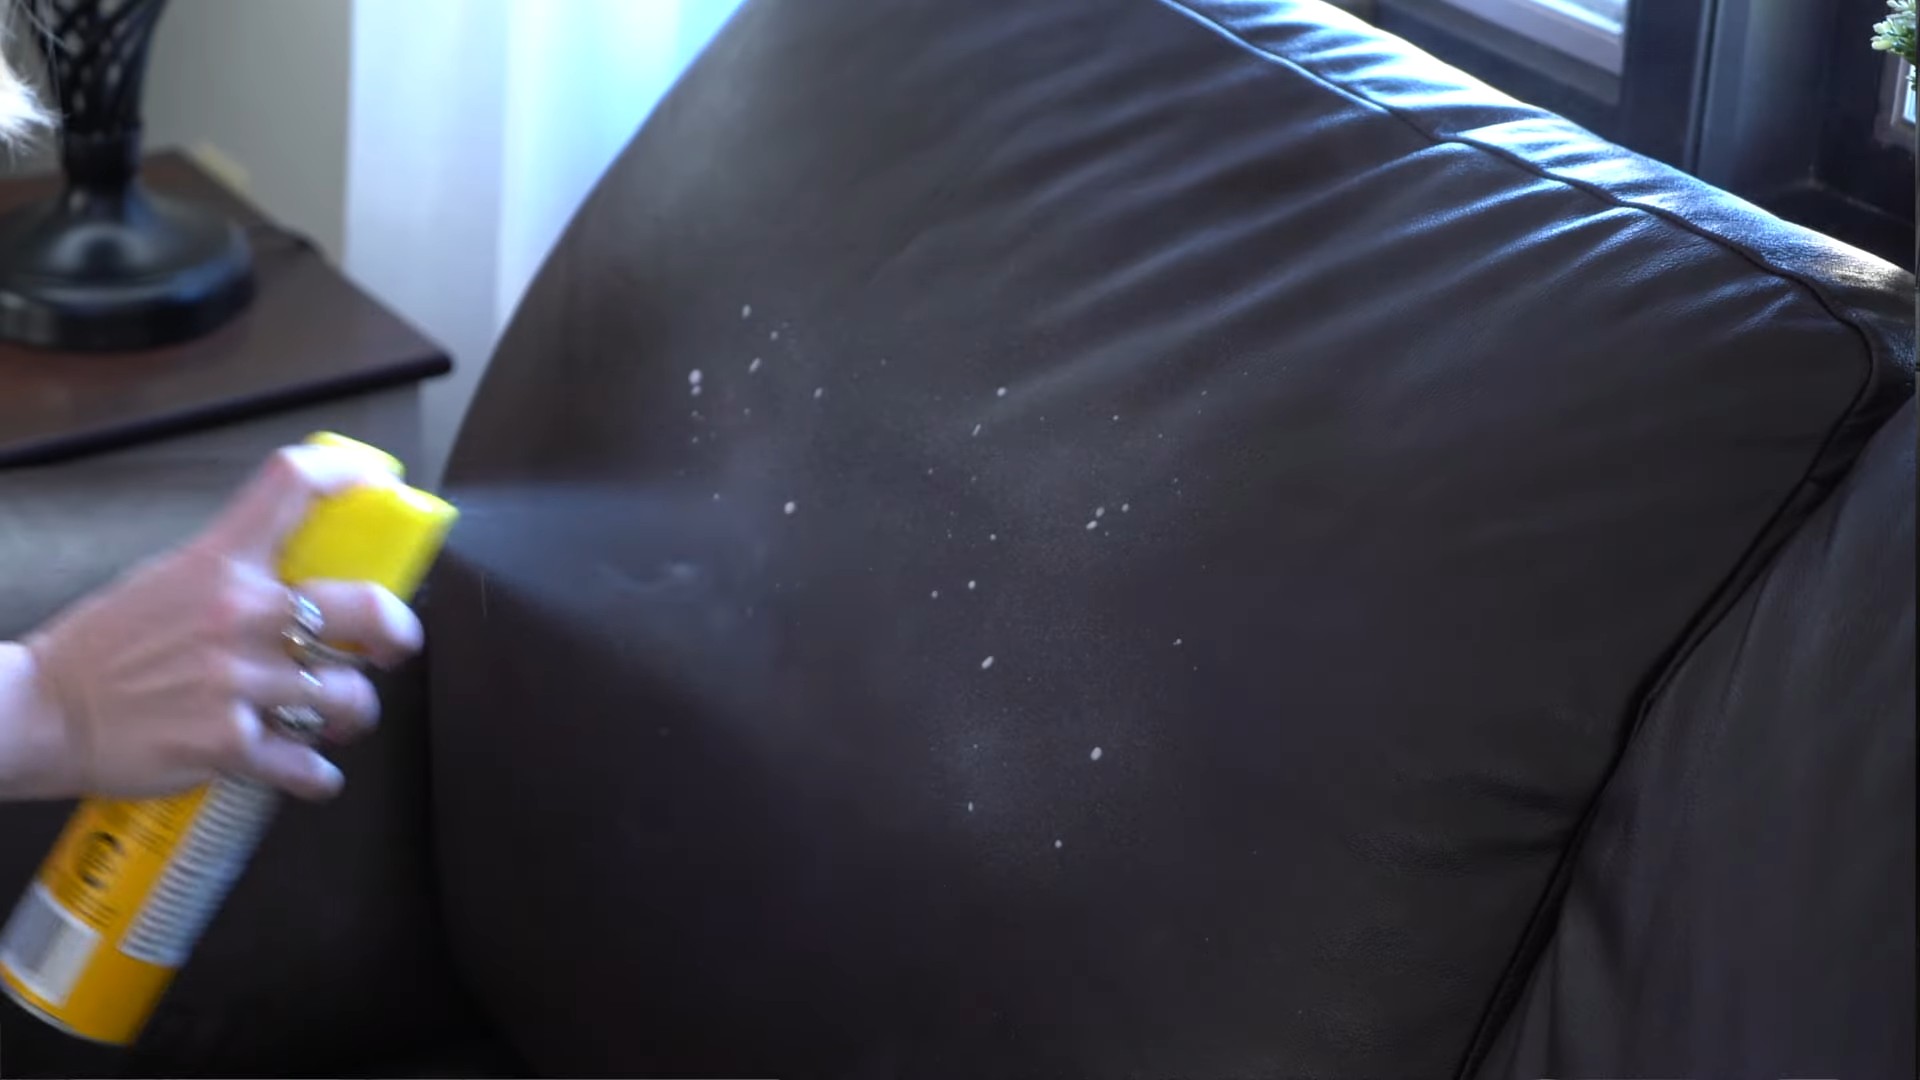
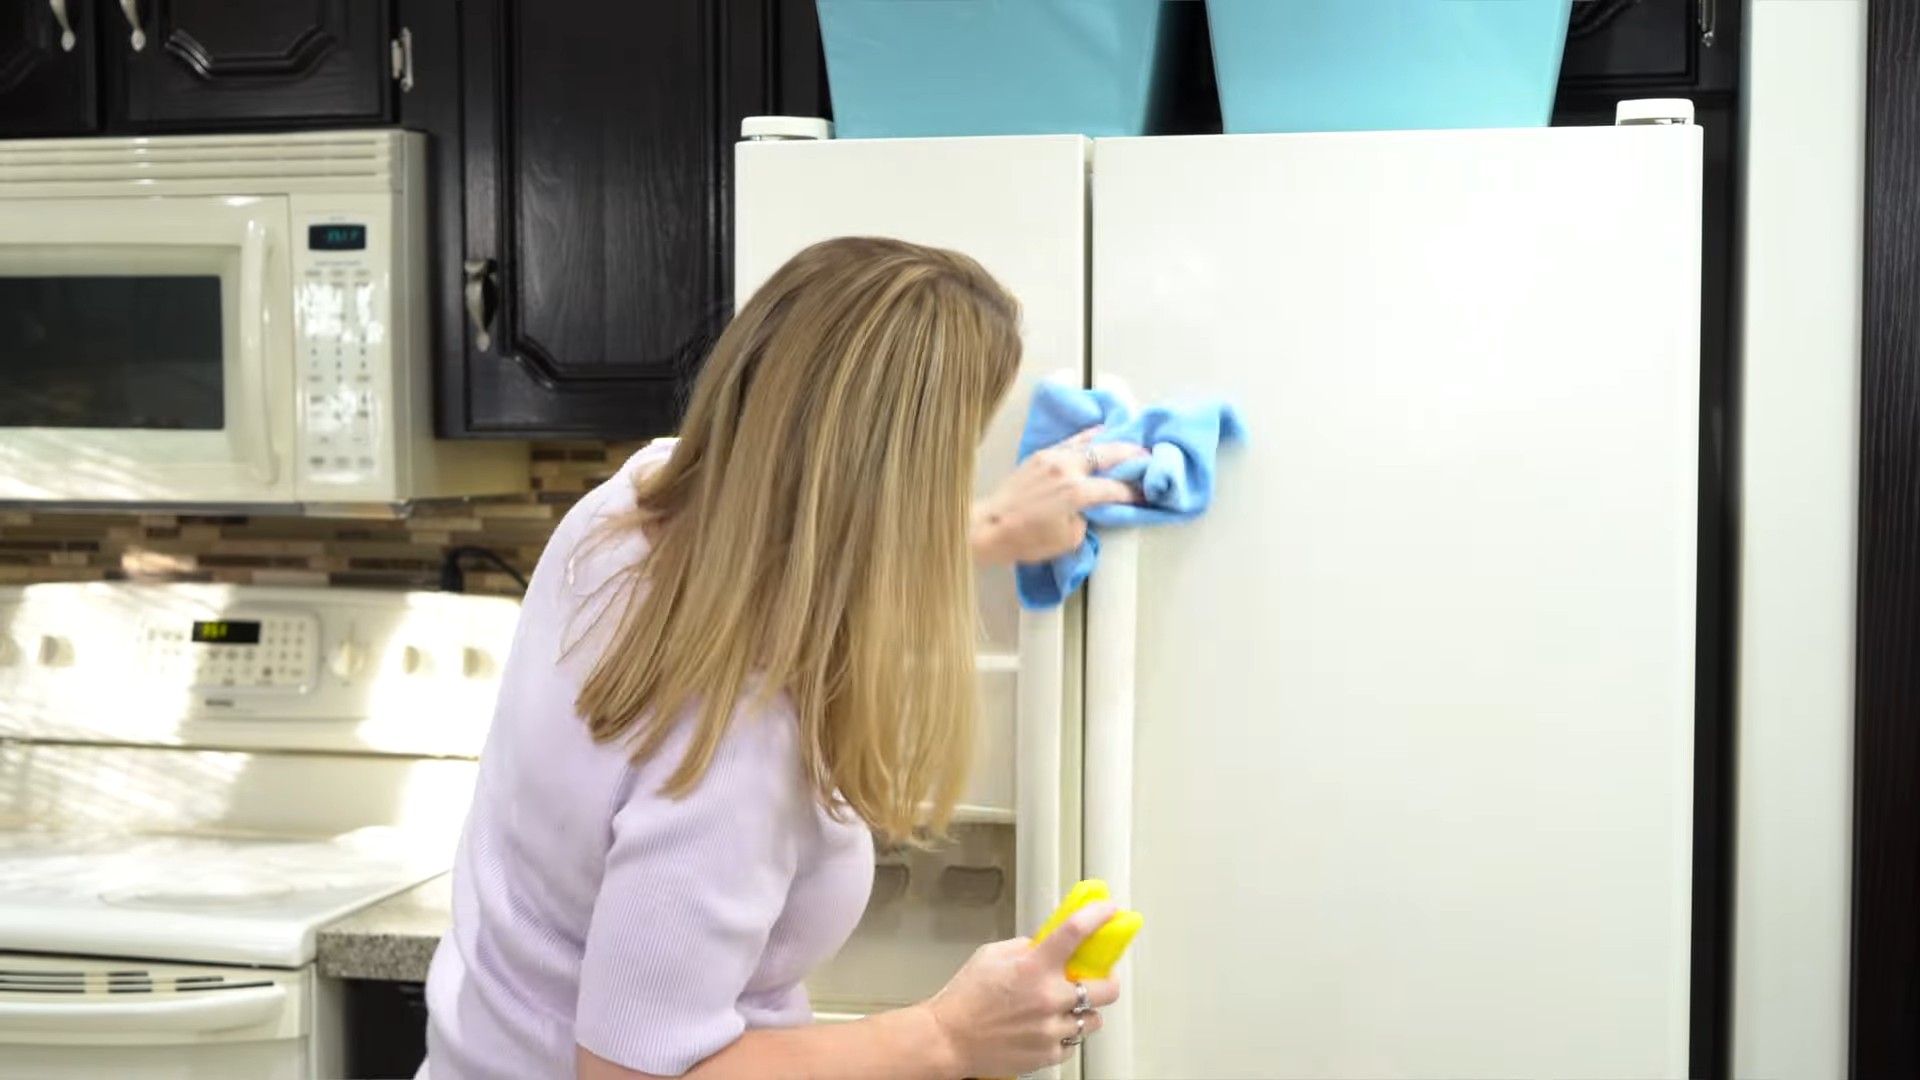
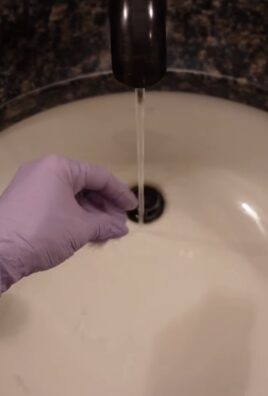
DIY appliance leather shine – ever looked at your once-gleaming leather appliances and felt a pang of disappointment? I know I have! Those fingerprints, smudges, and general dullness can really detract from the beauty of your kitchen. But before you resign yourself to expensive leather cleaners or, worse, replacing your appliances, let me tell you a secret: you can achieve a stunning, professional-looking shine with simple ingredients you probably already have at home.
Leather, a material prized for its durability and elegance, has been used for centuries, dating back to ancient civilizations. From clothing and tools to furniture and, yes, even appliance finishes, leather has always been a symbol of quality and sophistication. Maintaining that quality, however, requires a little know-how.
In today’s world, where sustainability and saving money are more important than ever, learning how to care for your belongings yourself is a game-changer. This DIY appliance leather shine trick isn’t just about aesthetics; it’s about extending the life of your appliances, reducing waste, and taking pride in your home. Plus, who doesn’t love the satisfaction of creating something beautiful with their own two hands? So, ditch the harsh chemicals and get ready to learn a simple, effective, and budget-friendly way to bring back the luster to your leather appliances!
Transform Your Old T-Shirts into Stylish Reusable Shopping Bags!
Hey there, fellow DIY enthusiasts! Are you drowning in old t-shirts that you can’t bear to throw away? Do you want to reduce your plastic consumption and look good doing it? Well, you’ve come to the right place! I’m going to show you how to turn those forgotten tees into super cute and functional reusable shopping bags. This project is incredibly easy, requires minimal sewing (or even *no* sewing if you choose the no-sew option!), and is a fantastic way to upcycle. Let’s get started!
What You’ll Need:
* An old t-shirt (preferably cotton or a cotton blend – the thicker, the better!)
* Sharp scissors
* A ruler or measuring tape
* Pins (optional, but helpful for sewing)
* Sewing machine or needle and thread (for the sewn option)
* Fabric glue (for the no-sew option)
* A marker or pen
* A plate or bowl (for tracing a rounded neckline, optional)
Choosing Your T-Shirt:
Before we dive in, let’s talk about t-shirt selection. Here’s what I look for:
* Fabric: Cotton or cotton blends are ideal because they’re durable and easy to work with. Avoid super stretchy or thin fabrics, as they might not hold up well to carrying groceries.
* Size: A larger t-shirt will naturally create a larger bag. Consider what you’ll primarily use the bag for when choosing your size. A standard adult size t-shirt will make a great general-purpose shopping bag.
* Design: This is where you can get creative! Choose a t-shirt with a cool graphic, a fun pattern, or a meaningful message. Remember, the design will be visible on your finished bag.
* Condition: While we’re upcycling, try to choose a t-shirt that’s free from major rips or stains in the main body of the shirt. Small holes near the collar or sleeves can usually be worked around.
Sewn T-Shirt Bag: Step-by-Step Instructions
This method is my preferred one because it creates a stronger and more durable bag. Don’t worry if you’re not a sewing pro – I’ll walk you through it!
1. Prepare the T-Shirt: Lay your t-shirt flat on a clean surface. Smooth out any wrinkles.
2. Cut Off the Sleeves: Using your scissors, carefully cut off both sleeves. Try to cut as close to the seam as possible for a clean look. Don’t worry about being perfectly symmetrical – a little imperfection adds character!
3. Widen the Neckline (Optional): If you want a wider opening for your bag, you can enlarge the neckline. Place a plate or bowl on the neckline and trace around it with a marker. Then, carefully cut along the traced line. This step is totally optional, so feel free to skip it if you like the original neckline.
4. Turn the T-Shirt Inside Out: This is important! We’ll be sewing the bottom seam from the inside.
5. Pin the Bottom Seam: Fold the bottom edge of the t-shirt up about 1/2 inch and pin it in place. This will create a nice, clean hem. Then, pin the bottom seam together, making sure the edges are aligned. I usually use pins every inch or two to keep everything secure.
6. Sew the Bottom Seam: Using your sewing machine or needle and thread, sew along the pinned bottom seam. If you’re using a sewing machine, a straight stitch is perfect. If you’re sewing by hand, use a backstitch for extra strength. I usually sew two or three passes over the seam to make it extra durable.
7. Reinforce the Bottom Corners: This is a crucial step for preventing the bag from ripping when you put heavy items in it. To reinforce the corners, pinch each corner to create a small triangle. Sew across the base of the triangle, perpendicular to the bottom seam. Again, I recommend sewing two or three passes for extra strength.
8. Turn the Bag Right Side Out: Carefully turn the bag right side out. Now you should see the design of your t-shirt on the outside.
9. Hem the Top Edge (Optional): If you want a more polished look, you can hem the top edge of the bag. Fold the top edge down about 1/2 inch, pin it in place, and sew along the folded edge. This will prevent the fabric from fraying and give the bag a cleaner finish.
10. Admire Your Handiwork! You’ve just created a stylish and sustainable shopping bag from an old t-shirt! Now go forth and conquer the grocery store in style.
No-Sew T-Shirt Bag: Step-by-Step Instructions
For those of you who are sewing-averse (or just short on time!), this no-sew method is a lifesaver. It’s quick, easy, and requires only fabric glue.
1. Prepare the T-Shirt: Just like with the sewn method, lay your t-shirt flat on a clean surface and smooth out any wrinkles.
2. Cut Off the Sleeves: Carefully cut off both sleeves, as close to the seam as possible.
3. Widen the Neckline (Optional): Enlarge the neckline if desired, using the plate or bowl method described above.
4. Turn the T-Shirt Inside Out: Turn the t-shirt inside out.
5. Apply Fabric Glue to the Bottom Seam: Fold the bottom edge of the t-shirt up about 1/2 inch and apply a thin line of fabric glue along the folded edge. Then, fold the bottom seam together, aligning the edges, and press firmly.
6. Reinforce the Bottom Corners: This is especially important for the no-sew method, as the glue might not be as strong as stitching. Pinch each corner to create a small triangle. Apply fabric glue to the base of the triangle and press firmly.
7. Let the Glue Dry Completely: This is the most crucial step! Follow the instructions on your fabric glue bottle for drying time. I usually let it dry for at least 24 hours to ensure a strong bond. Don’t be tempted to use the bag before the glue is fully dry, or it might fall apart.
8. Turn the Bag Right Side Out: Carefully turn the bag right side out.
9. Hem the Top Edge (Optional): If you want a cleaner look, you can hem the top edge using fabric glue. Fold the top edge down about 1/2 inch, apply a thin line of fabric glue along the folded edge, and press firmly. Let it dry completely.
10. Test the Strength: Before you load up your new bag with groceries, give it a gentle tug to make sure the glue is holding strong. If you notice any weak spots, apply more glue and let it dry completely.
11. Enjoy Your No-Sew Creation! You’ve successfully transformed an old t-shirt into a reusable shopping bag without even touching a needle and thread!
Adding Extra Touches:
Want to personalize your t-shirt bag even further? Here are a few ideas:
* Fabric Paint: Add your own designs, quotes, or patterns using fabric paint.
* Appliques: Sew or glue on fabric appliques for a unique and eye-catching look.
* Buttons: Sew on buttons for decoration or to create a closure for the bag.
* Pockets: Add pockets to the inside or outside of the bag for extra storage. You can use fabric scraps from other projects or even cut pockets from another old t-shirt.
* Tie-Dye: Give your t-shirt a tie-dye makeover before turning it into a bag for a groovy, colorful effect.
Care Tips for Your T-Shirt Bag:
To keep your t-shirt bag looking its best, follow these care tips:
* Washing: Machine wash your bag inside out in cold water on a gentle cycle. Avoid using bleach.
* Drying: Tumble dry on low heat or hang to dry.
* Ironing: Iron on low heat if needed, but avoid ironing directly over any fabric paint or appliques.
* Storage: Fold your bag neatly and store it in your car, purse, or backpack so you always have it on hand when you go shopping.
Troubleshooting:
* Seam Ripping: If a seam starts to rip, simply re-sew it or apply more fabric glue.
* Glue Not Holding: If the fabric glue isn’t holding, make sure you’re using a high-quality fabric glue and that you’re letting it dry completely. You can also try adding a few stitches for extra reinforcement.
* Bag Stretching: If your bag starts
Conclusion
So, there you have it! This simple, yet incredibly effective, DIY appliance leather shine trick is a game-changer for anyone looking to revitalize their kitchen or laundry room. Forget expensive, store-bought cleaners filled with harsh chemicals. This method utilizes ingredients you likely already have in your pantry, making it not only cost-effective but also a more environmentally conscious choice.
Why is this a must-try? Because it delivers professional-looking results without the professional price tag. Imagine transforming dull, lackluster appliance leather into surfaces that gleam with a rich, inviting shine. This isn’t just about aesthetics; it’s about extending the life of your appliances by protecting the leather from everyday wear and tear. A well-maintained appliance leather not only looks better but also resists stains and scratches more effectively.
Beyond the basic recipe, there’s plenty of room for customization. For a deeper clean, consider adding a few drops of tea tree oil to your solution. Tea tree oil possesses natural antibacterial properties, helping to eliminate germs and odors. If you prefer a more subtle shine, reduce the amount of oil in the mixture. Experiment with different ratios to find the perfect balance that suits your preferences and the specific type of leather on your appliances.
Another variation involves using beeswax polish after the initial cleaning. Applying a thin layer of beeswax polish and buffing it to a shine will provide an extra layer of protection and enhance the leather’s natural luster. This is particularly beneficial for appliances that are frequently touched or exposed to moisture.
Don’t be intimidated by the “DIY” aspect. This process is incredibly straightforward and requires minimal effort. The satisfaction of seeing your appliances transformed with your own two hands is truly rewarding. Plus, you’ll have the peace of mind knowing exactly what ingredients are being used on your valuable appliances.
We wholeheartedly encourage you to give this DIY appliance leather shine trick a try. It’s a small investment of time that yields significant results. Once you experience the difference, you’ll wonder why you didn’t try it sooner.
And most importantly, we want to hear about your experiences! Share your before-and-after photos, tips, and variations in the comments below. Let’s create a community of DIY enthusiasts who are passionate about keeping their appliances looking their best. Your feedback will not only inspire others but also help us refine and improve this method even further. Let’s bring back the shine, one appliance at a time!
Frequently Asked Questions (FAQ)
Q: What type of leather is this DIY appliance leather shine suitable for?
A: This DIY appliance leather shine is generally safe and effective for most types of finished leather commonly found on appliances. However, it’s always best to test a small, inconspicuous area first to ensure compatibility. Avoid using this method on suede or unfinished leather, as it may cause damage or discoloration. If you’re unsure about the type of leather on your appliance, consult the manufacturer’s instructions or a professional leather care specialist.
Q: How often should I use this DIY appliance leather shine?
A: The frequency of cleaning depends on how often your appliances are used and the level of exposure to dirt and grime. For appliances that are frequently touched or exposed to spills, cleaning every 2-4 weeks is recommended. For appliances that are used less often, cleaning every 1-2 months may suffice. Regular cleaning will help prevent the buildup of dirt and grime, making it easier to maintain the leather’s shine and prolong its lifespan.
Q: Can I use other types of oil besides olive oil?
A: While olive oil is a readily available and effective option, you can experiment with other types of oils, such as coconut oil or almond oil. Coconut oil has natural moisturizing properties and can leave a pleasant scent. Almond oil is lightweight and absorbs quickly into the leather. However, be sure to use oils that are food-grade and free of additives or fragrances that could damage the leather. Always test a small area first to ensure compatibility.
Q: What if I don’t have vinegar? Can I use something else?
A: Vinegar is a key ingredient in this DIY appliance leather shine due to its cleaning and disinfecting properties. However, if you don’t have vinegar on hand, you can substitute it with lemon juice. Lemon juice is also acidic and can help remove dirt and grime. Use the same amount of lemon juice as you would vinegar in the recipe. Be aware that lemon juice may have a slight bleaching effect, so test a small area first, especially on darker leather.
Q: My appliance leather has stubborn stains. Will this DIY method remove them?
A: This DIY appliance leather shine is effective for removing light to moderate stains. For stubborn stains, you may need to pre-treat the area with a specialized leather stain remover. Follow the manufacturer’s instructions carefully and test the product on a small, inconspicuous area first. After removing the stain, you can then proceed with the DIY appliance leather shine to restore the leather’s luster.
Q: How do I prevent my appliance leather from drying out?
A: Leather can dry out over time, especially if exposed to heat or sunlight. To prevent drying, it’s important to regularly condition the leather. After cleaning with the DIY appliance leather shine, apply a thin layer of leather conditioner to moisturize and protect the leather. Choose a conditioner that is specifically designed for appliance leather and follow the manufacturer’s instructions.
Q: Can I use this method on other leather items besides appliances?
A: Yes, this DIY appliance leather shine can be used on other leather items, such as furniture, shoes, and handbags. However, it’s important to consider the type of leather and the specific needs of each item. Always test a small, inconspicuous area first to ensure compatibility. For delicate or valuable leather items, it’s best to consult a professional leather care specialist.
Q: What kind of cloth should I use to apply the DIY appliance leather shine?
A: Use a soft, lint-free cloth to apply the DIY appliance leather shine. Microfiber cloths are an excellent choice as they are gentle on leather and effectively remove dirt and grime. Avoid using abrasive cloths or sponges, as they can scratch or damage the leather.
Q: How do I store the leftover DIY appliance leather shine solution?
A: Store any leftover DIY appliance leather shine solution in an airtight container in a cool, dark place. The solution should be good for several weeks. However, it’s always best to make a fresh batch each time to ensure optimal effectiveness.
Q: What if my appliance leather is cracked or damaged?
A: If your appliance leather is cracked or damaged, this DIY method may not be sufficient to restore it. In such cases, it’s best to consult a professional leather repair specialist. They can assess the damage and recommend the appropriate repair or restoration techniques.
Leave a Comment