

Grow Watermelon Easily
Have you ever dreamed of biting into a juicy, sun-ripened watermelon, knowing you grew it yourself? It’s a more rewarding experience than you might imagine! This article is all about sharing my secrets to growing watermelons easily, even if you’ve never gardened before. Forget the frustrating trips to the grocery store for disappointing, flavorless melons; I’ll guide you through simple, effective techniques to grow watermelon easily in your own backyard.
Growing watermelons has a rich history, dating back thousands of years to ancient Egypt and Africa. These vibrant fruits weren’t just a delicious treat; they held cultural significance, symbolizing prosperity and fertility. Today, the joy of homegrown produce remains, offering a connection to nature and a taste of summer that’s simply unmatched.
Why bother with all the effort? Because nothing beats the taste of a homegrown watermelon! Store-bought melons are often picked before they’re fully ripe to withstand shipping, resulting in a less intense flavor. By learning how to grow watermelon easily, you’ll enjoy the sweetest, most flavorful melons imaginable. Plus, it’s incredibly satisfying to nurture a plant from seed to harvest, watching it thrive under your care. This article will equip you with the knowledge and confidence to achieve a bountiful watermelon harvest, transforming your garden into a sweet oasis.
So, let’s get started on your journey to grow watermelon easily and experience the pure delight of homegrown goodness!
Amazing Rubber Band Crafts: A Comprehensive Guide
I’ve always loved the versatility of rubber bands. They’re cheap, readily available, and surprisingly capable of creating some really cool things! This guide will walk you through several rubber band crafts, from simple to more advanced projects. Let’s get crafting!
Section 1: The Basic Rubber Band Ball
This is a great starting point, especially for kids. It teaches fundamental rubber band manipulation and is a fun way to spend an afternoon.
- Materials: Lots of rubber bands (at least 100, more is better!), and a little patience.
- Skill Level: Beginner
- Start with a small group of about 10-15 rubber bands. Form a loose circle with them, overlapping slightly.
- Take another rubber band and wrap it around the circle, creating a tighter ring. Make sure it’s snug but not too tight.
- Continue adding rubber bands, wrapping them around the existing structure. Try to keep the layers even and compact.
- As the ball grows, you’ll need to use more rubber bands per layer. The goal is to create a dense, spherical shape.
- Keep adding layers until you reach your desired size. The more rubber bands, the firmer and more spherical your ball will be.
- Once you’re happy with the size, carefully examine the ball for any loose or weak spots. If you find any, add a few more rubber bands to reinforce them.
Section 2: Rainbow Rubber Band Bracelet
This project is a bit more intricate, but the result is a colorful and stylish bracelet you can wear with pride. It’s a great way to practice your knotting skills.
- Materials: Rubber bands in various colors, a small hook (a crochet hook works well), and a sturdy surface to work on.
- Skill Level: Intermediate
- Choose your colors and arrange them in the order you want them on your bracelet. I like to use a rainbow pattern.
- Make a slip knot with one rubber band and place it on your hook. This will be the foundation of your bracelet.
- Take another rubber band and loop it around the first rubber band on the hook, twisting it slightly. Pull it through the loop.
- Repeat step 3, adding rubber bands of different colors one by one. Each new rubber band should be looped around the previous one on the hook.
- Continue adding rubber bands until your bracelet reaches your desired length. Remember to keep the tension consistent to avoid a lopsided bracelet.
- Once you’ve reached the desired length, carefully remove the bracelet from the hook. You can now tie the ends together with a simple knot.
- Important Tip: Practice makes perfect! Don’t be discouraged if your first attempt isn’t perfect. Keep practicing, and you’ll soon be making beautiful bracelets.
Section 3: Rubber Band Loom Bracelets
This technique allows for more complex designs and patterns. You’ll need a loom, but the results are well worth the extra effort.
- Materials: Rubber bands, a rubber band loom (available online or in craft stores), and a hook.
- Skill Level: Advanced
- Set up your loom according to the manufacturer’s instructions. This usually involves placing pegs or hooks in a specific arrangement.
- Start by placing a few rubber bands on the loom, creating a base for your design. There are many different starting techniques, so refer to online tutorials for specific patterns.
- Follow your chosen pattern, adding rubber bands one by one and using the hook to weave them through the existing structure. This process involves a lot of looping and twisting.
- Understanding the Pattern: Loom bracelet patterns are often represented visually or with written instructions. Take your time to understand the pattern before you begin.
- Continue adding rubber bands according to the pattern until your bracelet reaches the desired length.
- Once finished, carefully remove the bracelet from the loom using the hook. You may need to gently stretch it to release it from the pegs.
- Tie the ends together securely to complete your bracelet. You can use a simple knot or a more decorative knot, depending on your preference.
Section 4: Advanced Rubber Band Projects
Once you’ve mastered the basics, you can explore more complex projects. These often involve combining different techniques and using additional materials.
- Rubber Band Animals: With enough patience and creativity, you can create surprisingly realistic-looking animals using rubber bands. Look for online tutorials for specific animal designs.
- Rubber Band Weaving: This technique involves creating intricate patterns by weaving rubber bands together. It’s similar to loom weaving but can be done without a loom.
- Rubber Band Guns: While these are more of a toy than a craft, building a rubber band gun is a fun and challenging project that teaches about simple mechanics.
- Combined Media Projects: Consider incorporating rubber bands into other crafts, such as adding them to sculptures or using them to create texture in mixed-media artwork.
Remember to always prioritize safety when working with rubber bands. Avoid pulling them too tightly, and supervise children when they are working on these projects.
Conclusion
So there you have it – a simple yet effective guide to growing watermelons with ease! This DIY approach, focusing on soil preparation, proper watering, and strategic sunlight exposure, truly unlocks the secrets to cultivating juicy, delicious watermelons right in your own backyard. Forget the disappointing, tasteless melons from the supermarket; this method empowers you to grow superior fruit, tailored to your preferences. The satisfaction of nurturing a tiny seed into a plump, ripe watermelon is unparalleled, offering a rewarding experience for both seasoned gardeners and enthusiastic beginners alike. This isn’t just about growing a fruit; it’s about connecting with nature, understanding the growth cycle, and enjoying the fruits (pun intended!) of your labor. The ease and success rate of this method make it a must-try for anyone with even a small patch of land or a large container. You’ll be amazed at the quality and flavor of homegrown watermelons.
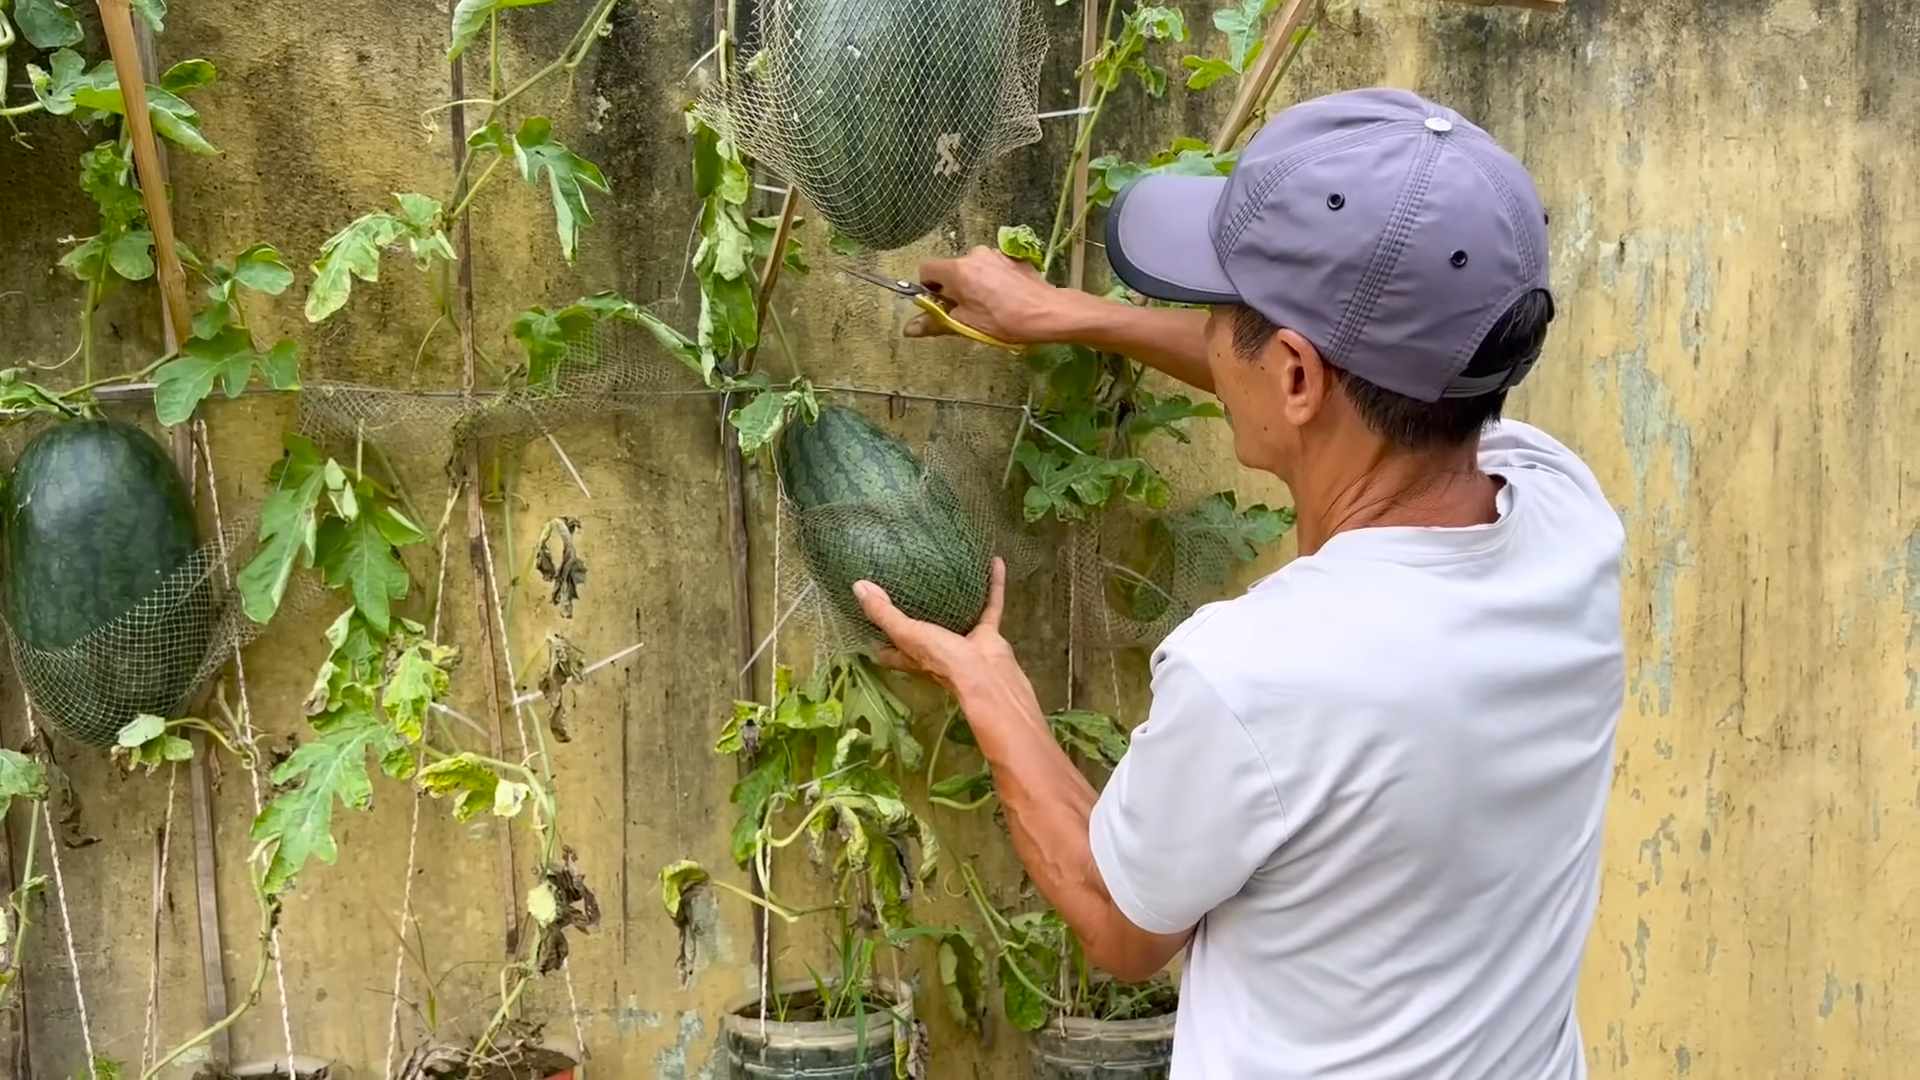
Beyond the basic method outlined, there’s plenty of room for experimentation and personalization. Consider trying different watermelon varieties to discover your favorite flavor profiles. Some varieties are better suited to specific climates, so research your local growing conditions to maximize your chances of success. You can also experiment with companion planting, incorporating plants like basil or marigolds to deter pests and improve soil health. For those with limited space, vertical gardening techniques can be surprisingly effective for growing watermelons, maximizing yield in a smaller footprint. And don’t be afraid to get creative with your growing setup – from raised beds to repurposed containers, the possibilities are endless!
We strongly encourage you to embark on this rewarding journey of growing your own watermelons. Share your experiences with us! Post pictures of your thriving vines and magnificent melons on social media using #GrowWatermelonEasily. We’d love to see your successes and learn from your experiences. Let’s build a community of watermelon enthusiasts, sharing tips, tricks, and the joy of harvesting homegrown goodness. Remember, even small adjustments to your approach can significantly impact your results. Don’t be discouraged by minor setbacks; the rewards of a perfectly ripe, sun-kissed watermelon are well worth the effort. So, grab some seeds, prepare your soil, and get ready to experience the joy of growing your own delicious watermelons. You won’t regret it!
Frequently Asked Questions
Q: What type of soil is best for growing watermelons?
Watermelons thrive in well-drained, fertile soil with a slightly acidic pH (around 6.0-6.8). Amend heavy clay soils with compost or other organic matter to improve drainage and aeration. Sandy soils may benefit from the addition of peat moss or other organic materials to retain moisture. A soil test can help determine your soil’s pH and nutrient levels, allowing you to make necessary adjustments.
Q: How much sunlight do watermelons need?
Watermelons are sun-worshippers! They need at least 6-8 hours of direct sunlight per day to produce abundant fruit. Choose a location in your garden that receives ample sunlight throughout the day. Insufficient sunlight can lead to poor fruit development and reduced yields.
Q: How often should I water my watermelons?
Consistent watering is crucial, especially during the fruiting stage. Aim for deep, infrequent watering rather than shallow, frequent watering. Water deeply at the base of the plant, avoiding wetting the leaves to prevent fungal diseases. The frequency of watering will depend on your climate and soil type; monitor the soil moisture regularly and water when the top inch or two feels dry.
Q: What are some common problems when growing watermelons?
Common problems include pests (like aphids, squash bugs, and vine borers), diseases (like powdery mildew and fusarium wilt), and insufficient pollination. Regularly inspect your plants for signs of pests or diseases and take appropriate action. Hand-pollination may be necessary in some cases, especially if there are few pollinators in your area. Choosing disease-resistant varieties can also help minimize problems.
Q: When are my watermelons ready to harvest?
Watermelons are typically ready for harvest 70-90 days after planting, depending on the variety. A ripe watermelon will have a dull, not shiny, skin. The tendril closest to the stem will turn brown and dry. When you thump the watermelon, it will produce a deep, hollow sound. These are all indicators that your watermelon is ready to be picked and enjoyed!
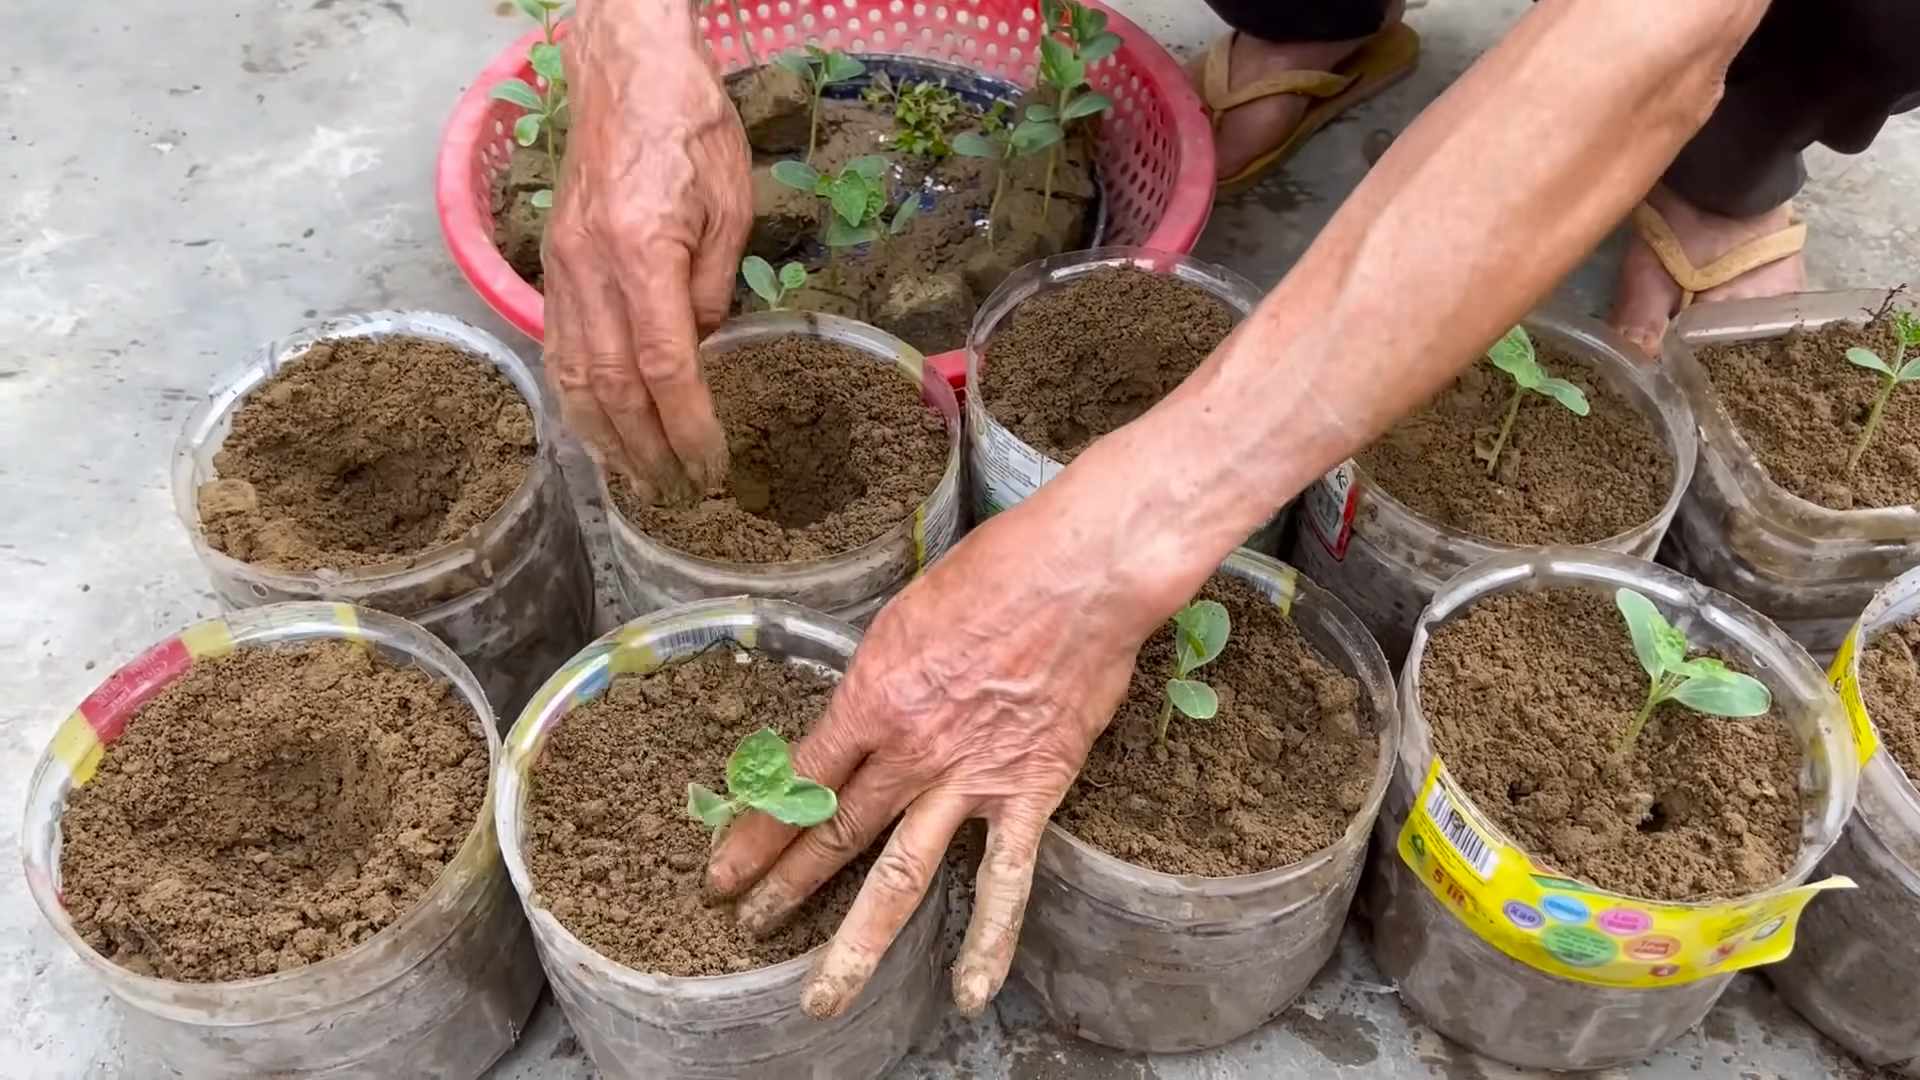
Q: Can I grow watermelons in containers?
Yes, you can! Choose a large container (at least 15-20 gallons) with drainage holes. Use a high-quality potting mix and ensure the container receives ample sunlight. Container-grown watermelons may require more frequent watering than those grown in the ground.
Q: What are some tips for preventing pests and diseases?
Practicing good garden hygiene, such as removing weeds and plant debris, can help prevent pest and disease problems. Rotating your crops each year can also help reduce the buildup of pathogens in the soil. Consider using organic pest control methods, such as insecticidal soap or neem oil, to manage pests. Proper watering and spacing can also help prevent fungal diseases.
Q: My watermelon vines are growing well, but I don’t see any fruit. What could be wrong?
Several factors can contribute to a lack of fruit production. Insufficient pollination is a common culprit. Ensure there are enough pollinators (bees, etc.) in your area, or consider hand-pollination. Insufficient sunlight, improper watering, or nutrient deficiencies can also hinder fruit development. Review the growing conditions and make necessary adjustments.


Leave a Comment