

Growing Kale in Bottles
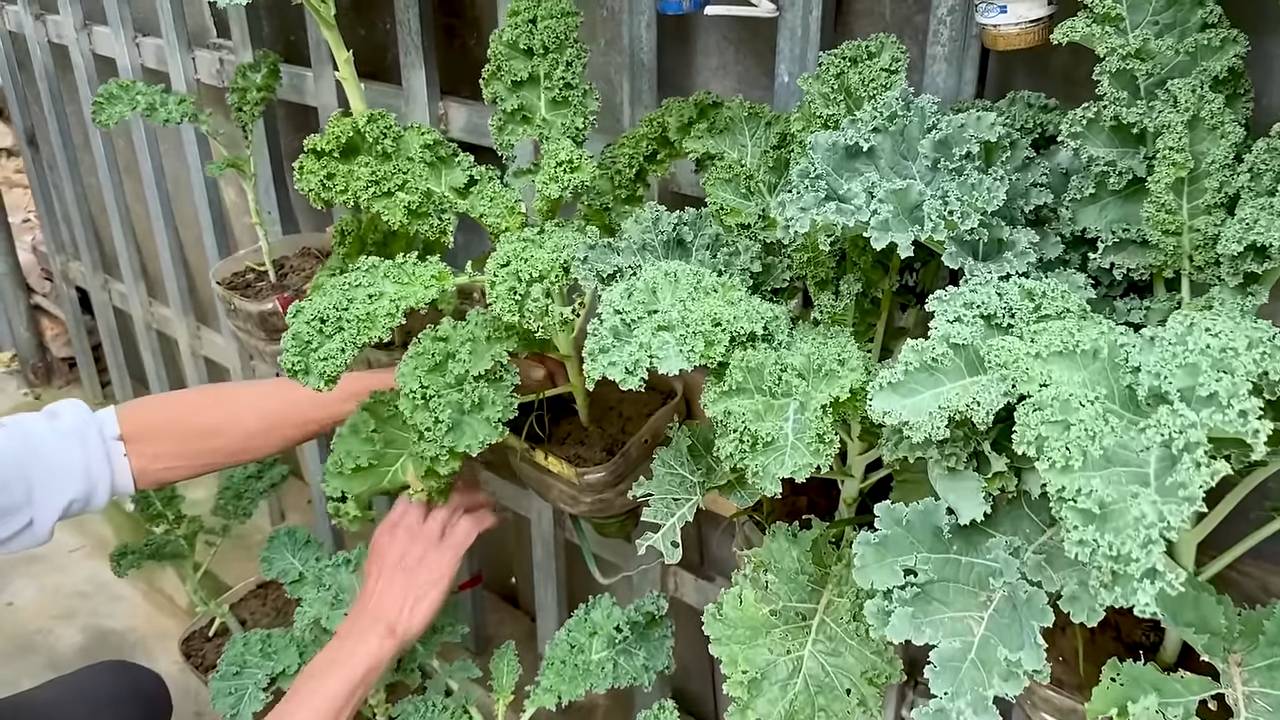
Growing Kale in Bottles might sound a little unconventional, but trust me, it’s a game-changer! I’ve always loved the vibrant green of kale, its nutritional punch, and the satisfying crunch in a salad, but space in my garden (or lack thereof!) was always a limiting factor. That’s why I started experimenting with vertical gardening, and discovered the amazing potential of growing kale in recycled bottles. This DIY project isn’t just about saving space; it’s a fun, sustainable way to enjoy fresh, homegrown kale all year round, regardless of your living situation.
The history of kale itself is fascinating, stretching back centuries. It’s a member of the brassica family, related to cabbage, broccoli, and Brussels sprouts, and has been a staple food in many cultures for its resilience and nutritional value. But even with its long history, finding innovative ways to grow it, especially in urban environments, remains a challenge. That’s where my Growing Kale in Bottles method comes in.
Why You Need This DIY Trick
This isn’t just another gardening tip; it’s a solution for anyone who dreams of fresh, healthy kale but lacks the space or resources for a traditional garden. Whether you live in a small apartment, have limited outdoor space, or simply want a fun and unique gardening project, Growing Kale in Bottles offers a practical and rewarding alternative. You’ll be amazed at how much kale you can grow in a surprisingly small footprint, and the satisfaction of harvesting your own homegrown greens is unparalleled. Plus, it’s a fantastic way to repurpose plastic bottles, reducing waste and contributing to a more sustainable lifestyle. So, let’s dive in and learn how to grow your own delicious, nutrient-rich kale using this simple and effective method of Growing Kale in Bottles!
Easy Sweet Potato Gardening: A Step-by-Step Guide
Sweet potatoes are surprisingly easy to grow, even for beginner gardeners! Here’s how I successfully grew a bumper crop in my own backyard, and how you can too.
Choosing Your Sweet Potatoes and Starting Your Plants
- Select the right sweet potatoes: Don’t just grab any sweet potato from the grocery store. Look for organically grown sweet potatoes that are firm, free of blemishes, and sprouting “eyes” – those little nubs where new growth will emerge. These eyes are crucial for successful propagation.
- Prepare your “slips”: About 4-6 weeks before the last expected frost in your area, it’s time to start your sweet potato slips. This is the process of growing new plants from your chosen sweet potatoes. You can do this in water or soil.
- Water propagation: Find a shallow container and fill it with water. Place your sweet potatoes horizontally, partially submerged, ensuring that the eyes are facing upwards. Keep the water level consistent, changing it every few days to prevent bacterial growth. Within a week or two, you should see sprouts emerging from the eyes. These are your slips.
- Soil propagation: Alternatively, you can plant your sweet potatoes directly into a pot filled with a well-draining potting mix. Lay them horizontally, about 2 inches deep, with the eyes facing upwards. Keep the soil moist but not soggy. Sprouts will emerge in a similar timeframe as the water method.
- Choosing the right container: Whether you use the water or soil method, ensure your container is large enough to accommodate the growing slips. As the slips grow, you’ll want to give them ample space to develop strong roots.
Preparing Your Garden Bed
- Choose a sunny spot: Sweet potatoes thrive in full sun – at least 6-8 hours of direct sunlight per day. Select a location in your garden that receives ample sunlight.
- Soil preparation is key: Sweet potatoes prefer well-drained, sandy loam soil. Amend heavy clay soils with plenty of compost or other organic matter to improve drainage. Poor drainage can lead to root rot.
- Test your soil pH: Sweet potatoes prefer a slightly acidic to neutral soil pH (6.0-7.0). You can purchase a soil testing kit to check your soil’s pH and adjust it accordingly using lime or sulfur if needed.
- Till the soil: Once you’ve amended your soil, till it to a depth of about 12 inches. This will help break up compacted soil and create a loose, airy environment for root growth.
- Weed control: Remove any existing weeds and grass from the garden bed. A clean bed will help prevent competition for nutrients and water.
Planting Your Sweet Potato Slips
- Prepare the planting rows: Create furrows or rows about 12-18 inches apart. The spacing will depend on the variety of sweet potato you are growing. Check the seed packet for specific recommendations.
- Plant the slips: Gently place the sweet potato slips into the furrows, burying them about 4-6 inches deep. Space the slips about 12-18 inches apart within the rows. Again, check your seed packet for specific spacing recommendations.
- Water thoroughly: After planting, water the slips deeply to help them settle into the soil and encourage root development. Avoid overwatering, which can lead to root rot.
- Mulching: Apply a layer of mulch, such as straw or shredded leaves, around the plants. Mulch helps retain soil moisture, suppress weeds, and regulate soil temperature.
Sweet Potato Care and Maintenance
- Watering: Water regularly, especially during dry periods. Aim to keep the soil consistently moist but not waterlogged. The frequency of watering will depend on your climate and soil type.
- Fertilizing: Sweet potatoes are relatively low-maintenance plants and don’t require heavy fertilization. A light application of balanced fertilizer early in the growing season can be beneficial, but avoid over-fertilizing, which can lead to excessive foliage growth at the expense of tuber development.
- Weed control: Regularly remove any weeds that emerge around your sweet potato plants. Competition from weeds can reduce yields.
- Pest and disease control: Monitor your plants for pests and diseases. Common pests include sweet potato weevils and aphids. Common diseases include root rot and leaf blight. Address any issues promptly using appropriate organic pest and disease control methods.
- Hilling: As the plants grow, you may need to hill them up – adding more soil around the base of the plants. This encourages more tuber development.
Harvesting Your Sweet Potatoes
- Timing is crucial: Sweet potatoes are typically ready for harvest 3-4 months after planting, depending on the variety and growing conditions. The leaves will start to yellow and die back as a sign of maturity.
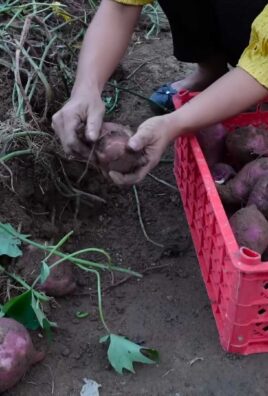
- Harvesting method: Carefully dig up the sweet potatoes using a garden fork or shovel. Be gentle to avoid damaging the tubers. Avoid washing the sweet potatoes immediately after harvesting.
- Curing: After harvesting, allow the sweet potatoes to cure for 7-10 days in a warm, dry, well-ventilated area. This process helps improve their flavor and storage life.
- Storage: Once cured, store your sweet potatoes in a cool, dark, and dry place. They can be stored for several months under the right conditions.
Important Note:
Always refer to the specific instructions provided with your sweet potato seeds or slips for optimal results. Growing conditions can vary, so adapting these guidelines to your local climate and soil is essential for a successful harvest.
Conclusion
So there you have it – a simple, effective, and surprisingly rewarding method for growing your own kale, all thanks to the magic of bottle gardening! This DIY trick isn’t just about saving space; it’s about connecting with nature in a unique and accessible way. Growing kale in bottles offers a fantastic opportunity to experience the satisfaction of nurturing a plant from seed to harvest, right in your own home. The process is incredibly straightforward, requiring minimal equipment and effort, making it perfect for beginners and seasoned gardeners alike. You’ll be amazed at how quickly your kale sprouts and thrives in this contained environment, providing you with fresh, healthy greens throughout the growing season. The vertical nature of bottle gardening also maximizes space, making it ideal for apartments, balconies, or even small kitchen counters. Beyond the practical benefits, there’s a certain charm to watching your kale plants flourish within these repurposed bottles – a testament to the ingenuity and resourcefulness of sustainable gardening.
Beyond the basic method outlined, there are countless ways to personalize your bottle kale garden. Experiment with different types of kale – from curly kale to dinosaur kale – to discover your favorite varieties. Consider adding a layer of gravel or small stones at the bottom of the bottle to improve drainage. You can also try using different types of bottles, as long as they are clear enough to allow sufficient sunlight. For a truly unique touch, decorate your bottles with paint, markers, or even decoupage to add a personal flair to your miniature garden. Remember to monitor the moisture levels regularly and adjust your watering schedule accordingly, depending on the climate and the type of bottle you are using. The possibilities are endless, allowing you to tailor your bottle kale garden to your specific needs and preferences.
We strongly encourage you to try this simple yet effective growing kale in bottles technique. It’s a fantastic way to add a touch of green to your living space while enjoying the freshest, most flavorful kale you’ve ever tasted. Share your experiences with us! Post pictures of your thriving bottle kale gardens on social media using the hashtag #BottleKaleGarden. We’d love to see your creations and hear about your successes (and any challenges you might encounter – learning from each other is part of the fun!). Let’s build a community of bottle gardeners, sharing tips, tricks, and inspiration to help each other grow the most vibrant and delicious kale possible.
Frequently Asked Questions
What type of bottles are best for growing kale in bottles?
Clear plastic bottles or glass bottles work best, as they allow sufficient sunlight to reach the kale plants. Avoid using dark-colored bottles, as they will limit light penetration and hinder plant growth. The size of the bottle is also important; a bottle that is too small will restrict root development, while a bottle that is too large may be difficult to manage. A 2-liter soda bottle is a good starting point.
How much sunlight do kale plants need?
Kale plants need at least 6-8 hours of direct sunlight per day to thrive. Place your bottle kale garden in a sunny location, such as a south-facing windowsill or a balcony that receives ample sunlight. If you live in an area with limited sunlight, you may need to supplement with grow lights to ensure your plants receive enough light for optimal growth.
How often should I water my bottle kale?
The frequency of watering will depend on several factors, including the size of the bottle, the type of soil you are using, and the climate. As a general rule, check the moisture level of the soil regularly. Water when the top inch of soil feels dry to the touch. Avoid overwatering, as this can lead to root rot. It’s better to underwater slightly than to overwater.
What type of soil is best for growing kale in bottles?
Use a well-draining potting mix specifically designed for vegetables. Avoid using garden soil, as it can be too heavy and compact for bottle gardening. A good quality potting mix will provide the necessary nutrients and aeration for healthy kale growth. You can also add perlite or vermiculite to improve drainage further.
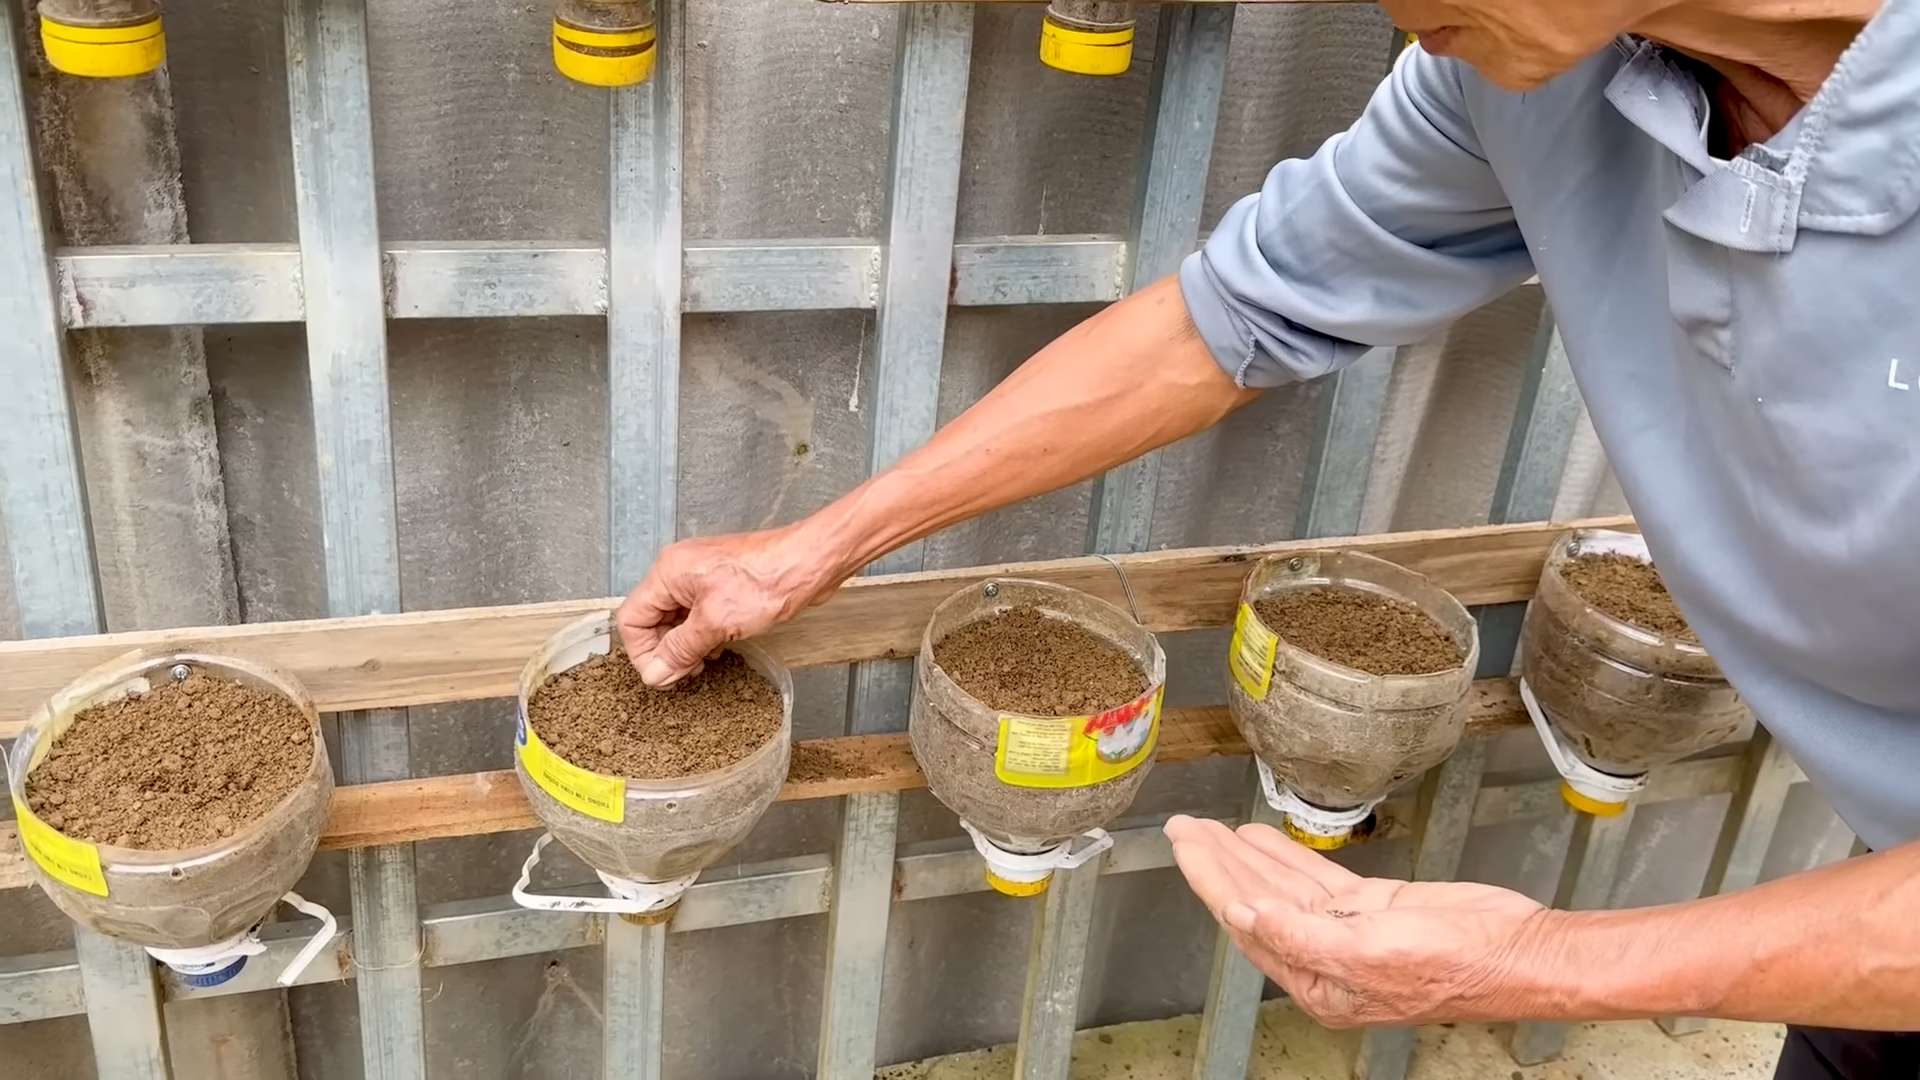
Can I use seeds or seedlings to start my bottle kale garden?
You can use either seeds or seedlings to start your bottle kale garden. Starting from seeds is a more economical option, but it requires more patience, as it takes longer for the plants to mature. Starting with seedlings is faster, but it can be more expensive. Choose the method that best suits your needs and preferences.
What should I do if my kale plants start to wilt?
Wilting kale plants usually indicate a problem with watering or sunlight. Check the moisture level of the soil and water if necessary. If the soil is moist, the problem may be insufficient sunlight. Relocate your bottle kale garden to a sunnier location or supplement with grow lights.
What are some common problems encountered when growing kale in bottles?
Some common problems include insufficient sunlight, overwatering, and nutrient deficiencies. Ensure your bottle kale garden receives adequate sunlight, water appropriately, and use a high-quality potting mix to provide the necessary nutrients. Pest infestations are less common in bottle gardens, but keep an eye out for any signs of pests and take appropriate action if necessary.
How long does it take to harvest kale grown in bottles?
The time it takes to harvest kale grown in bottles depends on the variety of kale and the growing conditions. Generally, you can expect to harvest your first kale leaves in 6-8 weeks from planting seeds, or sooner if you start with seedlings. You can continue harvesting leaves for several months, as long as the plants receive adequate care.

Leave a Comment