

Easy melon growing tips are what every gardener craves when summer rolls around! Let’s be honest, sinking your teeth into a juicy, homegrown melon is one of life’s simple pleasures. But the journey from tiny seed to that sweet, refreshing bite can sometimes feel like a daunting task. Have you ever dreamt of having a thriving melon patch bursting with cantaloupes, watermelons, and honeydews, but felt intimidated by the process? Well, you’re not alone! For centuries, melons have been cultivated across the globe, from the ancient Egyptians who revered watermelons as symbols of life, to the vibrant melon markets of Asia.
The good news is, achieving melon-growing success is easier than you think! I’m here to share some simple, yet effective, DIY tricks and hacks that will transform your garden into a melon paradise. These easy melon growing tips will help you avoid common pitfalls, maximize your yield, and enjoy the satisfaction of harvesting your own delicious melons. Whether you’re a seasoned gardener or just starting out, these tips will empower you to grow the sweetest, most flavorful melons you’ve ever tasted. So, grab your gardening gloves, and let’s get started on this exciting melon-growing adventure!
Grow Delicious Melons at Home: A Beginner’s Guide
Hey there, fellow gardening enthusiasts! I’m so excited to share my tried-and-true methods for growing juicy, flavorful melons right in your own backyard. Forget those bland, store-bought melons – with a little know-how, you can enjoy the sweet taste of homegrown goodness all summer long. This guide covers everything from choosing the right variety to harvesting your prize-winning fruit. Let’s get started!
Choosing Your Melon Variety
Before you even think about planting, you need to decide what kind of melon you want to grow. There are so many delicious options, each with its own unique flavor and growing requirements. Here’s a quick rundown of some popular choices:
* Watermelon: The quintessential summer fruit! Watermelons come in various sizes and colors, from classic red-fleshed varieties to yellow and even seedless options. Consider the space you have available, as some watermelons can get quite large.
* Cantaloupe: With its orange flesh and netted rind, cantaloupe is a sweet and aromatic favorite. It’s relatively easy to grow and a great choice for beginners.
* Honeydew: This smooth, green-skinned melon has a mild, refreshing flavor. It’s a bit more challenging to grow than cantaloupe, but the reward is well worth the effort.
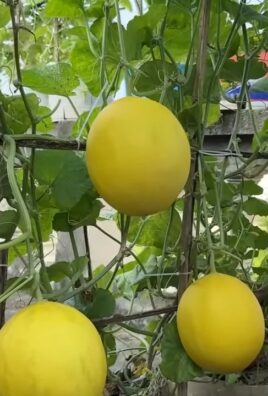
* Galia Melon: A hybrid melon with a yellow skin and green flesh. It has a sweet and slightly spicy flavor.
* Personal-Sized Melons: If you’re short on space, look for varieties specifically bred to be smaller, like ‘Sugar Baby’ watermelon or ‘Jenny Lind’ cantaloupe.
Key Considerations When Choosing:
* Climate: Melons need warm weather and plenty of sunshine. Make sure your chosen variety is suited to your local climate.
* Space: Consider the size of the mature plant and the amount of space you have available in your garden.
* Days to Maturity: This indicates how long it will take for the melon to ripen after planting. Choose varieties that will mature within your growing season.
* Disease Resistance: Look for varieties that are resistant to common melon diseases like powdery mildew and fusarium wilt.
Preparing Your Melon Patch
Melons are sun-loving, heavy feeders, so proper soil preparation is crucial for success. Here’s how to get your garden ready:
* Sunlight: Choose a location that receives at least 6-8 hours of direct sunlight per day.
* Soil: Melons prefer well-drained, sandy loam soil with a pH between 6.0 and 6.8.
* Soil Testing: I highly recommend getting your soil tested to determine its nutrient content and pH level. This will help you amend the soil appropriately.
* Amendments: Incorporate plenty of organic matter, such as compost, well-rotted manure, or leaf mold, into the soil. This will improve drainage, fertility, and water retention.
* Fertilizer: Melons benefit from a balanced fertilizer. I like to use a slow-release fertilizer formulated for vegetables. Follow the package instructions for application rates.
* Raised Beds (Optional): Growing melons in raised beds can improve drainage and soil temperature, especially in cooler climates.
Planting Your Melon Seeds or Transplants
You can start melon seeds indoors or direct sow them in the garden, depending on your climate and the length of your growing season.
Starting Seeds Indoors:
1. Timing: Start seeds indoors 4-6 weeks before the last expected frost.
2. Containers: Use peat pots or biodegradable containers to minimize root disturbance when transplanting.
3. Soil: Fill the containers with a seed-starting mix.
4. Sowing: Sow 2-3 seeds per container, about 1 inch deep.
5. Watering: Keep the soil consistently moist but not soggy.
6. Warmth: Provide bottom heat using a heat mat to speed up germination.
7. Light: Once the seedlings emerge, provide them with plenty of light, either from a sunny window or a grow light.
8. Hardening Off: Before transplanting, gradually acclimate the seedlings to outdoor conditions by exposing them to increasing amounts of sunlight and fresh air over a period of 1-2 weeks.
Direct Sowing:
1. Timing: Sow seeds directly in the garden after the last expected frost, when the soil has warmed to at least 70°F (21°C).
2. Spacing: Sow seeds according to the recommended spacing for your chosen variety. Generally, watermelons need more space than cantaloupes or honeydews.
3. Depth: Sow seeds about 1 inch deep.
4. Watering: Keep the soil consistently moist until the seedlings emerge.
5. Thinning: Once the seedlings have developed a few true leaves, thin them to the strongest plant per hill or row.
Transplanting Seedlings:
1. Timing: Transplant seedlings after the last expected frost, when the soil has warmed to at least 70°F (21°C).
2. Spacing: Space plants according to the recommended spacing for your chosen variety.
3. Planting: Dig a hole slightly larger than the root ball of the seedling. Gently remove the seedling from its container and place it in the hole. Backfill with soil and water thoroughly.
4. Mulching: Apply a layer of mulch around the plants to help retain moisture, suppress weeds, and regulate soil temperature.
Caring for Your Melon Plants
Once your melon plants are established, it’s important to provide them with the care they need to thrive.
* Watering: Melons need consistent moisture, especially during fruit development. Water deeply and regularly, especially during dry spells. Avoid overhead watering, as this can promote fungal diseases. Drip irrigation is an excellent option.
* Fertilizing: Side-dress your melon plants with a balanced fertilizer every 2-3 weeks. You can also use a liquid fertilizer, such as fish emulsion or seaweed extract.
* Weeding: Keep the melon patch free of weeds, which can compete with the plants for nutrients and water. Hand-pull weeds carefully to avoid disturbing the melon roots.
* Pest Control: Monitor your melon plants regularly for pests, such as aphids, squash bugs, and cucumber beetles. Use organic pest control methods, such as insecticidal soap or neem oil, to control infestations.
* Disease Control: Melons are susceptible to several fungal diseases, such as powdery mildew and fusarium wilt. To prevent these diseases, provide good air circulation, avoid overhead watering, and choose disease-resistant varieties. If you notice signs of disease, treat the plants with a fungicide.
Hey there, fellow gardening enthusiasts! I’m so excited to share my tried-and-true methods for growing juicy, flavorful melons right in your own backyard. Forget those bland, store-bought melons – with a little know-how, you can enjoy the sweet taste of homegrown goodness all summer long. This guide covers everything from choosing the right variety to harvesting your prize-winning fruit. Let’s get started!
Choosing Your Melon Variety
Before you even think about planting, you need to decide what kind of melon you want to grow. There are so many delicious options, each with its own unique flavor and growing requirements. Here’s a quick rundown of some popular choices:
* Watermelon: The quintessential summer fruit! Watermelons come in various sizes and colors, from classic red-fleshed varieties to yellow and even seedless options. Consider the space you have available, as some watermelons can get quite large.
* Cantaloupe: With its orange flesh and netted rind, cantaloupe is a sweet and aromatic favorite. It’s relatively easy to grow and a great choice for beginners.
* Honeydew: This smooth, green-skinned melon has a mild, refreshing flavor. It’s a bit more challenging to grow than cantaloupe, but the reward is well worth the effort.
* Galia Melon: A hybrid melon with a yellow skin and green flesh. It has a sweet and slightly spicy flavor.
* Personal-Sized Melons: If you’re short on space, look for varieties specifically bred to be smaller, like ‘Sugar Baby’ watermelon or ‘Jenny Lind’ cantaloupe.
Key Considerations When Choosing:
* Climate: Melons need warm weather and plenty of sunshine. Make sure your chosen variety is suited to your local climate.
* Space: Consider the size of the mature plant and the amount of space you have available in your garden.
* Days to Maturity: This indicates how long it will take for the melon to ripen after planting. Choose varieties that will mature within your growing season.
* Disease Resistance: Look for varieties that are resistant to common melon diseases like powdery mildew and fusarium wilt.
Preparing Your Melon Patch
Melons are sun-loving, heavy feeders, so proper soil preparation is crucial for success. Here’s how to get your garden ready:
* Sunlight: Choose a location that receives at least 6-8 hours of direct sunlight per day.
* Soil: Melons prefer well-drained, sandy loam soil with a pH between 6.0 and 6.8.
* Soil Testing: I highly recommend getting your soil tested to determine its nutrient content and pH level. This will help you amend the soil appropriately.
* Amendments: Incorporate plenty of organic matter, such as compost, well-rotted manure, or leaf mold, into the soil. This will improve drainage, fertility, and water retention.
* Fertilizer: Melons benefit from a balanced fertilizer. I like to use a slow-release fertilizer formulated for vegetables. Follow the package instructions for application rates.
* Raised Beds (Optional): Growing melons in raised beds can improve drainage and soil temperature, especially in cooler climates.
Planting Your Melon Seeds or Transplants
You can start melon seeds indoors or direct sow them in the garden, depending on your climate and the length of your growing season.
Starting Seeds Indoors:
1. Timing: Start seeds indoors 4-6 weeks before the last expected frost.
2. Containers: Use peat pots or biodegradable containers to minimize root disturbance when transplanting.
3. Soil: Fill the containers with a seed-starting mix.
4. Sowing: Sow 2-3 seeds per container, about 1 inch deep.
5. Watering: Keep the soil consistently moist but not soggy.
6. Warmth: Provide bottom heat using a heat mat to speed up germination.
7. Light: Once the seedlings emerge, provide them with plenty of light, either from a sunny window or a grow light.
8. Hardening Off: Before transplanting, gradually acclimate the seedlings to outdoor conditions by exposing them to increasing amounts of sunlight and fresh air over a period of 1-2 weeks.
Direct Sowing:
1. Timing: Sow seeds directly in the garden after the last expected frost, when the soil has warmed to at least 70°F (21°C).
2. Spacing: Sow seeds according to the recommended spacing for your chosen variety. Generally, watermelons need more space than cantaloupes or honeydews.
3. Depth: Sow seeds about 1 inch deep.
4. Watering: Keep the soil consistently moist until the seedlings emerge.
5. Thinning: Once the seedlings have developed a few true leaves, thin them to the strongest plant per hill or row.
Transplanting Seedlings:
1. Timing: Transplant seedlings after the last expected frost, when the soil has warmed to at least 70°F (21°C).
2. Spacing: Space plants according to the recommended spacing for your chosen variety.
3. Planting: Dig a hole slightly larger than the root ball of the seedling. Gently remove the seedling from its container and place it in the hole. Backfill with soil and water thoroughly.
4. Mulching: Apply a layer of mulch around the plants to help retain moisture, suppress weeds, and regulate soil temperature.
Caring for Your Melon Plants
Once your melon plants are established, it’s important to provide them with the care they need to thrive.
* Watering: Melons need consistent moisture, especially during fruit development. Water deeply and regularly, especially during dry spells. Avoid overhead watering, as this can promote fungal diseases. Drip irrigation is an excellent option.
* Fertilizing: Side-dress your melon plants with a balanced fertilizer every 2-3 weeks. You can also use a liquid fertilizer, such as fish emulsion or seaweed extract.
* Weeding: Keep the melon patch free of weeds, which can compete with the plants for nutrients and water. Hand-pull weeds carefully to avoid disturbing the melon roots.
* Pest Control: Monitor your melon plants regularly for pests, such as aphids, squash bugs, and cucumber beetles. Use organic pest control methods, such as insecticidal soap or neem oil, to control infestations.
* Disease Control: Melons are susceptible to several fungal diseases, such as powdery mildew and fusarium wilt. To prevent these diseases, provide good air circulation, avoid overhead watering, and choose disease-resistant varieties. If you notice signs of disease, treat the plants with a fungicide.
* Pollination: Melons require pollination to set fruit. If you’re not seeing any fruit develop, you may need to hand-pollinate the flowers. To do this, use a small paintbrush to transfer pollen from the male flowers to the female flowers. Female flowers have a small fruit at the base of the flower.
* Vine Training (Optional): You can train melon vines to grow up a trellis or fence to save space and improve air circulation.
Protecting Your Melons
As your melons start to ripen, they become vulnerable to pests and diseases. Here are some tips for protecting your precious fruit:
* Elevate Melons: Place melons on a bed of straw or cardboard to prevent them from rotting on the ground.
* Pest Protection: Use netting or row covers to protect melons from pests, such as birds, squirrels, and insects.
* Disease Prevention: Continue to monitor your plants for signs of disease and treat them promptly if necessary.
Harvesting Your Melons
Knowing when to harvest your melons is key to enjoying their peak flavor. Here are some general guidelines:
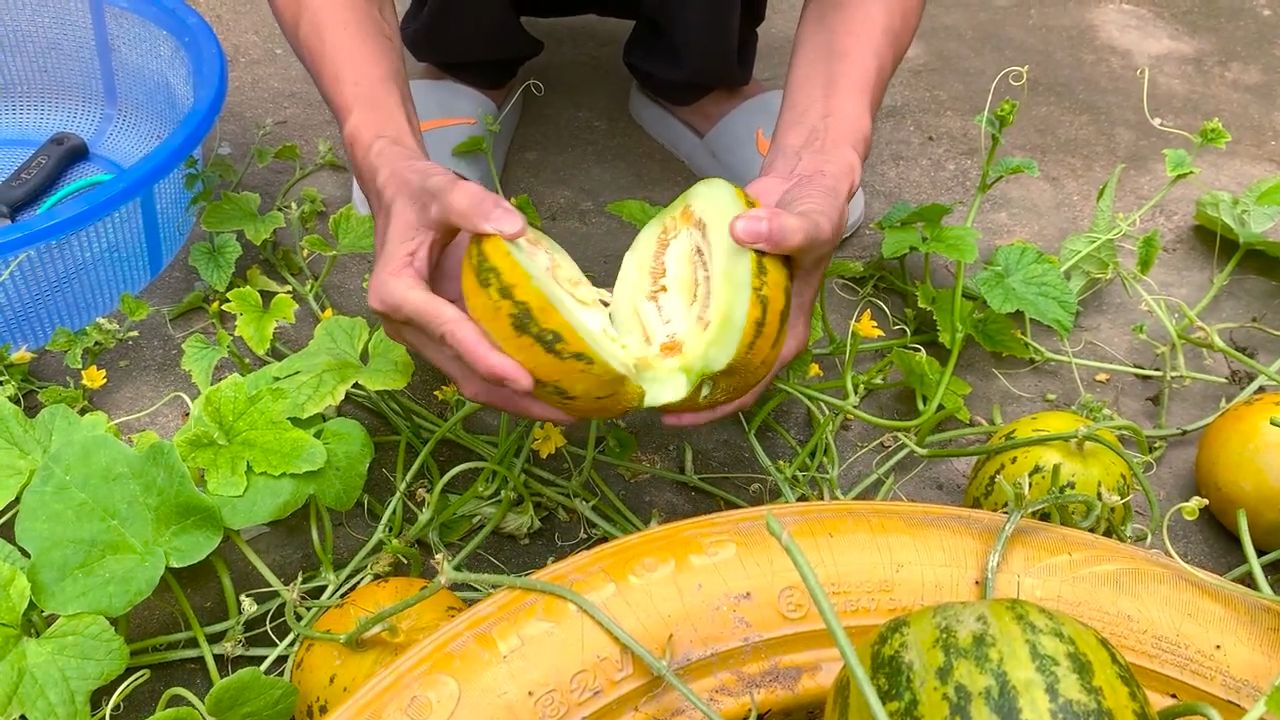
* Watermelon: Look for a dull rind, a dried tendril near the stem, and a yellowish spot on the underside where the melon rested on the ground. When you thump the melon, it should sound hollow.
* Cantaloupe: The melon should slip easily from the vine when it’s ripe. It should also have a strong, sweet aroma.
* Honeydew: The melon should have a slightly waxy feel and a pale yellow color. It should also have a slight give when you press on the blossom end.
* Galia Melon: The skin turns from green to yellow, and the melon emits a sweet aroma. The stem should also easily separate from the vine.
Harvesting Tips:
* Use a sharp knife or pruners to cut the melon from the vine.
* Handle melons carefully to avoid bruising.
* Store melons in a cool, dry place.
Troubleshooting Common Melon Problems
Even with the best care, you may encounter some challenges
Conclusion
So, there you have it! Transforming your melon growing experience with these simple yet effective DIY tricks is not just about saving money; it’s about fostering a deeper connection with your garden and understanding the nuances of what your melon plants truly need. We’ve explored how to create nutrient-rich soil amendments from kitchen scraps, build protective cloches from recycled materials, and even craft your own efficient watering system. Each of these techniques contributes to healthier, more productive melon vines and, ultimately, a more bountiful harvest.
But why is this a must-try? Because it empowers you to take control. You’re no longer solely reliant on expensive store-bought solutions. You become an active participant in your garden’s ecosystem, understanding the cycle of growth and decay, and harnessing the power of readily available resources. The satisfaction of nurturing a thriving melon patch using your own ingenuity is unparalleled.
Don’t be afraid to experiment! Consider variations on these DIY tricks to suit your specific needs and resources. For example, if you don’t have access to coffee grounds, try using other nitrogen-rich materials like grass clippings or aged manure in your soil amendments. If plastic bottles aren’t readily available, explore using clay pots or even repurposed milk jugs for your DIY watering system. The key is to adapt and innovate, always keeping the needs of your melon plants in mind.
Ready to embark on this rewarding journey? We wholeheartedly encourage you to try these DIY melon growing tricks. Start small, perhaps with just one or two techniques, and observe the results. Document your progress, take pictures, and most importantly, share your experiences with us! We’re eager to hear about your successes, your challenges, and any innovative variations you come up with. Let’s build a community of resourceful gardeners, sharing knowledge and inspiring each other to grow the best melons possible. Remember, successful **melon growing** is within your reach, and these DIY tricks are your secret weapon!
Frequently Asked Questions (FAQ)
Q: What if I don’t have all the materials listed for the DIY soil amendment?
A: Don’t worry! The beauty of DIY is its flexibility. The key components of a good soil amendment for melons are nitrogen, phosphorus, and potassium, along with organic matter to improve soil structure. If you’re missing coffee grounds (nitrogen), you can substitute with grass clippings or aged manure. For phosphorus, bone meal is excellent, but you can also use rock phosphate. Banana peels are a great source of potassium. Focus on providing a balanced mix of these nutrients using what you have available. The exact ratios aren’t critical; a little experimentation is part of the fun! Just be sure to avoid using diseased plant material or meat scraps, as these can attract pests and diseases.
Q: How often should I apply the DIY soil amendment to my melon plants?
A: It depends on the richness of your existing soil. If you have poor soil, you may want to amend it more frequently, perhaps every 2-3 weeks during the active growing season. If your soil is already relatively fertile, once a month may be sufficient. Observe your plants closely. If they are showing signs of nutrient deficiency, such as yellowing leaves or stunted growth, increase the frequency of application. A good rule of thumb is to side-dress your melon plants with the amendment, working it gently into the soil around the base of the plant, being careful not to disturb the roots. Water thoroughly after application to help the nutrients leach into the soil.
Q: Are these DIY cloches effective against all types of pests?
A: DIY cloches are most effective against larger pests like slugs, snails, and birds. They can also provide some protection against frost. However, they may not be effective against smaller pests like aphids or spider mites. For these pests, you may need to use other control methods, such as insecticidal soap or neem oil. Regularly inspect your melon plants for signs of pest infestation and take action promptly to prevent them from spreading. Consider companion planting with herbs like basil or marigolds, which can help repel certain pests.
Q: How do I prevent my DIY watering system from clogging?
A: The best way to prevent clogging is to use filtered water. If you’re using tap water, let it sit for 24 hours to allow chlorine to dissipate, as chlorine can harm beneficial soil microbes. You can also use rainwater, which is naturally soft and free of chemicals. Regularly flush out your DIY watering system with clean water to remove any accumulated debris. If you’re using a drip irrigation system, consider using a filter designed for drip irrigation to remove sediment and prevent clogging.
Q: What if my melon plants are still not thriving despite using these DIY tricks?
A: There could be several reasons why your melon plants aren’t thriving. First, ensure they are getting enough sunlight (at least 6-8 hours per day). Second, check the soil pH. Melons prefer a slightly acidic to neutral pH (6.0-7.0). You can test your soil pH with a simple soil testing kit. Third, make sure your plants are getting adequate water, but avoid overwatering, which can lead to root rot. Fourth, consider the variety of melon you’re growing. Some varieties are more challenging to grow than others. Finally, rule out any potential diseases or pest infestations. If you’ve addressed all these factors and your plants are still struggling, consult with a local gardening expert or your local agricultural extension office for further assistance. They can provide tailored advice based on your specific growing conditions.
Q: Can I use these DIY tricks for other types of plants besides melons?
A: Absolutely! Many of these DIY tricks can be adapted for use with other plants. The soil amendment recipe can be modified to suit the specific nutrient needs of different plants. DIY cloches can be used to protect seedlings and young plants from frost and pests. DIY watering systems can be used to provide consistent moisture to a variety of plants. The key is to understand the specific needs of the plants you’re growing and adapt the DIY techniques accordingly. For example, plants that prefer acidic soil, like blueberries, will benefit from a soil amendment that includes acidic materials like pine needles or coffee grounds.
Q: How can I share my experiences with other gardeners?
A: We encourage you to share your experiences in the comments section below this article! You can also share your photos and stories on social media using relevant hashtags like #DIYgardening, #melongrowing, #gardeningtips, and #growyourown. Consider joining online gardening forums or local gardening clubs to connect with other gardeners and share your knowledge. The more we share our experiences, the more we can learn from each other and improve our gardening skills.
Leave a Comment