

Grout Cleaning: Oxiclean vs Toilet Cleaner – Which Reigns Supreme? Are you tired of staring at dingy, discolored grout lines that seem to mock your cleaning efforts? I know I am! It’s like they’re a permanent fixture, stubbornly resisting every scrub and spray. But what if I told you the secret to sparkling grout might be hiding in your laundry room or even…under your bathroom sink?
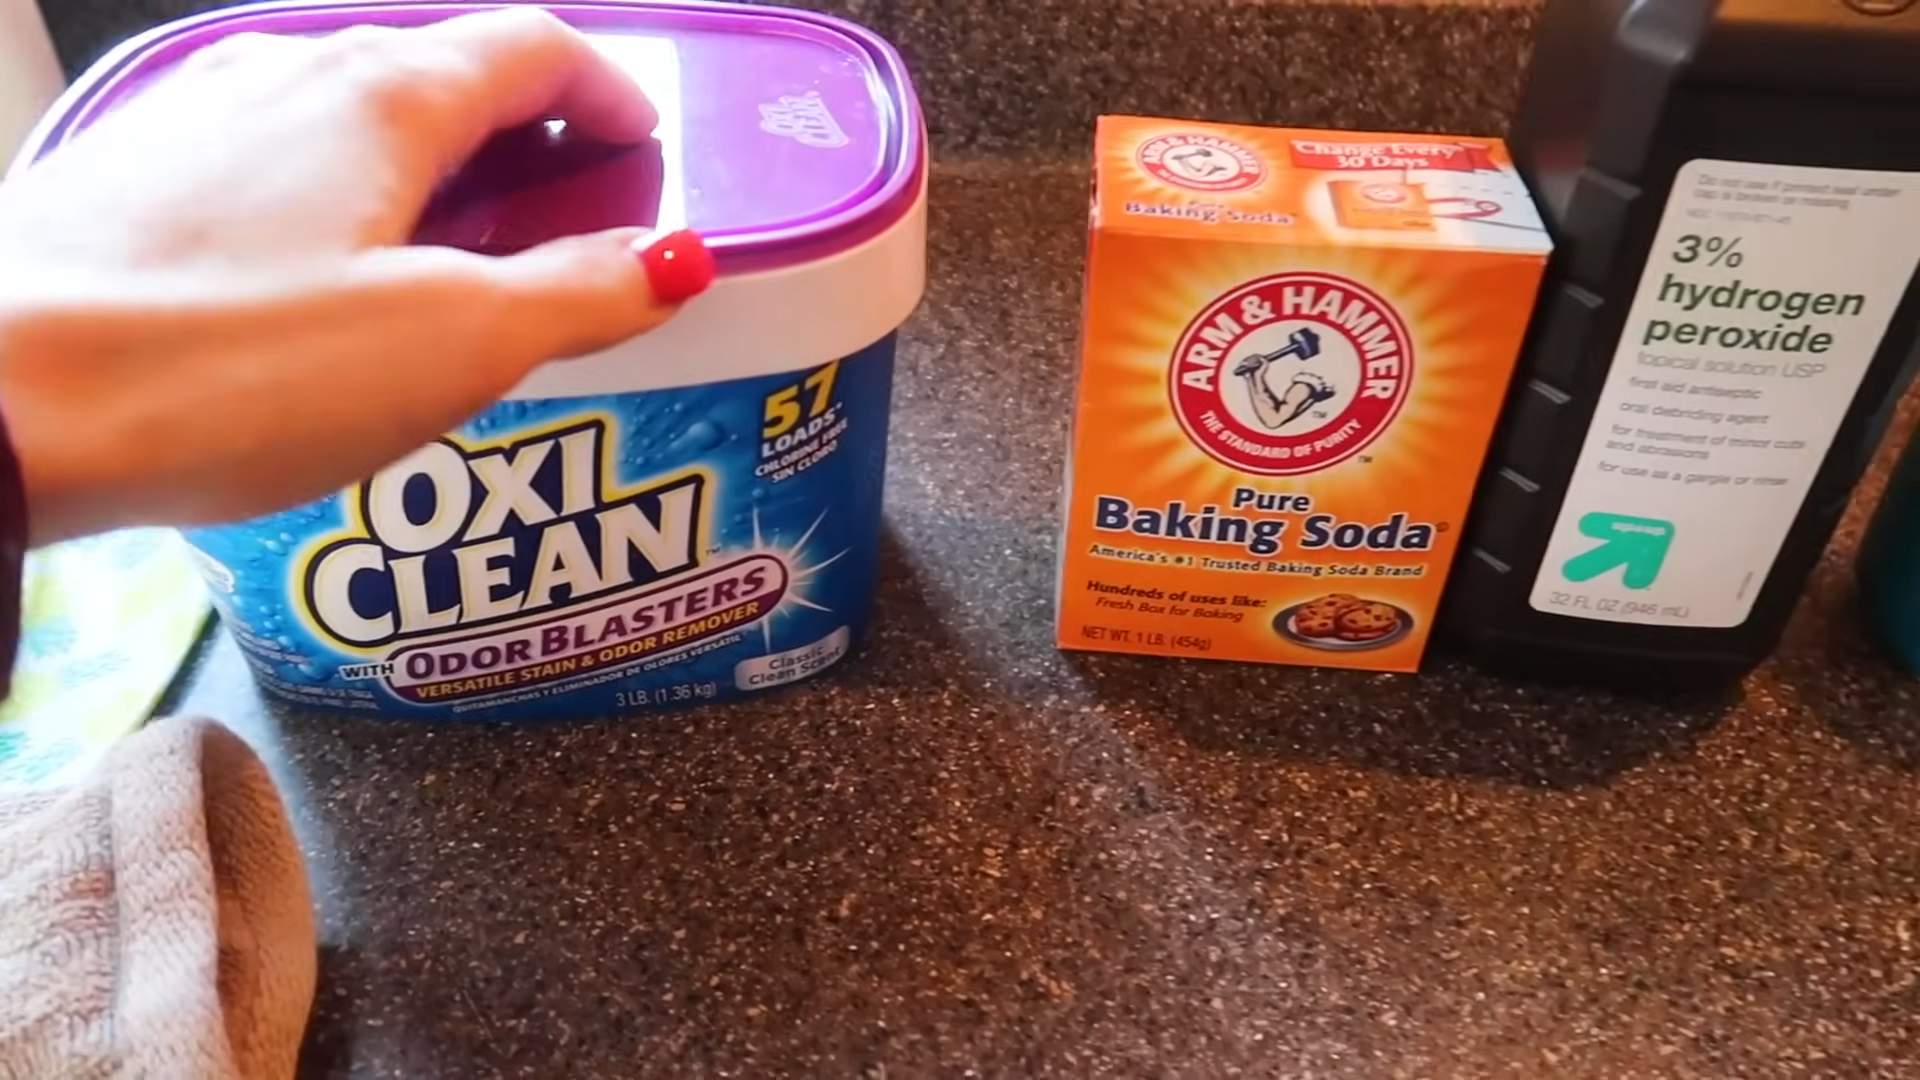
For generations, homeowners have battled the bane of dirty grout. From ancient Roman mosaics to modern tile masterpieces, the challenge of keeping those narrow lines clean has persisted. Traditional methods often involve harsh chemicals and hours of back-breaking work. But fear not! This DIY guide explores a surprisingly effective showdown: Grout Cleaning using Oxiclean versus toilet bowl cleaner.
Why is this DIY trick so crucial? Because a clean grout not only elevates the look of your entire space, making it feel fresh and inviting, but it also contributes to a healthier home environment. Grime and mildew love to lurk in grout, potentially triggering allergies and other health issues. Plus, let’s be honest, nobody wants to spend their precious weekends scrubbing grout! This article will provide you with a simple, cost-effective, and potentially game-changing solution for your grout cleaning woes. Get ready to discover which household staple will win the battle against stubborn grout stains!
DIY Corn Growing Bag: From Seed to Stalk in a Sack!
Hey there, fellow gardening enthusiasts! Ever dreamt of having fresh, homegrown corn but lack the space for a traditional cornfield? Well, I’ve got just the solution for you: a DIY corn growing bag! This project is perfect for apartment dwellers, balcony gardeners, or anyone who wants to maximize their yield in a small area. It’s surprisingly easy, cost-effective, and incredibly rewarding. Let’s get started!
What You’ll Need: The Corn Growing Bag Arsenal
Before we dive in, let’s gather our supplies. Here’s a comprehensive list of everything you’ll need to create your very own corn growing bag:
* A Large, Sturdy Bag: This is the foundation of our project. Look for a heavy-duty polypropylene bag (like the kind used for animal feed or landscaping materials). Aim for a bag that’s at least 30 inches tall and 24 inches in diameter. The bigger, the better, as corn roots need space to spread. You can often find these at farm supply stores or online.
* Potting Soil: Don’t skimp on the soil! Use a high-quality potting mix that’s well-draining and rich in nutrients. Avoid using garden soil directly, as it can compact and hinder root growth. I recommend a mix specifically formulated for vegetables.
* Compost: Compost is black gold for gardeners! It adds essential nutrients and improves soil structure. Mix in a generous amount of compost with your potting soil for optimal corn growth.
* Slow-Release Fertilizer: Corn is a heavy feeder, so a slow-release fertilizer will provide a steady supply of nutrients throughout the growing season. Choose a fertilizer with a balanced NPK ratio (nitrogen, phosphorus, and potassium).
* Corn Seeds: Obviously! Select a variety of corn that’s suitable for your climate and growing conditions. Sweet corn is a popular choice, but you can also grow popcorn or ornamental corn. Make sure to purchase seeds from a reputable source to ensure good germination rates.
* Drill or Scissors: We’ll need these to create drainage holes in the bag.
* Measuring Tape or Ruler: For accurate spacing of the corn seeds.
* Watering Can or Hose: To keep your corn plants well-hydrated.
* Optional: Stakes or Tomato Cages: Depending on the variety of corn you choose, you may need to provide support to prevent the stalks from falling over.
* Optional: Mulch: Mulch helps retain moisture, suppress weeds, and regulate soil temperature. Straw, wood chips, or shredded bark are all good options.
Step-by-Step Guide: Building Your Corn Growing Bag
Alright, let’s get our hands dirty! Follow these steps to create your very own corn growing bag:
1. Prepare the Bag: First, we need to create drainage holes in the bag. This is crucial to prevent waterlogging, which can lead to root rot. Using a drill or scissors, poke several holes (about ½ inch in diameter) in the bottom and lower sides of the bag. Space the holes about 4-6 inches apart.
2. Mix the Soil: In a large container or on a tarp, thoroughly mix the potting soil, compost, and slow-release fertilizer. I usually aim for a ratio of about 2 parts potting soil to 1 part compost. Follow the instructions on the fertilizer package for the correct amount to use.
3. Fill the Bag: Now, carefully fill the bag with the soil mixture. Leave about 4-6 inches of space at the top of the bag. This will make watering easier and prevent soil from spilling out.
4. Plant the Seeds: This is where the magic happens! Corn needs to be planted in a block or cluster for proper pollination. Using your measuring tape or ruler, mark out a grid on the surface of the soil. Space the seeds about 6-8 inches apart. Plant each seed about 1-2 inches deep. I usually plant 6-8 seeds per bag, depending on the size of the bag.
5. Water Thoroughly: After planting, water the soil thoroughly until water drains out of the drainage holes. This will help settle the soil and ensure good seed-to-soil contact.
6. Choose a Sunny Location: Corn needs at least 6-8 hours of direct sunlight per day to thrive. Place your corn growing bag in a sunny spot in your yard, on your balcony, or on your patio.
7. Water Regularly: Keep the soil consistently moist, but not waterlogged. Water deeply whenever the top inch of soil feels dry to the touch. The frequency of watering will depend on the weather and the drainage of your soil.
8. Fertilize as Needed: Even with slow-release fertilizer, your corn plants may need an extra boost of nutrients during the growing season. Side-dress with a balanced fertilizer every 4-6 weeks, following the instructions on the package.
9. Provide Support (Optional): As your corn plants grow taller, they may become susceptible to wind damage. If you live in a windy area or are growing a tall variety of corn, consider providing support with stakes or tomato cages.
10. Control Pests and Diseases: Keep an eye out for common corn pests and diseases, such as corn earworms, aphids, and fungal infections. Take action promptly to prevent infestations from spreading. Organic pest control methods, such as insecticidal soap or neem oil, are often effective.
Caring for Your Corn: Nurturing Your Stalks to Success
Once your corn plants are established, it’s important to provide them with the care they need to thrive. Here are some tips for nurturing your stalks to success:
* Thinning: After the seedlings emerge, you may need to thin them out to ensure that each plant has enough space to grow. Select the strongest and healthiest seedlings and remove the weaker ones.
* Weeding: Keep the area around your corn plants free of weeds. Weeds compete with corn for nutrients and water. Hand-pull weeds regularly or use a hoe to cultivate the soil.
* Pollination: Corn is wind-pollinated, so it’s important to ensure that the pollen from the tassels (the male flowers at the top of the plant) reaches the silks (the female flowers that emerge from the developing ears). If you’re growing corn in a sheltered location, you may need to hand-pollinate the plants by gently shaking the tassels to release pollen.
* Watering During Silking and Ear Development: Adequate watering is especially crucial during silking and ear development. This is when the plants need the most water to produce plump, juicy kernels.
* Monitoring for Pests and Diseases: Regularly inspect your corn plants for signs of pests and diseases. Early detection and treatment can prevent serious problems.
Harvesting Your Corn: The Sweet Reward
The moment you’ve been waiting for! Harvesting your homegrown corn is a truly rewarding experience. Here’s how to know when your corn is ready to harvest:
* Check the Silks: The silks should be dry and brown.
* Feel the Ears: The ears should feel plump and full.
* Pierce a Kernel: Gently pierce a kernel with your fingernail. If the liquid that comes out is milky, the corn is ready to harvest. If the liquid is clear, the corn needs more time to mature.
* Harvest in the Morning: Harvest your corn in the morning, when the sugars are at their peak.
* Twist and Pull: To harvest, grasp the ear firmly and twist it downward. The ear should snap off easily from the stalk.
Once you’ve harvested your corn, you can enjoy it fresh, grilled, boiled, or roasted. You can also freeze or can your corn for later use.
Troubleshooting: Addressing Common Corn Growing Bag Challenges
Even with the best planning, you might encounter some challenges along the way. Here are some common issues and how to address them:
* Poor Germination: If your corn seeds aren’t germinating, make sure the soil is warm enough (at least 60°F). You can also try soaking the seeds in water for 24 hours before planting to improve germination rates.
* Yellowing Leaves: Yellowing leaves can indicate a nutrient deficiency. Try fertilizing with a balanced fertilizer or adding compost to the soil.
* Stunted Growth: Stunted growth can be caused by a variety of factors, including poor soil, lack of sunlight, or pest infestations. Make sure your corn plants are getting enough sunlight, water, and nutrients.
* Corn Earworms: Corn earworms are a common pest that can damage the developing ears. You can control them by applying Bacillus thuringiensis (Bt) to the silks.
* Lodging (Falling Over): Lodging can be caused by strong winds or weak stalks. Provide support with stakes or tomato cages to prevent the plants from falling over.
Variations and Adaptations: Personalizing Your Corn Growing Bag
The beauty of DIY
Conclusion
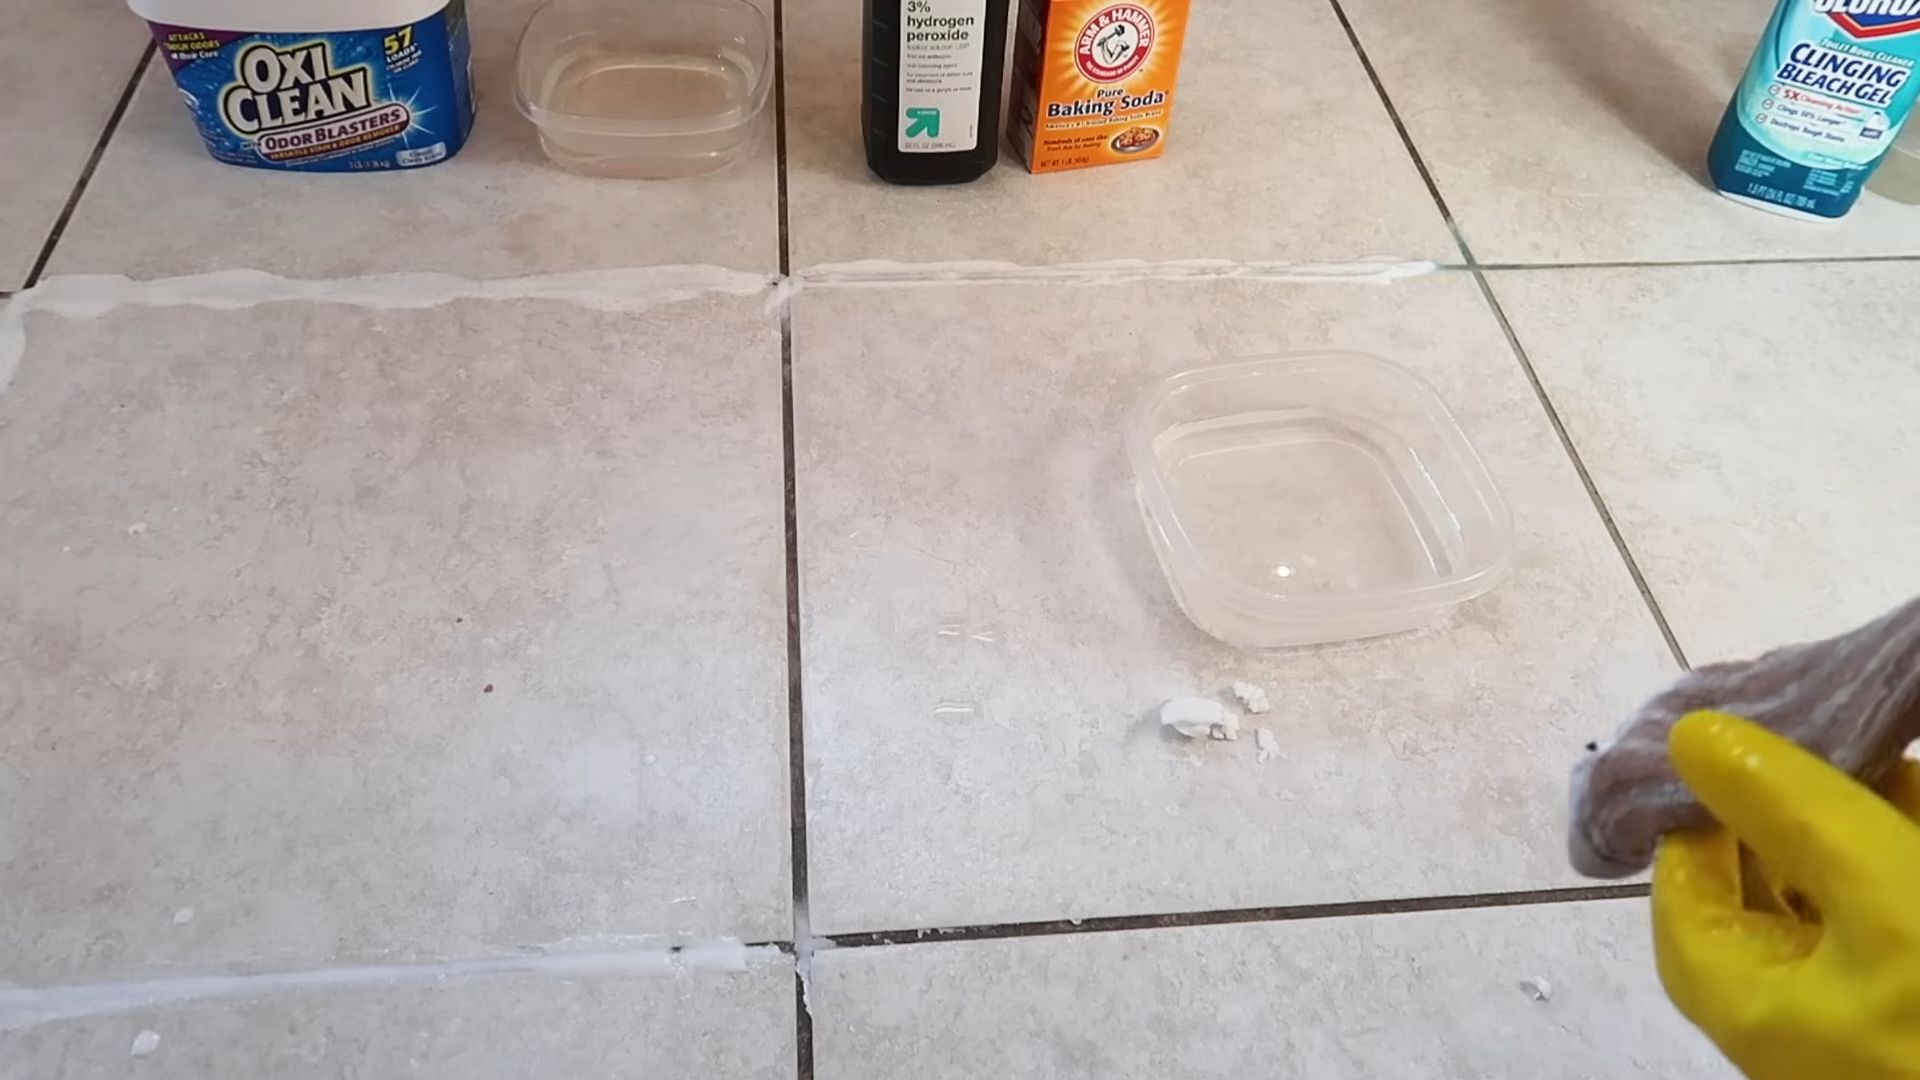
So, there you have it! We’ve explored the surprisingly effective world of DIY grout cleaning, pitting Oxiclean against toilet bowl cleaner in a battle for sparkling tiles. While both options offer a potential solution to grimy grout, the clear winner, in terms of safety, ease of use, and overall effectiveness, is Oxiclean. Its oxygen-based bleaching action gently lifts stains without the harsh chemicals found in toilet bowl cleaner, making it a safer choice for your home and your health.
Why is this DIY grout cleaning trick a must-try? Because it’s a cost-effective, readily available, and surprisingly powerful way to revitalize your tiled surfaces. Forget expensive commercial grout cleaners filled with questionable ingredients. Oxiclean offers a simple, straightforward solution that delivers impressive results. It’s also incredibly versatile. You can use it on various types of tile, from ceramic and porcelain to even some natural stone (always test in an inconspicuous area first!).
But don’t just take our word for it! We encourage you to try this DIY grout cleaning method using Oxiclean and witness the transformation for yourself. Remember to always wear gloves and eye protection, and ensure proper ventilation. Start with a small, manageable area to get a feel for the process and adjust the concentration of Oxiclean as needed.
Looking for variations? Consider adding a few drops of your favorite essential oil to the Oxiclean paste for a fresh, clean scent. Lemon, tea tree, and eucalyptus oils are all excellent choices for their antibacterial and antifungal properties. For particularly stubborn stains, you can try letting the Oxiclean paste sit for a longer period, up to an hour, before scrubbing. You can also use an old toothbrush or a specialized grout brush for more targeted cleaning. Another variation is to use a steam cleaner after applying the Oxiclean paste. The steam helps to loosen the dirt and grime, making it easier to scrub away.
We’re confident that you’ll be amazed by the results. Once you’ve tried this DIY grout cleaning trick, we’d love to hear about your experience! Share your before-and-after photos and tips in the comments below. Let’s build a community of sparkling clean homes, one grout line at a time! Remember, a little elbow grease and the power of Oxiclean can make a world of difference. This method of grout cleaning with Oxiclean is a game changer!
Frequently Asked Questions (FAQ)
Q: Is Oxiclean safe to use on all types of grout?
A: While Oxiclean is generally considered a safe and gentle cleaning agent, it’s always best to test it in an inconspicuous area first, especially on colored grout or more delicate materials like natural stone. Some colored grouts may be susceptible to fading, and certain types of stone can be damaged by prolonged exposure to any cleaning solution. Apply a small amount of the Oxiclean paste to a hidden area, let it sit for the recommended time, and then rinse thoroughly. Check for any discoloration or damage before proceeding to clean the entire surface. If you are unsure about your grout type, consult with a tile professional.
Q: Can I use Oxiclean on epoxy grout?
A: Epoxy grout is generally more resistant to staining and chemicals than cement-based grout. However, it’s still a good idea to test Oxiclean in a hidden area before applying it to the entire surface. While Oxiclean is less harsh than many other cleaning agents, prolonged exposure to any chemical can potentially dull the finish of epoxy grout. Follow the same testing procedure as with other grout types, and be sure to rinse thoroughly after cleaning.
Q: How long should I let the Oxiclean paste sit on the grout?
A: For most grout cleaning tasks, allowing the Oxiclean paste to sit for 15-30 minutes is sufficient. However, for particularly stubborn stains, you can let it sit for up to an hour. Be sure to keep the area well-ventilated and monitor the grout for any signs of discoloration. If you notice any fading or damage, rinse the area immediately.
Q: What kind of brush should I use to scrub the grout?
A: An old toothbrush is a great option for cleaning grout in small or hard-to-reach areas. For larger areas, a specialized grout brush with stiff bristles is more efficient. You can find grout brushes at most hardware stores or online retailers. Avoid using abrasive brushes or scouring pads, as these can scratch the tile and damage the grout.
Q: How do I make the Oxiclean paste?
A: To make the Oxiclean paste, simply mix Oxiclean powder with water until you achieve a thick, spreadable consistency. Start with a small amount of water and gradually add more until you reach the desired consistency. The paste should be thick enough to cling to the grout without running. A good starting ratio is typically 1 part Oxiclean powder to 1 part water, but you can adjust this as needed.
Q: Is it safe to mix Oxiclean with other cleaning products?
A: No, it is generally not safe to mix Oxiclean with other cleaning products, especially those containing bleach or ammonia. Mixing different chemicals can create dangerous fumes and potentially harmful reactions. Always use Oxiclean on its own and avoid combining it with other cleaning agents.
Q: How often should I clean my grout with Oxiclean?
A: The frequency of grout cleaning depends on the amount of traffic and exposure to dirt and grime. In high-traffic areas like bathrooms and kitchens, you may need to clean your grout every few weeks. In less frequently used areas, you can clean your grout less often. Regular cleaning will help prevent stains from setting in and make the cleaning process easier.
Q: What safety precautions should I take when cleaning grout with Oxiclean?
A: When cleaning grout with Oxiclean, it’s important to wear gloves and eye protection to protect your skin and eyes from irritation. Ensure proper ventilation by opening windows or using a fan. Avoid inhaling the Oxiclean powder or fumes. If you experience any irritation, discontinue use and rinse the affected area with water. Keep Oxiclean out of reach of children and pets.
Q: Can I use Oxiclean on colored grout?
A: While Oxiclean is generally safe for colored grout, it’s always best to test it in an inconspicuous area first to ensure that it doesn’t cause any fading or discoloration. Apply a small amount of the Oxiclean paste to a hidden area, let it sit for the recommended time, and then rinse thoroughly. Check for any changes in color before proceeding to clean the entire surface.
Q: What if the Oxiclean doesn’t remove all of the stains?
A: If the Oxiclean doesn’t remove all of the stains, you can try letting the paste sit for a longer period, up to an hour. You can also try using a more concentrated solution of Oxiclean. For particularly stubborn stains, you may need to repeat the cleaning process several times. If all else fails, you may need to consider using a commercial grout cleaner specifically designed for removing tough stains.

Leave a Comment