

Grow Basil Kitchen: Imagine stepping into your kitchen, not just to cook, but to snip fresh, fragrant basil leaves straight from your own little garden. Sounds dreamy, right? Well, it’s more achievable than you think! For centuries, basil has been cherished not only for its culinary prowess but also for its believed medicinal properties and even its symbolic meaning in various cultures, representing love and good wishes.
But let’s be honest, sometimes life gets in the way, and maintaining a sprawling outdoor garden just isn’t feasible. That’s where the magic of DIY comes in! I’m here to share some super simple, space-saving, and budget-friendly tricks to help you grow basil kitchen style, regardless of your gardening experience.
Why do you need these DIY hacks? Because fresh basil elevates any dish, and having it readily available is a game-changer. Plus, nurturing a little plant is incredibly therapeutic. Forget expensive store-bought herbs that wilt within days. With these tips, you’ll have a constant supply of vibrant, flavorful basil right at your fingertips. Let’s get started and transform your kitchen into a mini herb haven!
Grow Your Own Basil Bounty: A DIY Kitchen Herb Garden Guide
Hey there, fellow herb enthusiasts! Ever dream of having fresh, fragrant basil right at your fingertips? Well, ditch the grocery store packets and get ready to unleash your inner gardener! I’m going to walk you through creating your very own thriving basil garden, right in your kitchen. It’s easier than you think, and the rewards are oh-so-delicious.
What You’ll Need: The Basil Gardener’s Toolkit
Before we dive in, let’s gather our supplies. This is what you’ll need to set yourself up for basil-growing success:
* Basil Seeds or Seedlings: You can start from seeds (more budget-friendly but requires patience) or buy small basil seedlings from a nursery (faster results!). I personally love starting from seeds; it’s so rewarding to watch them sprout!
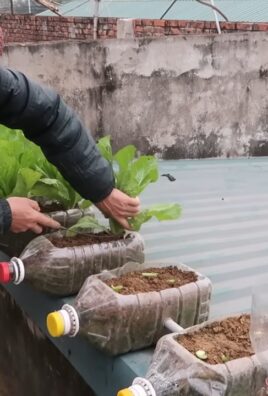
* Pots or Containers: Choose pots that are at least 6 inches in diameter and have drainage holes. Terra cotta pots are great because they allow the soil to breathe, but plastic works too. Just make sure they have those drainage holes!
* High-Quality Potting Mix: Don’t skimp on the soil! Use a well-draining potting mix specifically formulated for containers. Avoid using garden soil, as it can compact and suffocate your basil.
* Watering Can or Spray Bottle: A gentle watering can or spray bottle is essential for keeping your basil happy and hydrated.
* Sunny Spot: Basil loves sunshine! Find a spot in your kitchen that gets at least 6 hours of direct sunlight per day. A south-facing windowsill is ideal. If you don’t have enough natural light, consider using a grow light.
* Optional: Seed Starting Tray and Dome: If you’re starting from seeds, a seed starting tray and dome will help create the perfect environment for germination.
* Optional: Liquid Fertilizer: A balanced liquid fertilizer will give your basil a boost of nutrients.
Phase 1: Starting from Seeds (The Patient Gardener’s Path)
If you’re opting to start from seeds, here’s how to get those tiny basil babies growing:
1. Prepare Your Seed Starting Tray: Fill your seed starting tray with the potting mix, leaving about half an inch of space at the top. Gently pat down the soil.
2. Sow the Seeds: Sprinkle a few basil seeds on top of the soil in each cell of the tray. Don’t overcrowd them! Lightly cover the seeds with a thin layer of potting mix.
3. Water Gently: Use a spray bottle to mist the soil thoroughly. You want it to be moist but not soggy.
4. Cover with a Dome: Place the dome over the seed starting tray to create a humid environment. This will help the seeds germinate.
5. Find a Warm Spot: Place the tray in a warm location, ideally between 70-80°F (21-27°C).
6. Keep the Soil Moist: Check the soil daily and mist it with water whenever it starts to dry out.
7. Wait for Germination: Basil seeds typically germinate in 5-10 days. Once the seedlings emerge, remove the dome.
8. Provide Light: Place the seedlings in a sunny spot or under a grow light.
9. Thin the Seedlings: Once the seedlings have a few sets of true leaves (the leaves that look like miniature basil leaves), thin them out by snipping off the weaker seedlings with scissors. Leave only one strong seedling per cell.
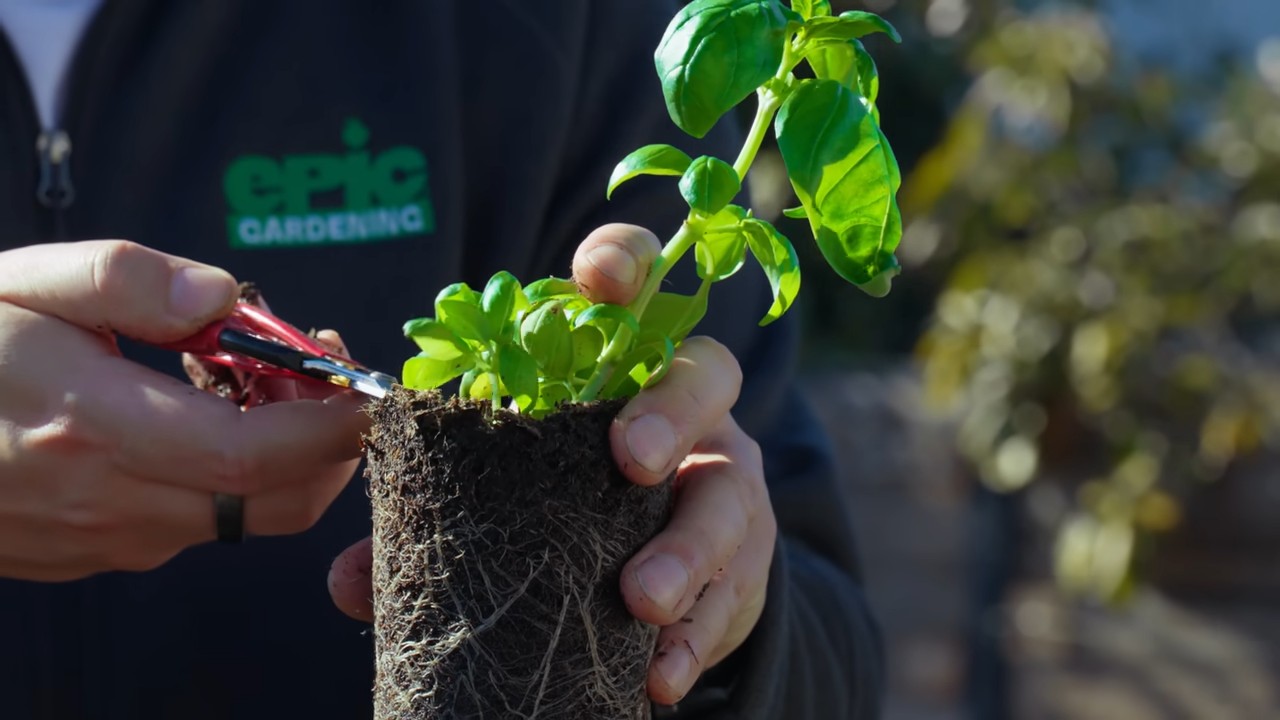
10. Transplant to Pots: When the seedlings are about 2-3 inches tall, they’re ready to be transplanted to their permanent pots. Gently remove the seedlings from the tray and plant them in the pots filled with potting mix.
Phase 2: Planting Seedlings (The Speedy Route to Basil Bliss)
If you’re starting with seedlings, you can skip the seed starting process and jump right to planting:
1. Prepare Your Pots: Fill your pots with the potting mix, leaving about an inch of space at the top.
2. Gently Remove Seedlings: Carefully remove the basil seedlings from their nursery containers. Gently loosen the roots if they are tightly packed.
3. Plant the Seedlings: Plant each seedling in a pot, making sure the top of the root ball is level with the soil surface.
4. Water Thoroughly: Water the seedlings thoroughly after planting.
5. Place in a Sunny Spot: Place the pots in a sunny spot or under a grow light.
Phase 3: Basil Care 101: Keeping Your Basil Happy and Healthy
Now that your basil is planted, it’s time to learn how to care for it. Here’s what you need to know:
1. Watering: Basil likes consistently moist soil, but it doesn’t like to be waterlogged. Water your basil when the top inch of soil feels dry to the touch. Avoid overwatering, as this can lead to root rot.
2. Sunlight: Basil needs at least 6 hours of direct sunlight per day. If you don’t have enough natural light, use a grow light.
3. Fertilizing: Feed your basil with a balanced liquid fertilizer every 2-4 weeks. Follow the instructions on the fertilizer label.
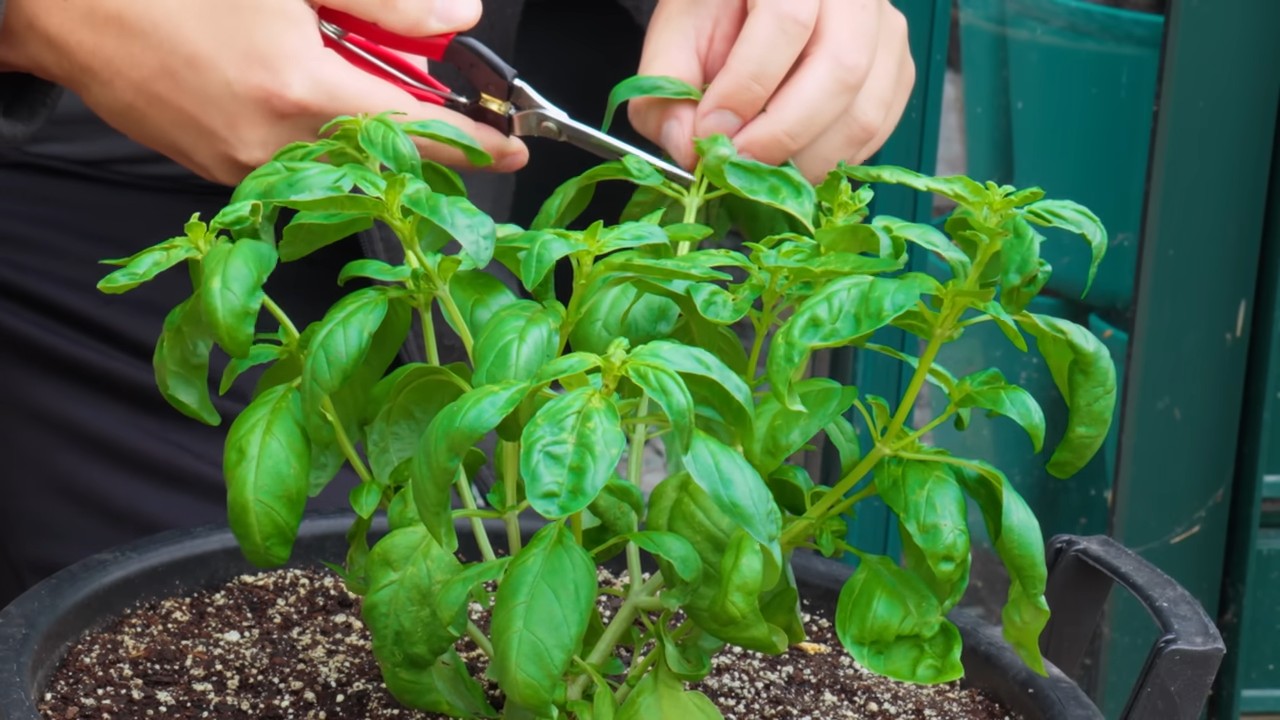
4. Pinching: Pinch off the top sets of leaves regularly to encourage bushier growth. This will also prevent your basil from flowering, which can make the leaves taste bitter. Pinching is key to a productive basil plant!
5. Pruning: Prune your basil regularly to remove any dead or yellowing leaves. This will help keep your plant healthy and prevent disease.
6. Pest Control: Keep an eye out for pests like aphids and spider mites. If you see any pests, spray your basil with insecticidal soap.
7. Temperature: Basil prefers warm temperatures, ideally between 65-80°F (18-27°C). Protect your basil from frost.
8. Air Circulation: Good air circulation is important for preventing fungal diseases. Make sure your basil plants are not too crowded.
Phase 4: Harvesting Your Basil Bounty: The Sweetest Reward
The best part of growing your own basil is, of course, harvesting it! Here’s how to harvest your basil for maximum flavor and yield:
1. Harvest Regularly: Start harvesting your basil when the plants are about 6-8 inches tall.
2. Pinch or Cut: Pinch or cut off the top sets of leaves, just above a leaf node (the point where leaves grow from the stem).
3. Harvest Before Flowering: Harvest your basil before it starts to flower. Once it flowers, the leaves will become bitter.
4. Harvest in the Morning: Harvest your basil in the morning, after the dew has dried. This is when the leaves are at their most flavorful.
5. Store Properly: Store your harvested basil in the refrigerator. You can wrap it in a damp paper towel and place it in a plastic bag. Basil can also be frozen or dried.
Troubleshooting: Common Basil Problems and Solutions
Even with the best care, you might encounter some problems with your basil. Here are some common issues and how to fix them:
* Yellowing Leaves: Yellowing leaves can be caused by overwatering, underwatering, nutrient deficiencies, or pests. Check the soil moisture and adjust your watering accordingly. Fertilize your basil with a balanced liquid fertilizer. Inspect your plants for pests and treat them with insecticidal soap if necessary.
* Brown Spots: Brown spots on the leaves can be caused by fungal diseases. Improve air circulation around your plants and avoid overhead watering. Remove any affected leaves.
* Leggy Growth: Leggy growth (long, spindly stems with few leaves) is usually caused by insufficient light. Move your basil to a sunnier spot or use a grow light. Pinch off the top sets of leaves to encourage bushier growth.
* Wilting: Wilting can be caused by underwatering or root rot. Check the soil moisture and adjust your watering accordingly. If you suspect root rot, repot your basil in fresh potting mix.
* Pests: Aphids, spider mites, and other pests can damage your basil plants. Inspect your plants regularly and treat them with insecticidal soap if necessary.
Basil Varieties to Explore: Beyond the Genovese
While Genovese basil is the most common variety, there’s a whole world of basil flavors and aromas to discover! Here are a few other varieties to try:
* Thai Basil: With its anise-like flavor, Thai basil is perfect for Asian dishes.
* Lemon Basil: This variety has a bright, citrusy flavor that’s great in salads and desserts.
* Purple Basil: Not only is purple basil beautiful, but it also has a unique, slightly spicy flavor.
* Globe
Conclusion
So, there you have it! Growing your own basil in the kitchen isn’t just a fun project; it’s a game-changer for your culinary adventures. Imagine the sheer delight of snipping fresh, fragrant basil leaves right before adding them to your pasta sauce, pesto, or even a simple Caprese salad. No more wilted, store-bought basil that lacks that vibrant, peppery punch. This DIY trick empowers you to have a constant supply of fresh herbs, elevating your cooking from ordinary to extraordinary.
Why is this a must-try? Because it’s incredibly rewarding, surprisingly easy, and significantly more cost-effective than constantly buying basil from the grocery store. Plus, you get the satisfaction of nurturing something from a tiny seed (or cutting!) to a thriving plant. It’s a little bit of green therapy right in your kitchen.
But the fun doesn’t stop there! Feel free to experiment with different varieties of basil. Genovese basil is a classic for pesto, but lemon basil adds a citrusy twist to salads and teas. Thai basil brings an anise-like flavor to Asian-inspired dishes. You can even try growing purple basil for a beautiful and flavorful garnish. Consider using different containers too. While a simple pot works perfectly, you could also repurpose mason jars or even create a vertical herb garden for a stylish and space-saving solution.
Don’t be afraid to get creative with your setup. If you’re short on sunlight, consider investing in a grow light to ensure your basil gets the light it needs to flourish. You can also experiment with different soil mixes to find what works best for your plants.
We wholeheartedly encourage you to give this DIY trick a try. It’s a simple yet impactful way to enhance your cooking and bring a touch of nature into your home. Once you experience the joy of harvesting your own fresh basil, you’ll never go back to store-bought again.
And most importantly, we want to hear about your experiences! Share your photos, tips, and challenges in the comments below. Let’s create a community of home basil growers and learn from each other. What variety of basil are you most excited to grow? What challenges did you face, and how did you overcome them? Your insights could help other aspiring gardeners on their journey to fresh, homegrown basil. So, get your hands dirty, embrace the process, and enjoy the delicious rewards of growing your own basil in the kitchen! Let us know how your journey to **grow basil kitchen** goes!
Frequently Asked Questions (FAQ)
1. What is the best location in my kitchen to grow basil?
The most crucial factor is sunlight. Basil thrives on at least 6-8 hours of direct sunlight per day. A south-facing windowsill is ideal. If you don’t have a sunny windowsill, consider using a grow light. Place the light a few inches above the plants and keep it on for 12-14 hours a day. Rotate your basil plant regularly to ensure even growth on all sides. Avoid placing your basil near drafts or sources of extreme heat or cold, such as radiators or air conditioning vents.
2. What kind of soil should I use for growing basil?
Basil prefers well-draining soil that is rich in organic matter. A good potting mix specifically formulated for herbs is a great option. You can also create your own mix by combining equal parts of potting soil, compost, and perlite or vermiculite. The compost provides nutrients, while the perlite or vermiculite improves drainage and aeration. Avoid using garden soil, as it can be too heavy and may contain pests or diseases.
3. How often should I water my basil plant?
Water your basil plant when the top inch of soil feels dry to the touch. Avoid overwatering, as this can lead to root rot. When you water, water thoroughly until water drains out of the bottom of the pot. Empty the saucer underneath the pot to prevent the plant from sitting in water. During hot weather, you may need to water more frequently. Check the soil moisture daily and adjust your watering schedule accordingly.
4. How do I harvest basil leaves without harming the plant?
The best way to harvest basil is to pinch or cut off the leaves just above a leaf node (the point where leaves grow from the stem). This encourages the plant to branch out and produce more leaves. Avoid removing more than one-third of the plant’s leaves at a time. Regularly pruning your basil plant will also help to prevent it from flowering, which can make the leaves taste bitter.
5. My basil plant is flowering. What should I do?
If your basil plant starts to flower, pinch off the flower buds as soon as you see them. Flowering signals the end of the plant’s life cycle, and the leaves will become less flavorful. By removing the flowers, you can encourage the plant to continue producing leaves for a longer period.
6. What are some common pests and diseases that affect basil plants?
Common pests that can affect basil plants include aphids, spider mites, and whiteflies. These pests can be controlled with insecticidal soap or neem oil. Common diseases include fungal infections such as powdery mildew and downy mildew. These diseases can be prevented by providing good air circulation and avoiding overwatering. If your plant does develop a fungal infection, remove the affected leaves and treat the plant with a fungicide.
7. Can I grow basil from cuttings?
Yes, growing basil from cuttings is a very easy and effective method. Take a 4-6 inch cutting from a healthy basil plant, removing the lower leaves. Place the cutting in a glass of water, making sure that the leaves are above the water line. Change the water every day or two. Within a week or two, the cutting should develop roots. Once the roots are about an inch long, you can plant the cutting in a pot with well-draining soil.
8. How can I store fresh basil leaves?
Fresh basil leaves are best used immediately, but they can be stored for a few days. To store basil leaves, wrap them in a damp paper towel and place them in a plastic bag in the refrigerator. You can also freeze basil leaves by blanching them in boiling water for a few seconds, then plunging them into ice water. Drain the leaves and freeze them in a single layer on a baking sheet. Once frozen, transfer the leaves to a freezer bag.
9. My basil leaves are turning yellow. What could be the problem?
Yellowing basil leaves can be caused by several factors, including overwatering, underwatering, nutrient deficiencies, or pests. Check the soil moisture to ensure that you are not overwatering or underwatering. If the soil is dry, water the plant thoroughly. If the soil is soggy, allow it to dry out before watering again. You can also fertilize your basil plant with a balanced fertilizer to provide it with the nutrients it needs. Inspect the plant for pests and treat accordingly.
10. Can I grow basil indoors year-round?
Yes, you can grow basil indoors year-round, provided that you provide it with enough light and warmth. A sunny windowsill or a grow light is essential. Keep the temperature between 65-80°F (18-27°C). With proper care, you can enjoy fresh basil leaves all year long.
Leave a Comment