

Grow carrots at home, even if you think you don’t have a green thumb! Have you ever dreamed of pulling a vibrant, crunchy carrot straight from your own backyard? It’s more achievable than you might think, and this DIY guide is your secret weapon to making that dream a reality. Forget those bland, store-bought carrots imagine the sweet, earthy flavor of homegrown goodness!
Carrots have a rich history, dating back thousands of years. Originally cultivated for their aromatic leaves and seeds, the vibrant orange root we know and love today is a relatively modern development. Throughout history, carrots have been used not only as a food source but also for medicinal purposes. Now, you can continue this legacy by cultivating your own little carrot patch!
Why should you learn to grow carrots at home? Well, for starters, it’s incredibly rewarding! Plus, you have complete control over what goes into your food no harmful pesticides or chemicals. In today’s world, where healthy eating is a priority, knowing exactly where your food comes from is a huge advantage. This DIY guide will provide you with simple, effective tricks and hacks to ensure a bountiful carrot harvest, regardless of your gardening experience. Let’s get started and transform your space into a thriving garden!
Karottenanbau im eigenen Garten: So klappt’s garantiert!
Hallo liebe Gartenfreunde! Ich zeige euch heute, wie ihr ganz einfach knackige, süße Karotten in eurem eigenen Garten oder sogar auf dem Balkon ziehen könnt. Es ist wirklich nicht schwer und macht unglaublich viel Spaß, die kleinen orangefarbenen Schätze selbst zu ernten. Los geht’s!
Die Vorbereitung: Der Schlüssel zum Erfolg
Bevor wir mit dem Pflanzen loslegen, müssen wir ein paar wichtige Vorbereitungen treffen. Das ist wie beim Kochen: Die richtigen Zutaten und die richtige Vorbereitung sind das A und O!
- Der richtige Standort: Karotten lieben die Sonne! Sucht euch also ein sonniges Plätzchen in eurem Garten oder auf dem Balkon aus. Mindestens sechs Stunden Sonne am Tag sollten es schon sein.
- Der perfekte Boden: Karotten brauchen lockeren, sandigen Boden. Schwere, lehmige Böden sind nicht ideal, da die Karotten sich schwer tun, in die Tiefe zu wachsen und sich verformen können.
- Bodenverbesserung: Wenn euer Boden nicht ideal ist, keine Panik! Ihr könnt ihn ganz einfach verbessern. Mischt Sand, Kompost und eventuell etwas Gartenerde unter. Das macht den Boden lockerer und nährstoffreicher.
- Die richtige Sorte: Es gibt unzählige Karottensorten. Für den Anbau im Topf eignen sich besonders kurze Sorten wie “Pariser Markt” oder “Rondo”. Für den Garten könnt ihr euch austoben und auch längere Sorten wie “Nantaise” oder “Berlikumer” wählen.
- Das richtige Saatgut: Achtet darauf, hochwertiges Saatgut zu kaufen. Das Saatgut sollte nicht zu alt sein, da die Keimfähigkeit mit der Zeit abnimmt.
Schritt-für-Schritt-Anleitung: Karotten säen und pflegen
Jetzt geht’s ans Eingemachte! Hier ist eine detaillierte Anleitung, wie ihr eure Karotten erfolgreich aussät und pflegt:
- Den Boden vorbereiten: Lockert den Boden gründlich auf und entfernt Steine und Unkraut. Karotten mögen es, wenn der Boden fein krümelig ist.
- Saatrillen ziehen: Zieht mit einem Stock oder einer Harke Saatrillen. Die Rillen sollten etwa 1-2 cm tief sein und einen Abstand von 15-20 cm zueinander haben.
- Aussaat: Verteilt die Karottensamen gleichmäßig in den Saatrillen. Karottensamen sind sehr klein, daher ist es wichtig, nicht zu viele Samen auf einmal auszusäen. Ihr könnt die Samen auch mit etwas Sand vermischen, um sie besser verteilen zu können.
- Bedecken: Bedeckt die Samen mit einer dünnen Schicht Erde und drückt sie leicht an.
- Gießen: Gießt die Saatrillen vorsichtig an. Achtet darauf, dass die Erde nicht weggeschwemmt wird.
- Feucht halten: Haltet die Erde in den nächsten Wochen feucht, aber nicht nass. Die Samen brauchen Feuchtigkeit, um zu keimen.
- Vereinzeln: Sobald die Keimlinge etwa 2-3 cm groß sind, müsst ihr sie vereinzeln. Das bedeutet, dass ihr die schwächsten Keimlinge entfernt, damit die stärkeren genug Platz zum Wachsen haben. Der Abstand zwischen den einzelnen Karotten sollte etwa 3-5 cm betragen.
- Unkraut jäten: Haltet das Beet unkrautfrei. Unkraut konkurriert mit den Karotten um Nährstoffe und Wasser.
- Gießen: Gießt die Karotten regelmäßig, besonders in trockenen Perioden. Achtet darauf, dass die Erde nicht austrocknet.
- Düngen: Karotten sind keine Starkzehrer, aber eine leichte Düngung kann nicht schaden. Verwendet am besten einen organischen Dünger wie Kompost oder Hornspäne.
- Schutz vor Schädlingen: Karotten können von verschiedenen Schädlingen befallen werden, wie z.B. der Möhrenfliege. Um eure Karotten zu schützen, könnt ihr ein Insektenschutznetz über das Beet spannen.
Die Ernte: Der Lohn der Mühe
Nach etwa 2-3 Monaten könnt ihr eure ersten Karotten ernten. Der genaue Zeitpunkt hängt von der Sorte und den Witterungsbedingungen ab.
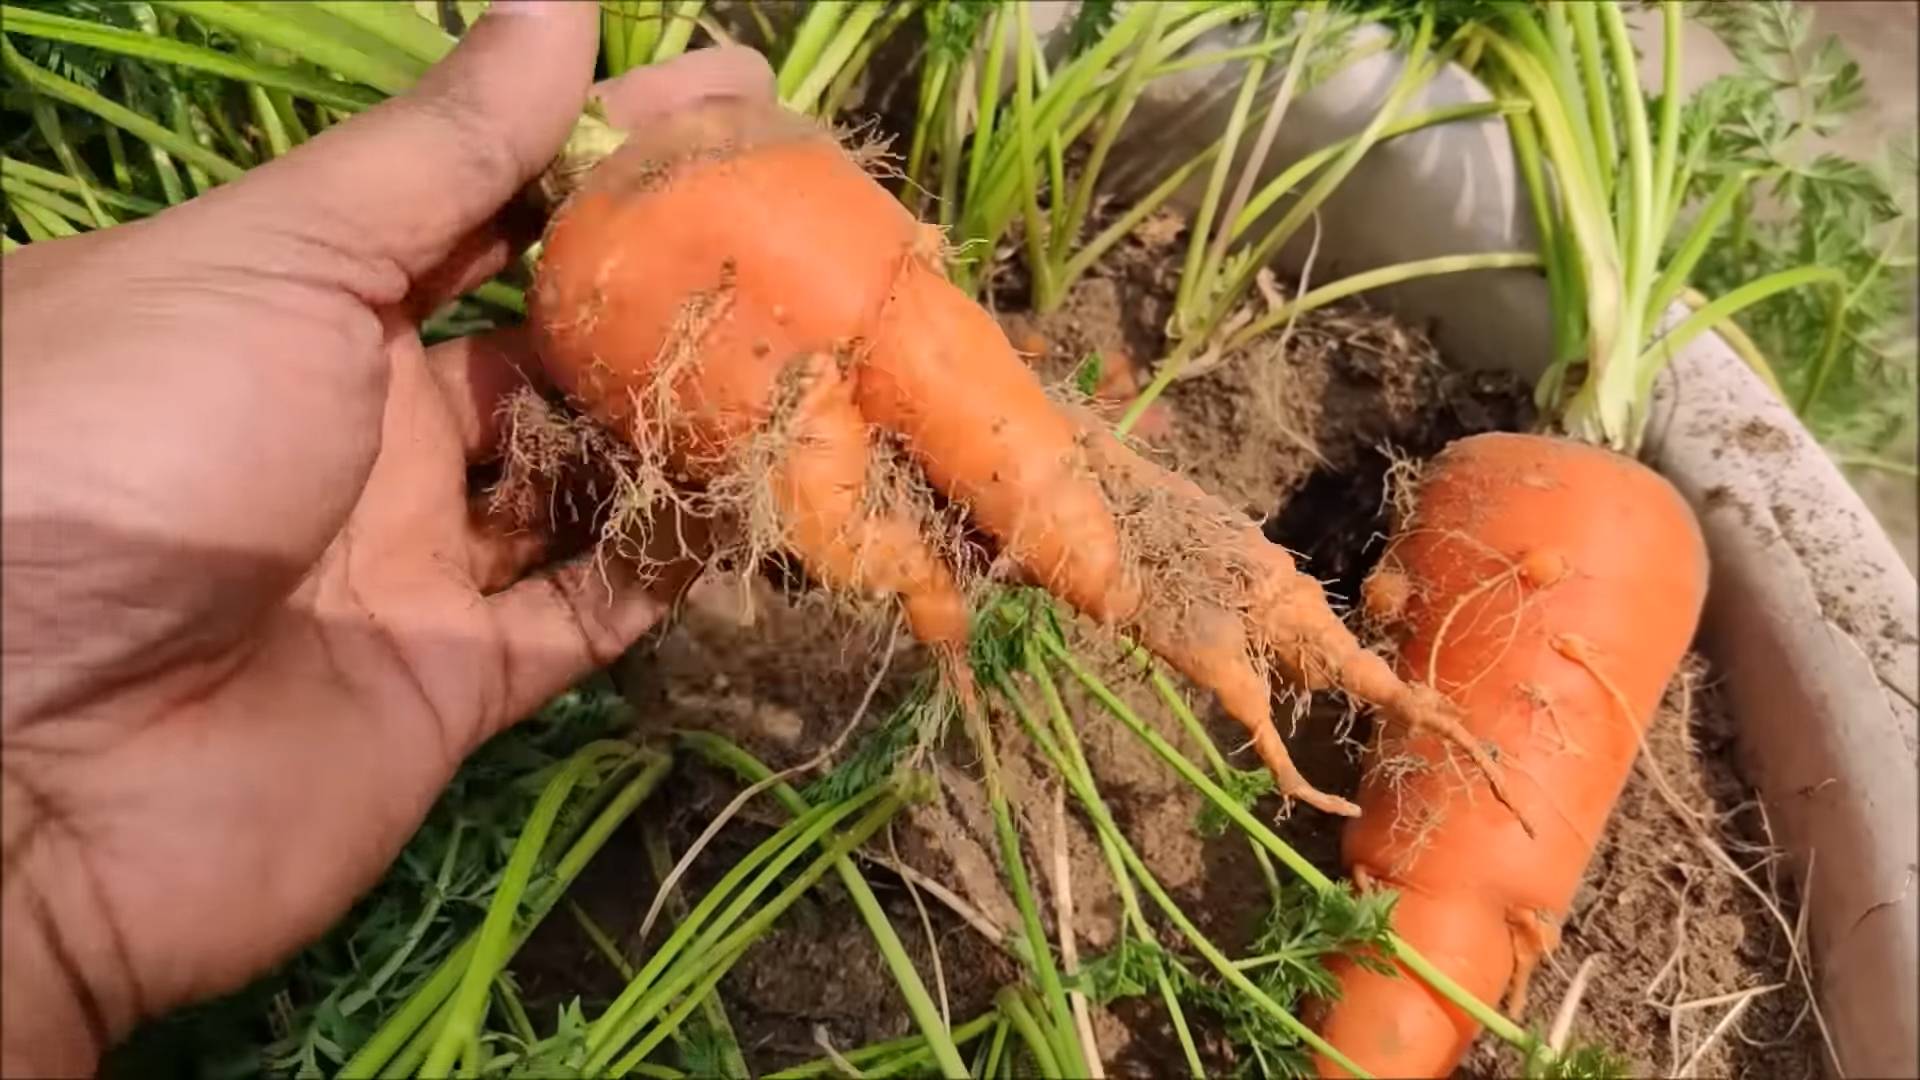
- Erntezeitpunkt: Die Karotten sind erntereif, wenn sie die gewünschte Größe erreicht haben. Ihr könnt auch vorsichtig eine Karotte aus der Erde ziehen, um zu sehen, ob sie reif ist.
- Erntemethode: Zieht die Karotten vorsichtig aus der Erde. Wenn der Boden sehr fest ist, könnt ihr ihn vorher etwas auflockern.
- Lagerung: Karotten können im Kühlschrank oder im kühlen Keller gelagert werden. Wickelt sie am besten in ein feuchtes Tuch, damit sie nicht austrocknen.
Spezialfall: Karotten im Topf anbauen
Auch wenn ihr keinen Garten habt, müsst ihr nicht auf selbst gezogene Karotten verzichten. Der Anbau im Topf ist eine tolle Alternative!
Die richtige Topfgröße
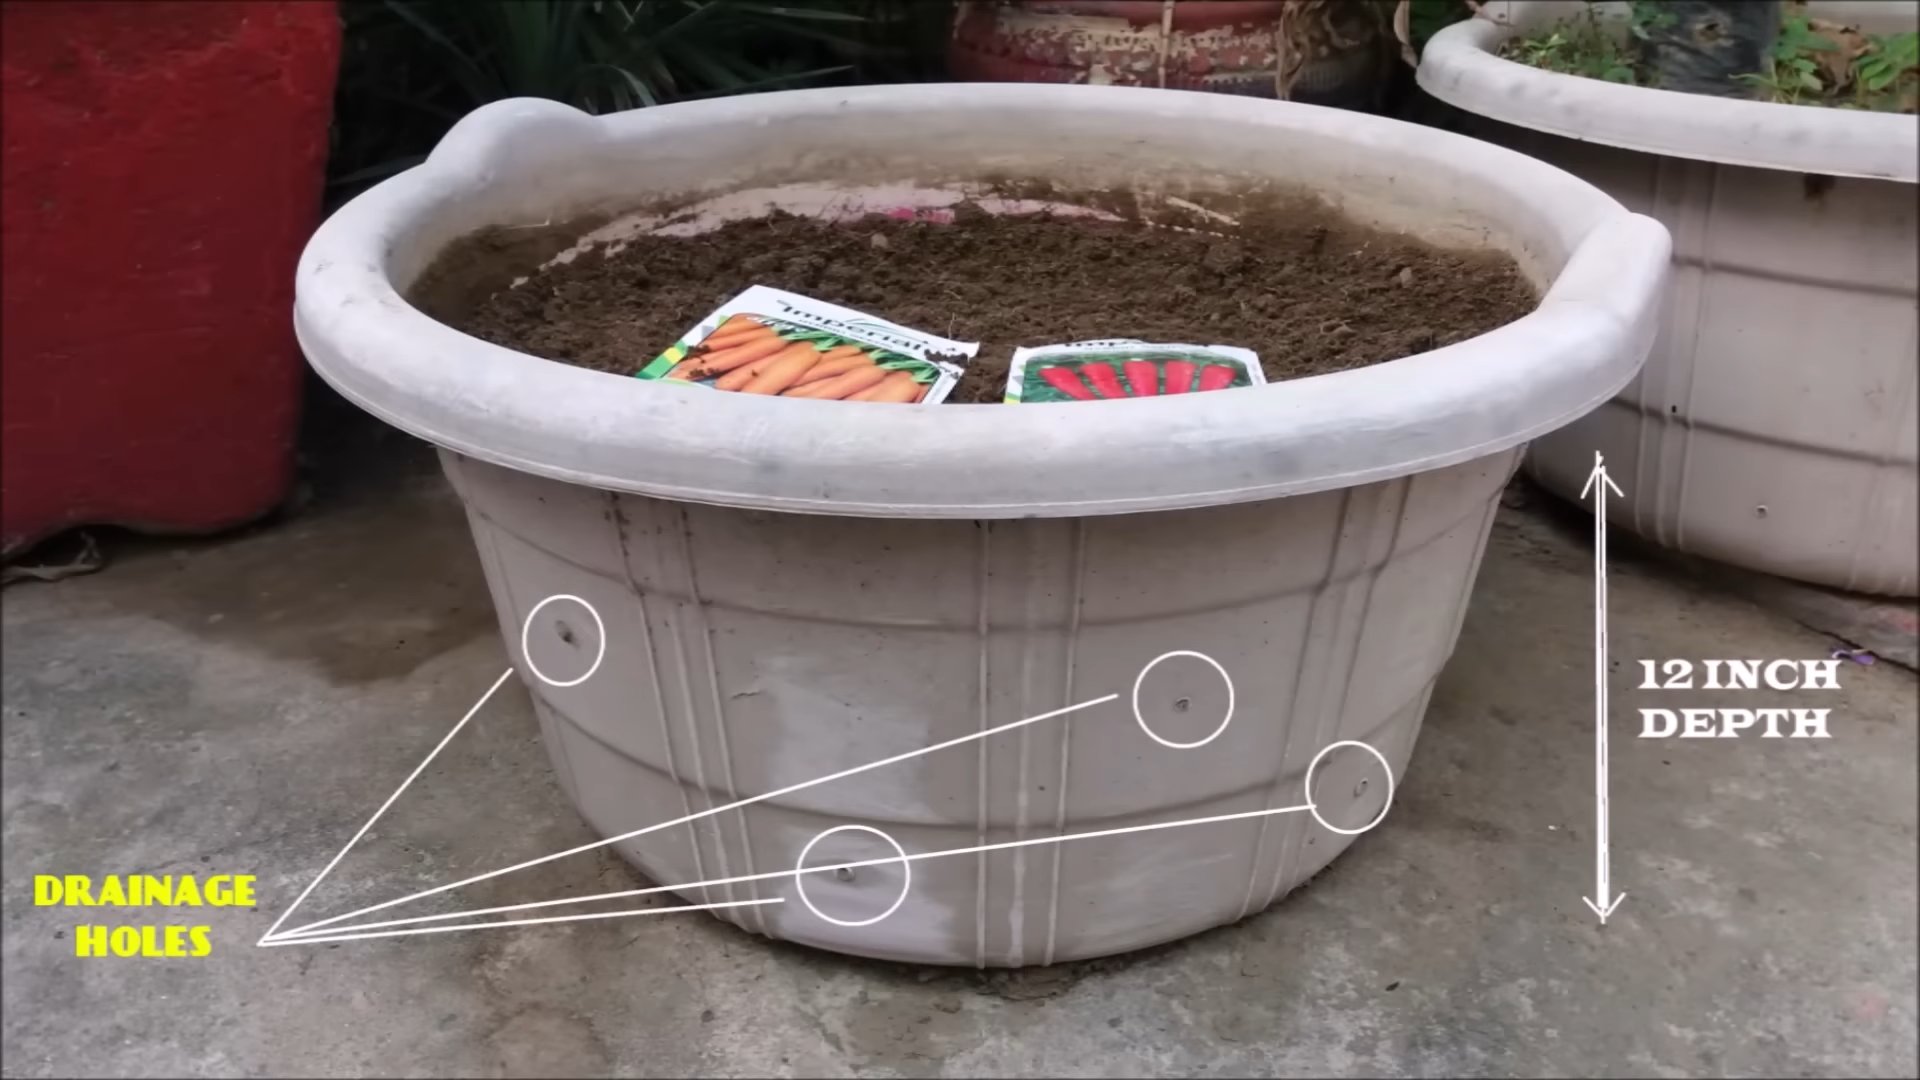
Wählt einen Topf mit einem Durchmesser von mindestens 20 cm und einer Tiefe von mindestens 20 cm. Je größer der Topf, desto besser!
Die richtige Erde
Verwendet eine lockere, sandige Erde. Ihr könnt auch spezielle Gemüseerde verwenden.
Die Aussaat im Topf
Die Aussaat im Topf erfolgt genauso wie im Garten. Achtet darauf, dass der Topf ausreichend Wasserabzugslöcher hat, damit sich keine Staunässe bildet.
Die Pflege im Topf
Die Pflege im Topf ist etwas aufwendiger als im Garten, da die Erde schneller austrocknet. Gießt die Karotten regelmäßig und düngt sie alle paar Wochen mit einem organischen Dünger.
Häufige Probleme und Lösungen
Auch beim Karottenanbau kann es zu Problemen kommen. Hier sind einige häufige Probleme und wie ihr sie lösen könnt:
- Schlechte Keimung: Wenn die Samen nicht keimen, kann das verschiedene Ursachen haben. Möglicherweise ist das Saatgut zu alt, der Boden zu trocken oder zu kalt. Achtet darauf, hochwertiges Saatgut zu verwenden, den Boden feucht zu halten und die Samen nicht zu früh im Jahr auszusäen.
- Verkrümmte Karotten: Verkrümmte Karotten entstehen oft durch zu festen Boden oder Steine im Boden. Lockert den Boden vor der Aussaat gründlich auf und entfernt Steine.
- Befall mit der Möhrenfliege: Die Möhrenfliege legt ihre Eier an den Karotten ab. Die Larven fressen sich dann in die Karotten und verursachen Schäden. Um eure Karotten zu schützen, könnt ihr ein Insektenschutznetz über das Beet spannen oder spezielle Fallen aufstellen.
- Blattläuse: Blattläuse saugen an den Blättern der Karotten und schwächen die Pflanzen. Ihr könnt Blattläuse mit einem Wasserstrahl abspritzen oder mit einem biologischen Insektizid bekämpfen.
Ich hoffe, diese Anleitung hilft euch dabei, eure eigenen Karotten erfolgreich anzubauen. Viel Spaß beim Gärtnern und guten Appetit!
Conclusion
So, there you have it! Growing carrots at home, while it might seem daunting at first, is an incredibly rewarding experience that puts fresh, flavorful produce right at your fingertips. Forget those bland, store-bought carrots imagine the vibrant color and unparalleled sweetness of a carrot you nurtured from seed to harvest. This DIY trick isn’t just about saving money; it’s about connecting with nature, understanding the food you eat, and enjoying the satisfaction of creating something delicious.
This method, focusing on container gardening, is a must-try for several reasons. First, it’s incredibly accessible, even if you lack a traditional garden space. A sunny balcony, a patio, or even a well-lit windowsill can become your personal carrot patch. Second, it gives you complete control over the growing environment, allowing you to optimize soil conditions, watering schedules, and pest control, leading to healthier and more productive plants. Finally, it’s a fantastic learning experience for gardeners of all levels, from beginners to seasoned pros.
But don’t stop there! Experiment with different carrot varieties. Nantes carrots are known for their sweet flavor and cylindrical shape, perfect for slicing and dicing. Chantenay carrots are shorter and stouter, ideal for heavier soils or shallower containers. Rainbow carrots offer a stunning visual appeal, adding a pop of color to your garden and your plate. You can also try companion planting. Marigolds can help deter nematodes, while rosemary can repel carrot flies.
Consider adding a slow-release fertilizer specifically formulated for root vegetables to boost growth and ensure a bountiful harvest. Remember to thin your seedlings regularly to give each carrot enough space to develop properly. And don’t be afraid to get your hands dirty! Gardening is a tactile experience, and the more you engage with your plants, the better you’ll understand their needs.
We’re confident that you’ll find this DIY approach to growing carrots at home both enjoyable and successful. The taste of homegrown carrots is simply unmatched, and the pride you’ll feel when you harvest your first batch is truly special.
So, grab your seeds, prepare your containers, and get ready to embark on a rewarding gardening adventure. We encourage you to try this DIY trick and share your experiences with us! Let us know what varieties you’re growing, what challenges you’ve faced, and what successes you’ve celebrated. Share your photos, your tips, and your stories in the comments below. We can’t wait to hear about your homegrown carrot journey! Happy gardening!
Frequently Asked Questions (FAQ)
What kind of container is best for growing carrots?
The most important factor is depth. Carrots need room to grow downwards, so choose a container that is at least 12 inches deep, and preferably 18 inches for longer varieties. A wide container is also beneficial, allowing you to plant multiple carrots. Consider using plastic pots, terracotta pots, or even repurposed containers like buckets or tubs. Make sure the container has drainage holes to prevent waterlogging. Fabric pots are also a great option as they allow for excellent drainage and aeration.
What type of soil should I use for growing carrots in containers?
Carrots thrive in loose, well-draining soil. Avoid heavy clay soils, as they can hinder root development and result in misshapen carrots. A good potting mix specifically formulated for vegetables is ideal. You can also create your own mix by combining equal parts of compost, peat moss (or coconut coir), and perlite or vermiculite. The compost provides nutrients, the peat moss or coconut coir retains moisture, and the perlite or vermiculite improves drainage. Avoid adding too much nitrogen-rich fertilizer, as this can encourage leafy growth at the expense of root development.
How often should I water my carrot plants?
Carrots need consistent moisture to grow properly, but avoid overwatering, which can lead to root rot. Water deeply when the top inch of soil feels dry to the touch. Check the soil moisture regularly, especially during hot, dry weather. Water in the morning to allow the foliage to dry before nightfall, which can help prevent fungal diseases. Using a watering can or a hose with a gentle spray nozzle is preferable to avoid disturbing the soil and damaging the delicate seedlings.
How much sunlight do carrots need?
Carrots need at least six hours of sunlight per day to thrive. Choose a location that receives full sun for the majority of the day. If you live in a particularly hot climate, some afternoon shade may be beneficial to prevent the soil from drying out too quickly. If you’re growing carrots indoors, supplement with grow lights if necessary to ensure they receive adequate light.
When is the best time to plant carrots?
Carrots are a cool-season crop, so the best time to plant them is in early spring or late summer. In warmer climates, you can plant carrots throughout the fall and winter. Avoid planting during the hottest months of the year, as high temperatures can inhibit germination and growth. Check your local planting calendar for specific recommendations based on your region’s climate.
How long does it take for carrots to grow?
Carrots typically take 60-80 days to mature, depending on the variety. Check the seed packet for specific information on the maturity time for the carrots you’re growing. You can start harvesting carrots when they reach a usable size, even if they’re not fully mature. Baby carrots can be harvested as early as 50 days.
What are some common pests and diseases that affect carrots?
Common pests that affect carrots include carrot rust flies, aphids, and nematodes. Carrot rust flies lay their eggs near the base of the plants, and the larvae burrow into the roots, causing damage. Aphids suck sap from the foliage, weakening the plants. Nematodes are microscopic worms that live in the soil and feed on the roots. To prevent pest problems, practice good garden hygiene, such as removing weeds and debris that can harbor pests. You can also use row covers to protect your plants from carrot rust flies. Common diseases that affect carrots include leaf blight and root rot. To prevent disease problems, ensure good air circulation around your plants and avoid overwatering.
How do I know when my carrots are ready to harvest?
The best way to tell if your carrots are ready to harvest is to check the size of the roots. Gently brush away some of the soil around the base of the plant to expose the top of the carrot. If the carrot is the size you desire, you can harvest it. You can also harvest a few carrots as a test to see if they’re ready. To harvest carrots, gently loosen the soil around the plant and pull the carrot straight up.
Can I grow carrots from carrot tops?
While you can’t grow a full carrot from a carrot top, you can regrow the greens. Place the carrot top in a shallow dish of water, with the cut side down. Place the dish in a sunny location and change the water every day. After a few days, the carrot top will start to sprout new greens. You can use these greens in salads or as a garnish.
What are some tips for getting the best flavor from homegrown carrots?
Harvest carrots in the morning, when they’re at their sweetest. Avoid harvesting carrots after a heavy rain, as they may be waterlogged and less flavorful. Store carrots in the refrigerator in a plastic bag or container to keep them fresh. You can also freeze carrots for longer storage. Roasting carrots brings out their natural sweetness.
Leave a Comment