

Grow Celery Water Efficiently and unlock the secrets to a thriving, crisp celery harvest, even when water is scarce! Have you ever dreamed of plucking fresh, crunchy celery stalks straight from your own backyard, knowing you’re doing your part for the environment? Well, dream no more! This DIY guide is packed with simple, yet incredibly effective tricks to help you cultivate a water-wise celery patch that will be the envy of all your gardening friends.
Celery, with its refreshing crunch and versatility in the kitchen, has a rich history. Originating in the Mediterranean, it was initially valued for its medicinal properties before becoming a culinary staple. Today, with increasing concerns about water conservation, learning to grow celery water efficiently is more important than ever. Traditional methods can be quite water-intensive, but I’m here to show you how to bypass those thirsty techniques and embrace a more sustainable approach.
Why is this DIY trick so crucial? Because water is a precious resource, and by adopting these methods, you’ll not only reduce your water bill but also contribute to a healthier planet. Plus, imagine the satisfaction of knowing you’re growing delicious, healthy celery in an eco-conscious way. So, let’s dive in and discover the secrets to a bountiful, water-smart celery garden!
Grow Celery From Kitchen Scraps: A Water-Wise DIY Guide
Hey there, fellow gardeners! Are you tired of throwing away the base of your celery stalks? Did you know you can actually regrow them, saving money and reducing food waste? Plus, this method is surprisingly water-efficient, perfect for those of us looking to conserve water in our gardens. I’m going to walk you through the whole process, step-by-step, so you can enjoy fresh celery without constantly running to the grocery store. Let’s get started!
What You’ll Need
Before we dive in, let’s gather our supplies. This is a pretty simple project, so you probably already have most of these items on hand:
* Celery stalk base (about 2 inches from the bottom, with the root end intact)
* Shallow dish or bowl
* Water
* Spray bottle
* Potting soil
* Small pot (4-6 inches in diameter)
* Gardening gloves (optional, but recommended)
* Sunny windowsill or grow light
Phase 1: Rooting Your Celery Base
This is where the magic begins! We’re going to coax those little celery cells into growing new roots.
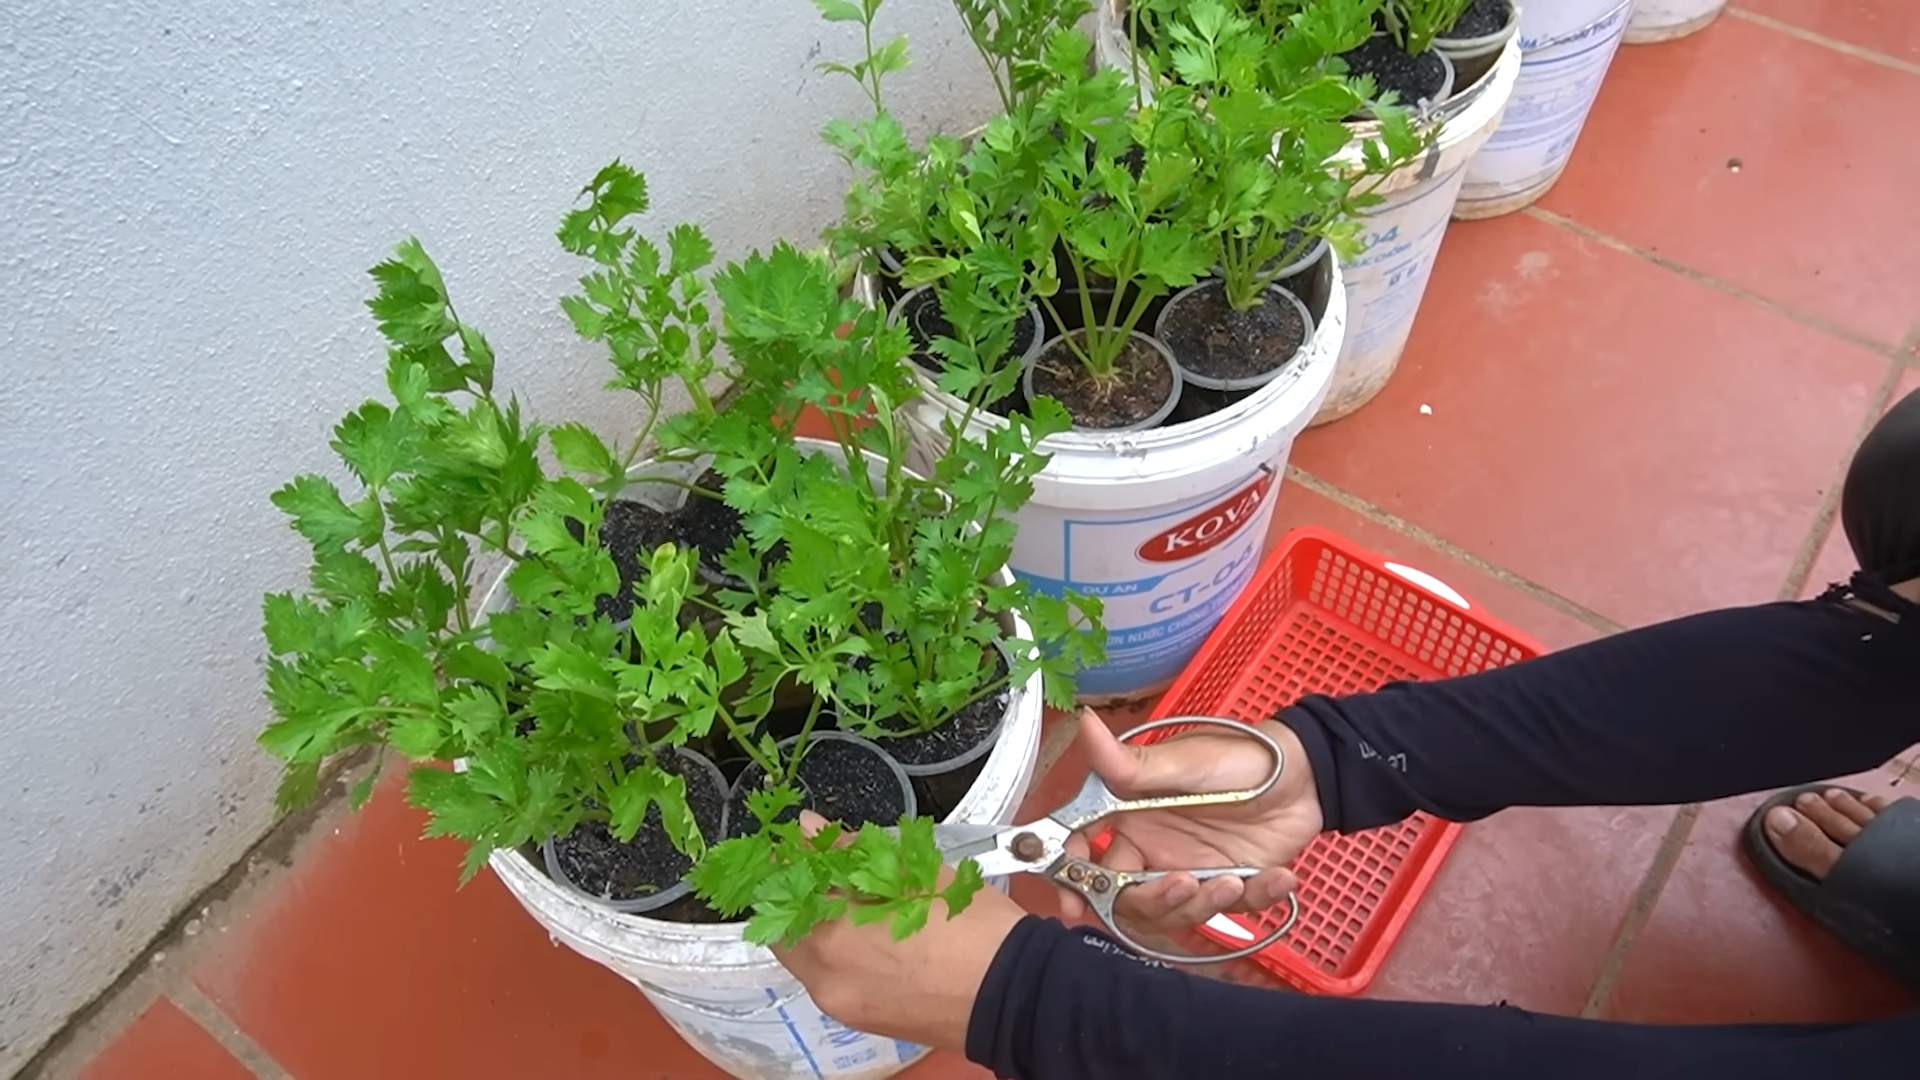
1. Prepare the Celery Base: After you’ve used the celery stalks for cooking or snacking, don’t toss the base! Make sure it’s about 2 inches tall. Gently clean off any dirt or debris.
2. Place in Water: Fill your shallow dish or bowl with about an inch of water. Place the celery base, cut-side up, in the water. The water level should just touch the bottom of the celery. You don’t want to submerge the entire base, as this can lead to rot.
3. Find a Sunny Spot: Place the dish with the celery base on a sunny windowsill or under a grow light. Celery needs plenty of light to thrive.
4. Change the Water Regularly: This is crucial! Change the water every 1-2 days to prevent bacteria growth and keep the water fresh. This will encourage healthy root development.
5. Observe and Wait: Over the next few days, you should start to see small roots emerging from the bottom of the celery base. You’ll also notice new green leaves sprouting from the center. This is a sign that your celery is happy and healthy! This process usually takes about 5-7 days, but it can vary depending on the temperature and light conditions.
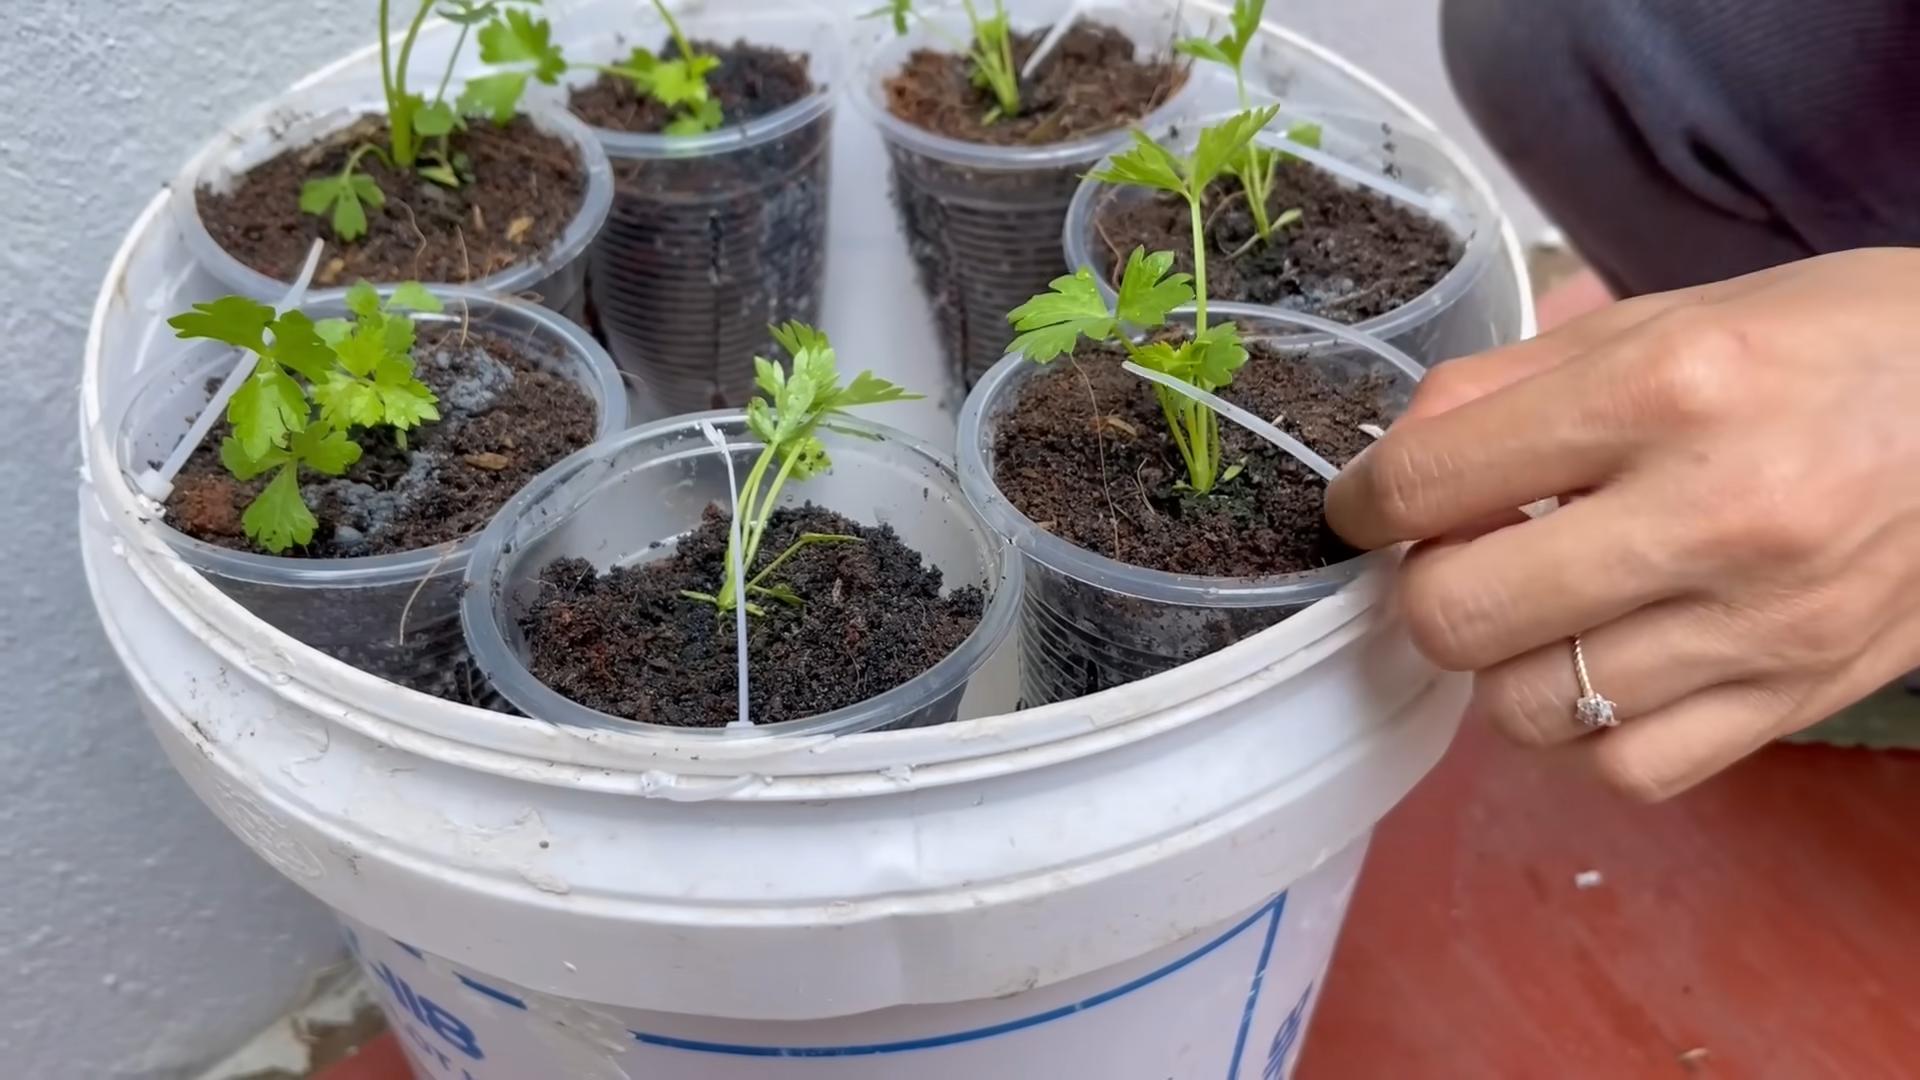
Phase 2: Planting Your Celery
Once your celery has developed a good root system, it’s time to move it to a pot with soil.
1. Prepare the Pot: Fill your small pot with potting soil. Make sure the pot has drainage holes to prevent waterlogging. Gently moisten the soil with water. You don’t want it soaking wet, just damp.
2. Carefully Remove the Celery: Gently lift the celery base from the water. Be careful not to damage the delicate roots.
3. Plant the Celery: Create a small hole in the center of the potting soil. Place the celery base in the hole, making sure the roots are spread out. Cover the roots with soil, leaving the top of the celery base (where the new leaves are growing) exposed.
4. Water Gently: Water the newly planted celery gently, making sure the soil is evenly moist. Avoid overwatering, as this can lead to root rot.
5. Return to Sunny Spot: Place the pot back on the sunny windowsill or under the grow light.
Phase 3: Caring for Your Growing Celery
Now that your celery is planted, it’s time to provide it with the care it needs to flourish.
1. Watering: Celery needs consistent moisture, but it doesn’t like to be waterlogged. Water the plant when the top inch of soil feels dry to the touch. A good rule of thumb is to water deeply once or twice a week, depending on the weather conditions. Remember, we’re aiming for water efficiency here, so avoid unnecessary watering. Check the soil moisture before you water.
2. Sunlight: Celery loves sunlight! Make sure your plant gets at least 6 hours of direct sunlight per day. If you don’t have a sunny windowsill, consider using a grow light.
3. Fertilizing (Optional): If you want to give your celery a boost, you can fertilize it every few weeks with a balanced liquid fertilizer. Follow the instructions on the fertilizer label. However, I’ve found that celery grown from scraps often does just fine without fertilizer, especially if you’re using good quality potting soil.
4. Pest Control: Keep an eye out for pests like aphids or spider mites. If you notice any pests, you can try spraying the plant with a mixture of water and dish soap. You can also purchase organic pest control products from your local garden center.
5. Harvesting: You can start harvesting your celery when the stalks are about 6-8 inches tall. Simply cut off the stalks you need, leaving the base of the plant intact. The celery will continue to grow and produce more stalks.
Water-Wise Tips for Celery Growing
Here are some additional tips to help you conserve water while growing celery:
* Mulch: Apply a layer of mulch around the base of the plant to help retain moisture in the soil. Straw, wood chips, or shredded leaves are all good options.
* Water in the Morning: Water your celery in the morning to minimize water loss due to evaporation.
* Use a Self-Watering Pot: Consider using a self-watering pot to help regulate the amount of water your celery receives.
* Collect Rainwater: Collect rainwater to use for watering your plants. This is a great way to conserve water and provide your plants with a natural source of hydration.
* Group Plants Together: Grouping plants with similar watering needs together can help you water more efficiently.
Troubleshooting
Sometimes, things don’t go exactly as planned. Here are some common problems you might encounter and how to fix them:
* Celery base is rotting: This is usually caused by overwatering or not changing the water frequently enough. Make sure the water level is just touching the bottom of the celery base and change the water every 1-2 days.
* No roots are growing: This could be due to a lack of sunlight or using tap water with high chlorine content. Try moving the celery to a sunnier location and using filtered water.
* Leaves are turning yellow: This could be a sign of overwatering or nutrient deficiency. Make sure the soil is well-draining and consider fertilizing the plant.
* Plant is wilting: This could be due to underwatering or extreme heat. Water the plant deeply and provide some shade during the hottest part of the day.
Enjoy Your Homegrown Celery!
Growing celery from kitchen scraps is a fun and rewarding project that can save you money and reduce food waste. Plus, it’s a great way to conserve water in your garden. With a little patience and care, you can enjoy fresh, homegrown celery all season long. I hope you found this guide helpful. Happy gardening!
Conclusion
So, there you have it! Growing celery water efficiently isn’t just a pipe dream; it’s an achievable reality with this simple, yet effective DIY trick. We’ve walked you through the process, highlighting how you can significantly reduce water waste while still enjoying a bountiful harvest of crisp, delicious celery. This method isn’t just about saving water; it’s about becoming a more conscious and sustainable gardener, contributing to a healthier planet one celery stalk at a time.
The beauty of this DIY approach lies in its adaptability. Feel free to experiment with different container sizes to suit your space and needs. Consider using recycled plastic bottles or even repurposed milk jugs to further minimize your environmental impact. You can also adjust the wick material based on what you have readily available – cotton strips, felt, or even old t-shirt scraps can work wonders.
For those living in particularly hot and dry climates, consider adding a layer of mulch around the base of your celery plants to further conserve moisture and regulate soil temperature. You might also want to explore using a larger reservoir to extend the time between refills.
Don’t be afraid to get creative and personalize this method to fit your specific gardening conditions and preferences. The key is to ensure that the wick is consistently drawing water up to the soil, providing your celery plants with the hydration they need to thrive.
This method of growing celery water efficiently is a game-changer for both novice and experienced gardeners. It’s a cost-effective, environmentally friendly, and incredibly rewarding way to cultivate your own fresh produce. Imagine the satisfaction of harvesting your own celery, knowing that you’ve done so in a way that minimizes water usage and maximizes resourcefulness.
We wholeheartedly encourage you to give this DIY trick a try. It’s a simple project that yields significant results, both in terms of water conservation and the quality of your celery harvest. Once you’ve experienced the benefits of this method firsthand, we’re confident that you’ll be hooked!
But don’t just take our word for it. We want to hear about your experiences! Share your tips, tricks, and variations in the comments below. Let’s create a community of sustainable gardeners who are passionate about growing their own food while minimizing their environmental footprint. Your insights could inspire others to adopt this water-efficient method and contribute to a more sustainable future.
So, grab your celery starts, gather your materials, and get ready to embark on a journey of water-wise gardening. We’re excited to see what you create! Happy growing!
Frequently Asked Questions (FAQ)
What type of celery is best suited for this water-efficient growing method?
While this method works well for most celery varieties, some may perform better than others depending on your local climate and soil conditions. Generally, Pascal celery, known for its crisp stalks and robust flavor, is a popular choice. However, you can experiment with other varieties like Golden Self-Blanching or Redventure to see which thrives best in your garden. Consider factors like disease resistance and maturity time when selecting your celery variety.
How often do I need to refill the water reservoir?
The frequency of refills will depend on several factors, including the size of your reservoir, the size of your celery plants, the ambient temperature, and the humidity levels. In hotter, drier climates, you’ll likely need to refill the reservoir more frequently than in cooler, more humid climates. As a general guideline, check the water level in the reservoir every day or two, especially during the peak growing season. If the water level is significantly lower, it’s time to refill. You can also monitor the moisture level of the soil near the base of the celery plants. If the soil feels dry to the touch, it’s a good indication that the reservoir needs refilling.
Can I use fertilizer with this water-efficient growing method?
Yes, you can definitely use fertilizer to boost the growth and health of your celery plants. However, it’s important to use a water-soluble fertilizer and to dilute it according to the manufacturer’s instructions. Add the diluted fertilizer to the water reservoir when you refill it. This will ensure that the nutrients are evenly distributed to the plants as they draw water up through the wick. Avoid using granular fertilizers, as they may not dissolve properly and could clog the wick. Organic options like compost tea or liquid seaweed extract are also excellent choices for providing essential nutrients to your celery plants.
What type of wick material is best to use?
The best wick material is one that is absorbent, durable, and resistant to degradation. Cotton strips, felt, and even old t-shirt scraps are all viable options. Cotton is a natural fiber that is highly absorbent, making it an excellent choice for drawing water up to the soil. Felt is also a good option, as it is relatively durable and can hold a significant amount of water. If you’re using old t-shirt scraps, choose a fabric that is made from natural fibers like cotton or linen. Avoid using synthetic fabrics, as they may not be as absorbent. Experiment with different materials to see which works best for you.
How do I prevent algae growth in the water reservoir?
Algae growth in the water reservoir can be a common problem, especially in sunny locations. To prevent algae growth, try using an opaque container for the reservoir. This will block sunlight from reaching the water, which is essential for algae to thrive. You can also add a small amount of hydrogen peroxide to the water reservoir. Hydrogen peroxide is a natural disinfectant that can help to kill algae and other microorganisms. Use a diluted solution of about 1 tablespoon of 3% hydrogen peroxide per gallon of water. Alternatively, you can add a copper penny to the reservoir. Copper is a natural algaecide that can help to prevent algae growth. Make sure the penny is clean and free of any coatings.
What if my celery plants start to wilt despite having water in the reservoir?
If your celery plants are wilting despite having water in the reservoir, there could be several reasons. First, check to make sure that the wick is properly inserted into the soil and that it is making good contact with the water in the reservoir. If the wick is not functioning properly, it may not be drawing enough water up to the soil. Second, check the soil moisture level. If the soil feels dry to the touch, even near the base of the plants, it could indicate that the wick is not working effectively or that the plants are not getting enough water. Third, consider the possibility of root rot. Root rot can occur if the soil is consistently waterlogged, even with this water-efficient method. Ensure that the soil is well-draining and that the plants are not sitting in standing water. Finally, check for pests or diseases that could be affecting the plants’ ability to absorb water.
Can I use this method for other vegetables besides celery?
Yes, this water-efficient growing method can be adapted for other vegetables that require consistent moisture, such as lettuce, spinach, and herbs like basil and mint. The key is to choose plants that have similar water requirements and to adjust the size of the container and the wick accordingly. For larger plants, you may need to use a larger reservoir and a thicker wick to ensure that they receive enough water. Experiment with different vegetables to see which ones thrive best using this method.
How do I know when my celery is ready to harvest?
Celery is typically ready to harvest when the stalks are at least 6-8 inches long and have reached a desired thickness. The stalks should be firm and crisp, not limp or wilted. You can harvest individual stalks as needed, or you can harvest the entire plant at once. To harvest, simply cut the stalks at the base of the plant using a sharp knife. After harvesting, store the celery in the refrigerator to keep it fresh and crisp.

Leave a Comment