

Grow Chili Peppers Easily, even if you think you don’t have a green thumb! Have you ever dreamed of adding a fiery kick to your meals with peppers you’ve grown yourself? Imagine the satisfaction of harvesting vibrant, flavorful chili peppers right from your own backyard or balcony. This isn’t just a pipe dream; it’s an achievable reality with a few simple tricks and DIY hacks.
Chili peppers have a rich history, dating back thousands of years in South America, where they were not only a culinary staple but also held cultural and medicinal significance. From ancient civilizations to modern-day cuisine, these fiery fruits have captivated palates and added zest to dishes around the world. I think it’s amazing how something so small can pack such a powerful punch!
But why should you learn to grow chili peppers easily? Well, store-bought peppers can be expensive and sometimes lack the intense flavor you crave. Plus, growing your own allows you to control the entire process, ensuring you’re using organic methods and getting the freshest, most flavorful peppers possible. In this article, I’m going to share some of my favorite DIY tricks and hacks that will help you cultivate a thriving chili pepper garden, no matter your experience level. Get ready to spice up your life!
Growing Chili Peppers: My Foolproof DIY Guide
Hey there, fellow spice enthusiasts! I’m so excited to share my tried-and-true method for growing chili peppers at home. Trust me, even if you think you have a black thumb, you can do this! I’ve broken it down into easy-to-follow steps, so you’ll be harvesting your own fiery peppers in no time.
Choosing Your Chili Pepper Variety
Before we dive into the nitty-gritty, let’s talk about choosing the right chili pepper for you. There are literally hundreds of varieties, ranging from mild bell peppers to scorching habaneros. Consider your heat tolerance and what you plan to use the peppers for.
* Mild Peppers: Anaheim, Poblano, Jalapeño (some can be quite spicy!), Banana Pepper
* Medium Peppers: Serrano, Cayenne, Thai Chili
* Hot Peppers: Habanero, Scotch Bonnet, Bird’s Eye Chili
* Extremely Hot Peppers: Ghost Pepper (Bhut Jolokia), Carolina Reaper, Trinidad Scorpion
I personally love growing a mix of Jalapeños for everyday cooking and Habaneros for adding a serious kick to my salsas.
Starting Your Chili Pepper Seeds
Starting from seed gives you the most control over your plants and allows you to grow varieties that might not be available at your local nursery.
What You’ll Need:
* Chili pepper seeds
* Seed starting tray or small pots
* Seed starting mix (a light, sterile mix is crucial)
* Spray bottle
* Heat mat (optional, but highly recommended)
* Grow light (optional, but beneficial)
* Clear plastic dome or plastic wrap
Step-by-Step Instructions:
1. Prepare Your Seed Starting Tray: Fill your seed starting tray or small pots with seed starting mix. Gently tap the tray to settle the mix.
2. Sow the Seeds: Make a small indentation (about ¼ inch deep) in the center of each cell or pot. Place 1-2 seeds in each indentation. Cover the seeds with a thin layer of seed starting mix.
3. Water Gently: Use a spray bottle to mist the soil thoroughly. You want the soil to be moist, but not soggy.
4. Create a Humid Environment: Cover the tray with a clear plastic dome or plastic wrap to create a humid environment. This helps the seeds germinate.
5. Provide Warmth: Place the tray on a heat mat. Chili pepper seeds germinate best in warm temperatures (around 80-85°F). If you don’t have a heat mat, find a warm spot in your house, like on top of your refrigerator.
6. Provide Light (After Germination): Once the seeds germinate (usually within 7-14 days), remove the plastic dome or plastic wrap and place the tray under a grow light or in a sunny window. If using a grow light, keep it a few inches above the seedlings.
7. Water Regularly: Keep the soil consistently moist, but not waterlogged. Water when the top inch of soil feels dry to the touch.
8. Thin Seedlings (If Necessary): If more than one seed germinated in a cell or pot, thin the seedlings to one strong plant per cell or pot. Snip off the weaker seedlings at the soil line with scissors.
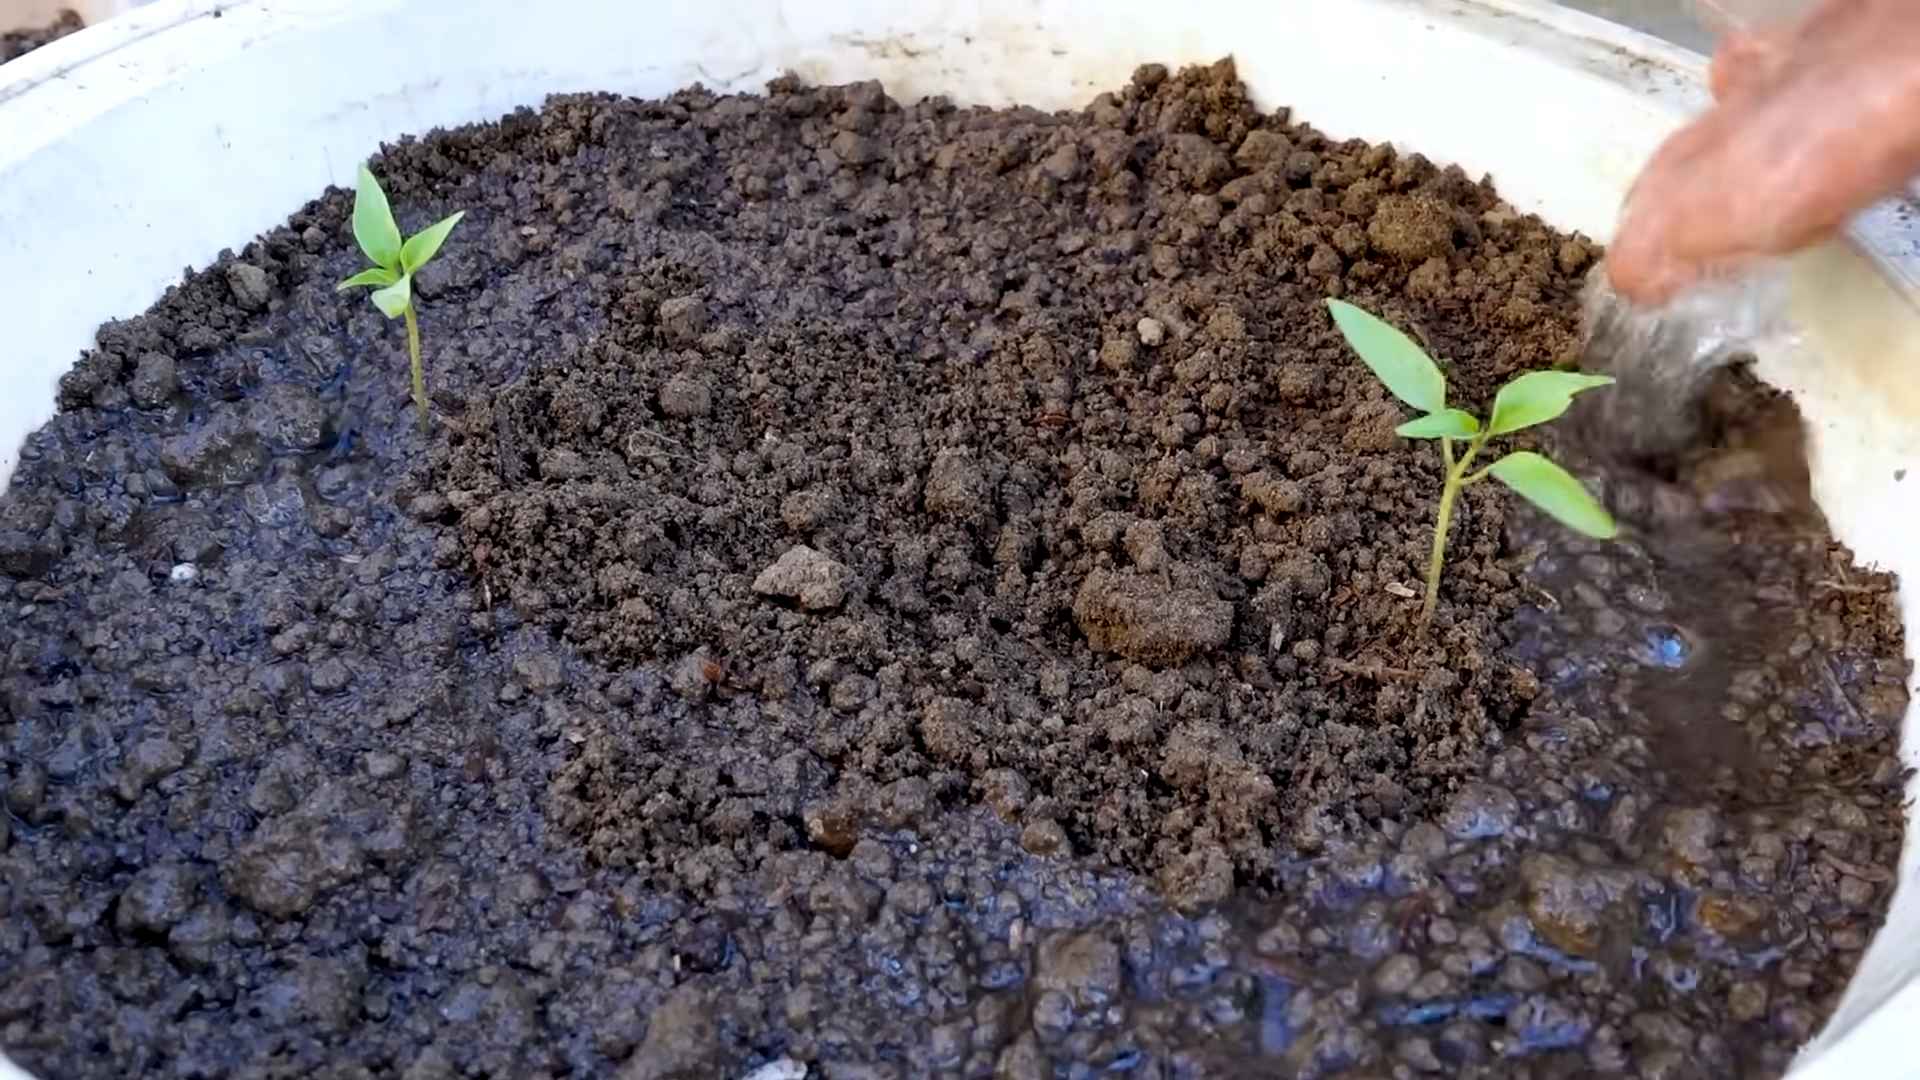
Transplanting Your Chili Pepper Seedlings
Once your seedlings have developed a few sets of true leaves (the leaves that look like miniature versions of the adult plant’s leaves), they’re ready to be transplanted into larger pots or directly into your garden.
What You’ll Need:
* Larger pots (at least 6 inches in diameter) or a prepared garden bed
* Potting mix or garden soil
* Trowel
* Watering can
* Fertilizer (optional)
Step-by-Step Instructions:
1. Harden Off Your Seedlings: Before transplanting your seedlings outdoors, you need to “harden them off.” This means gradually exposing them to outdoor conditions over a period of 7-10 days. Start by placing them in a sheltered spot outdoors for an hour or two each day, gradually increasing the amount of time they spend outside. This helps them acclimate to the sun, wind, and temperature changes.
2. Prepare Your Pots or Garden Bed: Fill your larger pots with potting mix or prepare your garden bed by loosening the soil and adding compost or other organic matter. Chili peppers prefer well-drained soil.
3. Transplant the Seedlings: Gently remove the seedlings from their seed starting tray or small pots. Be careful not to damage the roots.
4. Plant the Seedlings: Dig a hole in the potting mix or garden soil that is large enough to accommodate the root ball. Place the seedling in the hole and gently backfill with soil.
5. Water Thoroughly: Water the seedlings thoroughly after transplanting.
6. Fertilize (Optional): If desired, you can fertilize your chili pepper plants with a balanced fertilizer. Follow the instructions on the fertilizer package.
Caring for Your Chili Pepper Plants
Now that your chili pepper plants are in their permanent homes, it’s time to provide them with the care they need to thrive.
Sunlight: Chili peppers need at least 6-8 hours of sunlight per day. Choose a sunny location in your garden or place your potted plants in a sunny spot on your patio or balcony.
Watering: Water your chili pepper plants regularly, especially during hot, dry weather. Water deeply, allowing the soil to dry out slightly between waterings. Avoid overwatering, as this can lead to root rot.
Fertilizing: Fertilize your chili pepper plants every 2-3 weeks with a balanced fertilizer or a fertilizer specifically formulated for peppers and tomatoes.
Pruning: Pruning is not essential for chili pepper plants, but it can help to improve air circulation and encourage bushier growth. You can prune off any dead or yellowing leaves.
Pest and Disease Control: Keep an eye out for pests and diseases. Common pests of chili peppers include aphids, spider mites, and whiteflies. Common diseases include blossom end rot and fungal diseases. Treat any problems promptly with appropriate organic or chemical controls. I personally prefer using neem oil for pest control.
Support: As your chili pepper plants grow, they may need support to prevent them from falling over. You can use stakes, cages, or trellises to support the plants.
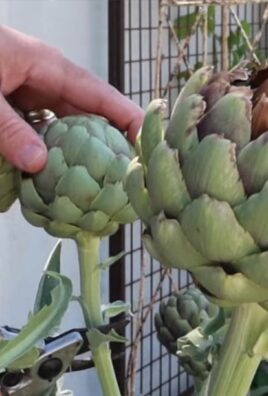
Harvesting Your Chili Peppers
The moment you’ve been waiting for! Harvesting your chili peppers is the most rewarding part of the process.
When to Harvest: The best time to harvest your chili peppers depends on the variety and your personal preference. Generally, chili peppers are ready to harvest when they have reached their mature size and color. For example, Jalapeños are typically harvested when they are dark green and about 2-3 inches long. Habaneros are typically harvested when they are bright orange or red.
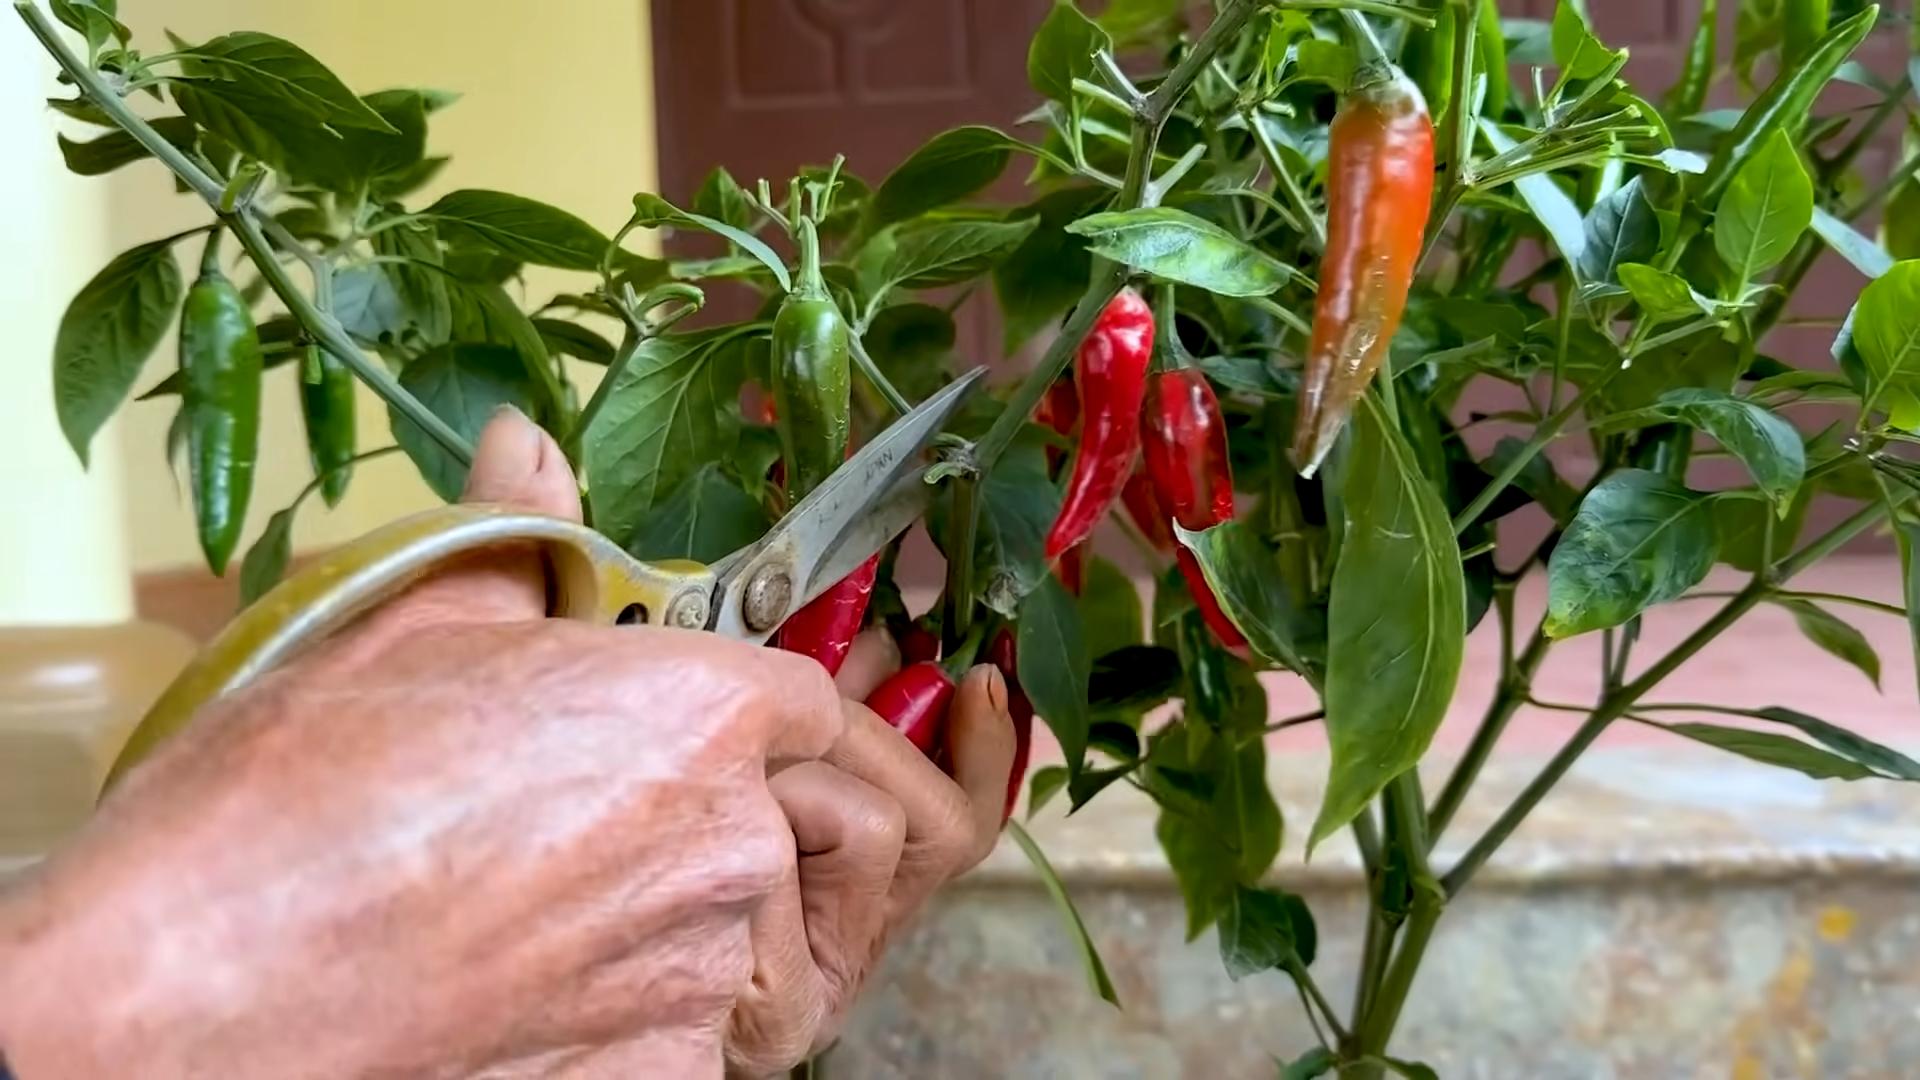
How to Harvest: Use scissors or pruning shears to cut the peppers from the plant. Be careful not to damage the plant.
Handling Hot Peppers: This is important! When handling hot peppers, wear gloves to protect your skin from the capsaicin, the chemical that makes peppers hot. Avoid touching your eyes or face after handling hot peppers.
Troubleshooting Common Problems
Even with the best care, you may encounter some problems while growing chili peppers. Here are some common problems and how to fix them:
* Blossom End Rot: This is a condition that causes the bottom of the peppers to rot. It is usually caused by a calcium deficiency. To prevent blossom end rot, make sure your soil is rich in calcium and water your plants consistently.
* Aphids: These small, sap-sucking insects can weaken your plants. Treat aphids with insecticidal soap or neem oil.
* Spider Mites: These tiny pests can cause yellowing and stippling on the leaves. Treat spider mites with insecticidal soap or neem oil.
* Fungal Diseases: Fungal diseases can cause spots on the leaves and stems. Prevent fungal diseases by providing good air circulation and avoiding overwatering. Treat fungal diseases with a fungicide.
Enjoying Your Harvest
Now that you’ve harvested your chili peppers, it’s time to enjoy them! You can use them fresh in salsas, sauces, and other dishes. You can also dry them, pickle them, or freeze them for later use.
I love making homemade chili oil with my dried peppers. It’s so easy! Just toast the dried peppers in a pan, then grind them up and infuse them in hot oil. Delicious!
Growing chili peppers is a fun and rewarding experience. With a little bit of care and attention, you can enjoy a bountiful harvest of your own homegrown peppers. Happy growing!
Conclusion
So, there you have it! Growing chili peppers easily doesn’t have to be a daunting task reserved for seasoned gardeners. With this simple, yet effective DIY trick, you can transform your chili pepper growing experience from frustrating to fruitful. We’ve shown you how to create the perfect environment for your chili plants to thrive, maximizing their yield and ensuring a bountiful harvest of fiery goodness.
This method isn’t just about ease; it’s about empowerment. It’s about taking control of your food source, understanding the needs of your plants, and reaping the rewards of your labor. Imagine the satisfaction of adding your own homegrown chili peppers to your favorite dishes, knowing that you nurtured them from seedling to spicy perfection.
But the beauty of this DIY trick lies in its adaptability. Feel free to experiment with different types of containers, soil mixtures, and even companion plants to further enhance your chili pepper growing journey. Consider adding marigolds to your chili pepper patch to deter pests, or try using a self-watering container to minimize the need for constant monitoring. You could even explore different methods of providing support for your plants as they grow taller and heavier with peppers.
For those who prefer a milder flavor, bell peppers can be grown using the same technique. Simply adjust the variety of pepper you plant, and you’ll be enjoying fresh, crisp bell peppers in no time. If you’re feeling adventurous, why not try growing a variety of chili peppers with different heat levels? From the mild poblano to the scorching habanero, the possibilities are endless.
We’re confident that this DIY trick will revolutionize the way you grow chili peppers. It’s a game-changer for both beginner and experienced gardeners alike. It’s time to ditch the complicated methods and embrace a simpler, more effective approach.
Don’t just take our word for it, though. We encourage you to try this DIY trick for yourself and witness the incredible results firsthand. Plant your chili pepper seeds, follow our simple instructions, and watch your plants flourish.
And most importantly, we want to hear about your experience! Share your success stories, your challenges, and your variations on this DIY trick in the comments below. Let’s create a community of chili pepper enthusiasts who are passionate about growing their own food and sharing their knowledge with others. Together, we can unlock the secrets to growing the perfect chili peppers and enjoy the delicious rewards of our labor. So, get your hands dirty, embrace the challenge, and start growing chili peppers easily today! We can’t wait to see what you create.
Frequently Asked Questions (FAQ)
What kind of soil is best for growing chili peppers?
Chili peppers thrive in well-draining soil that is rich in organic matter. A good starting point is a mix of equal parts potting soil, compost, and perlite or vermiculite. The potting soil provides a base for nutrients, the compost adds essential organic matter and improves drainage, and the perlite or vermiculite enhances aeration and prevents the soil from becoming compacted. Avoid using garden soil directly in containers, as it can be too heavy and may contain pests or diseases. You can also amend your soil with slow-release fertilizer to provide a steady supply of nutrients throughout the growing season. Consider testing your soil’s pH level; chili peppers prefer a slightly acidic to neutral pH of around 6.0 to 7.0.
How often should I water my chili pepper plants?
Watering frequency depends on several factors, including the size of the container, the type of soil, the weather conditions, and the stage of growth of the plant. As a general rule, water your chili pepper plants when the top inch of soil feels dry to the touch. Avoid overwatering, as this can lead to root rot. When you do water, water deeply, ensuring that the entire root ball is thoroughly moistened. During hot, dry weather, you may need to water more frequently, perhaps even daily. Conversely, during cooler, wetter weather, you may only need to water every few days. Observe your plants closely for signs of overwatering or underwatering. Overwatered plants may have yellowing leaves or wilting, while underwatered plants may have drooping leaves.
How much sunlight do chili pepper plants need?
Chili pepper plants are sun-loving plants and require at least 6-8 hours of direct sunlight per day to thrive. The more sunlight they receive, the more peppers they will produce. If you are growing your chili pepper plants indoors, place them near a sunny window or use grow lights to supplement natural sunlight. Rotate your plants regularly to ensure that all sides receive equal exposure to light. If you are growing your chili pepper plants outdoors, choose a location that receives full sun throughout the day. Be mindful of the intensity of the sunlight, especially during the hottest part of the day. In extremely hot climates, you may need to provide some shade during the afternoon to prevent the plants from scorching.
What are some common pests and diseases that affect chili pepper plants, and how can I prevent them?
Chili pepper plants are susceptible to a variety of pests and diseases, including aphids, spider mites, whiteflies, blossom-end rot, and fungal diseases. To prevent these problems, start with healthy plants and provide them with optimal growing conditions. Inspect your plants regularly for signs of pests or diseases. If you detect any problems, take action immediately. Aphids, spider mites, and whiteflies can be controlled with insecticidal soap or neem oil. Blossom-end rot, which is caused by a calcium deficiency, can be prevented by ensuring that your soil is properly amended with calcium and that your plants are watered consistently. Fungal diseases can be prevented by providing good air circulation and avoiding overhead watering. Consider using organic pest control methods whenever possible to minimize the impact on the environment.
Can I grow chili peppers indoors?
Yes, you can definitely grow chili peppers indoors! In fact, growing chili peppers indoors can be a great way to extend the growing season and enjoy fresh peppers year-round. To grow chili peppers indoors successfully, you will need to provide them with adequate light, warmth, and humidity. Place your plants near a sunny window or use grow lights to supplement natural sunlight. Maintain a consistent temperature of around 70-80°F (21-27°C). Increase humidity by misting your plants regularly or using a humidifier. Choose a well-draining potting mix and water your plants when the top inch of soil feels dry to the touch. Fertilize your plants regularly with a balanced fertilizer. With proper care, you can enjoy a bountiful harvest of chili peppers even in the middle of winter.
What are some good companion plants for chili peppers?
Companion planting can be a great way to improve the health and yield of your chili pepper plants. Some good companion plants for chili peppers include basil, marigolds, onions, garlic, and carrots. Basil helps to repel pests such as aphids and whiteflies. Marigolds also deter pests and attract beneficial insects. Onions and garlic have antifungal properties that can help to prevent fungal diseases. Carrots improve soil drainage and aeration. Avoid planting chili peppers near fennel, as it can inhibit their growth. By planting companion plants alongside your chili peppers, you can create a more balanced and thriving garden ecosystem.
How do I know when my chili peppers are ripe?
The ripeness of chili peppers depends on the variety. Generally, chili peppers change color as they ripen, from green to red, yellow, orange, or even purple. The color change is a good indicator of ripeness, but it’s not the only factor to consider. Ripe chili peppers will also feel firm and slightly heavy for their size. You can also test the ripeness by tasting a small piece of the pepper. Ripe chili peppers will have a more intense flavor and heat than unripe peppers. Once your chili peppers are ripe, you can harvest them by clipping them off the plant with pruning shears or scissors. Handle the peppers carefully to avoid bruising them.
Leave a Comment