

Grow chives indoors? Absolutely! Imagine snipping fresh, flavorful chives right from your kitchen windowsill, adding a burst of oniony goodness to your omelets, salads, or baked potatoes, even in the dead of winter. No more sad, wilted bunches from the grocery store – just vibrant, homegrown flavor at your fingertips. For centuries, chives have been a culinary staple, gracing dishes from ancient Rome to modern-day kitchens. Their delicate flavor and ease of cultivation have made them a beloved herb worldwide.
But let’s be honest, not everyone has a sprawling garden or the perfect outdoor conditions to grow chives indoors year-round. That’s where these simple DIY tricks come in! I’m going to share some easy-to-follow methods that will have you harvesting your own chives in no time. Whether you’re a seasoned gardener or a complete beginner, these hacks will empower you to bring a touch of green (and delicious flavor) into your home. So, ditch the store-bought chives and let’s get growing!

Growing Chives Indoors: A Beginner’s Guide
Hey there, fellow plant enthusiasts! Ever dreamt of snipping fresh chives right from your kitchen windowsill? Well, dream no more! Growing chives indoors is surprisingly easy, rewarding, and adds a touch of green (and deliciousness!) to your home. I’m going to walk you through everything you need to know, from choosing the right pot to harvesting your flavorful bounty. Let’s get started!
Choosing Your Chives and Container
Before we dive into the nitty-gritty, let’s talk about what kind of chives you want and where they’ll live.
* **Seed vs. Starter Plant:** You have two main options: starting from seed or buying a small starter plant. Seeds are more economical, but require a bit more patience. Starter plants give you a head start and faster gratification. I personally love the instant gratification of a starter plant, but starting from seed is a fun project too!
* **Chive Varieties:** Common chives (Allium schoenoprasum) are the most popular and readily available. Garlic chives (Allium tuberosum) have a milder garlic flavor and flat leaves. I recommend starting with common chives, especially if you’re a beginner.
* **Container Size:** Chives don’t need a huge pot, but they do need room to spread. A pot that’s at least 6 inches in diameter and 6 inches deep is a good starting point. You can always repot them later if they outgrow their home. Make sure your pot has drainage holes! This is crucial to prevent root rot. I learned that the hard way!
* **Pot Material:** Plastic, terracotta, or ceramic pots all work well. Terracotta pots dry out faster, so you’ll need to water more frequently. I prefer plastic pots because they retain moisture better, but it really comes down to personal preference.
Gathering Your Supplies
Okay, now that we’ve covered the basics, let’s gather our supplies. You’ll need:
* Chive seeds or a starter plant
* A pot with drainage holes
* Potting mix (not garden soil!)
* Watering can or spray bottle
* A sunny windowsill or grow light
* Scissors or kitchen shears
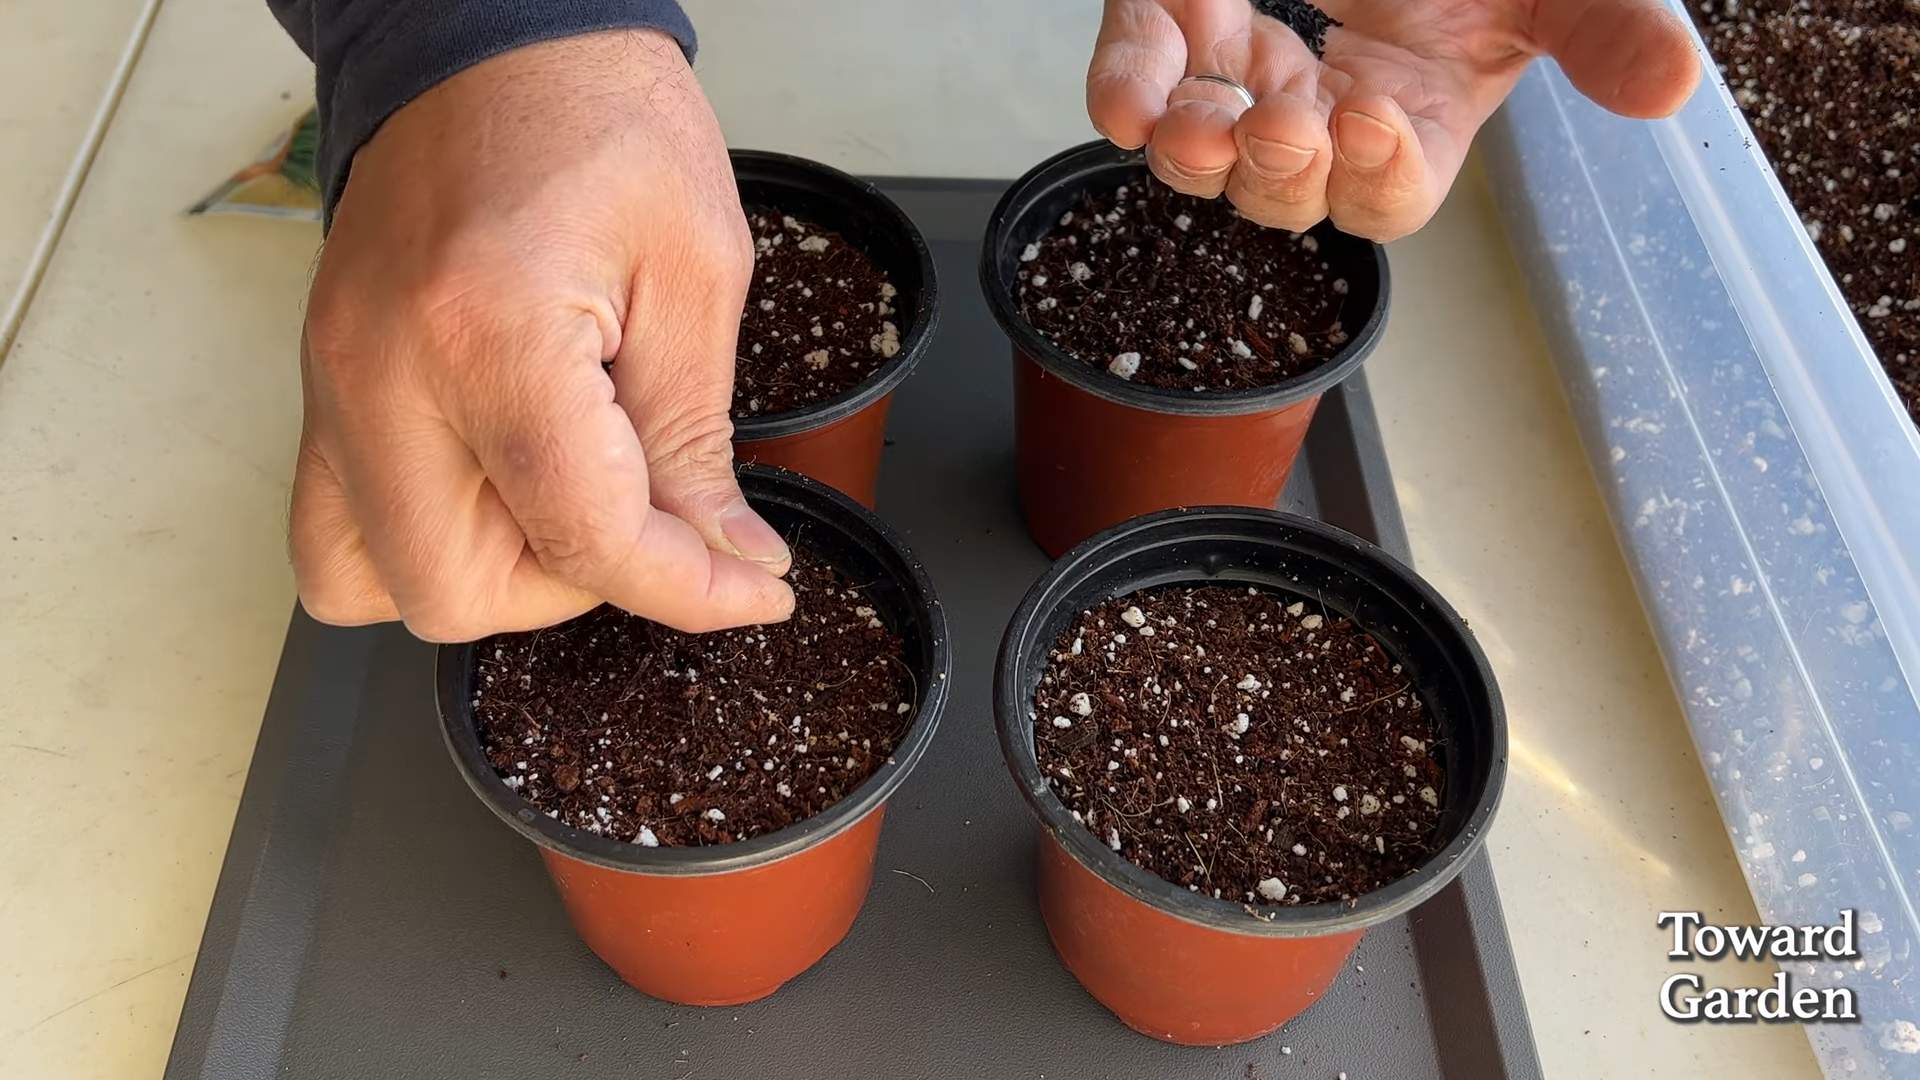
Planting Your Chives
Alright, let’s get our hands dirty!
Planting from Seed:
1. **Prepare the Pot:** Fill your pot with potting mix, leaving about an inch of space at the top. Gently pat down the soil.
2. **Sow the Seeds:** Sprinkle the chive seeds evenly over the surface of the soil. You don’t need to bury them too deep; about 1/4 inch is perfect.
3. **Cover the Seeds:** Lightly cover the seeds with more potting mix.
4. **Water Gently:** Use a watering can or spray bottle to gently moisten the soil. Avoid overwatering, which can cause the seeds to rot.
5. **Provide Light and Warmth:** Place the pot in a sunny windowsill or under a grow light. Chives need at least 6 hours of sunlight per day. Keep the soil consistently moist, but not soggy.
6. **Be Patient:** Germination can take anywhere from 7 to 21 days. Once the seedlings emerge, thin them out so that they’re about an inch apart.
Planting a Starter Plant:
1. **Prepare the Pot:** Fill your pot with potting mix, leaving about an inch of space at the top.
2. **Remove the Plant from its Container:** Gently remove the chive plant from its nursery pot. If the roots are tightly bound, gently loosen them with your fingers.
3. **Plant the Chives:** Dig a small hole in the center of the pot and place the chive plant in the hole. Make sure the top of the root ball is level with the surrounding soil.
4. **Fill in the Gaps:** Fill in the gaps around the plant with more potting mix.
5. **Water Thoroughly:** Water the chives thoroughly until water drains out of the drainage holes.
6. **Place in Sunlight:** Place the pot in a sunny windowsill or under a grow light.
Caring for Your Indoor Chives
Now that your chives are planted, it’s time to learn how to keep them happy and healthy.
* **Watering:** Water your chives when the top inch of soil feels dry to the touch. Avoid overwatering, which can lead to root rot. I usually water mine about once a week, but it depends on the humidity and temperature in my home.
* **Sunlight:** Chives need at least 6 hours of sunlight per day. If you don’t have a sunny windowsill, you can use a grow light. I’ve found that grow lights make a huge difference, especially during the winter months.
* **Fertilizing:** Feed your chives with a balanced liquid fertilizer every 2-4 weeks during the growing season (spring and summer). Follow the instructions on the fertilizer label. I like to use a diluted fish emulsion fertilizer.
* **Pruning:** Regular pruning encourages new growth and prevents your chives from becoming leggy. Simply snip off the tips of the leaves with scissors or kitchen shears.
* **Repotting:** If your chives outgrow their pot, you’ll need to repot them into a larger container. You’ll know it’s time to repot when the roots start to circle around the bottom of the pot.
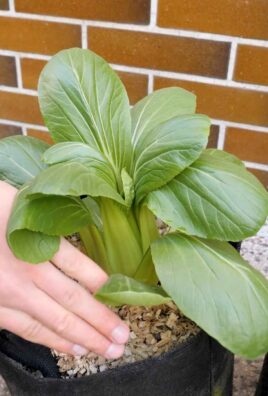
Harvesting Your Chives
The best part! Harvesting your own fresh chives is incredibly satisfying.
1. **Wait for Maturity:** Allow your chives to grow to at least 6 inches tall before harvesting.
2. **Snip the Leaves:** Use scissors or kitchen shears to snip off the leaves near the base of the plant. Avoid cutting off more than one-third of the plant at a time.
3. **Harvest Regularly:** Regular harvesting encourages new growth and keeps your chives producing.
4. **Enjoy!** Use your fresh chives to add flavor to soups, salads, omelets, dips, and more!
Troubleshooting Common Problems
Even with the best care, you might encounter a few problems along the way. Here are some common issues and how to fix them:
* **Yellowing Leaves:** Yellowing leaves can be caused by overwatering, underwatering, or nutrient deficiencies. Check the soil moisture and adjust your watering schedule accordingly. If the soil is dry, water thoroughly. If the soil is soggy, allow it to dry out before watering again. You may also need to fertilize your chives.
* **Leggy Growth:** Leggy growth is usually caused by insufficient sunlight. Move your chives to a sunnier location or use a grow light.
* **Pests:** Chives are relatively pest-resistant, but they can occasionally be infested with aphids or spider mites. If you notice pests, spray your chives with insecticidal soap. I’ve also had success with just wiping the leaves down with a damp cloth.
* **Root Rot:** Root rot is caused by overwatering. Make sure your pot has drainage holes and avoid overwatering. If you suspect root rot, repot your chives into fresh potting mix.
Extending Your Harvest
Want to keep your chives producing all year round? Here are a few tips:
* **Succession Planting:** Plant new chive seeds every few weeks to ensure a continuous harvest.
* **Divide Your Plants:** Every year or two, divide your chive plants to prevent them from becoming overcrowded. Simply dig up the plant and gently separate the roots into smaller clumps. Replant the clumps in separate pots.
* **Overwintering:** If you live in a cold climate, you can overwinter your chives indoors. Bring your chives indoors before the first frost and place them in a sunny windowsill or under a grow light. Water sparingly during the winter months.
Bonus Tip: Chive Blossom Vinegar
When your chives bloom (those beautiful purple flowers!), don’t throw them away! You can use them to make chive blossom vinegar. Simply fill a jar with chive blossoms and cover them with white wine vinegar. Let the vinegar steep for a few weeks, then strain out the blossoms. The resulting vinegar will have a delicate chive flavor and a beautiful pink hue. It’s perfect for salad dressings and marinades.
Growing chives indoors is a simple and rewarding way to add fresh flavor to your meals. With a little care and attention, you can enjoy a continuous harvest of delicious chives all year round. Happy gardening!
Conclusion
So, there you have it! Growing chives indoors is not only achievable, but it’s also incredibly rewarding. Imagine having fresh, flavorful chives at your fingertips, ready to elevate your culinary creations any time of year. No more sad, wilted bunches from the grocery store – just vibrant, aromatic chives bursting with flavor.
This DIY trick is a must-try for several compelling reasons. First and foremost, it provides a constant supply of fresh herbs, regardless of the season or your outdoor gardening space. Whether you live in an apartment with limited sunlight or experience harsh winters, you can still enjoy the delightful taste of homegrown chives. Secondly, it’s a cost-effective solution. Think about how often you buy chives, only to use a small portion and watch the rest go to waste. Growing your own eliminates this waste and saves you money in the long run. Finally, it’s incredibly satisfying to nurture a plant from start to finish and reap the delicious rewards of your labor.
But the beauty of this indoor gardening adventure lies in its adaptability. Feel free to experiment with different varieties of chives. Garlic chives, with their subtle garlic flavor, are a fantastic alternative to the standard variety. You can also try growing them in different types of containers – from repurposed yogurt cups to stylish terracotta pots – to match your aesthetic. Consider using a self-watering planter to simplify the watering process, especially if you tend to forget.
For a fun variation, try companion planting your chives with other herbs like parsley or basil in the same container. This not only maximizes space but also creates a beautiful and fragrant mini-herb garden. Just be sure to choose herbs with similar watering and light requirements. You can even use your indoor chives to propagate new plants. Simply divide the clumps and replant them in separate containers to expand your chive empire!
Don’t be intimidated if you’ve never grown herbs indoors before. Growing chives indoors is a forgiving and beginner-friendly project. With a little sunlight, water, and care, you’ll be harvesting your own fresh chives in no time.
We wholeheartedly encourage you to give this DIY trick a try. It’s a simple, affordable, and incredibly rewarding way to enhance your cooking and bring a touch of green into your home. Once you experience the joy of snipping fresh chives from your own indoor garden, you’ll wonder why you didn’t start sooner.
And most importantly, we want to hear about your experience! Share your tips, tricks, and photos of your indoor chive gardens in the comments below. Let’s create a community of indoor gardeners and inspire others to embrace the joy of growing their own herbs. What challenges did you face? What successes did you celebrate? What unique variations did you try? Your insights can help others on their own indoor gardening journey. So, grab a pot, some soil, and some chive seeds or seedlings, and get ready to enjoy the fresh, flavorful taste of homegrown chives all year round! Let us know how your **grow chives indoors** project goes!
Frequently Asked Questions (FAQ)
What kind of soil should I use for growing chives indoors?
The best soil for growing chives indoors is a well-draining potting mix. Avoid using garden soil, as it can be too heavy and compact, hindering drainage and potentially leading to root rot. A good quality potting mix will provide the necessary nutrients and aeration for healthy chive growth. You can also amend the potting mix with perlite or vermiculite to further improve drainage. Look for a potting mix specifically formulated for herbs or vegetables for optimal results.
How much sunlight do indoor chives need?
Chives thrive in bright, indirect sunlight. Aim for at least 6-8 hours of sunlight per day. If you don’t have a sunny windowsill, you can supplement with a grow light. Place the grow light a few inches above the chives and keep it on for 12-14 hours per day. Rotate the pot regularly to ensure even light exposure on all sides of the plant. Signs of insufficient sunlight include leggy growth and pale leaves.
How often should I water my indoor chives?
Water your chives when the top inch of soil feels dry to the touch. Avoid overwatering, as this can lead to root rot. Ensure that the pot has drainage holes to allow excess water to escape. During the warmer months, you may need to water more frequently than during the cooler months. Check the soil moisture regularly and adjust your watering schedule accordingly. A good rule of thumb is to water thoroughly until water drains out of the bottom of the pot.
How do I harvest chives from my indoor plant?
Harvest chives by snipping the leaves close to the base of the plant with scissors. Avoid cutting off more than one-third of the plant at a time, as this can stress the plant and slow down growth. Regular harvesting encourages new growth and keeps the plant healthy. You can harvest chives as needed throughout the growing season. The more you harvest, the more they will grow!
Do I need to fertilize my indoor chives?
Yes, fertilizing your indoor chives will help them thrive. Use a balanced liquid fertilizer diluted to half strength every 2-4 weeks during the growing season (spring and summer). Avoid over-fertilizing, as this can burn the roots. Look for a fertilizer specifically formulated for herbs or vegetables. Alternatively, you can use a slow-release fertilizer at the time of planting.
How do I deal with pests on my indoor chives?
Inspect your chives regularly for pests such as aphids or spider mites. If you find any pests, you can try washing them off with a strong stream of water or using insecticidal soap. Avoid using harsh chemicals, as these can harm the plant and make the chives unsafe to eat. You can also try introducing beneficial insects, such as ladybugs, to control pests naturally.
Can I grow chives from seed indoors?
Yes, you can grow chives from seed indoors. Start seeds indoors 6-8 weeks before the last expected frost. Sow seeds ¼ inch deep in a seed-starting mix. Keep the soil moist and warm (around 70-75°F). Once the seedlings emerge, provide them with plenty of light. Transplant the seedlings into individual pots when they are a few inches tall.
How long will my indoor chive plant last?
With proper care, your indoor chive plant can last for several years. Chives are perennials, meaning they can live for more than two years. Repot the plant every year or two to refresh the soil and provide more space for the roots to grow. Divide the plant every few years to prevent overcrowding and promote healthy growth.
What if my chives are turning yellow?
Yellowing chives can indicate several issues. Overwatering is a common cause, so ensure the soil is well-draining and allow it to dry slightly between waterings. Nutrient deficiencies can also cause yellowing; try fertilizing with a balanced liquid fertilizer. Insufficient sunlight can also lead to yellowing; move the plant to a sunnier location or supplement with a grow light. Finally, pests or diseases can also cause yellowing; inspect the plant carefully and treat accordingly.
Can I freeze or dry my harvested chives?
Yes, you can freeze or dry your harvested chives to preserve them for later use. To freeze chives, chop them finely and place them in a freezer bag or container. To dry chives, spread them out on a baking sheet and dry them in a low oven (around 170°F) or in a dehydrator until they are brittle. Store dried chives in an airtight container in a cool, dark place. Freezing preserves the flavor better than drying.

Leave a Comment