

Grow Ginger at Home – sounds like a challenge, right? But trust me, it’s easier than you think! Have you ever imagined harvesting your own fresh, spicy ginger root right from your kitchen or garden? It’s not just a dream; it’s a deliciously achievable reality with a few simple tricks and a little bit of patience.
Ginger, with its vibrant flavor and incredible health benefits, has been cultivated for thousands of years. Originating in South Asia, it quickly spread across the globe, becoming a staple in cuisines and traditional medicine. Ancient cultures revered ginger for its medicinal properties, using it to treat everything from nausea to inflammation. Today, we still appreciate its versatility and the zing it adds to our dishes.
But why should you bother learning to grow ginger at home? Well, for starters, store-bought ginger can sometimes be a bit lackluster. Growing your own ensures you have access to the freshest, most flavorful ginger possible. Plus, it’s incredibly rewarding to nurture a plant from rhizome to harvest! Imagine the satisfaction of adding your homegrown ginger to your favorite stir-fry, tea, or even a homemade ginger ale.
This DIY guide will walk you through every step of the process, from selecting the perfect ginger rhizome to troubleshooting common problems. I’ll share my favorite tips and tricks to help you cultivate a thriving ginger plant, even if you don’t have a green thumb. So, let’s get started and bring the taste of the tropics to your home!
Grow Your Own Ginger: A Simple DIY Guide
Hey there, fellow plant enthusiasts! Ever thought about growing your own ginger? It’s surprisingly easy and rewarding, and nothing beats the fresh, zesty flavor of homegrown ginger. I’m going to walk you through the whole process, from choosing the right ginger root to harvesting your very own crop. Let’s get started!
Choosing Your Ginger Rhizome
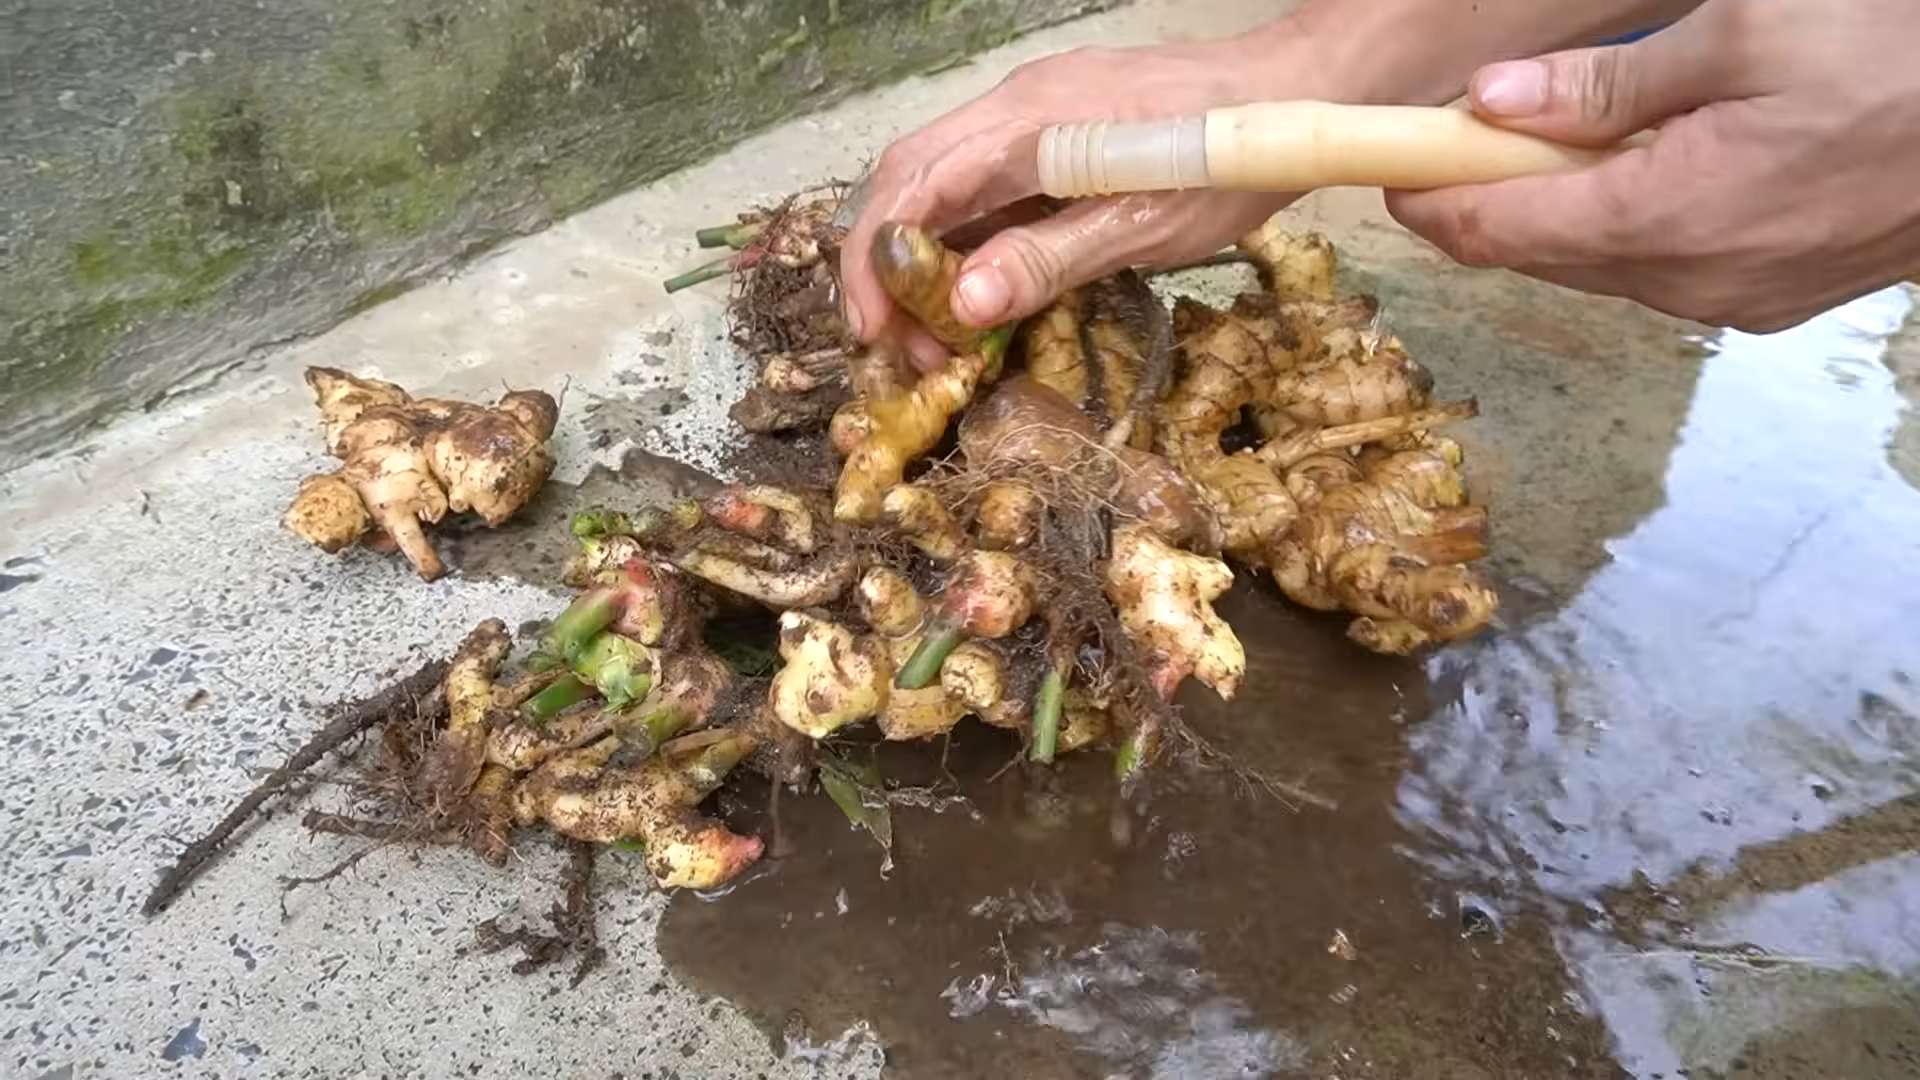
The first step is selecting a healthy ginger rhizome (that’s the “root” we eat). Here’s what to look for:
* Plump and Firm: Avoid rhizomes that are shriveled, soft, or have any signs of mold.
* Healthy Buds: Look for rhizomes with visible “eyes” or buds. These are the little bumps that will sprout into new shoots. The more eyes, the better!
* Organic is Best: If possible, choose organic ginger. Non-organic ginger may have been treated with growth inhibitors to prevent sprouting during storage.
* Freshness Matters: The fresher the ginger, the better the chances of successful sprouting.
Preparing Your Ginger for Planting
Before planting, we need to wake up those buds! This process is called “chitting.”
1. Soaking the Rhizome: Soak the ginger rhizome in lukewarm water for 12-24 hours. This rehydrates the ginger and encourages the buds to swell. I usually use a bowl and make sure the ginger is fully submerged.
2. Cutting (Optional): If you have a large rhizome with multiple buds, you can cut it into smaller pieces, ensuring each piece has at least one or two healthy buds. Use a clean, sharp knife to prevent infection. I like to let the cut ends callous over for a day or two before planting to further reduce the risk of rot.
3. Callousing (Optional): After cutting, leave the pieces in a warm, dry place for 1-2 days. This allows the cut surfaces to dry and form a protective layer, preventing rot when planted.
Planting Your Ginger
Now for the fun part – getting that ginger in the ground (or pot)!
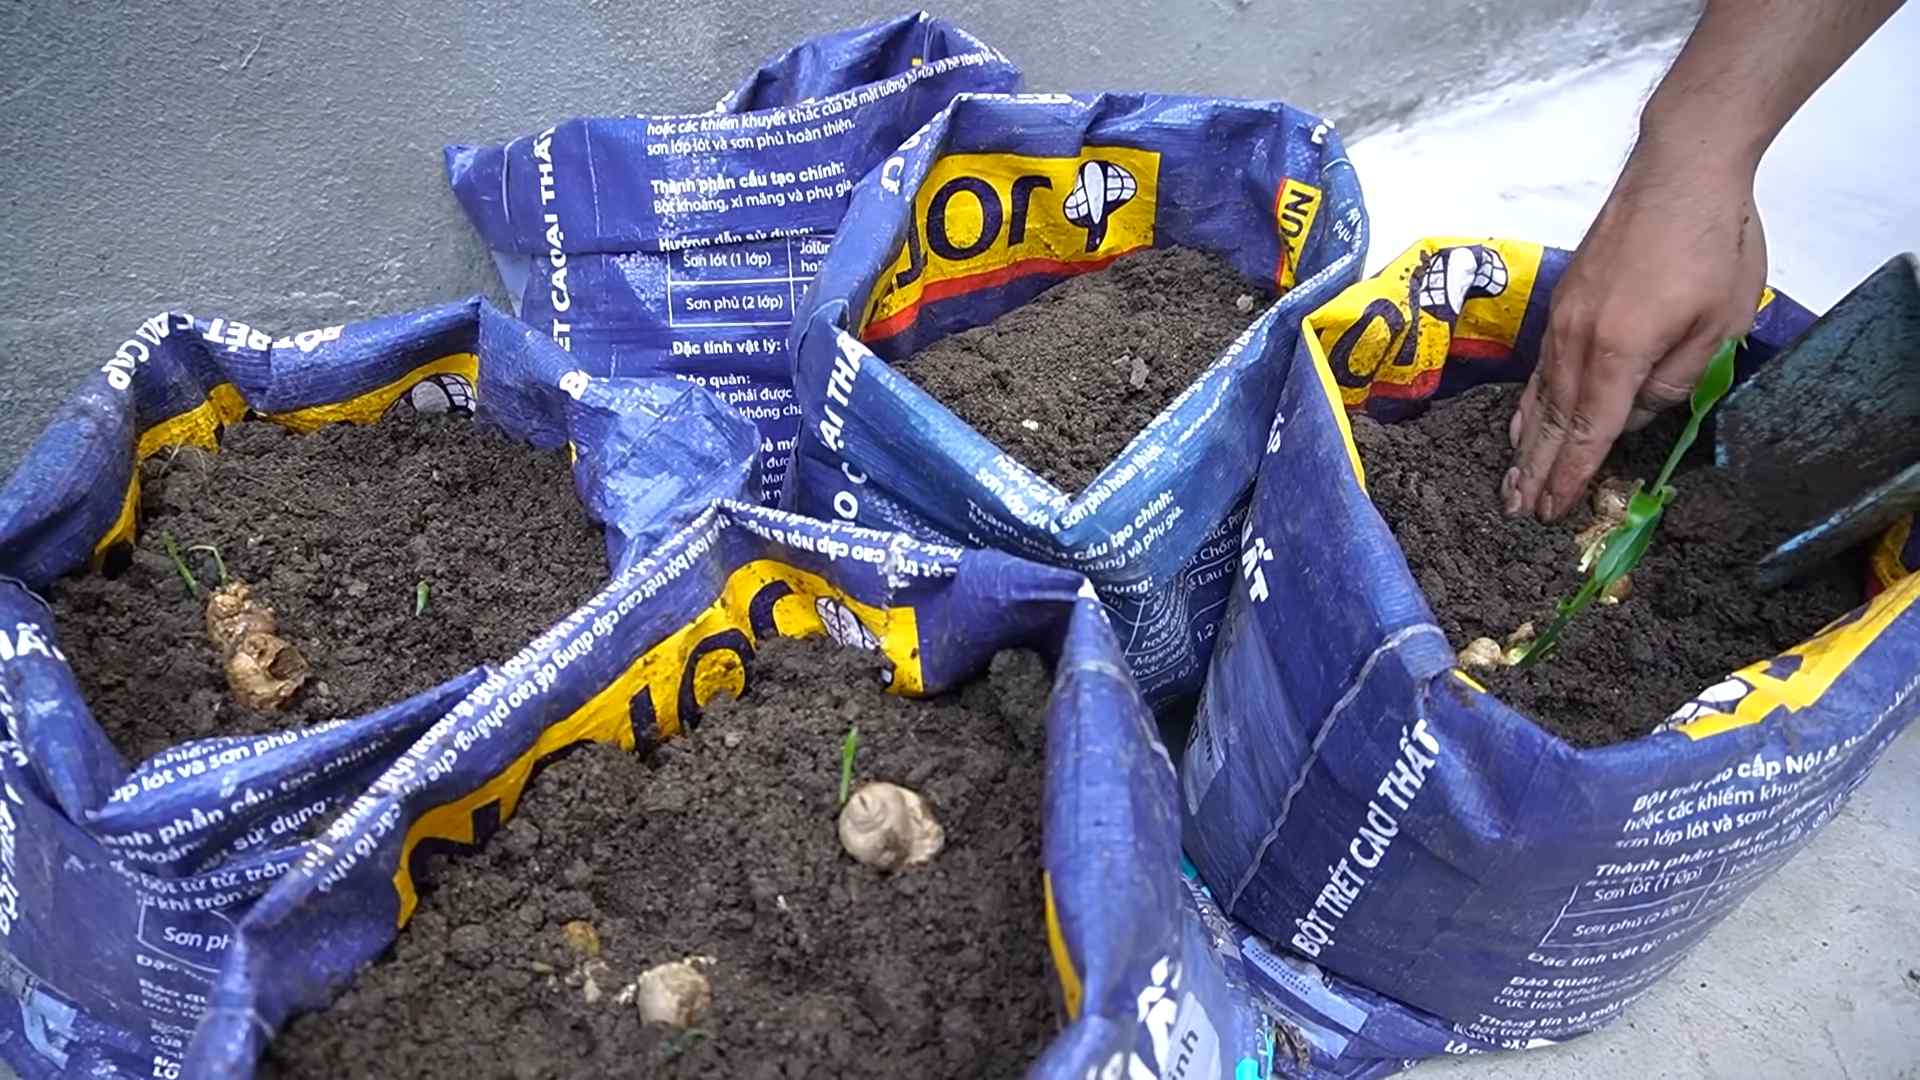
1. Choosing the Right Container: Ginger needs plenty of space to spread its roots. Select a pot that is at least 12 inches deep and 12 inches wide. A wider pot is better than a deeper one, as ginger roots tend to grow horizontally. Make sure the pot has drainage holes to prevent waterlogging.
2. Preparing the Soil: Ginger thrives in well-draining, nutrient-rich soil. I like to use a mix of potting soil, compost, and perlite. The compost provides nutrients, while the perlite improves drainage. A good ratio is 2 parts potting soil, 1 part compost, and 1 part perlite.
3. Planting the Rhizome: Fill the pot with your soil mixture, leaving about an inch or two of space at the top. Place the ginger rhizome horizontally on top of the soil, with the buds facing upwards. Cover the rhizome with about 1-2 inches of soil.
4. Watering: Water the soil thoroughly after planting, making sure the water drains freely from the bottom of the pot. Don’t overwater, as this can lead to root rot. The soil should be moist but not soggy.
Caring for Your Ginger Plant
Ginger needs the right environment to thrive. Here’s what to keep in mind:
1. Light: Ginger prefers bright, indirect sunlight. Avoid direct sunlight, which can scorch the leaves. An east-facing window is ideal, or a spot that receives filtered sunlight. If you’re growing ginger outdoors, choose a location that is shaded during the hottest part of the day.
2. Temperature: Ginger loves warmth! The ideal temperature range is between 65°F and 85°F (18°C and 29°C). Avoid exposing your ginger plant to temperatures below 50°F (10°C). If you live in a colder climate, you can grow ginger indoors year-round.
3. Watering: Water your ginger plant regularly, keeping the soil consistently moist but not soggy. Allow the top inch of soil to dry out between waterings. During the growing season (spring and summer), you may need to water more frequently. Reduce watering in the fall and winter when the plant is dormant.
4. Humidity: Ginger thrives in humid environments. If you live in a dry climate, you can increase humidity by misting the leaves regularly, placing the pot on a tray filled with pebbles and water, or using a humidifier.
5. Fertilizing: Feed your ginger plant every 2-3 weeks during the growing season with a balanced liquid fertilizer. Follow the instructions on the fertilizer label. I like to use an organic fertilizer, such as fish emulsion or seaweed extract.
6. Pest Control: Ginger is relatively pest-resistant, but it can occasionally be affected by aphids or spider mites. If you notice any pests, you can treat them with insecticidal soap or neem oil.
Harvesting Your Ginger
The moment we’ve all been waiting for!
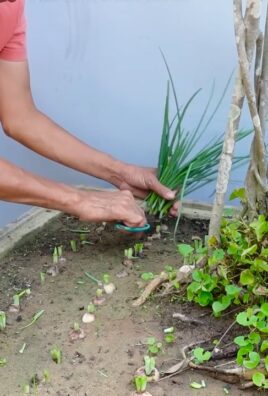
1. When to Harvest: You can start harvesting ginger about 8-10 months after planting. The leaves will start to turn yellow and die back, indicating that the rhizomes are mature.
2. Harvesting Process: Gently dig around the plant to expose the rhizomes. You can harvest the entire plant or just a portion of the rhizomes, leaving the rest to continue growing. Use a garden fork or trowel to carefully lift the rhizomes from the soil.
3. Cleaning: Wash the harvested ginger rhizomes thoroughly with water to remove any dirt or debris.
4. Storing: Freshly harvested ginger can be stored in the refrigerator for several weeks. Wrap it in a paper towel and place it in a plastic bag. You can also freeze ginger for longer storage. To freeze, peel and chop the ginger into small pieces, then place them in a freezer bag.
Troubleshooting
Even with the best care, you might encounter some challenges. Here are a few common issues and how to address them:
* Yellowing Leaves: This could be a sign of overwatering, underwatering, or nutrient deficiency. Check the soil moisture and adjust your watering accordingly. If the soil is dry, water more frequently. If the soil is soggy, allow it to dry out before watering again. You may also need to fertilize your plant.
* Root Rot: This is caused by overwatering and poor drainage. Make sure your pot has drainage holes and that the soil is well-draining. If you suspect root rot, remove the plant from the pot and inspect the roots. Cut away any rotten or mushy roots. Repot the plant in fresh, well-draining soil.
* Lack of Growth: This could be due to insufficient light, temperature, or nutrients. Make sure your plant is receiving enough light and warmth. Fertilize your plant regularly during the growing season.
* Pests: As mentioned earlier, aphids and spider mites can sometimes affect ginger plants. Treat them with insecticidal soap or neem oil.
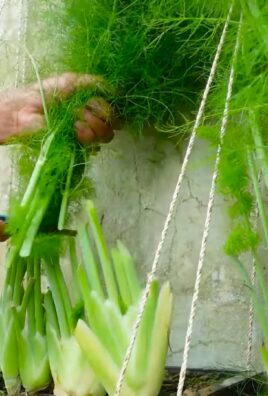
Enjoying Your Homegrown Ginger
Now that you’ve harvested your own ginger, it’s time to enjoy the fruits (or rather, rhizomes) of your labor! Here are a few ideas:
* Cooking: Fresh ginger adds a zesty flavor to stir-fries, soups, curries, and other dishes.
* Tea: Ginger tea is a soothing and warming beverage. Simply steep a few slices of fresh ginger in hot water.
* Pickling: Pickled ginger is a delicious condiment that pairs well with sushi and other Asian dishes.
* Candied Ginger: Candied ginger is a sweet and spicy treat.
* Gingerbread: Of course, you can’t forget about gingerbread! Fresh ginger adds a wonderful flavor to this classic holiday treat.
Growing your own ginger is a rewarding experience that allows you to enjoy the fresh, zesty flavor of homegrown ginger in your cooking and beverages. With a little patience and care, you can easily grow your own ginger at home. Happy gardening!
Conclusion
So, there you have it! Growing ginger at home is not only surprisingly simple, but it’s also incredibly rewarding. Imagine the satisfaction of harvesting your own fresh, vibrant ginger root, knowing exactly where it came from and how it was grown. Forget those bland, store-bought rhizomes – with this DIY trick, you’ll have access to ginger bursting with flavor and aroma, ready to elevate your culinary creations.
This isn’t just about saving a few dollars; it’s about connecting with nature, learning a new skill, and enjoying the unparalleled taste of homegrown produce. Think of the possibilities! You can add freshly grated ginger to your morning smoothies, brew a soothing ginger tea, or spice up your favorite stir-fries and curries. The possibilities are truly endless.
But the benefits don’t stop there. Growing your own ginger allows you to control the growing environment, ensuring that your ginger is free from harmful pesticides and chemicals. You’ll also be reducing your carbon footprint by eliminating the need for transportation and packaging associated with store-bought ginger. It’s a win-win for you and the planet!
Ready to take your ginger game to the next level? Consider experimenting with different varieties of ginger. Some popular choices include common ginger, galangal, and turmeric, each offering its unique flavor profile and culinary applications. You can also try growing your ginger in different types of containers, such as terracotta pots or raised garden beds, to see which works best for your space and climate.
Another fun variation is to grow ginger indoors during the colder months and then transplant it outdoors when the weather warms up. This allows you to extend your growing season and enjoy fresh ginger year-round. Just be sure to provide your ginger with plenty of sunlight and well-draining soil, and you’ll be well on your way to a bountiful harvest.
We’re confident that once you try this DIY trick, you’ll be hooked. It’s a fun, easy, and rewarding way to add fresh, flavorful ginger to your life. So, grab a ginger rhizome, follow our simple steps, and get ready to experience the joy of growing your own ginger at home.
Don’t forget to share your experiences with us! We’d love to see your homegrown ginger creations and hear about any tips or tricks you’ve discovered along the way. Share your photos and stories on social media using #HomegrownGinger and inspire others to join the fun. Let’s create a community of ginger-growing enthusiasts!
Final Thoughts
Growing ginger at home is more than just a gardening project; it’s an investment in your health, your culinary adventures, and your connection to the natural world. So, what are you waiting for? Get started today and experience the magic of homegrown ginger!
Frequently Asked Questions (FAQ)
1. What kind of ginger should I use to start growing?
You can use ginger from the grocery store, but make sure it’s plump, healthy-looking, and preferably organic. Look for rhizomes with “eyes” or small buds, as these are where the new shoots will emerge. Avoid ginger that is shriveled, moldy, or has been treated with growth inhibitors. Organic ginger is often a safer bet as it’s less likely to have been treated.
2. How long does it take to grow ginger at home?
It typically takes around 8-10 months from planting to harvest mature ginger. However, you can start harvesting small pieces of ginger after about 4 months for culinary use. The longer you let it grow, the larger and more flavorful the rhizomes will become. Be patient, and you’ll be rewarded with a bountiful harvest.
3. What is the best soil for growing ginger?
Ginger thrives in well-draining, nutrient-rich soil. A mixture of potting soil, compost, and perlite or vermiculite is ideal. The soil should be slightly acidic to neutral (pH 6.0-7.0). Avoid heavy clay soils, as they can retain too much moisture and lead to root rot. Good drainage is crucial for healthy ginger growth.
4. How much sunlight does ginger need?
Ginger prefers partial shade, especially in hot climates. Direct sunlight can scorch the leaves. Aim for about 2-4 hours of indirect sunlight per day. If you’re growing ginger indoors, place it near a bright window but away from direct sunlight. A north- or east-facing window is often a good choice.
5. How often should I water my ginger plant?
Keep the soil consistently moist but not waterlogged. Water thoroughly when the top inch of soil feels dry to the touch. Avoid overwatering, as this can lead to root rot. During the warmer months, you may need to water more frequently. Reduce watering during the cooler months when the plant is not actively growing.
6. What are some common problems when growing ginger, and how can I prevent them?
The most common problems include root rot, pests, and nutrient deficiencies. To prevent root rot, ensure good drainage and avoid overwatering. Pests like aphids and spider mites can be controlled with insecticidal soap or neem oil. To prevent nutrient deficiencies, fertilize your ginger plant regularly with a balanced organic fertilizer.
7. Can I grow ginger in a container? What size container should I use?
Yes, ginger grows very well in containers. Choose a container that is at least 12 inches deep and wide to allow the rhizomes to spread. Make sure the container has drainage holes to prevent waterlogging. You can use terracotta pots, plastic containers, or even grow bags.
8. How do I harvest ginger?
To harvest ginger, gently dig around the plant and lift the rhizomes from the soil. You can harvest the entire plant or just take a few pieces as needed. If you only harvest a few pieces, be sure to leave the rest of the plant undisturbed so it can continue to grow.
9. How do I store harvested ginger?
Freshly harvested ginger can be stored in the refrigerator for several weeks. Wrap it in a paper towel and place it in a plastic bag. You can also freeze ginger for longer storage. To freeze ginger, peel and chop it into small pieces, then place it in a freezer bag or container.
10. Can I grow ginger indoors year-round?
Yes, you can grow ginger indoors year-round, especially in colder climates. Provide your ginger plant with adequate light, warmth, and humidity. You may need to supplement with artificial light during the winter months. Keep the soil consistently moist and fertilize regularly.
11. What fertilizer should I use for growing ginger?
Use a balanced organic fertilizer with a ratio of 10-10-10 or 5-5-5. You can also use compost tea or fish emulsion. Fertilize your ginger plant every 2-4 weeks during the growing season. Avoid over-fertilizing, as this can burn the roots.
12. Is it possible to grow ginger from store-bought ground ginger?
No, you cannot grow ginger from ground ginger. Ground ginger is processed and dried, which destroys its ability to sprout. You need to use a fresh ginger rhizome with viable buds or “eyes” to grow a new plant.
13. My ginger plant’s leaves are turning yellow. What could be the problem?
Yellowing leaves can indicate several problems, including overwatering, underwatering, nutrient deficiencies, or pest infestations. Check the soil moisture and adjust your watering accordingly. Fertilize your plant with a balanced organic fertilizer. Inspect the leaves for pests and treat them with insecticidal soap or neem oil if necessary.
14. Can I grow ginger in a hydroponic system?
Yes, ginger can be grown in a hydroponic system, but it requires careful monitoring and management. You’ll need to provide the plants with the right nutrients and maintain the proper pH levels. Hydroponic ginger growing is more complex than growing in soil, but it can be a rewarding experience for experienced hydroponic gardeners.
15. What are the health benefits of growing and using fresh ginger?
Fresh ginger is packed with health benefits. It has anti-inflammatory properties, can help relieve nausea, and may boost the immune system. It’s also a good source of antioxidants and can aid in digestion. Growing your own ginger ensures that you have access to fresh, high-quality ginger with all of its beneficial properties.
Leave a Comment