

Grow Carrots in Bags: Imagine harvesting a vibrant bunch of sweet, crunchy carrots right from your balcony or patio, even if you don’t have a traditional garden! It’s easier than you think, and this DIY guide will show you exactly how. For centuries, carrots have been a staple in diets worldwide, with evidence suggesting their cultivation dates back to ancient Persia. While traditionally grown in sprawling fields, modern ingenuity has brought this root vegetable to even the smallest of urban spaces.
But why grow carrots in bags? Well, many of us dream of fresh, homegrown produce but are limited by space. Bags offer a fantastic solution, providing excellent drainage and allowing you to control the soil quality perfectly. Plus, it’s a fun and rewarding project! This DIY trick is a game-changer for apartment dwellers, renters with limited garden access, or anyone who wants to enjoy the satisfaction of growing their own food without the hassle of extensive landscaping. I’m excited to share my tried-and-true method for cultivating these delicious root vegetables in a simple, space-saving way. Let’s get started!
Grow Carrots in Bags: A Gardener’s Guide
Hey there, fellow gardening enthusiasts! Are you short on space but dreaming of fresh, homegrown carrots? Well, I’ve got the perfect solution for you: growing carrots in bags! It’s a surprisingly easy and rewarding way to cultivate these crunchy root vegetables, even if you only have a balcony or small patio. I’ve been doing this for a few years now, and I’m excited to share my secrets with you. Let’s get started!
Why Grow Carrots in Bags?
Before we dive into the how-to, let’s quickly touch on why growing carrots in bags is such a great idea:
* Space-Saving: This is the biggest advantage! Bags take up far less space than traditional garden beds.
* Portability: You can easily move your carrot bags to follow the sun or protect them from harsh weather.
* Better Soil Control: You have complete control over the soil composition, ensuring optimal growing conditions.
* Fewer Weeds: Bags help to minimize weed growth, making maintenance easier.
* Earlier Harvest: The soil in bags tends to warm up faster in the spring, leading to an earlier harvest.
What You’ll Need
Okay, let’s gather our supplies. Here’s what you’ll need to successfully grow carrots in bags:
* Grow Bags: Choose fabric grow bags that are at least 12 inches in diameter and 12 inches deep. I prefer using 15-gallon bags, as they provide ample space for the carrots to grow long and straight. Fabric bags are great because they allow for good drainage and aeration.
* Potting Mix: This is crucial! Don’t use garden soil, as it’s often too heavy and compacted for carrots. Opt for a lightweight, well-draining potting mix specifically formulated for vegetables. I like to mix equal parts of peat moss, perlite, and compost.
* Carrot Seeds: Select a carrot variety that’s suitable for container gardening. Shorter, rounder varieties like ‘Thumbelina’ or ‘Parisian’ are excellent choices. Nantes varieties also work well.
* Slow-Release Fertilizer: Carrots are heavy feeders, so a slow-release fertilizer will provide them with the nutrients they need throughout the growing season. Choose a balanced fertilizer with an NPK ratio of around 5-10-10.
* Watering Can or Hose: You’ll need a way to water your carrots regularly.
* Trowel or Small Shovel: For filling the bags with soil and planting the seeds.
* Optional: Horticultural sand to improve drainage, and mulch to retain moisture.
Step-by-Step Instructions
Alright, let’s get our hands dirty! Here’s how to grow carrots in bags, step by step:
1. Prepare the Grow Bags
* Choose a Location: Select a sunny spot that receives at least 6-8 hours of direct sunlight per day. Carrots need plenty of sunshine to thrive.
* Position the Bags: Place the empty grow bags in your chosen location. Once they’re filled with soil, they’ll be heavy and difficult to move.
* Optional Drainage Layer: If you’re concerned about drainage, you can add a layer of gravel or small stones to the bottom of the bag. However, with fabric grow bags and a well-draining potting mix, this is usually not necessary.
2. Prepare the Soil Mix
* Combine Ingredients: In a large container or wheelbarrow, mix together your potting mix, compost, and slow-release fertilizer. Make sure everything is thoroughly combined.
* Moisten the Mix: Add water to the soil mix until it’s evenly moist but not soggy. You should be able to squeeze a handful of the mix and have it hold its shape without dripping water.
3. Fill the Grow Bags
* Fill the Bags: Using your trowel or shovel, fill the grow bags with the prepared soil mix, leaving about 2-3 inches of space at the top.
* Settle the Soil: Gently tap the sides of the bags to settle the soil. Add more soil if needed to maintain the 2-3 inch gap.
4. Sow the Carrot Seeds
* Water the Soil: Lightly water the surface of the soil in the bags. This will help to create a good seedbed.
* Sow the Seeds: Carrot seeds are tiny, so it’s easy to sow them too thickly. To avoid overcrowding, sprinkle the seeds thinly and evenly over the surface of the soil. Aim for about 1/2 inch spacing between seeds.
* Cover the Seeds: Gently cover the seeds with a thin layer (about 1/4 inch) of potting mix or horticultural sand.
* Water Again: Lightly water the surface again to ensure good seed-to-soil contact.
5. Germination and Early Care
* Keep the Soil Moist: The key to successful germination is keeping the soil consistently moist. Water gently whenever the top inch of soil feels dry to the touch.
* Monitor Germination: Carrot seeds typically germinate in 7-21 days, depending on the temperature and moisture levels.
* Thin Seedlings: Once the seedlings emerge and have developed a few true leaves, it’s time to thin them. This is crucial for allowing the remaining carrots to grow to their full size. Thin the seedlings to about 2-3 inches apart. The easiest way to do this is to gently snip off the unwanted seedlings at the soil line with scissors. Avoid pulling them out, as this can disturb the roots of the remaining plants.
6. Ongoing Care
* Watering: Carrots need consistent moisture to grow well. Water deeply whenever the top inch of soil feels dry. Avoid overwatering, as this can lead to root rot.
* Fertilizing: Carrots are heavy feeders, so they’ll benefit from regular fertilization. Side-dress the plants with a balanced fertilizer every 4-6 weeks. Alternatively, you can use a liquid fertilizer diluted to half strength every 2 weeks.
* Weeding: Keep the bags free of weeds, as they can compete with the carrots for nutrients and water. Hand-pull any weeds that appear.
* Mulching: Apply a layer of mulch around the base of the plants to help retain moisture, suppress weeds, and regulate soil temperature. Straw, shredded leaves, or wood chips are all good options.
* Sunlight: Ensure your carrot bags continue to receive at least 6-8 hours of direct sunlight per day. If necessary, move the bags to a sunnier location.
* Pest Control: Keep an eye out for common carrot pests, such as carrot rust flies and aphids. If you notice any pests, take action promptly to prevent them from damaging your crop. Insecticidal soap or neem oil can be effective treatments.
7. Harvesting
* Check for Maturity: Carrots are typically ready to harvest 60-80 days after planting, depending on the variety. Check the seed packet for specific maturity dates.
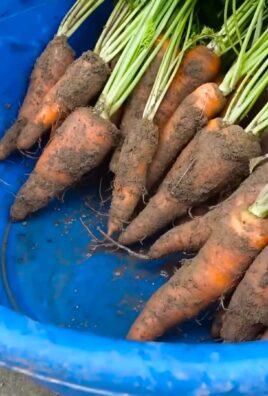
* Harvesting Time: You can harvest carrots at any size, but they’ll be sweetest and most flavorful when they’re fully mature. To check for maturity, gently brush away the soil around the top of the carrot to see its size.
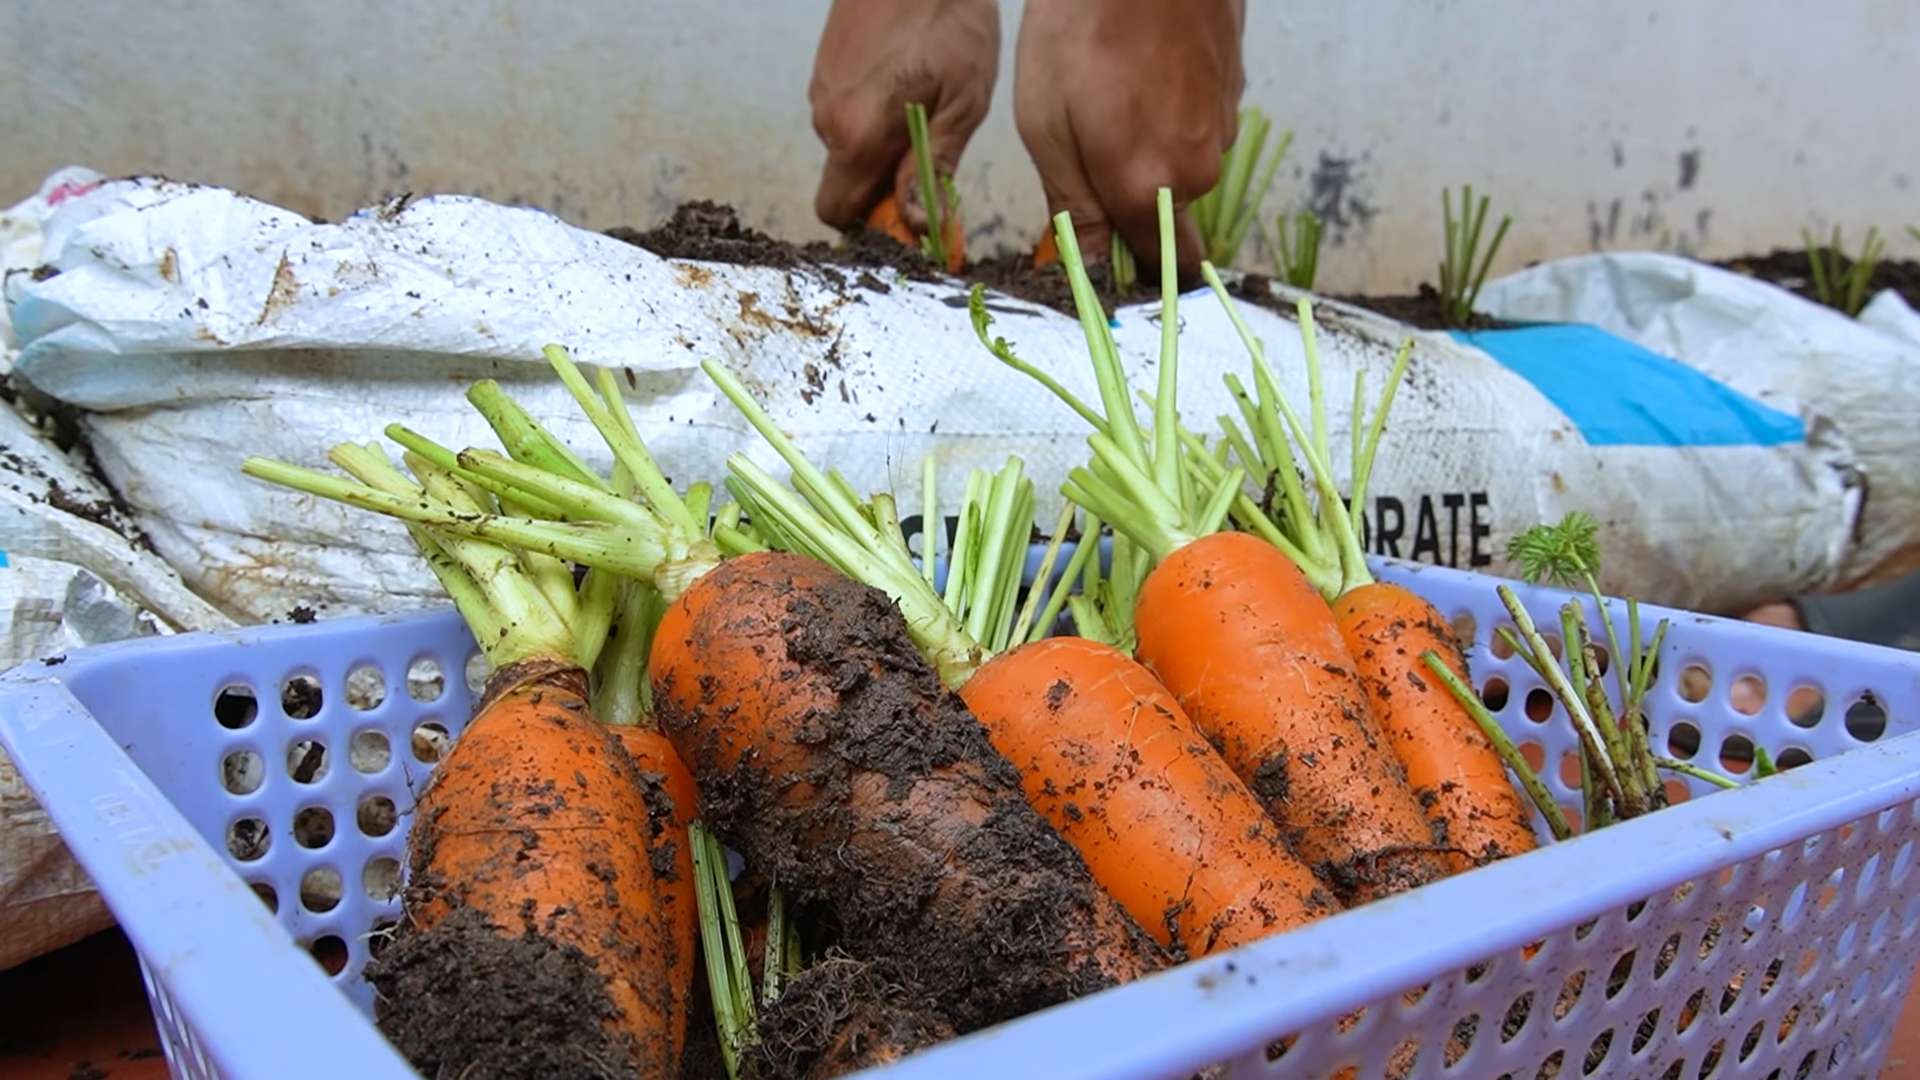
* Harvesting Method: To harvest, gently loosen the soil around the carrot with a trowel or fork. Then, grasp the carrot firmly at the base and pull it straight up. If the soil is dry, water it thoroughly a few hours before harvesting to make it easier to pull the carrots.
* Enjoy Your Harvest: Once you’ve harvested your carrots, wash them thoroughly and enjoy them fresh from the garden! They’re delicious raw, roasted, steamed, or added to soups and stews.
Troubleshooting
Even with the best care, you might encounter some challenges when growing carrots in bags. Here are a few common problems and how to address them:
* Forked or Twisted Carrots: This is often caused by rocks or compacted soil in the bag. Make sure your potting mix is loose and well-draining, and remove any rocks or debris.
* Small Carrots: This could be due to overcrowding, insufficient sunlight, or lack of nutrients. Thin the seedlings properly, ensure the bags receive enough sunlight, and fertilize regularly.
* Bitter Carrots: This can be caused by inconsistent watering or high temperatures. Water deeply and regularly, and provide shade during the hottest part of the day.
* Pests: Keep an eye out for common carrot pests and take action promptly to prevent them from damaging your crop.
Tips for Success
Here are a few extra tips to help you grow the best carrots possible in bags:
* Choose the Right Variety: Select a carrot variety that’s well-suited for container gardening. Shorter, rounder varieties tend to perform best
Conclusion
So, there you have it! Growing carrots in bags is not just a gardening trend; it’s a game-changer, especially if you’re short on space, battling poor soil, or simply looking for a more controlled and rewarding gardening experience. We’ve walked you through the simple steps, highlighted the benefits, and armed you with the knowledge to cultivate your own vibrant, delicious carrot harvest right on your patio, balcony, or even indoors.
Why is this DIY trick a must-try? Because it democratizes gardening. It removes the barriers of needing a large plot of land or perfectly amended soil. It’s accessible to everyone, from seasoned gardeners to complete beginners. Imagine the satisfaction of pulling up your own homegrown carrots, knowing exactly where they came from and what went into nurturing them. The taste difference alone is worth the effort – store-bought carrots simply can’t compare to the fresh, sweet flavor of homegrown varieties.
But the benefits extend beyond just taste. Growing carrots in bags offers superior drainage, preventing root rot and ensuring healthy growth. It allows you to control the soil composition, creating the ideal environment for your carrots to thrive. And let’s not forget the convenience – you can easily move your bags to chase the sun or protect them from harsh weather.
Ready to take your carrot growing to the next level? Consider these variations:
* Vertical Gardening: Stack your bags to create a stunning vertical carrot garden. This is a fantastic option for maximizing space and adding a touch of greenery to your outdoor area.
* Companion Planting: Plant herbs like rosemary or sage alongside your carrots to deter pests and enhance their flavor. Marigolds are also excellent companions, adding a splash of color and repelling nematodes.
* Variety is the Spice of Life: Experiment with different carrot varieties! From the classic Nantes to the colorful Rainbow Blend, there’s a carrot for every palate and preference. Consider shorter varieties like ‘Thumbelina’ if your bags are not very deep.
* Indoor Growing: If you live in a colder climate, bring your carrot bags indoors during the winter months. Provide them with ample sunlight or supplement with grow lights to keep them thriving.
* Fertilizer Options: While we recommended a slow-release fertilizer, you can also use liquid seaweed extract or compost tea to give your carrots an extra boost. Just be sure to dilute the fertilizer properly to avoid burning the roots.
Ultimately, the best way to discover the magic of growing carrots in bags is to try it yourself. Don’t be afraid to experiment, adapt the techniques to your specific environment, and learn from your experiences. Gardening is a journey, and every carrot you harvest is a testament to your dedication and hard work.
We are confident that you’ll find this DIY gardening method incredibly rewarding. So, grab your bags, gather your supplies, and get ready to embark on a carrot-growing adventure! We can’t wait to hear about your successes (and even your challenges – we’re all learning together!). Share your photos, tips, and stories with us in the comments below. Let’s build a community of bag-grown carrot enthusiasts! Remember, the key to successful gardening is patience, observation, and a willingness to learn. Happy growing, and may your harvest be bountiful! This method of growing carrots in bags is a great way to start your gardening journey.
FAQ
What kind of bags should I use for growing carrots?
The best bags for growing carrots are durable, breathable, and have good drainage. Fabric grow bags are an excellent choice because they allow air to circulate around the roots, preventing them from becoming waterlogged. Plastic pots or containers can also be used, but make sure they have drainage holes. The size of the bag depends on the carrot variety you’re growing. Shorter varieties like ‘Thumbelina’ can thrive in smaller bags, while longer varieties like ‘Nantes’ will need deeper bags (at least 12 inches deep). Avoid using thin plastic bags, as they can easily tear and don’t provide adequate drainage.
What type of soil is best for growing carrots in bags?
Carrots need loose, well-draining soil to grow properly. A sandy loam mix is ideal. You can create your own mix by combining equal parts of potting soil, compost, and sand. Avoid using heavy clay soil, as it can compact and prevent the carrots from developing properly. The soil should be rich in organic matter to provide the carrots with the nutrients they need. Before planting, amend the soil with compost or well-rotted manure to improve its fertility and drainage.
How often should I water my carrots grown in bags?
Watering frequency depends on the weather and the type of bag you’re using. Fabric grow bags tend to dry out more quickly than plastic pots, so you may need to water them more often. Check the soil moisture regularly by sticking your finger into the soil. If the top inch feels dry, it’s time to water. Water deeply and thoroughly, ensuring that the entire root zone is moistened. Avoid overwatering, as this can lead to root rot. In hot, dry weather, you may need to water your carrots daily. In cooler, wetter weather, you may only need to water them every few days.
How much sunlight do carrots need when grown in bags?
Carrots need at least 6 hours of sunlight per day to grow properly. Choose a location that receives full sun for most of the day. If you live in a hot climate, you may need to provide some afternoon shade to prevent the carrots from overheating. If you’re growing carrots indoors, you’ll need to supplement with grow lights. Place the grow lights about 6-12 inches above the plants and keep them on for 12-14 hours per day. Rotate the bags regularly to ensure that all sides of the plants receive adequate sunlight.
What are some common pests and diseases that affect carrots grown in bags?
Common pests that affect carrots include carrot rust flies, aphids, and nematodes. Carrot rust flies lay their eggs near the base of the plants, and the larvae burrow into the roots, causing damage. Aphids suck the sap from the leaves, weakening the plants. Nematodes are microscopic worms that live in the soil and feed on the roots. To prevent pest problems, use companion planting (e.g., marigolds), practice crop rotation, and inspect your plants regularly for signs of infestation. Common diseases that affect carrots include leaf blight and root rot. Leaf blight causes brown spots on the leaves, while root rot causes the roots to become soft and mushy. To prevent disease problems, provide good drainage, avoid overwatering, and ensure good air circulation.
When is the best time to harvest carrots grown in bags?
The best time to harvest carrots depends on the variety you’re growing and your personal preference. Carrots are typically ready to harvest when they reach the size specified on the seed packet. You can also check the maturity by gently pulling back the soil around the top of the carrot to see how it’s developing. Carrots taste best when they’re fully mature but still tender. Overripe carrots can become woody and bitter. To harvest, gently loosen the soil around the carrot and pull it straight up. If the soil is dry, water it beforehand to make it easier to pull the carrots.
Can I reuse the soil in the bags after harvesting carrots?
It’s generally not recommended to reuse the soil in the bags after harvesting carrots, especially if you had any pest or disease problems. Carrots are heavy feeders, and they deplete the soil of nutrients. Reusing the soil can also increase the risk of disease and pest infestations. If you do want to reuse the soil, amend it with plenty of compost and fertilizer to replenish the nutrients. You can also sterilize the soil by baking it in the oven or microwaving it to kill any pathogens or pests. However, it’s often easier and more effective to simply start with fresh soil each season.
How do I prevent my carrots from splitting or forking when grown in bags?
Splitting or forking in carrots is often caused by inconsistent watering or rocky soil. To prevent this, ensure that you water your carrots regularly and deeply, especially during dry spells. Avoid letting the soil dry out completely, as this can cause the carrots to split when they’re rehydrated. Also, make sure that your soil is free of rocks and debris. If you have rocky soil, consider sifting it or using raised beds or containers. Adding compost to the soil can also help to improve its structure and drainage, reducing the risk of splitting or forking.
What fertilizer should I use for carrots grown in bags?
Carrots benefit from a fertilizer that is low in nitrogen and high in phosphorus and potassium. A 5-10-10 fertilizer is a good choice. Avoid using fertilizers that are high in nitrogen, as this can promote leafy growth at the expense of root development. You can also use organic fertilizers such as bone meal (for phosphorus) and wood ash (for potassium). Apply the fertilizer according to the instructions on the package. You can also side-dress your carrots with compost tea or liquid seaweed extract every few weeks to provide them with extra nutrients.
Can I grow other vegetables in the same bag as carrots?
While it’s possible to grow other vegetables in the same bag as carrots, it’s generally not recommended. Carrots need plenty of space to grow properly, and overcrowding can lead to smaller, misshapen roots.
Leave a Comment