

Grow Red Cabbage at Home? Absolutely! Imagine plucking vibrant, jewel-toned red cabbage straight from your own backyard, ready to be transformed into a delicious slaw, a tangy ferment, or a hearty roasted side dish. Forget those wilted, overpriced heads at the grocery store – with a few simple tricks, you can cultivate your own thriving red cabbage patch, even if you’re a complete beginner.
For centuries, cabbage has been a staple in diets across the globe, prized for its nutritional value and versatility. From ancient Roman feasts to traditional sauerkraut recipes, this humble vegetable has a rich and fascinating history. But growing your own red cabbage takes that connection to the past a step further, allowing you to participate in a time-honored tradition while enjoying the freshest possible produce.
Why should you learn to grow red cabbage at home? Well, beyond the satisfaction of nurturing your own food, you’ll gain control over the quality and freshness of your ingredients. Plus, you’ll avoid harmful pesticides and support sustainable gardening practices. In this article, I’m going to share my favorite DIY tricks and hacks to help you succeed, from choosing the right variety to protecting your precious plants from pests. Get ready to roll up your sleeves and embark on a rewarding gardening adventure!
Growing Vibrant Red Cabbage at Home: A DIY Guide
Hey there, fellow gardening enthusiasts! I’m so excited to share my experience with growing red cabbage. It’s not only a beautiful addition to your garden, but it’s also incredibly nutritious and delicious. Don’t be intimidated – growing red cabbage at home is totally achievable, even for beginners. Let’s dive in!
Choosing the Right Red Cabbage Variety
First things first, let’s talk about varieties. Different red cabbage types mature at different rates and have slightly different flavors. Here are a few popular choices:
* ‘Red Acre’: This is a classic, reliable variety that matures in about 85 days. It produces medium-sized, dense heads with a slightly peppery flavor.
* ‘Ruby Ball’: A faster-maturing option, ‘Ruby Ball’ is ready in around 72 days. It’s known for its excellent color and good storage capabilities.
* ‘Red Express’: As the name suggests, this is a super-early variety, maturing in just 65 days. It’s perfect if you’re impatient (like me!) and want to harvest your cabbage quickly.
* ‘Langedijker Dauer’: This is a late-season variety, known for its excellent storage capabilities. If you want to harvest and store your cabbage for winter use, this is a great choice.
I personally love ‘Red Acre’ because it’s so dependable, but feel free to experiment and find the variety that works best for you and your climate.
Starting Your Red Cabbage Seeds
You have two options here: starting seeds indoors or direct sowing. I prefer starting seeds indoors because it gives me a head start, especially in areas with shorter growing seasons.
Starting Seeds Indoors:
1. Gather Your Supplies: You’ll need seed starting trays or small pots, seed starting mix (I recommend a peat-free mix), red cabbage seeds, a spray bottle, and a grow light (optional, but highly recommended).
2. Prepare the Seed Starting Mix: Moisten the seed starting mix with water until it’s damp but not soggy.
3. Sow the Seeds: Fill the trays or pots with the moistened mix. Make a small indentation (about ¼ inch deep) in each cell or pot. Place 2-3 seeds in each indentation.
4. Cover the Seeds: Gently cover the seeds with a thin layer of seed starting mix.
5. Water Gently: Use a spray bottle to mist the surface of the soil. Avoid overwatering, as this can lead to damping-off disease.
6. Provide Warmth and Light: Place the trays or pots in a warm location (around 70-75°F) and under a grow light. If you don’t have a grow light, a sunny windowsill will work, but be sure to rotate the trays regularly to prevent the seedlings from leaning towards the light.
7. Keep the Soil Moist: Check the soil moisture daily and mist with water as needed to keep it consistently moist.
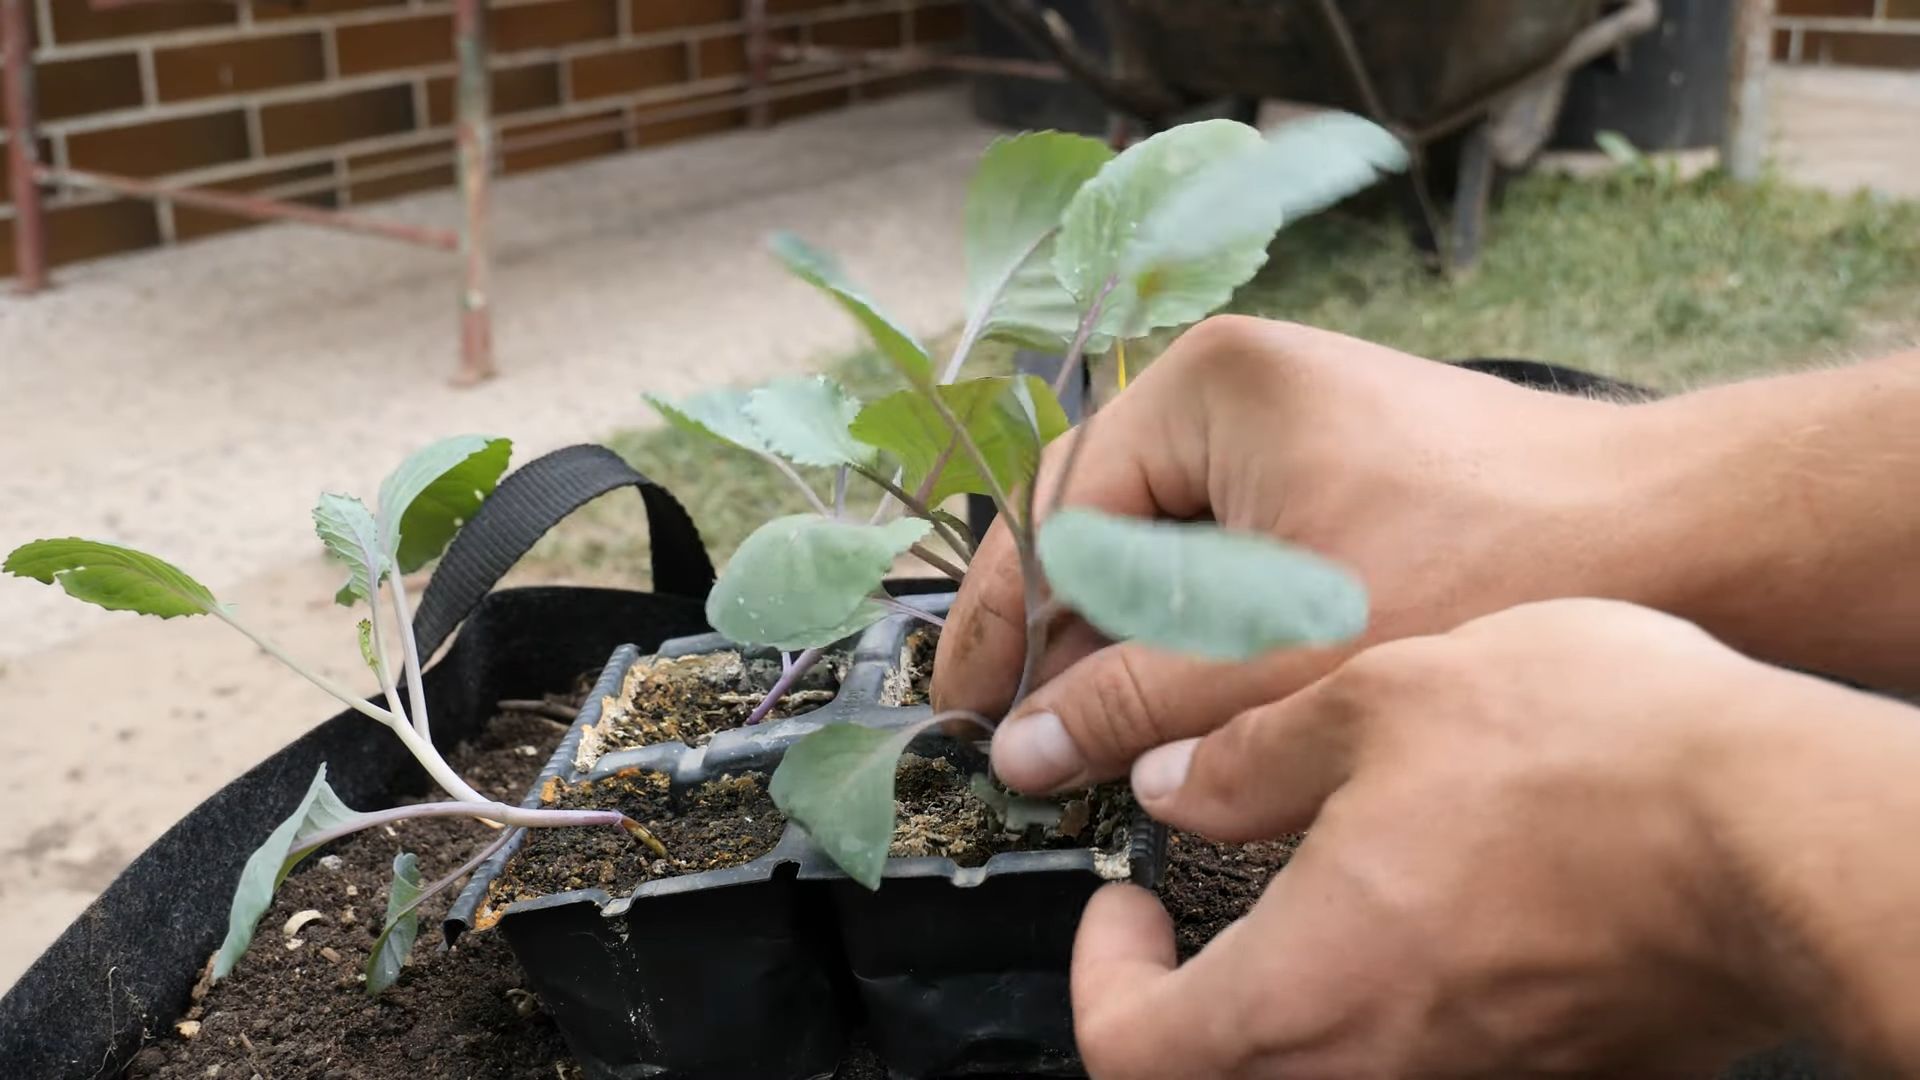
8. Thin the Seedlings: Once the seedlings have developed their first true leaves (the leaves that appear after the initial seed leaves), thin them to one seedling per cell or pot. Choose the strongest, healthiest-looking seedling and snip off the others at the soil line.
9. Harden Off the Seedlings: About a week before you plan to transplant the seedlings outdoors, you’ll need to harden them off. This process gradually acclimates the seedlings to outdoor conditions. Start by placing the trays or pots outdoors in a sheltered location for a few hours each day, gradually increasing the amount of time they spend outside. Protect them from direct sunlight and strong winds.
Direct Sowing:
If you live in an area with a long growing season, you can direct sow red cabbage seeds directly into the garden.
1. Prepare the Soil: Choose a sunny location with well-drained soil. Amend the soil with compost or other organic matter to improve its fertility and drainage.
2. Sow the Seeds: Sow the seeds about ½ inch deep and 1-2 inches apart in rows.
3. Water Gently: Water the soil gently to keep it moist.
4. Thin the Seedlings: Once the seedlings have developed their first true leaves, thin them to about 18-24 inches apart.
Preparing the Garden Bed
Red cabbage thrives in well-drained, fertile soil with a pH of 6.0 to 7.0. Before transplanting or sowing, it’s essential to prepare the garden bed properly.
1. Choose a Sunny Location: Red cabbage needs at least 6 hours of sunlight per day.
2. Amend the Soil: Incorporate plenty of compost or well-rotted manure into the soil to improve its fertility and drainage. I usually add a generous amount – about 2-3 inches of compost worked into the top 6-8 inches of soil.
3. Check the Soil pH: Use a soil testing kit to check the pH of your soil. If the pH is too low (acidic), add lime to raise it. If the pH is too high (alkaline), add sulfur to lower it.
4. Ensure Good Drainage: Red cabbage doesn’t like to sit in soggy soil. If your soil is heavy clay, consider adding sand or other drainage-improving materials.
5. Consider Raised Beds: If you have poor soil or drainage issues, growing red cabbage in raised beds can be a great solution.
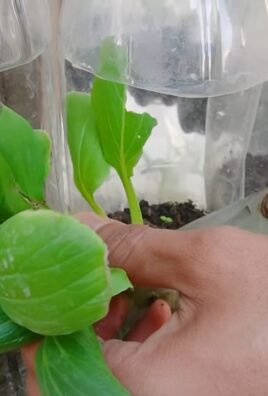
Transplanting Red Cabbage Seedlings
Once your seedlings have been hardened off and the danger of frost has passed, it’s time to transplant them into the garden.
1. Choose a Cloudy Day: Transplanting on a cloudy day will help reduce stress on the seedlings.
2. Dig Holes: Dig holes that are slightly larger than the root balls of the seedlings. Space the holes 18-24 inches apart.
3. Add Fertilizer: Add a small amount of slow-release fertilizer to each hole. I like to use an organic fertilizer formulated for vegetables.
4. Carefully Remove Seedlings: Gently remove the seedlings from their trays or pots, being careful not to damage the roots.
5. Place Seedlings in Holes: Place each seedling in a hole and backfill with soil. Make sure the top of the root ball is level with the surrounding soil.
6. Water Thoroughly: Water the seedlings thoroughly after transplanting.
7. Mulch: Apply a layer of mulch around the plants to help retain moisture, suppress weeds, and regulate soil temperature. I use straw or shredded leaves.
Caring for Your Red Cabbage Plants
Once your red cabbage plants are in the ground, they’ll need regular care to thrive.
* Watering: Red cabbage needs consistent moisture, especially during hot, dry weather. Water deeply whenever the top inch of soil feels dry. Avoid overhead watering, as this can promote fungal diseases. Drip irrigation is ideal.
* Fertilizing: Feed your red cabbage plants every few weeks with a balanced fertilizer. I like to use a liquid fertilizer diluted according to the package directions.
* Weeding: Keep the garden bed free of weeds, as they can compete with the cabbage plants for nutrients and water. Hand-pull weeds or use a hoe to cultivate the soil.
* Pest Control: Red cabbage can be susceptible to several pests, including cabbage worms, aphids, and flea beetles. Inspect your plants regularly for signs of infestation.
* Cabbage Worms: These green caterpillars can quickly devour cabbage leaves. Handpick them off the plants or use Bacillus thuringiensis (Bt), a biological insecticide that is safe for humans and pets.
* Aphids: These small, sap-sucking insects can weaken plants and transmit diseases. Spray them with a strong stream of water or use insecticidal soap.
* Flea Beetles: These tiny beetles can create small holes in cabbage leaves. Cover the plants with row covers to prevent flea beetles from reaching them.
* Disease Prevention: Red cabbage can also be susceptible to several diseases, including black rot and clubroot.
* Black Rot: This bacterial disease can cause yellowing and wilting of leaves. Prevent black rot by planting disease-resistant varieties and practicing crop rotation.
* Clubroot: This fungal disease causes swollen, distorted roots. Prevent clubroot by maintaining a soil pH of 7.0 or higher and practicing crop rotation.
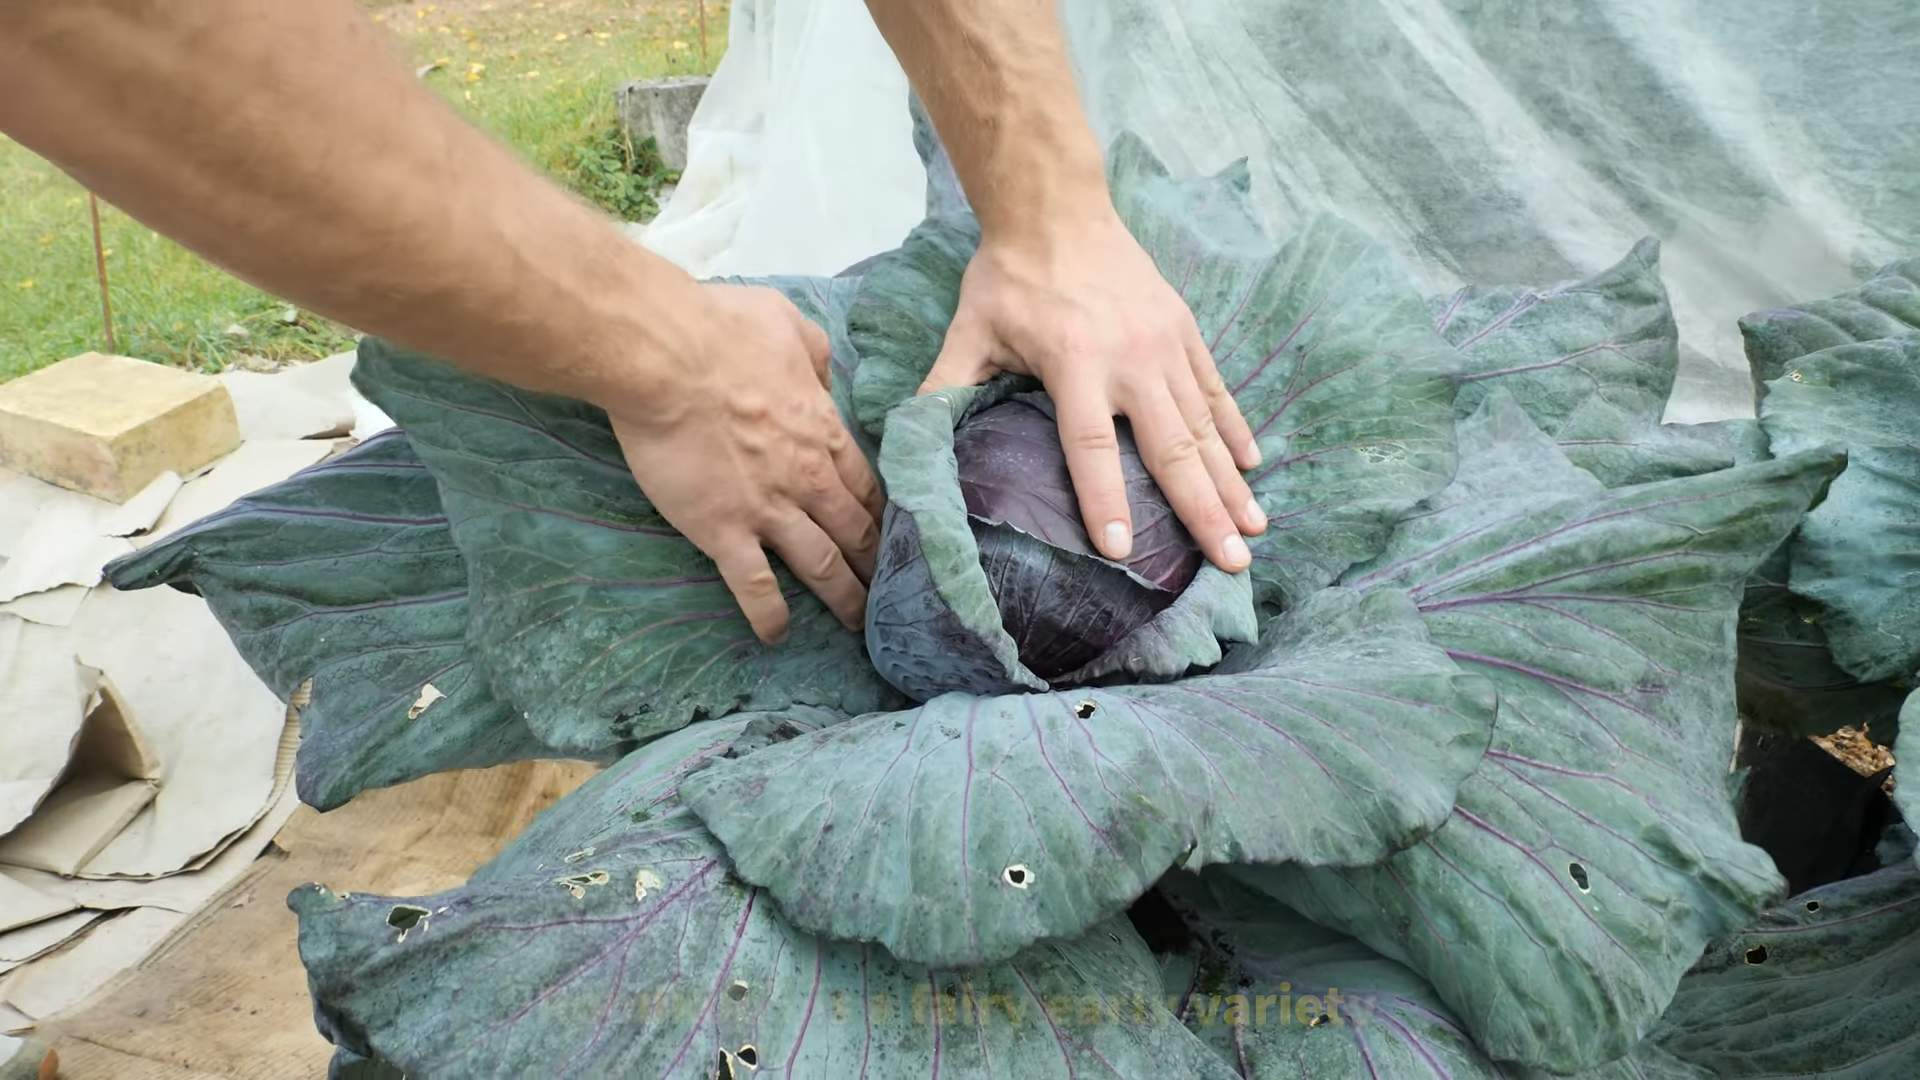
Harvesting Your Red Cabbage
Red cabbage is typically ready to harvest 80-100 days after transplanting, depending on the variety.
1. Check for Firmness: The cabbage head should feel firm and dense when squeezed gently.
2. Cut the Head: Use a sharp knife to cut the head from the plant, leaving a few outer leaves attached.
3. Store Properly: Red cabbage can be stored in the refrigerator for several weeks. Wrap
Conclusion
So, there you have it! Growing red cabbage at home is not only achievable, but it’s also incredibly rewarding. Forget those wilted, overpriced heads at the grocery store. Imagine stepping out into your garden and harvesting a vibrant, crisp red cabbage, bursting with flavor and packed with nutrients. This DIY project is a game-changer for anyone who appreciates fresh, homegrown produce and wants to take control of their food source.
Why is this a must-try? Because it’s more than just growing a vegetable; it’s about connecting with nature, understanding the growing process, and enjoying the unparalleled taste of something you nurtured from seed to table. Plus, it’s a fantastic way to reduce your carbon footprint and support sustainable living. You’ll be amazed at the difference in taste and texture compared to store-bought varieties. The vibrant color alone is enough to make you want to try it!
But the fun doesn’t stop there! Feel free to experiment with different varieties of red cabbage. Some are more compact, perfect for smaller gardens or containers, while others boast deeper colors and sweeter flavors. Consider companion planting with herbs like rosemary or thyme to deter pests naturally. You can also try different growing mediums, from traditional soil to raised beds or even hydroponics, to see what works best for your environment.
For those in colder climates, starting your red cabbage indoors is a great way to get a head start on the growing season. And for those in warmer regions, providing some afternoon shade can help prevent bolting (premature flowering). Don’t be afraid to get your hands dirty and learn as you go. Gardening is all about experimentation and adapting to your specific conditions.
We wholeheartedly encourage you to give this DIY trick a try. The satisfaction of harvesting your own beautiful, healthy red cabbage is truly unmatched. It’s a project that’s both educational and delicious, and it’s a fantastic way to add some color and flavor to your meals.
Once you’ve harvested your first head of homegrown red cabbage, we’d love to hear about your experience! Share your photos, tips, and challenges in the comments below. Let’s build a community of home gardeners and inspire others to embrace the joy of growing their own food. What are you waiting for? Get planting and experience the magic of growing red cabbage at home!
Frequently Asked Questions (FAQ)
1. What is the best time of year to plant red cabbage?
The ideal time to plant red cabbage depends on your climate. In general, red cabbage is a cool-season crop, meaning it thrives in temperatures between 60°F and 70°F (15°C and 21°C). For spring harvests, start seeds indoors 6-8 weeks before the last expected frost. Transplant seedlings outdoors 2-3 weeks before the last frost. For fall harvests, sow seeds directly into the garden in mid-summer, about 10-12 weeks before the first expected frost. If you live in a region with mild winters, you can even grow red cabbage throughout the winter months.
2. What kind of soil does red cabbage need?
Red cabbage prefers well-drained, fertile soil that is rich in organic matter. The ideal soil pH is between 6.0 and 7.0. Before planting, amend your soil with compost, aged manure, or other organic materials to improve drainage and fertility. Red cabbage also benefits from a soil that retains moisture, so consider adding mulch around the plants to help conserve water. A soil test can help you determine if your soil is lacking any essential nutrients.
3. How much sunlight does red cabbage need?
Red cabbage requires at least 6 hours of direct sunlight per day to thrive. Choose a planting location that receives full sun for optimal growth. If you live in a particularly hot climate, providing some afternoon shade can help prevent bolting. Insufficient sunlight can result in smaller heads and reduced yields.
4. How often should I water red cabbage?
Red cabbage needs consistent moisture to grow properly. Water deeply and regularly, especially during dry periods. Aim to keep the soil consistently moist but not waterlogged. Mulching around the plants can help retain moisture and reduce the need for frequent watering. Check the soil moisture regularly by sticking your finger about an inch into the soil. If it feels dry, it’s time to water.
5. What are some common pests and diseases that affect red cabbage?
Red cabbage can be susceptible to several pests and diseases, including cabbage worms, aphids, flea beetles, clubroot, and black rot. To prevent pest problems, consider using row covers to protect your plants. Regularly inspect your plants for signs of pests and diseases and take action promptly. Organic pest control methods, such as insecticidal soap or neem oil, can be effective for controlling many common pests. Crop rotation and good sanitation practices can help prevent soilborne diseases.
6. How do I know when my red cabbage is ready to harvest?
Red cabbage is typically ready to harvest when the head is firm and solid. The size of the head will vary depending on the variety, but generally, heads are ready to harvest when they reach about 6-8 inches in diameter. Gently squeeze the head to check for firmness. If it feels solid and compact, it’s likely ready to harvest. Use a sharp knife to cut the head from the stem, leaving a few outer leaves intact.
7. Can I grow red cabbage in containers?
Yes, you can grow red cabbage in containers, especially if you have limited garden space. Choose a large container that is at least 12 inches in diameter and depth. Use a well-draining potting mix and ensure that the container has drainage holes. Water regularly and fertilize as needed. Container-grown red cabbage may require more frequent watering and fertilization than plants grown in the ground.
8. How do I store red cabbage after harvesting?
Red cabbage can be stored in the refrigerator for several weeks. Wrap the head tightly in plastic wrap or store it in a plastic bag to prevent it from drying out. You can also store red cabbage in a cool, dark, and humid place, such as a root cellar, for several months. Avoid storing red cabbage near fruits like apples and bananas, as they release ethylene gas, which can cause the cabbage to spoil more quickly.
9. What are some ways to use red cabbage in cooking?
Red cabbage is a versatile vegetable that can be used in a variety of dishes. It can be eaten raw in salads, coleslaw, or slaws. It can also be cooked by braising, roasting, stir-frying, or pickling. Red cabbage pairs well with a variety of flavors, including sweet, sour, and savory. Some popular red cabbage recipes include braised red cabbage with apples and vinegar, pickled red cabbage, and red cabbage slaw with a creamy dressing.
10. Can I save seeds from my red cabbage plants?
Saving seeds from red cabbage can be a bit challenging, as it is a biennial plant, meaning it takes two years to produce seeds. In the first year, the plant will produce a head of cabbage. In the second year, if left in the ground, it will flower and produce seeds. However, red cabbage is often cross-pollinated, so the seeds may not produce plants that are true to type. If you want to save seeds, you will need to isolate your red cabbage plants from other brassicas to prevent cross-pollination.
Leave a Comment