

Grow Sage in Pots: Unlock the secrets to cultivating this fragrant and flavorful herb right on your patio or windowsill! Have you ever dreamed of snipping fresh sage leaves to add a touch of earthy goodness to your culinary creations? Or perhaps you’re drawn to the herb’s rich history and its use in traditional medicine and spiritual practices? Well, you’re in the right place!
Sage, with its origins tracing back to the Mediterranean, has been revered for centuries. The Romans called it “salvia,” derived from “salvere,” meaning “to heal,” highlighting its medicinal properties. From flavoring dishes to warding off evil spirits (according to folklore!), sage has played a significant role in various cultures. But let’s be honest, not everyone has a sprawling garden to dedicate to growing herbs. That’s where the magic of container gardening comes in!
I’m here to show you how incredibly easy it is to grow sage in pots, even if you have limited space or a less-than-green thumb. Imagine the convenience of having fresh sage readily available whenever you need it. No more last-minute trips to the grocery store or settling for dried herbs that lack the vibrant flavor of fresh ones. Plus, growing your own sage is a fantastic way to connect with nature, reduce your carbon footprint, and add a touch of beauty to your home. So, let’s dive in and discover the simple steps to successfully cultivate this wonderful herb in pots!
Grow Your Own Sage: A Beginner’s Guide to Potted Sage Perfection
Hey there, fellow plant enthusiasts! I’m so excited to share my experience with growing sage in pots. It’s surprisingly easy, incredibly rewarding, and having fresh sage on hand for cooking is a total game-changer. Trust me, once you start, you’ll wonder why you didn’t do it sooner!
Why Grow Sage in Pots?
Before we dive into the how-to, let’s talk about why growing sage in pots is such a great idea:
* Space Saver: Perfect for small gardens, balconies, or even just a sunny windowsill.
* Control: You have complete control over the soil, watering, and sunlight, ensuring your sage thrives.
* Mobility: Easily move your sage indoors during harsh weather or to optimize sunlight exposure.
* Aesthetics: Potted sage adds a touch of rustic charm to any space.
* Fresh Herbs: The most important reason! Having fresh sage readily available for your culinary creations is simply amazing.
Choosing the Right Sage Variety
While common sage (Salvia officinalis) is the most popular choice for cooking, there are many other varieties to consider, each with its own unique flavor and appearance. Here are a few of my favorites:
* Common Sage (Salvia officinalis): The classic choice, with a strong, earthy flavor.
* Purple Sage (Salvia officinalis ‘Purpurascens’): Beautiful purple foliage and a slightly milder flavor.
* Golden Sage (Salvia officinalis ‘Aurea’): Variegated golden leaves and a subtle, sweet flavor.
* Tricolor Sage (Salvia officinalis ‘Tricolor’): A stunning variety with green, white, and pink leaves.
I recommend starting with common sage, especially if you’re new to growing herbs. It’s hardy and relatively easy to care for. Once you get the hang of it, you can experiment with other varieties!
What You’ll Need
Okay, let’s gather our supplies. Here’s what you’ll need to get started:
* Sage Seeds or Seedling: You can start from seeds or buy a young sage plant from a nursery. I personally prefer starting with a seedling because it’s faster and easier.
* Pot: Choose a pot that’s at least 12 inches in diameter. Make sure it has drainage holes! Good drainage is crucial for sage.
* Potting Mix: Use a well-draining potting mix specifically formulated for herbs or vegetables. Avoid using garden soil, as it can become compacted in pots.
* Watering Can: For gentle watering.
* Trowel: For planting and transplanting.
* Optional:
* Slow-release fertilizer: To provide your sage with a steady supply of nutrients.
* Mulch: To help retain moisture and suppress weeds.
* Gardening Gloves: To keep your hands clean.
Planting Your Sage
Now for the fun part! Let’s get our hands dirty and plant some sage.
Starting from Seed
1. Prepare the Pot: Fill your pot with potting mix, leaving about an inch of space at the top.
2. Sow the Seeds: Sprinkle the sage seeds evenly over the surface of the soil.
3. Cover the Seeds: Lightly cover the seeds with a thin layer of potting mix.
4. Water Gently: Water the soil gently using a watering can or spray bottle. Avoid overwatering.
5. Provide Light: Place the pot in a warm, sunny location. Sage needs at least 6 hours of sunlight per day.
6. Keep the Soil Moist: Keep the soil consistently moist, but not soggy.
7. Germination: Sage seeds typically germinate in 10-21 days.
8. Thin Seedlings: Once the seedlings have developed a few sets of true leaves, thin them out, leaving only the strongest plants.
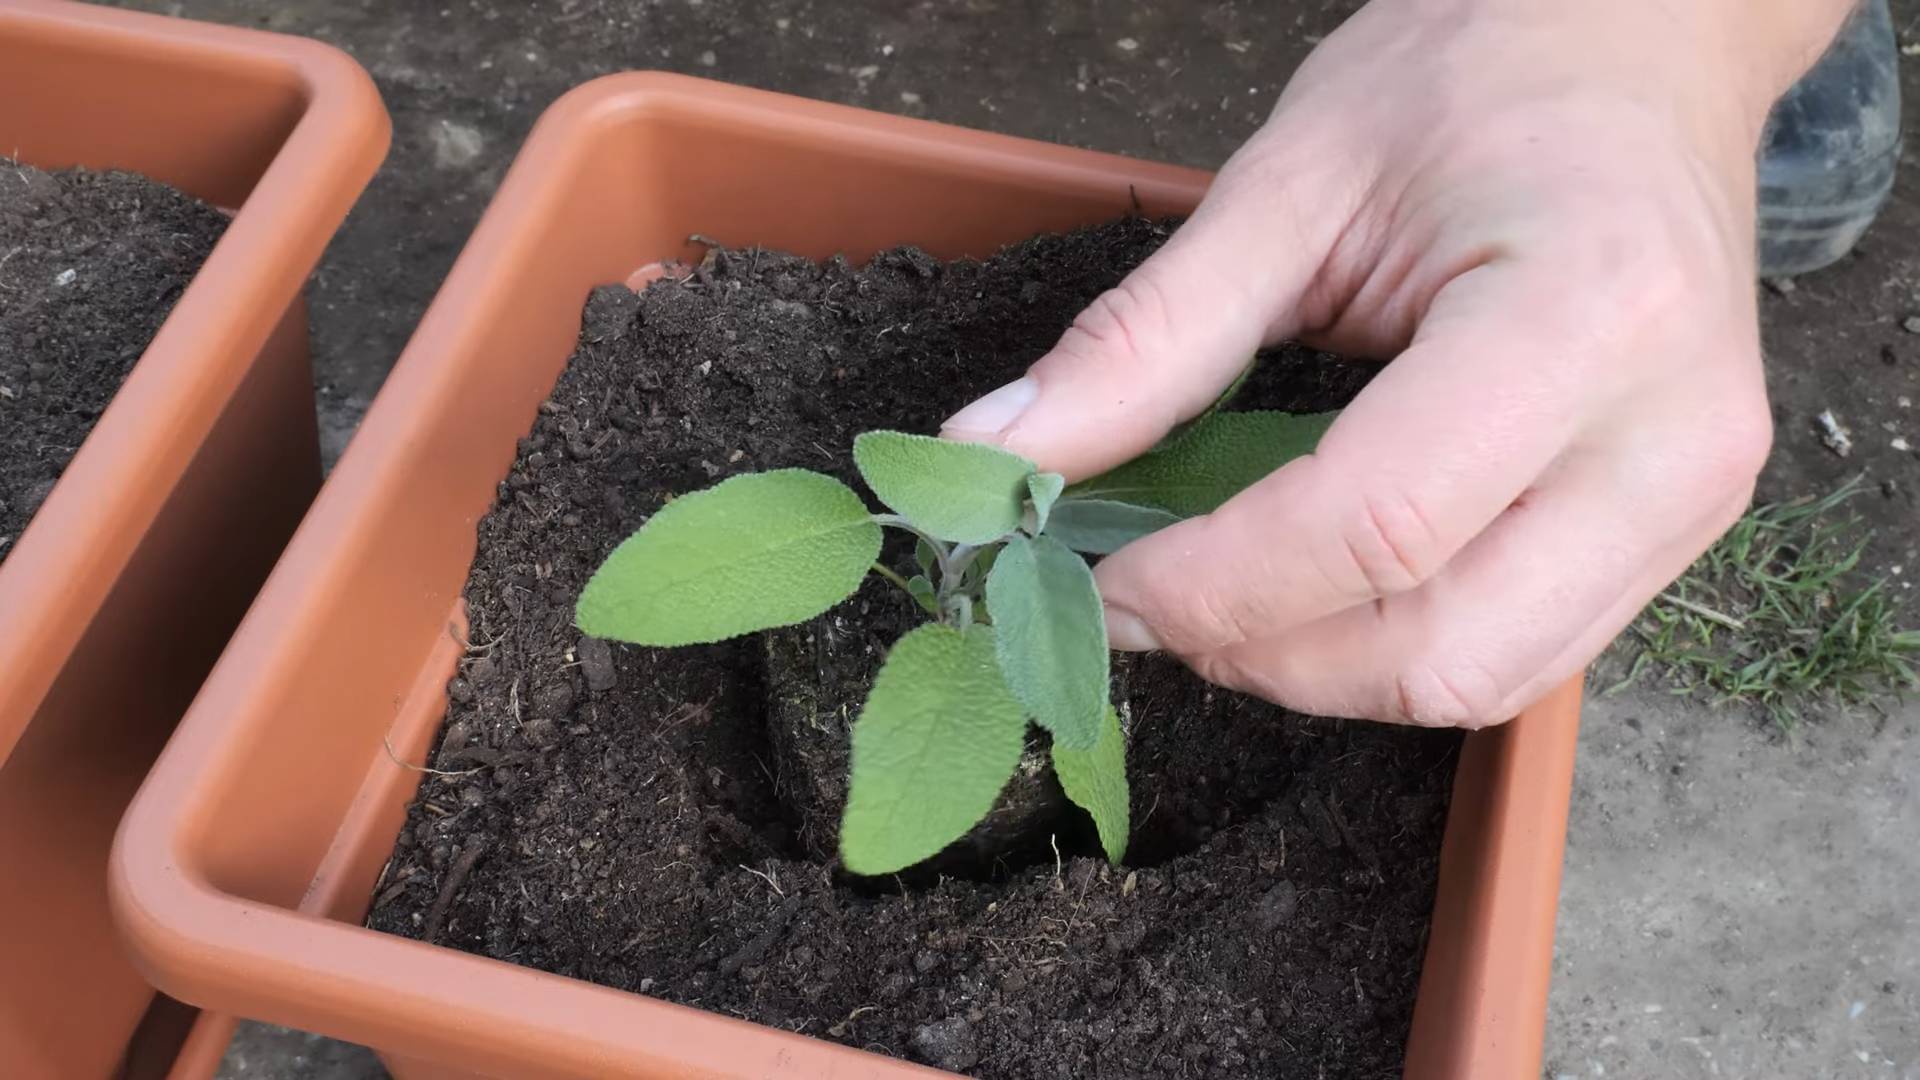
Planting a Seedling
1. Prepare the Pot: Fill your pot with potting mix, leaving about an inch of space at the top.
2. Dig a Hole: Dig a hole in the center of the pot that’s slightly larger than the root ball of the seedling.
3. Remove the Seedling: Gently remove the seedling from its container. If the roots are tightly bound, gently loosen them with your fingers.
4. Place the Seedling: Place the seedling in the hole, making sure the top of the root ball is level with the surrounding soil.
5. Fill the Hole: Fill the hole with potting mix, gently firming the soil around the seedling.
6. Water Thoroughly: Water the seedling thoroughly until water drains out of the drainage holes.
7. Provide Light: Place the pot in a warm, sunny location.
Caring for Your Potted Sage
Once your sage is planted, it’s time to provide it with the care it needs to thrive.
Watering
Sage is relatively drought-tolerant, so it’s important not to overwater it. Allow the soil to dry out slightly between waterings. When you do water, water deeply, until water drains out of the drainage holes. Avoid getting the leaves wet, as this can lead to fungal diseases. I usually check the soil moisture by sticking my finger about an inch deep. If it feels dry, it’s time to water.
Sunlight
Sage needs at least 6 hours of sunlight per day. Place your pot in a sunny location, such as a south-facing window or a sunny balcony. If you don’t have enough natural sunlight, you can supplement with a grow light.
Fertilizing
Sage doesn’t need a lot of fertilizer. In fact, over-fertilizing can actually reduce its flavor. If you’re using a slow-release fertilizer, apply it according to the package directions. Otherwise, you can fertilize your sage every few weeks with a diluted liquid fertilizer. I like to use a balanced fertilizer with an N-P-K ratio of 10-10-10.
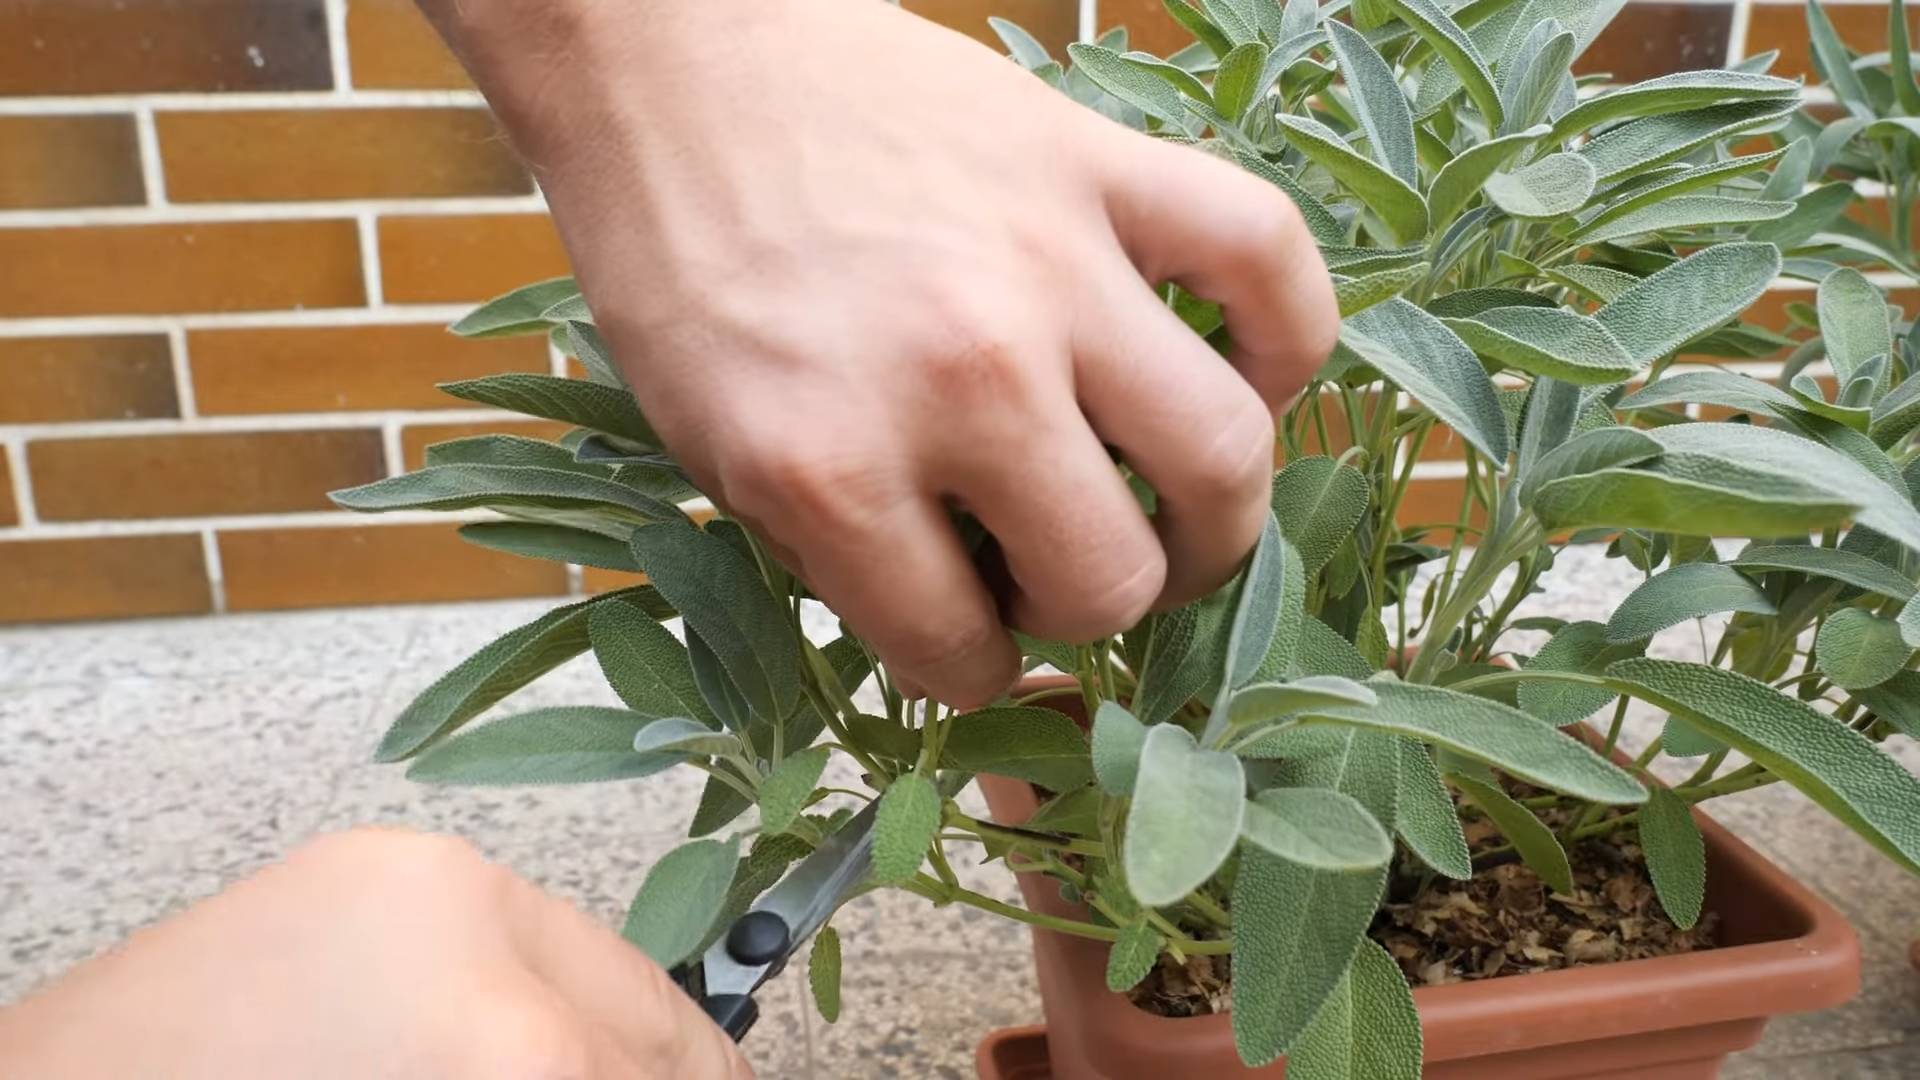
Pruning
Pruning is essential for keeping your sage plant healthy and productive. Prune your sage regularly to encourage bushier growth and prevent it from becoming leggy. You can prune your sage at any time of year, but the best time to prune is in the spring, after the last frost.
To prune your sage, simply snip off the tips of the stems with a pair of pruning shears. You can also remove any dead or damaged leaves. Don’t be afraid to prune your sage quite heavily. It will bounce back quickly.
Pest and Disease Control
Sage is generally resistant to pests and diseases, but it can occasionally be affected by aphids, spider mites, or fungal diseases.
* Aphids: These tiny insects suck the sap from plants, causing them to become weak and stunted. You can control aphids by spraying them with a strong stream of water or by using an insecticidal soap.
* Spider Mites: These tiny pests create webs on plants and suck the sap from the leaves. You can control spider mites by spraying them with a strong stream of water or by using a miticide.
* Fungal Diseases: Fungal diseases can cause leaves to develop spots or rot. You can prevent fungal diseases by providing good air circulation and avoiding overwatering. If your sage does develop a fungal disease, you can treat it with a fungicide.
I always prefer to use organic pest and disease control methods whenever possible. Neem oil is a great option for controlling aphids and spider mites.
Harvesting Your Sage
The best part of growing your own sage is harvesting it! You can start harvesting sage leaves as soon as the plant is established, usually about 60-75 days after planting.
To harvest sage, simply snip off the leaves with a pair of scissors or pruning shears. You can harvest individual leaves or entire stems. The flavor of sage is most intense in the morning, so it’s best to harvest it then.
You can use fresh sage leaves immediately or dry them for later use. To dry sage, simply hang the stems upside down in a cool, dry place. Once the leaves are dry, you can store them in an airtight container.
Using Your Fresh Sage
Now that you have a bounty of fresh sage, it’s time to get cooking! Sage is a versatile herb that can be used in a variety of dishes. Here are a few of my favorite ways to use fresh sage:
* Sage Butter: Melt butter in a pan and add chopped sage leaves. Cook until the sage is fragrant and the butter is golden brown. Serve over pasta, gnocchi, or roasted vegetables.
* Sage and Sausage Stuffing: Add chopped sage leaves to your favorite stuffing recipe.
* Sage-Roasted Chicken: Rub a whole chicken with olive oil, salt, pepper, and chopped sage leaves. Roast until cooked through.
* Sage Tea:
Conclusion
So, there you have it! Growing sage in pots is not only achievable, but it’s also incredibly rewarding. From the convenience of having fresh herbs readily available to the sheer joy of nurturing a thriving plant, the benefits are numerous. This DIY trick transforms even the smallest space into a fragrant and functional herb garden.
Why is this a must-try? Because it empowers you to take control of the quality and freshness of your sage. No more wilted, overpriced bunches from the grocery store! You’ll have vibrant, flavorful sage at your fingertips, ready to elevate your culinary creations. Plus, growing your own herbs is a sustainable and eco-friendly choice, reducing your reliance on commercially grown produce and minimizing your carbon footprint.
But the beauty of growing sage in pots lies in its adaptability. Feel free to experiment with different varieties of sage. Consider adding companion plants like rosemary or thyme to the same pot for a delightful Mediterranean-inspired arrangement. You can also play around with different pot sizes and materials to find what works best for your space and aesthetic. For a truly unique touch, try decorating your pots with paint or mosaic tiles to create personalized planters that reflect your style.
Don’t be afraid to get creative with your sage harvest, too! Beyond culinary uses, sage has a rich history of medicinal and aromatic applications. Dry your sage leaves to create your own herbal teas, potpourri, or even smudge sticks for cleansing your home. The possibilities are endless!
We wholeheartedly encourage you to embark on this simple yet satisfying DIY project. Growing sage in pots is a fantastic way to connect with nature, enhance your cooking, and add a touch of green to your living space. It’s a project that offers both immediate gratification and long-term rewards.
Now, it’s your turn! Grab a pot, some sage seeds or a starter plant, and get your hands dirty. We’re confident that you’ll be amazed by how easy and enjoyable it is to grow your own sage. And most importantly, we want to hear about your experience! Share your tips, tricks, and photos with us in the comments below. Let’s build a community of sage-loving gardeners and inspire others to discover the joys of growing their own herbs. Happy gardening!
Frequently Asked Questions (FAQs)
What is the best type of pot for growing sage?
The ideal pot for growing sage should be made of terracotta or plastic, and it should have drainage holes. Terracotta pots are porous, which allows for better air circulation and prevents the soil from becoming waterlogged. Plastic pots are lightweight and retain moisture better, but it’s important to ensure they have adequate drainage. The size of the pot should be at least 12 inches in diameter to allow the sage plant to develop a healthy root system.
What kind of soil should I use for growing sage in pots?
Sage thrives in well-draining soil that is slightly alkaline. A good potting mix for sage should consist of equal parts of potting soil, perlite, and compost. The perlite will improve drainage, while the compost will provide essential nutrients. Avoid using heavy clay soil, as it can retain too much moisture and lead to root rot. You can also add a small amount of lime to the soil to increase its alkalinity.
How often should I water my sage plant in a pot?
Water your sage plant when the top inch of soil feels dry to the touch. Avoid overwatering, as sage is susceptible to root rot. During the growing season (spring and summer), you may need to water your sage plant more frequently than during the dormant season (fall and winter). When watering, water deeply until water drains out of the drainage holes.
Where is the best location to place my potted sage plant?
Sage requires at least six hours of sunlight per day to thrive. Place your potted sage plant in a sunny location, such as a south-facing window or a balcony. If you live in a hot climate, provide some afternoon shade to prevent the leaves from scorching. If you don’t have access to a sunny location, you can supplement with artificial light.
How do I fertilize my sage plant in a pot?
Sage is not a heavy feeder, so you don’t need to fertilize it frequently. Fertilize your sage plant once or twice during the growing season with a balanced liquid fertilizer diluted to half strength. Avoid over-fertilizing, as it can lead to leggy growth and reduced flavor. You can also add compost to the soil to provide slow-release nutrients.
How do I prune my sage plant?
Pruning your sage plant regularly will encourage bushier growth and prevent it from becoming leggy. Prune your sage plant in the spring after the last frost. Remove any dead or damaged stems, and trim back the remaining stems by about one-third. You can also pinch off the tips of the stems throughout the growing season to encourage branching.
Can I grow sage indoors?
Yes, you can grow sage indoors, but it requires bright light and good air circulation. Place your potted sage plant near a sunny window or under grow lights. Ensure that the pot has drainage holes and that the soil is well-draining. Water your sage plant when the top inch of soil feels dry to the touch, and fertilize it sparingly.
How do I harvest sage leaves?
You can harvest sage leaves at any time during the growing season. Simply snip off the leaves with scissors or pruning shears. Harvest the leaves in the morning after the dew has dried. Avoid harvesting more than one-third of the plant at a time, as this can weaken it.
How do I dry sage leaves?
To dry sage leaves, tie them in small bundles and hang them upside down in a cool, dry, and well-ventilated place. You can also dry sage leaves in a dehydrator or in the oven at a low temperature. Once the leaves are completely dry, store them in an airtight container in a cool, dark place.
What are some common problems with growing sage in pots?
Some common problems with growing sage in pots include root rot, powdery mildew, and spider mites. Root rot is caused by overwatering, so ensure that the pot has drainage holes and that the soil is well-draining. Powdery mildew is a fungal disease that can be prevented by providing good air circulation. Spider mites are tiny pests that can be controlled with insecticidal soap.
Can I propagate sage from cuttings?
Yes, you can propagate sage from cuttings. Take 4-6 inch cuttings from new growth in the spring or summer. Remove the lower leaves and dip the cut end in rooting hormone. Plant the cuttings in a well-draining potting mix and keep them moist. Roots should develop in a few weeks.
Is sage a perennial?
Yes, sage is a perennial herb, meaning it will come back year after year. In colder climates, it may die back to the ground in the winter, but it will regrow in the spring. To protect your sage plant in the winter, mulch around the base of the plant with straw or leaves.
What are the culinary uses for sage?
Sage has a distinctive, slightly peppery flavor that pairs well with savory dishes. It is commonly used to season meats, poultry, stuffing, and sauces. Sage is also a key ingredient in many Italian dishes, such as gnocchi and ravioli. You can also use sage to make herbal teas or to flavor butter and olive oil.
Is sage safe for pets?
While sage is generally considered safe for humans, it can be toxic to pets if ingested in large quantities. The essential oils in sage can cause gastrointestinal upset, central nervous system depression, and even seizures in pets. If you have pets, it’s best to keep your potted sage plant out of their reach.

Leave a Comment