

Grow Taro in Small Spaces? Absolutely! Imagine harvesting your own fresh, nutritious taro right from your balcony or patio. It’s easier than you think, and I’m here to show you how! For centuries, taro has been a staple in many cultures, particularly in the Pacific Islands and Asia, where it’s revered not just as food but also as a symbol of sustenance and connection to the land. Think of poi in Hawaii or the various taro-based dishes enjoyed across Southeast Asia – it’s a plant with deep roots (pun intended!).
But you don’t need acres of land to enjoy this versatile crop. Many people are intimidated by the thought of growing their own food, especially if they live in apartments or have limited outdoor space. That’s where these DIY tricks come in! I’m going to share some simple, effective methods to grow taro in small spaces, transforming your urban dwelling into a mini-farm. Not only will you have access to fresh, healthy food, but you’ll also experience the joy and satisfaction of nurturing a plant from start to finish. Plus, it’s a fantastic way to connect with nature, even in the heart of the city. Let’s get started and unlock the secrets to successful small-space taro cultivation!
Growing Taro in Small Spaces: A DIY Guide
Hey there, fellow plant enthusiasts! Ever dreamed of growing your own taro but thought you didn’t have the space? Well, I’m here to tell you that you absolutely can! Taro, with its beautiful, large leaves and edible corms (the underground stem), can thrive even in small spaces with a little DIY ingenuity. I’m going to walk you through everything you need to know to cultivate your own taro patch, even if you only have a balcony or a small patio.
What You’ll Need
Before we dive in, let’s gather our supplies. This is a pretty straightforward project, and you probably already have some of these items lying around.
* Taro Corms: You can usually find these at Asian grocery stores or online. Look for firm, healthy corms without any soft spots or blemishes.
* Large Container: A plastic tub, a large pot, or even a repurposed container will work. Aim for something at least 12 inches deep and 18 inches wide to give the taro roots plenty of room to grow.
* Well-Draining Soil: Taro loves moisture, but it doesn’t like to sit in soggy soil. A mix of potting soil, compost, and perlite or vermiculite is ideal.
* Water: Taro needs consistent moisture, so have a watering can or hose handy.
* Fertilizer: A balanced, slow-release fertilizer will provide the nutrients your taro needs to flourish.
* Optional:
* Mulch: To help retain moisture and suppress weeds.
* Grow Lights: If you don’t have a sunny spot.
* Pond Liner (if using a container without drainage holes): To create a bog-like environment.
Choosing the Right Taro Variety
While most taro varieties can be grown in containers, some are better suited for smaller spaces than others. Look for varieties that are known to be more compact or dwarf. Some good options include:
* Bun Long: A popular variety with a mild flavor.
* Lehua Maoli: Known for its reddish-purple stems and leaves.
* Chinese Taro: A smaller variety that’s well-suited for container gardening.
Preparing Your Container
The first step is to get your container ready for planting. This is crucial for ensuring proper drainage and creating a healthy environment for your taro.
1. Clean Your Container: If you’re using a repurposed container, make sure to clean it thoroughly with soap and water to remove any dirt or debris.
2. Drill Drainage Holes (if needed): If your container doesn’t have drainage holes, drill several holes in the bottom to allow excess water to escape. This is essential to prevent root rot. If you’re aiming for a bog-like environment, you can skip this step and use a pond liner.
3. Line the Container (optional): If you’re using a container without drainage holes and want to create a bog-like environment, line the container with a pond liner. Make sure the liner is securely in place and extends slightly over the edges of the container.
4. Add a Layer of Gravel (optional): If you’ve drilled drainage holes, add a layer of gravel or pebbles to the bottom of the container to improve drainage. This will help prevent the drainage holes from becoming clogged with soil.
Planting Your Taro Corms
Now for the fun part – planting your taro corms! This is a simple process, but it’s important to do it correctly to give your taro the best start.
1. Fill the Container with Soil: Fill your container with your well-draining soil mix, leaving a few inches of space at the top.
2. Create Planting Holes: Dig holes that are about 4-6 inches deep and spaced about 12 inches apart. If you’re only planting one corm, place it in the center of the container.
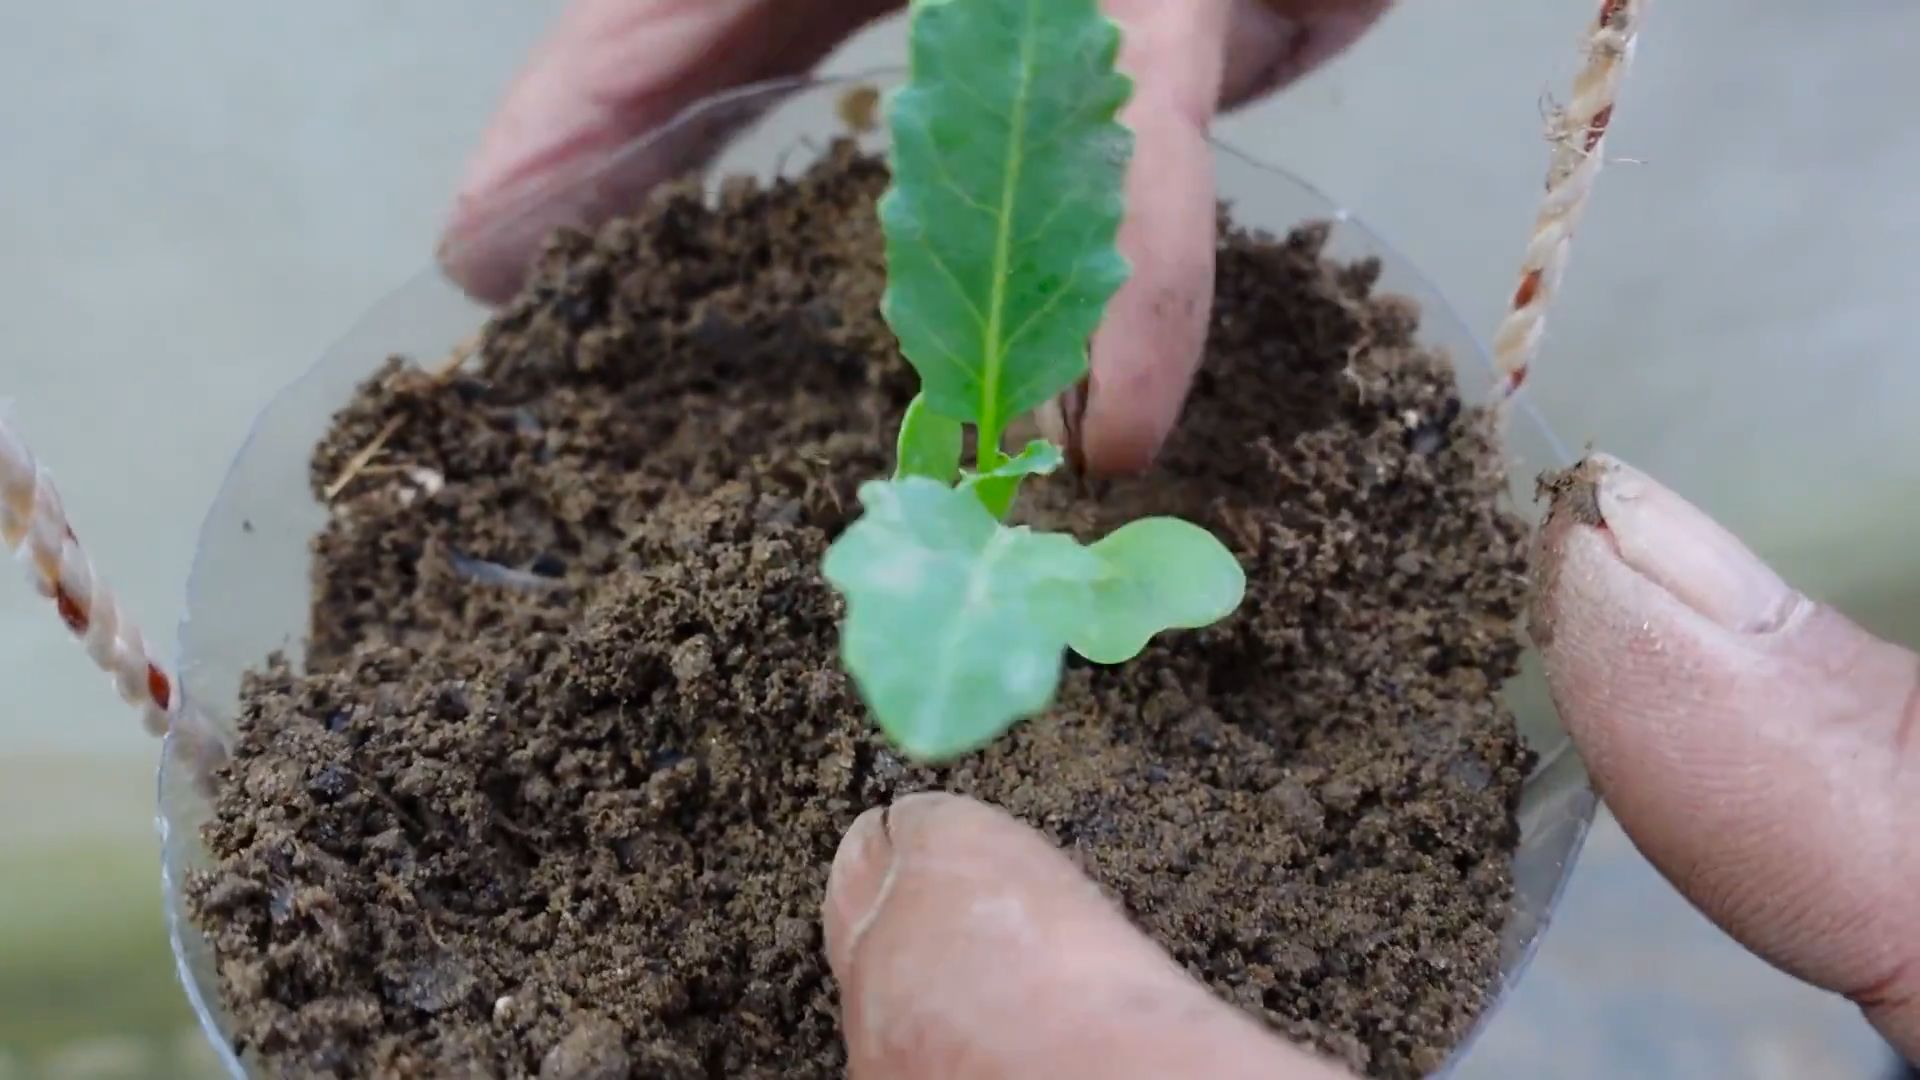
3. Plant the Corms: Place the taro corms in the holes, with the pointed end facing up. Cover the corms with soil and gently pat the soil down.
4. Water Thoroughly: Water the soil thoroughly until water drains out of the drainage holes (if you have them). This will help settle the soil and ensure that the corms are properly hydrated.
Caring for Your Taro Plants
Once your taro corms are planted, it’s important to provide them with the right care to ensure they thrive. Here’s what you need to know:
1. Sunlight: Taro prefers partial shade, especially during the hottest part of the day. If you’re growing your taro outdoors, choose a spot that receives morning sun and afternoon shade. If you’re growing it indoors, place it near a sunny window or use grow lights.
2. Watering: Taro needs consistent moisture, so water it regularly, especially during hot, dry weather. The soil should always be moist but not soggy. Check the soil moisture by sticking your finger into the soil. If the top inch of soil feels dry, it’s time to water.
3. Fertilizing: Taro is a heavy feeder, so it needs regular fertilization to thrive. Apply a balanced, slow-release fertilizer according to the package directions. You can also supplement with liquid fertilizer every few weeks.
4. Mulching: Apply a layer of mulch around the base of the plants to help retain moisture, suppress weeds, and regulate soil temperature.
5. Pruning: Remove any yellowing or damaged leaves to encourage new growth. You can also prune the plants to maintain their shape and size.
6. Pest Control: Taro is generally pest-resistant, but it can be susceptible to aphids, spider mites, and other common garden pests. Inspect your plants regularly and treat any infestations promptly with insecticidal soap or neem oil.
7. Overwintering: In colder climates, taro is not frost-hardy and needs to be overwintered indoors. Before the first frost, dig up the corms and store them in a cool, dry place until spring. You can also bring the entire container indoors and place it in a sunny location.
Creating a Bog-Like Environment (Optional)
Taro naturally grows in wet, swampy environments, so creating a bog-like environment in your container can help it thrive. Here’s how to do it:
1. Use a Container Without Drainage Holes: As mentioned earlier, use a container without drainage holes and line it with a pond liner.
2. Keep the Soil Constantly Moist: Water the soil frequently to keep it constantly moist. The soil should be saturated but not completely submerged.
3. Add Aquatic Plants (optional): Add some aquatic plants, such as water lilies or water hyacinths, to the container to create a more natural bog-like environment.
4. Monitor Water Quality: Regularly monitor the water quality and change the water if it becomes stagnant or cloudy.
Harvesting Your Taro
The time it takes for taro to mature depends on the variety and growing conditions, but it typically takes about 7-12 months. You’ll know your taro is ready to harvest when the leaves start to turn yellow and die back.
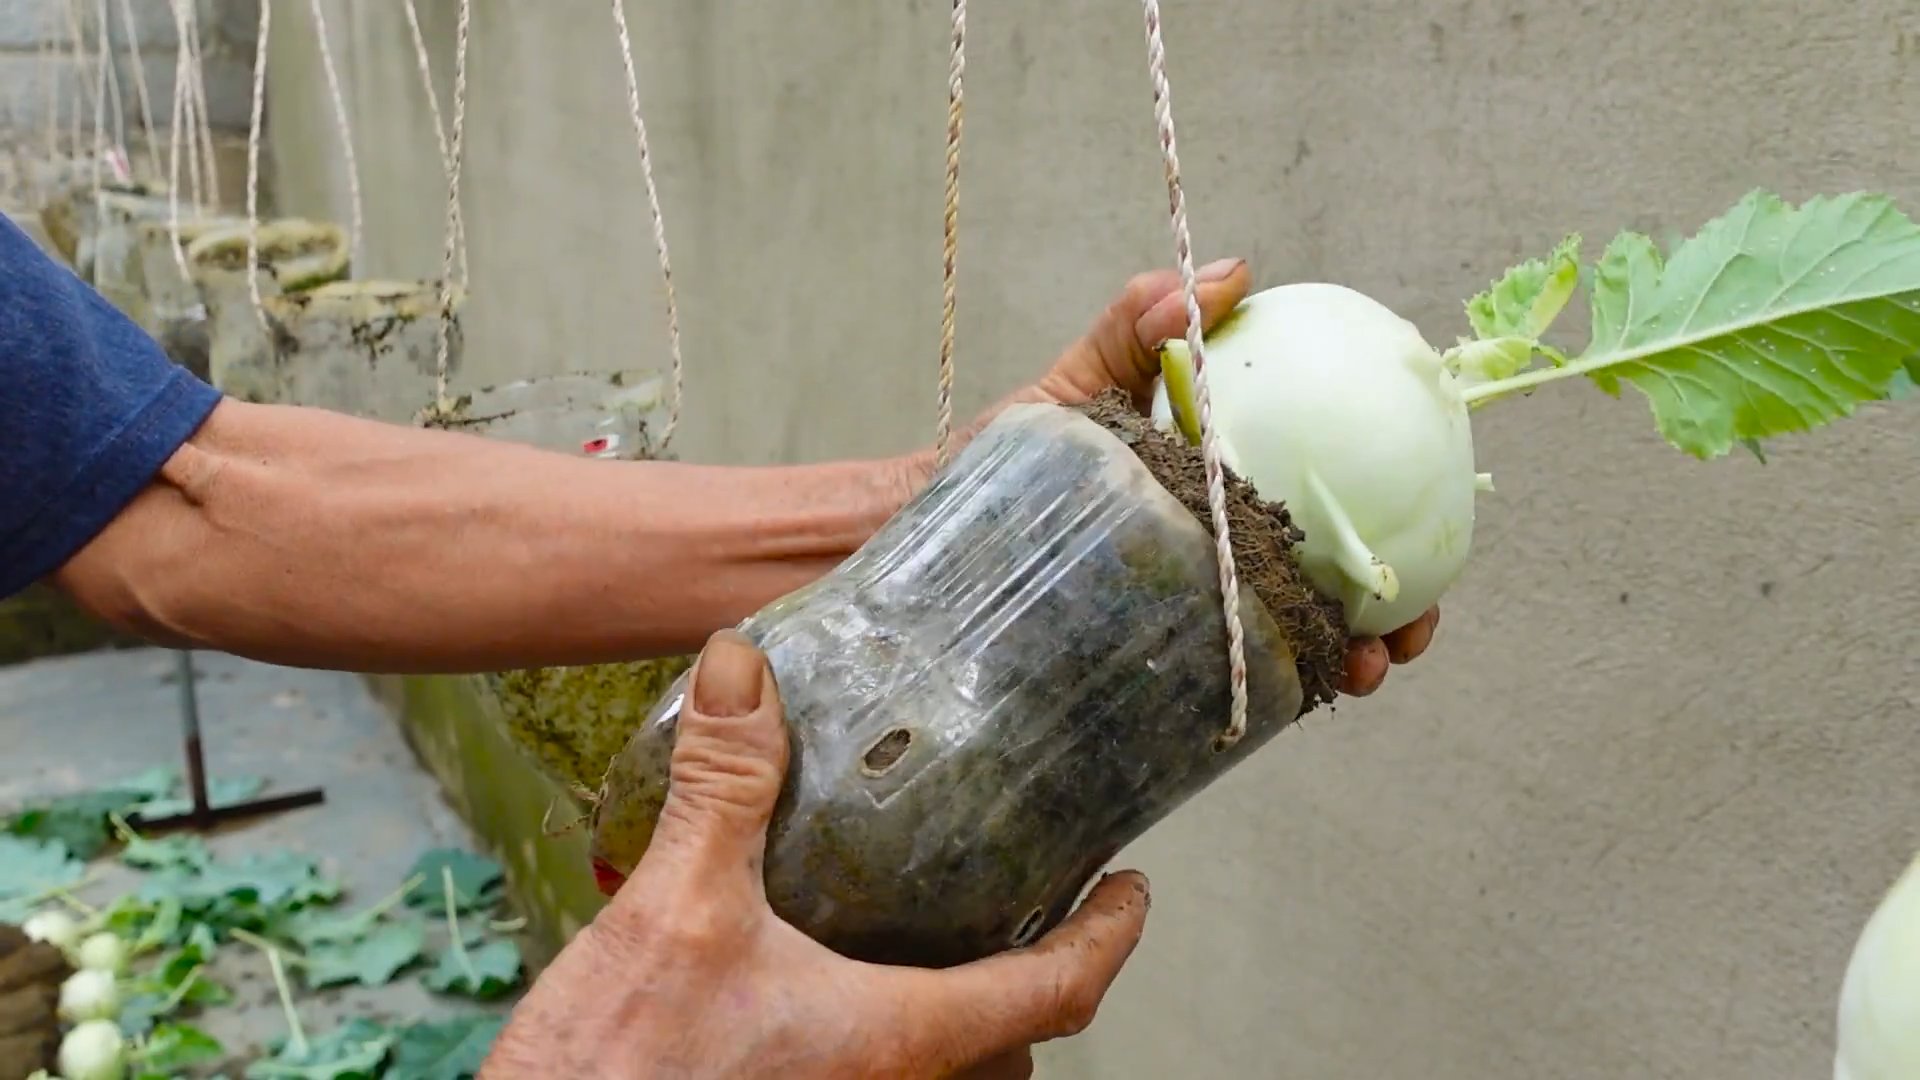
1. Dig Up the Corms: Carefully dig up the corms from the soil. Be careful not to damage the corms.
2. Clean the Corms: Wash the corms thoroughly to remove any dirt or debris.
3. Cure the Corms: Cure the corms by placing them in a cool, dry place for a few days. This will help them develop a sweeter flavor.
4. Store the Corms: Store the cured corms in a cool, dry place until you’re ready to use them.
Enjoying Your Homegrown Taro
Taro corms are a versatile ingredient that can be used in a variety of dishes. They can be boiled, steamed, baked, or fried. They can also be used to make poi, a traditional Hawaiian dish. Remember that raw taro contains calcium oxalate crystals, which can cause irritation. Always cook taro thoroughly before eating it. The leaves are also edible, but they should be cooked well to remove any toxins.
Troubleshooting
Even with the best care, you might encounter some challenges when growing taro. Here are some common problems and how to fix them:
* Yellowing Leaves: This could be a sign of overwatering, underwatering, nutrient deficiency, or pest infestation. Check the soil moisture, fertilize your plants, and inspect them for pests.
* Stunted Growth: This could be due to insufficient sunlight, poor soil, or lack of fertilizer. Move your plants to a sunnier location, amend the soil with compost, and fertilize regularly.
* Root Rot: This is caused by overwatering and poor drainage. Make sure your container has drainage holes and avoid overwatering. If root rot is severe, you may need to repot your
Conclusion
So, there you have it! Growing taro in small spaces is not only achievable but also incredibly rewarding. This DIY trick transforms a humble root vegetable into a beautiful, edible ornamental plant, bringing a touch of the tropics to even the most compact urban environments. We’ve shown you how to bypass the need for expansive fields and muddy paddies, proving that with a little ingenuity and the right techniques, you can cultivate your own taro, regardless of your limited space.
Why is this a must-try? Because it’s more than just growing a plant; it’s about connecting with nature, learning new skills, and enjoying the satisfaction of harvesting your own food. Imagine the pride you’ll feel serving up a dish made with taro you nurtured from a small corm. Plus, the lush, heart-shaped leaves of the taro plant add a vibrant, exotic touch to any balcony, patio, or even indoor space. It’s a conversation starter, a stress reliever, and a delicious ingredient all rolled into one.
But the fun doesn’t stop there! Feel free to experiment with different varieties of taro. Some are better suited for container gardening than others. Consider trying ‘Bun Long’ or ‘Black Magic’ for their compact size and striking foliage. You can also play around with different potting mixes. While we recommended a well-draining, nutrient-rich mix, you can amend it with compost or aged manure for an extra boost. Don’t be afraid to get creative with your container choices either. Repurposed buckets, old tires (properly cleaned, of course!), or even woven baskets can all make unique and stylish homes for your taro.
And remember, consistent watering and fertilization are key to success. Keep a close eye on your plant, adjusting your watering schedule based on the weather and the moisture level of the soil. A balanced liquid fertilizer applied every few weeks will ensure your taro gets the nutrients it needs to thrive.
We are confident that you can successfully grow taro in small spaces using our simple and effective method. It’s a project that’s both fun and educational, and the results are well worth the effort.
Now, it’s your turn! We encourage you to give this DIY trick a try. Start small, be patient, and don’t be afraid to experiment. And most importantly, share your experience with us! We’d love to see photos of your taro plants, hear about your successes (and challenges!), and learn any tips or tricks you discover along the way. Let’s build a community of small-space taro growers and inspire others to embrace the joy of urban gardening. So, grab a corm, get your hands dirty, and start growing your own little piece of the tropics today!
Frequently Asked Questions (FAQ)
What exactly is taro, and what does it taste like?
Taro (Colocasia esculenta) is a root vegetable that’s a staple food in many tropical and subtropical regions. It’s known for its large, heart-shaped leaves and its starchy corm (the underground stem). The taste of taro is often described as slightly sweet and nutty, with a texture similar to potatoes or sweet potatoes. It can be used in a variety of dishes, from savory stews and curries to sweet desserts and snacks.
Is it safe to eat taro leaves?
Raw taro leaves contain calcium oxalate crystals, which can cause irritation and discomfort in the mouth and throat. Therefore, it’s crucial to cook taro leaves thoroughly before eating them. Boiling, steaming, or baking the leaves for at least 30 minutes will break down the crystals and make them safe to consume. Cooked taro leaves are a nutritious and delicious addition to many dishes.
How much sunlight does taro need when grown in a container?
Taro thrives in bright, indirect sunlight. While it can tolerate some direct sunlight, especially in the morning, too much intense sun can scorch the leaves. Aim for at least 4-6 hours of indirect sunlight per day. If you’re growing taro indoors, place it near a sunny window or supplement with grow lights.
What kind of soil is best for growing taro in pots?
Taro prefers a well-draining, nutrient-rich soil. A good potting mix for taro should consist of equal parts of potting soil, compost, and perlite or vermiculite. The compost provides essential nutrients, while the perlite or vermiculite improves drainage and aeration. Avoid using heavy clay soils, as they can become waterlogged and lead to root rot.
How often should I water my taro plant?
Taro loves moisture, so it’s important to keep the soil consistently moist but not waterlogged. Water your taro plant thoroughly whenever the top inch of soil feels dry to the touch. During hot, dry weather, you may need to water it more frequently. Ensure that the pot has drainage holes to prevent water from accumulating at the bottom.
How do I fertilize my taro plant?
Feed your taro plant with a balanced liquid fertilizer every 2-3 weeks during the growing season (spring and summer). A fertilizer with an NPK ratio of 10-10-10 or 20-20-20 is a good choice. Follow the instructions on the fertilizer label for proper dilution rates. Avoid over-fertilizing, as this can burn the roots.
When can I harvest my taro corms?
Taro corms are typically ready to harvest 6-12 months after planting. You’ll know they’re ready when the leaves start to turn yellow and die back. To harvest, carefully dig up the entire plant and separate the corms from the roots.
Can I grow taro indoors?
Yes, you can grow taro indoors, provided you can provide it with enough light and moisture. Place your taro plant near a sunny window or supplement with grow lights. Maintain high humidity by misting the leaves regularly or placing the pot on a tray filled with pebbles and water.
What are some common problems when growing taro, and how can I fix them?
Some common problems when growing taro include:
* **Yellowing leaves:** This can be caused by overwatering, underwatering, nutrient deficiencies, or pests. Adjust your watering schedule, fertilize regularly, and inspect the plant for pests.
* **Root rot:** This is caused by overwatering and poor drainage. Ensure that the pot has drainage holes and avoid letting the soil stay soggy.
* **Pests:** Taro can be susceptible to pests such as aphids, spider mites, and mealybugs. Treat infestations with insecticidal soap or neem oil.
Can I grow taro in water only?
While taro primarily grows in soil, it can be propagated in water. You can place a taro corm in a jar of water, ensuring that the bottom portion is submerged. Change the water every few days to prevent algae growth. Once roots develop, you can transplant the corm into a pot filled with soil. However, for long-term growth and optimal corm development, growing taro in soil is recommended.
Is growing taro in small spaces sustainable?
Growing taro in small spaces can be a sustainable practice, especially if you use organic gardening methods. Composting kitchen scraps and yard waste to create your own potting mix reduces waste and provides valuable nutrients for your plants. Additionally, growing your own food reduces your reliance on commercially produced food, which often involves long-distance transportation and resource-intensive farming practices.
What are some creative ways to use taro in cooking?
Taro is a versatile ingredient that can be used in a variety of dishes. Some creative ways to use taro include:
* **Taro chips:** Slice taro corms thinly and bake or fry them into crispy chips.
* **Taro fries:** Cut taro corms into fries and bake or fry them until golden brown.
* **Taro soup:** Add diced taro to soups and stews for a creamy and flavorful addition.
* **Taro dumplings:** Use mashed taro as a base for dumplings or gnocchi.
* **Taro desserts:** Incorporate taro into cakes, puddings, and ice cream for a unique flavor and texture.
Leave a Comment