

Grow Watermelon at Home? Absolutely! Imagine biting into a juicy, sweet, homegrown watermelon on a hot summer day. Sounds idyllic, right? Well, it’s more achievable than you might think, even if you don’t have acres of farmland. For centuries, watermelons have been a symbol of summer, abundance, and good times, enjoyed in cultures around the globe from ancient Egypt to modern-day picnics.
But let’s be honest, the thought of growing such a large fruit can be intimidating. Many people believe you need a sprawling garden and expert knowledge. That’s where this DIY guide comes in! I’m here to share some simple, effective tricks and hacks that will empower you to grow watermelon at home, regardless of your space or experience level.
This isn’t just about saving money at the grocery store; it’s about connecting with nature, enjoying the satisfaction of nurturing something from seed to fruit, and knowing exactly what went into your food. Plus, homegrown watermelons often taste even better than store-bought ones! So, are you ready to ditch the doubts and embark on a fun and rewarding gardening adventure? Let’s get started!
Wassermelonen-Anbau zu Hause: Dein umfassender DIY-Leitfaden
Hey Gartenfreunde! Habt ihr euch jemals vorgestellt, eure eigenen, saftigen Wassermelonen im Garten zu ernten? Klingt traumhaft, oder? Ich zeige euch, wie ihr diesen Traum in die Realität umsetzen könnt. Keine Angst, es ist einfacher als ihr denkt! Mit ein wenig Geduld und den richtigen Tipps könnt ihr schon bald eure selbstgezogenen Wassermelonen genießen.
Die Vorbereitung: Der Schlüssel zum Erfolg
Bevor wir loslegen, ist eine gute Vorbereitung das A und O. Wassermelonen sind kleine Diven, wenn es um ihre Bedürfnisse geht, aber wenn wir diese erfüllen, belohnen sie uns mit köstlichen Früchten.
* Wahl der Sorte: Es gibt unzählige Wassermelonensorten. Für den Hausgarten empfehle ich Sorten wie ‘Sugar Baby’ (frühreif und kompakt), ‘Crimson Sweet’ (klassisch rot und süß) oder ‘Yellow Doll’ (gelbes Fruchtfleisch, sehr süß). Informiert euch, welche Sorten in eurer Region gut gedeihen.
* Der richtige Standort: Wassermelonen lieben die Sonne! Wählt einen Standort, der mindestens 6-8 Stunden direkte Sonneneinstrahlung pro Tag erhält. Außerdem brauchen sie viel Platz, da ihre Ranken sich gerne ausbreiten.
* Der perfekte Boden: Der Boden sollte locker, gut durchlässig und reich an Nährstoffen sein. Wassermelonen mögen leicht sauren Boden (pH-Wert zwischen 6,0 und 6,8).
* Vorkultur oder Direktsaat: Ihr könnt die Samen entweder direkt ins Beet säen oder sie in Töpfen vorziehen. Die Vorkultur hat den Vorteil, dass die Pflanzen einen Wachstumsvorsprung haben und weniger anfällig für Schädlinge sind.
Schritt-für-Schritt-Anleitung: Vom Samen zur Frucht
Jetzt geht’s ans Eingemachte! Hier ist eine detaillierte Anleitung, wie ihr eure Wassermelonen erfolgreich anbauen könnt:
1. Samen vorziehen (optional)
Wenn ihr euch für die Vorkultur entscheidet, beginnt ihr etwa 4-6 Wochen vor dem letzten erwarteten Frost.
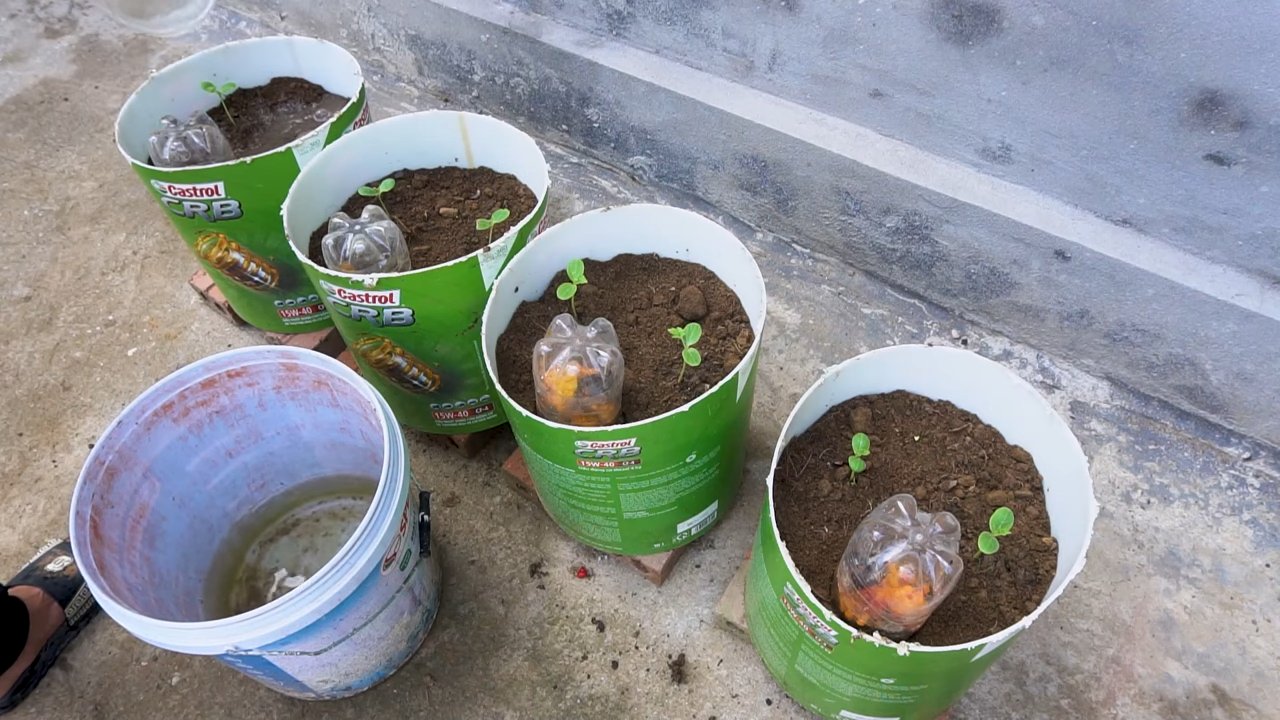
1. Aussaatgefäße vorbereiten: Füllt kleine Töpfe (ca. 8-10 cm Durchmesser) mit Anzuchterde.
2. Samen säen: Legt 2-3 Samen pro Topf etwa 2-3 cm tief in die Erde.
3. Angießen: Gießt die Erde vorsichtig an, sodass sie feucht, aber nicht nass ist.
4. Warm stellen: Stellt die Töpfe an einen warmen, hellen Ort (idealerweise 25-30°C). Ein Mini-Gewächshaus oder eine Heizmatte können helfen, die Temperatur zu halten.
5. Feucht halten: Haltet die Erde gleichmäßig feucht, aber vermeidet Staunässe.
6. Keimung abwarten: Die Samen keimen in der Regel innerhalb von 7-14 Tagen.
7. Vereinzeln: Sobald die Keimlinge ein paar Blätter haben, entfernt ihr den schwächsten Keimling pro Topf.
2. Beet vorbereiten
Egal ob ihr die Samen direkt säen oder die vorgezogenen Pflanzen einsetzen wollt, die Beetvorbereitung ist entscheidend.
1. Boden lockern: Lockert den Boden gründlich auf und entfernt Unkraut, Steine und Wurzeln.
2. Kompost einarbeiten: Mischt reichlich Kompost oder gut verrotteten Mist in den Boden ein. Das verbessert die Bodenstruktur und versorgt die Pflanzen mit Nährstoffen.
3. Langzeitdünger hinzufügen: Ein organischer Langzeitdünger (z.B. Hornspäne) sorgt für eine kontinuierliche Nährstoffversorgung.
4. Beet vorbereiten: Formt kleine Hügel oder Dämme, um die Drainage zu verbessern. Wassermelonen mögen keine nassen Füße.
3. Aussaat oder Auspflanzen
Jetzt kommt der spannende Teil!
1. Direktsaat: Wenn ihr die Samen direkt ins Beet säen wollt, wartet, bis die Bodentemperatur mindestens 18°C beträgt. Legt 2-3 Samen pro Pflanzstelle etwa 2-3 cm tief in die Erde. Der Abstand zwischen den Pflanzstellen sollte etwa 80-100 cm betragen.
2. Auspflanzen: Wenn ihr die Pflanzen vorgezogen habt, gewöhnt sie langsam an die Bedingungen im Freien (Abhärten). Stellt sie dazu tagsüber für ein paar Stunden ins Freie und holt sie nachts wieder rein. Nach etwa einer Woche könnt ihr sie dann ins Beet pflanzen. Der Abstand zwischen den Pflanzen sollte ebenfalls 80-100 cm betragen.
3. Angießen: Gießt die Pflanzen nach dem Auspflanzen oder der Aussaat gründlich an.
4. Pflege während der Wachstumsphase
Die Wassermelonen brauchen jetzt eure Aufmerksamkeit!
1. Gießen: Gießt die Pflanzen regelmäßig, besonders während trockener Perioden. Vermeidet es, die Blätter zu benetzen, um Pilzkrankheiten vorzubeugen.
2. Düngen: Düngt die Pflanzen alle 2-3 Wochen mit einem organischen Flüssigdünger.
3. Unkraut entfernen: Haltet das Beet unkrautfrei, um die Konkurrenz um Nährstoffe und Wasser zu minimieren.
4. Mulchen: Eine Mulchschicht aus Stroh oder Rasenschnitt hilft, die Feuchtigkeit im Boden zu halten und Unkraut zu unterdrücken.
5. Ranken lenken: Lenkt die Ranken in die gewünschte Richtung, um Platz zu sparen und die Früchte besser zu belüften.
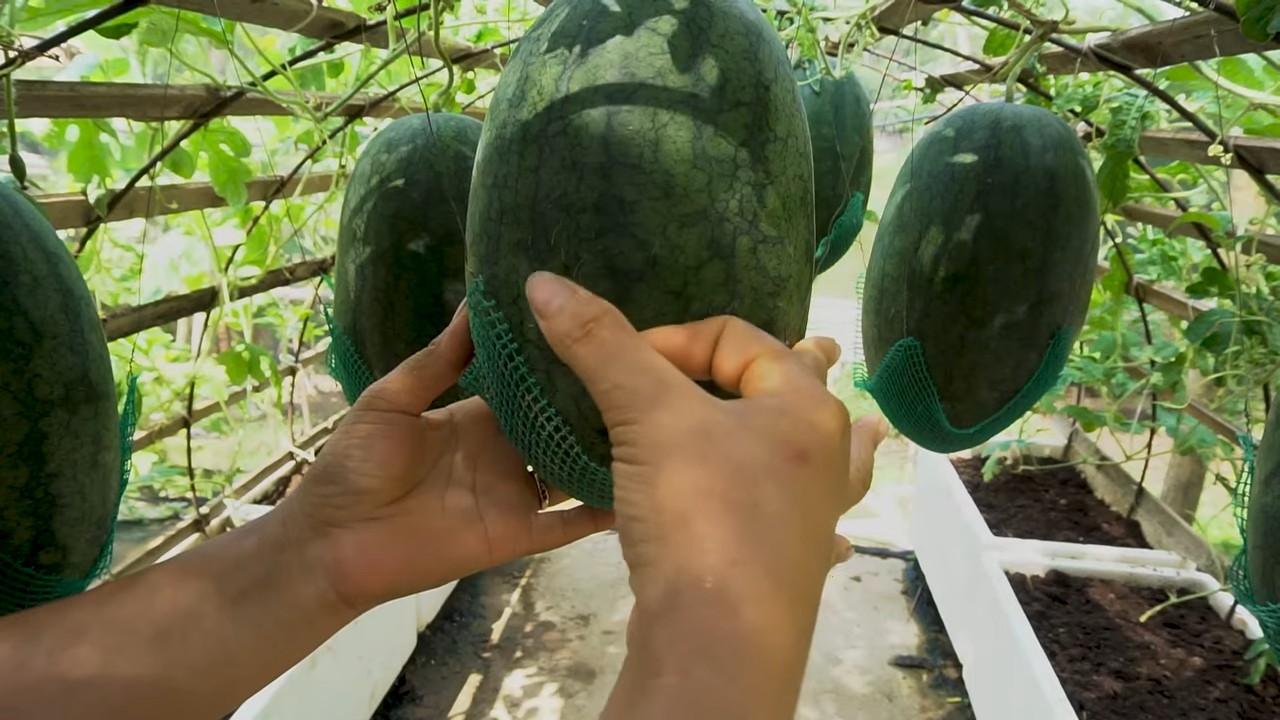
6. Früchte schützen: Legt die wachsenden Früchte auf Stroh oder Holzbretter, um sie vor Bodenkontakt und Fäulnis zu schützen.
5. Bestäubung
Wassermelonen sind auf die Bestäubung durch Bienen und andere Insekten angewiesen.
1. Bienenfreundlicher Garten: Pflanzt bienenfreundliche Blumen in der Nähe des Wassermelonenbeets, um Bestäuber anzulocken.
2. Handbestäubung (optional): Wenn es wenig Insekten gibt, könnt ihr die Blüten auch von Hand bestäuben. Übertragt dazu mit einem Pinsel Pollen von den männlichen Blüten (dünner Stiel) auf die weiblichen Blüten (kleine Fruchtansätze).
6. Ernte
Der Moment, auf den ihr gewartet habt!
1. Reife erkennen: Die Reife einer Wassermelone zu erkennen, ist nicht immer einfach. Achtet auf folgende Anzeichen:
* Die Stelle, an der die Melone auf dem Boden liegt (Bauchfleck), verfärbt sich von weiß nach gelblich.
* Die Ranke, die mit der Melone verbunden ist, wird trocken und braun.
* Wenn ihr auf die Melone klopft, sollte sie hohl klingen.
2. Ernten: Schneidet die Melone mit einem scharfen Messer oder einer Gartenschere von der Ranke ab. Lasst dabei einen kleinen Stielansatz stehen.
Häufige Probleme und Lösungen
Auch beim Wassermelonenanbau können Probleme auftreten. Hier sind einige der häufigsten und wie ihr sie lösen könnt:
* Schädlinge: Blattläuse, Schnecken und Kürbisfliegen können Wassermelonen befallen. Bekämpft sie mit natürlichen Mitteln wie Neemöl, Schneckenkorn oder Insektizidseife.
* Krankheiten: Echter Mehltau, Falscher Mehltau und Fusarium-Welke können auftreten. Sorgt für eine gute Belüftung, vermeidet Staunässe und behandelt die Pflanzen gegebenenfalls mit einem Fungizid.
* Fruchtansatzprobleme: Wenn die Blüten abfallen, ohne Früchte zu bilden, kann das an mangelnder Bestäubung, zu niedrigen Temperaturen oder Nährstoffmangel liegen. Achtet auf eine gute Bestäubung, schützt die Pflanzen vor Kälte und düngt sie regelmäßig.
* Früchte platzen: Unregelmäßige Bewässerung kann dazu führen, dass die Früchte platzen. Gießt die Pflanzen gleichmäßig und vermeidet extreme Schwankungen in der Bodenfeuchtigkeit.
Zusätzliche Tipps für den erfolgreichen Anbau
Hier noch ein paar zusätzliche Tipps, die euch helfen werden, eure Wass
Conclusion
So, there you have it! Growing watermelons at home, while it might seem daunting at first, is entirely achievable with a little planning, patience, and the right approach. We’ve walked you through the key steps, from selecting the perfect variety for your climate to nurturing those precious seedlings and finally, harvesting your own juicy, homegrown watermelons.
But why should you bother? Why not just pick one up at the grocery store? The answer is simple: flavor and satisfaction. There’s nothing quite like the taste of a watermelon you’ve grown yourself. It’s sweeter, more vibrant, and bursting with a freshness you just can’t find in commercially grown fruit. Plus, the sheer joy of watching a tiny seed transform into a sprawling vine laden with delicious watermelons is an incredibly rewarding experience.
This DIY approach to growing watermelons isn’t just about saving money; it’s about connecting with nature, understanding where your food comes from, and enjoying the fruits (literally!) of your labor. It’s about knowing exactly what went into your watermelon – no mystery pesticides or long-distance transportation.
This is more than just growing a fruit; it’s about cultivating a connection.
Don’t be afraid to experiment! Try different watermelon varieties to find your favorite. Consider using companion planting techniques to deter pests and improve soil health. You could even try growing watermelons in containers if you have limited space. The possibilities are endless!
Here are a few variations to consider:
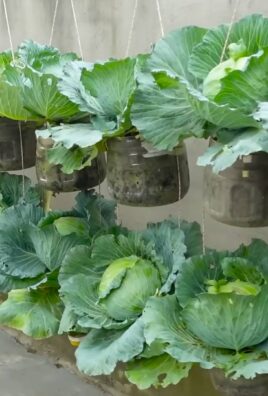
* Mini Watermelons: If you’re short on space, opt for mini watermelon varieties like ‘Sugar Baby’ or ‘Bush Sugar Baby’. These smaller watermelons are perfect for container gardening and still pack a flavorful punch.
* Heirloom Varieties: Explore the world of heirloom watermelons for unique flavors and colors. Varieties like ‘Moon and Stars’ or ‘Blacktail Mountain’ offer a taste of history and a visually stunning addition to your garden.
* Grafted Watermelons: For increased disease resistance and vigor, consider purchasing grafted watermelon plants. These plants are grafted onto a strong rootstock, making them more resilient to common watermelon diseases.
We encourage you to take the plunge and try growing watermelons at home this season. It’s a fun, educational, and delicious project that the whole family can enjoy. And once you’ve tasted your own homegrown watermelon, you’ll never look at store-bought watermelons the same way again.
So, grab some seeds, get your hands dirty, and prepare to be amazed by the magic of growing your own watermelons. We’re confident that you’ll be thrilled with the results.
Don’t forget to share your experiences with us! We’d love to hear about your successes, challenges, and favorite watermelon varieties. Post pictures of your homegrown watermelons on social media and tag us. Let’s create a community of home gardeners who are passionate about growing their own food. Happy gardening!
Frequently Asked Questions (FAQ)
What is the best time to start growing watermelons?
The best time to start growing watermelons depends on your climate. Watermelons are warm-season crops and require a long growing season of at least 70-90 days. In general, you should start seeds indoors about 6-8 weeks before the last expected frost. If you live in a warmer climate with a longer growing season, you can direct sow seeds outdoors after the soil has warmed up to at least 70°F (21°C). Make sure to check your local frost dates to determine the optimal time to start your watermelon seeds.
How much space do watermelons need?
Watermelons are sprawling plants that require a significant amount of space. Vining varieties can spread up to 10-15 feet, so it’s important to provide them with ample room to grow. Space plants at least 3-4 feet apart in rows that are 6-8 feet apart. If you’re growing watermelons in containers, choose a large container that is at least 24 inches in diameter and depth. Bush varieties are more compact and require less space, but still need adequate room to grow.
What kind of soil is best for growing watermelons?
Watermelons thrive in well-drained, sandy loam soil that is rich in organic matter. The soil should have a pH between 6.0 and 6.8. Before planting, amend the soil with compost or well-rotted manure to improve drainage and fertility. Watermelons are heavy feeders, so it’s important to provide them with a steady supply of nutrients throughout the growing season. Consider using a fertilizer that is specifically formulated for fruits and vegetables.
How often should I water my watermelon plants?
Watermelons need consistent moisture, especially during fruit development. Water deeply and regularly, aiming for about 1-2 inches of water per week. Avoid overhead watering, as this can promote fungal diseases. Use a soaker hose or drip irrigation system to deliver water directly to the roots. During hot, dry weather, you may need to water more frequently. Check the soil moisture regularly and adjust your watering schedule accordingly.
How do I know when my watermelon is ripe?
Determining when a watermelon is ripe can be tricky, but there are a few key indicators to look for. First, check the tendril closest to the fruit. When this tendril turns brown and dries out, it’s a sign that the watermelon is nearing ripeness. Second, look at the spot where the watermelon rests on the ground. This spot, known as the ground spot, should turn from white to a creamy yellow color. Finally, thump the watermelon with your knuckles. A ripe watermelon will sound hollow and deep. With practice, you’ll develop a feel for identifying ripe watermelons.
What are some common pests and diseases that affect watermelons?
Watermelons are susceptible to a variety of pests and diseases, including aphids, squash bugs, vine borers, powdery mildew, and fusarium wilt. To prevent pest and disease problems, practice good garden hygiene. Remove weeds and debris from around your plants, and water at the base of the plants to avoid wetting the foliage. Inspect your plants regularly for signs of pests or diseases, and take action promptly if you notice any problems. Use organic pest control methods, such as insecticidal soap or neem oil, to control aphids and squash bugs. Choose disease-resistant watermelon varieties to minimize the risk of fungal diseases.
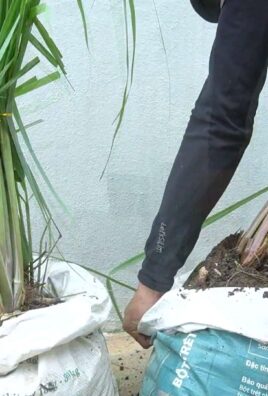
Can I grow watermelons in containers?
Yes, you can grow watermelons in containers, but it requires careful planning and attention. Choose a large container that is at least 24 inches in diameter and depth. Use a high-quality potting mix that is well-draining and rich in organic matter. Select a bush or mini watermelon variety that is well-suited for container gardening. Provide your watermelon plants with plenty of sunlight, water, and fertilizer. You may also need to provide support for the vines as they grow.
How can I improve the sweetness of my watermelons?
Several factors can influence the sweetness of your watermelons. First, choose a watermelon variety that is known for its sweetness. Second, provide your plants with plenty of sunlight and water. Third, fertilize your plants regularly with a fertilizer that is high in potassium. Finally, avoid overwatering your watermelons as they approach ripeness, as this can dilute the sugars in the fruit.
What are some good companion plants for watermelons?
Companion planting can help to deter pests, attract beneficial insects, and improve soil health. Some good companion plants for watermelons include marigolds, nasturtiums, basil, oregano, and rosemary. Marigolds and nasturtiums repel nematodes and other soil pests. Basil and oregano attract beneficial insects that prey on aphids and other pests. Rosemary helps to improve soil drainage and deter squash bugs.
How do I save watermelon seeds for next year?
Saving watermelon seeds is a simple process. After you harvest your watermelon, scoop out the seeds and rinse them thoroughly to remove any pulp. Spread the seeds out on a paper towel to dry completely. Once the seeds are dry, store them in an airtight container in a cool, dark, and dry place. Watermelon seeds can remain viable for several years if stored properly.

Leave a Comment