

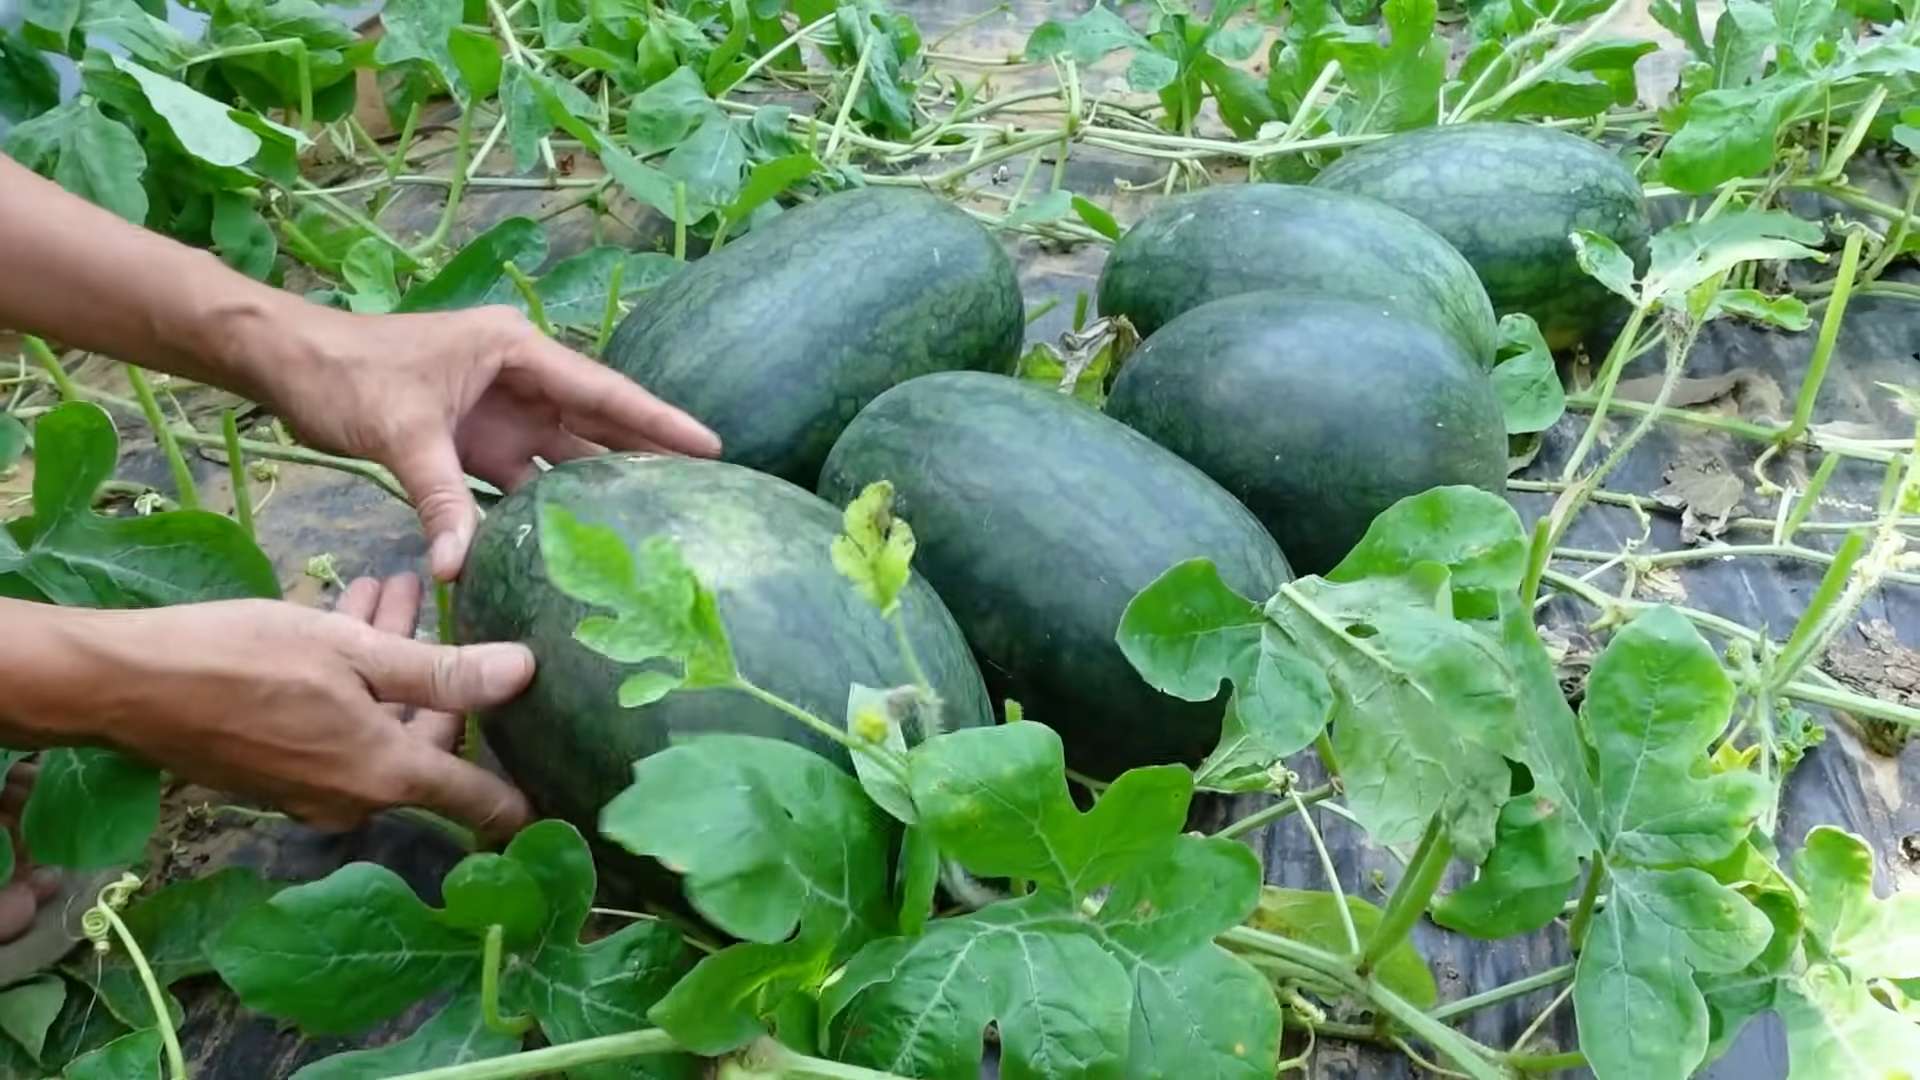
Grow Watermelons Backyard – sounds like a dream, right? Imagine sinking your teeth into a juicy, homegrown watermelon, bursting with flavor, all thanks to your own green thumb! Forget those bland, store-bought melons; we’re talking about the real deal, cultivated with love (and a few clever tricks) right in your own backyard.
For centuries, watermelons have been a symbol of summer, abundance, and good times. Originating in Africa, they’ve traveled the globe, becoming a beloved treat in countless cultures. Think of picnics, barbecues, and family gatherings – watermelons are often at the heart of these cherished memories. But what if I told you that you could easily bring that joy and freshness directly to your table?
Let’s face it, gardening can sometimes feel intimidating, especially when you’re aiming for something as substantial as a watermelon. Many people believe you need acres of land and years of experience to successfully grow watermelons backyard. But that’s simply not true! With a few simple DIY tricks and hacks, even beginner gardeners can enjoy a bountiful harvest. I’m here to show you how to maximize your space, optimize your growing conditions, and troubleshoot common problems, so you can enjoy the sweet taste of success – and delicious watermelons – all summer long. So, grab your gardening gloves, and let’s get started!
Growing Strawberries From Seed: A Beginner’s Guide
Okay, so you want to grow strawberries from seed? Awesome! It might seem a little daunting compared to buying starter plants, but trust me, it’s totally doable and super rewarding. Plus, you get to choose from a wider variety of strawberry types. I’ve done it myself, and I’m here to walk you through the whole process, step-by-step. Get ready for some delicious, homegrown berries!
Why Grow Strawberries From Seed?
Before we dive in, let’s quickly touch on why you might choose to start from seed.
* Variety: You’ll find a much larger selection of strawberry varieties available as seeds compared to starter plants at your local nursery. Think alpine strawberries, everbearing varieties, and even some unique colors!
* Cost-Effective: Seeds are generally cheaper than buying established plants, especially if you’re planning on growing a lot of strawberries.
* Satisfaction: There’s just something incredibly satisfying about nurturing a tiny seed into a thriving plant that produces delicious fruit. It’s a real accomplishment!
What You’ll Need
Here’s a list of everything you’ll need to get started. Don’t worry, most of it is pretty basic.
* Strawberry Seeds: Choose a variety that suits your climate and taste preferences. Reputable seed companies are your best bet for quality seeds.
* Seed Starting Trays or Small Pots: These will be your nurseries for the baby strawberry plants.
* Seed Starting Mix: This is a light, sterile soil mix specifically designed for starting seeds. Don’t use regular garden soil; it’s too heavy and can contain diseases.
* Spray Bottle: For gently watering the seeds and seedlings.
* Clear Plastic Wrap or a Humidity Dome: To create a humid environment for germination.
* Grow Lights (Optional but Recommended): Strawberries need a lot of light, especially when they’re young. Grow lights will ensure they get enough.
* Heat Mat (Optional): Strawberries germinate best in slightly warmer temperatures.
* Small Pots (For Transplanting): You’ll need these when the seedlings get bigger.
* Potting Soil: A good quality potting soil for transplanting.
* Fertilizer: A balanced liquid fertilizer for feeding the seedlings.
Phase 1: Stratification (The Cold Treatment)
This is a crucial step for most strawberry varieties. Stratification mimics the natural winter conditions that strawberry seeds need to break dormancy and germinate properly. Basically, we’re tricking the seeds into thinking they’ve been through winter.
1. Prepare the Seeds: Place your strawberry seeds in a small, airtight container or a zip-top bag.
2. Moisten a Paper Towel: Lightly dampen a paper towel with distilled water. It should be moist, not soaking wet.
3. Wrap the Seeds: Place the seeds on the damp paper towel and fold the towel over them.
4. Seal and Refrigerate: Put the paper towel with the seeds inside the container or bag, seal it tightly, and place it in your refrigerator.
5. Chill Time: Keep the seeds in the refrigerator for 4-6 weeks. This chilling period is essential for successful germination. Make sure to check the paper towel periodically to ensure it stays moist. If it dries out, lightly re-dampen it.
Phase 2: Sowing the Seeds
After the stratification period, it’s time to sow the seeds!
1. Prepare the Seed Starting Trays: Fill your seed starting trays or small pots with seed starting mix. Gently press down on the mix to level it.
2. Moisten the Soil: Lightly moisten the seed starting mix with the spray bottle. Again, you want it damp, not soggy.
3. Sow the Seeds: Strawberry seeds are tiny, so be careful! Sprinkle the seeds thinly over the surface of the soil. You don’t want to overcrowd them. A good rule of thumb is to aim for about 2-3 seeds per cell or pot.
4. Lightly Cover the Seeds: Strawberry seeds need light to germinate, so don’t bury them too deeply. Just sprinkle a very thin layer of seed starting mix over the seeds, or gently press them into the surface of the soil.
5. Water Gently: Use the spray bottle to gently mist the surface of the soil again. Be careful not to dislodge the seeds.
6. Create a Humid Environment: Cover the seed starting trays or pots with clear plastic wrap or a humidity dome. This will help to retain moisture and create a humid environment that’s ideal for germination.
7. Provide Warmth: Place the seed starting trays or pots on a heat mat, if you’re using one. Strawberry seeds germinate best at temperatures between 70-75°F (21-24°C).
8. Provide Light: Place the seed starting trays or pots under grow lights, or in a very bright location. Strawberry seeds need at least 12-14 hours of light per day to germinate properly.
Phase 3: Germination and Early Seedling Care
This is where the magic happens! Be patient; strawberry seeds can take anywhere from 1-4 weeks to germinate.
1. Monitor Moisture Levels: Check the soil moisture daily. The soil should be consistently moist, but not waterlogged. If the soil is drying out, mist it with the spray bottle. If it’s too wet, remove the plastic wrap or humidity dome for a few hours to allow some of the moisture to evaporate.
2. Ventilation: Once you see seedlings emerging, start to ventilate the seed starting trays or pots by removing the plastic wrap or humidity dome for a few hours each day. This will help to prevent fungal diseases.
3. Light: Continue to provide plenty of light. If you’re using grow lights, keep them a few inches above the seedlings.
4. Thinning (If Necessary): If you have multiple seedlings growing in the same cell or pot, you’ll need to thin them out to give the strongest seedling room to grow. Use small scissors to snip off the weaker seedlings at the soil line.
5. Fertilizing: Once the seedlings have their first true leaves (the leaves that appear after the initial seed leaves), you can start to fertilize them with a diluted liquid fertilizer. Follow the instructions on the fertilizer label. I usually start with half the recommended strength.
Phase 4: Transplanting
Once the seedlings have developed several sets of true leaves and are large enough to handle (usually a few inches tall), it’s time to transplant them into larger pots.
1. Prepare the Pots: Fill small pots (about 3-4 inches in diameter) with potting soil.
2. Gently Remove the Seedlings: Carefully remove the seedlings from the seed starting trays or pots. Use a small spoon or fork to gently loosen the soil around the seedlings and lift them out. Be careful not to damage the roots.
3. Plant the Seedlings: Make a small hole in the center of each pot and gently place the seedling in the hole. Make sure the crown of the plant (the point where the roots meet the stem) is level with the soil surface.
4. Fill and Water: Fill the pot with potting soil, gently firming it around the seedling. Water thoroughly.
5. Acclimatize: After transplanting, keep the seedlings in a sheltered location for a few days to allow them to adjust to their new environment. Gradually expose them to more sunlight over the course of a week.
Phase 5: Ongoing Care
Now that your strawberry plants are in their own pots, it’s time to focus on ongoing care.
1. Watering: Water regularly, keeping the soil consistently moist but not waterlogged.
2. Fertilizing: Continue to fertilize the plants every 2-3 weeks with a balanced liquid fertilizer.
3. Light: Provide plenty of sunlight. Strawberries need at least 6-8 hours of sunlight per day.
4. Pest and Disease Control: Keep an eye out for pests and diseases. Common strawberry pests include aphids, spider mites, and slugs. Common diseases include powdery mildew and gray mold. Treat any problems promptly with appropriate organic pest control methods.
5. Overwintering: If you live in a cold climate, you’ll need to overwinter your strawberry plants. You can do this by bringing them indoors and placing them in a cool, bright location, or by mulching them heavily with straw or leaves.
Phase 6: Planting Outdoors (Eventually!)
Once the danger of frost has passed in the spring, and your strawberry plants are well-established, you can transplant them into your garden or into larger containers.
1. Choose a Location: Select a sunny location with well-drained soil. Strawberries prefer slightly acidic soil
Conclusion
So, there you have it! Growing watermelons in your backyard might seem daunting at first, but with a little planning, preparation, and this simple DIY trick, you’ll be well on your way to harvesting juicy, sweet watermelons right from your own garden. This isn’t just about saving money; it’s about experiencing the satisfaction of nurturing something from seed to table, knowing exactly what went into it, and enjoying the unparalleled flavor of homegrown produce.
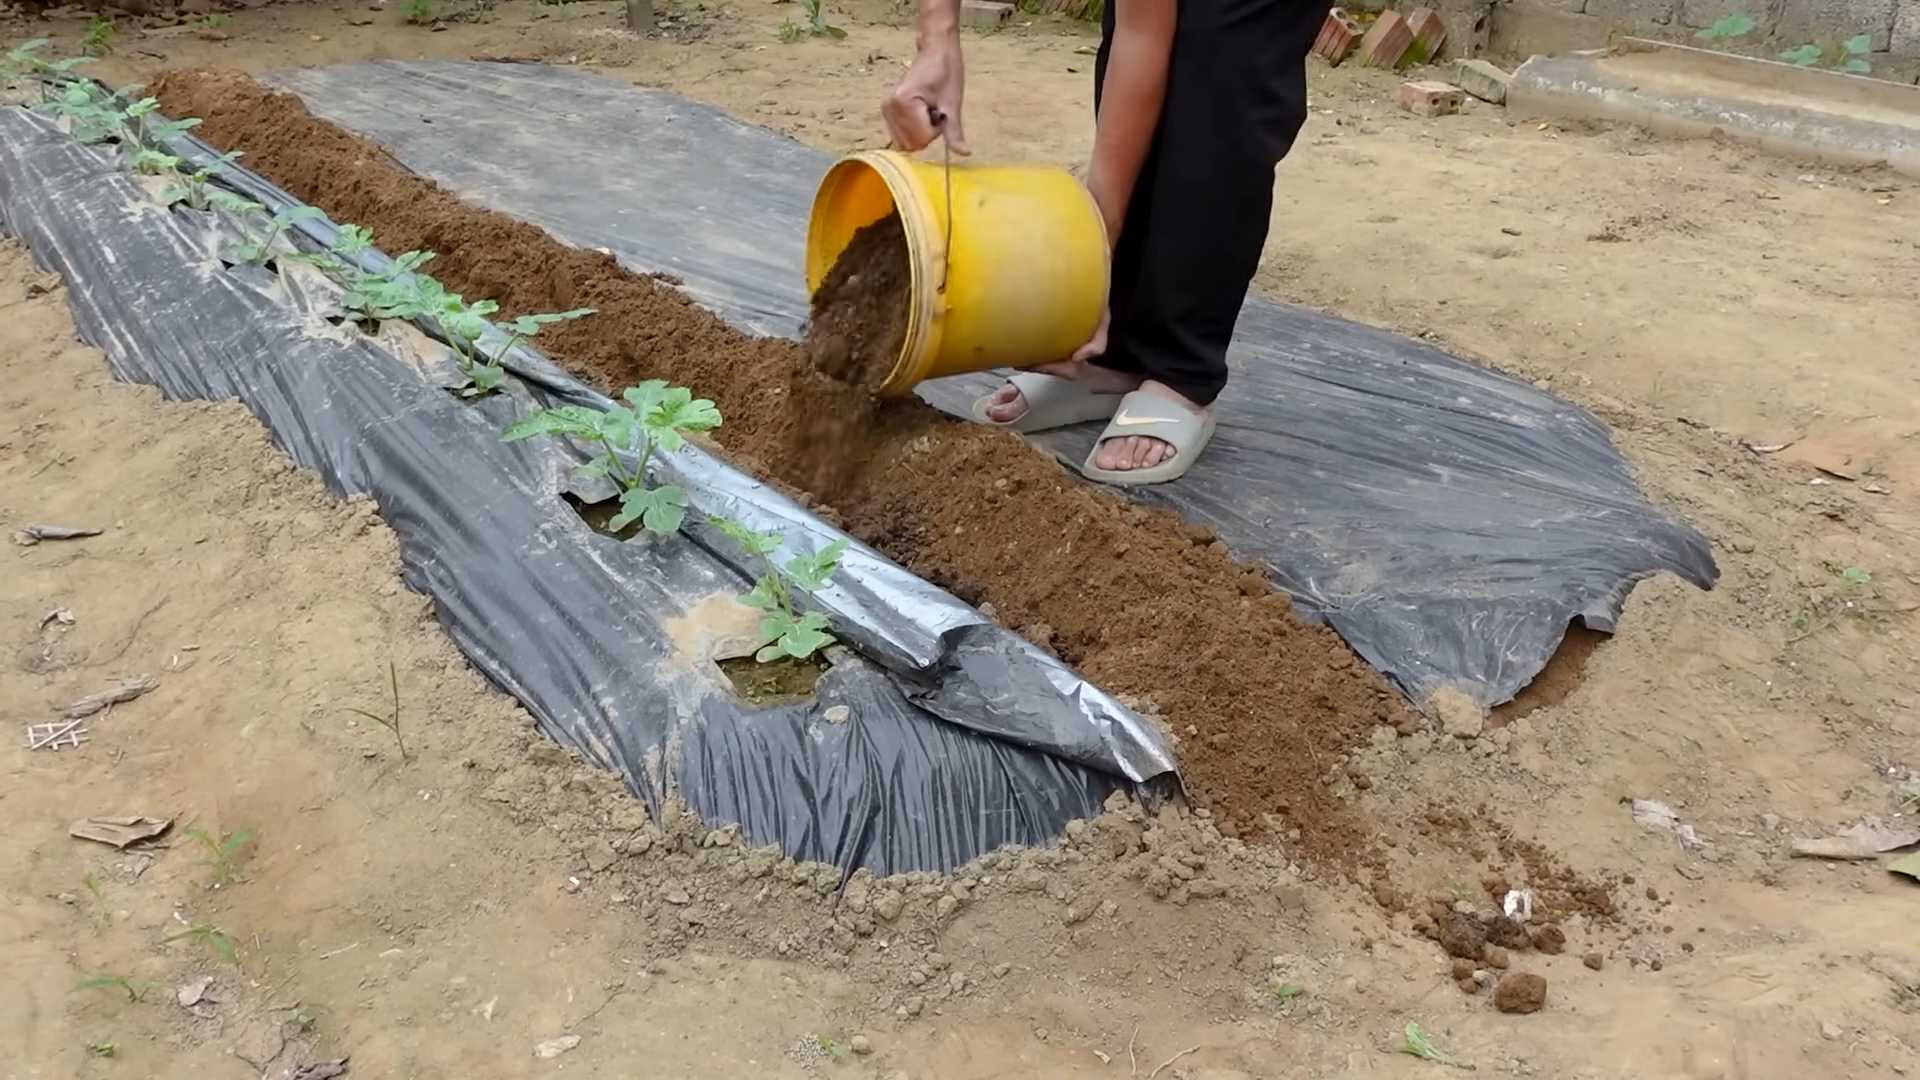
This DIY method, focusing on [mention the specific DIY trick from the article, e.g., “vertical growing using repurposed materials” or “creating a mini-greenhouse effect with plastic sheeting”], offers a significant advantage over traditional methods. It maximizes space, improves air circulation, and can even extend your growing season, giving you a head start in the spring or allowing you to harvest later into the fall.
Why is this a must-try? Because it empowers you to take control of your food source, reduces your reliance on store-bought produce, and provides a rewarding and educational experience for the whole family. Imagine the look on your children’s faces when they taste a watermelon they helped grow!
Don’t be afraid to experiment with variations. Try different watermelon varieties to find your favorite. Consider companion planting with herbs like basil or marigolds to deter pests and attract pollinators. You can also adjust the DIY trick to suit your specific backyard conditions and available materials. For example, if you don’t have access to [mention a specific material used in the DIY trick], you could substitute it with [suggest an alternative material].
We’re confident that this DIY trick will transform your watermelon-growing experience. But the real magic happens when you try it yourself. So, grab your seeds, gather your materials, and get ready to embark on a delicious adventure.
We encourage you to try this method for growing watermelons in your backyard and share your results with us! Post pictures of your progress, tell us about your successes (and any challenges you encounter), and let us know what variations you tried. Your feedback will not only help other gardeners but also contribute to a community of passionate growers who are dedicated to sharing their knowledge and experiences. Happy gardening!
Frequently Asked Questions (FAQs)
What are the best watermelon varieties to grow in a backyard garden?
The best watermelon varieties for your backyard depend on your climate and the amount of space you have. For smaller gardens, consider bush or dwarf varieties like ‘Bush Sugar Baby’ or ‘Golden Midget.’ These varieties produce smaller fruits on compact vines, making them ideal for limited spaces. If you have more room, you can try larger varieties like ‘Crimson Sweet’ or ‘Jubilee,’ which are known for their excellent flavor and size. Heirloom varieties like ‘Moon and Stars’ offer unique colors and flavors, adding a touch of novelty to your garden. Always check the days to maturity for each variety to ensure it aligns with your growing season.
How much sunlight do watermelons need?
Watermelons are sun-loving plants and require at least 6-8 hours of direct sunlight per day to thrive. Insufficient sunlight can result in smaller fruits, reduced sweetness, and increased susceptibility to diseases. Choose a location in your backyard that receives ample sunlight throughout the day. If you live in a particularly hot climate, providing some afternoon shade can help prevent sunburn on the fruits.
What kind of soil is best for growing watermelons?
Watermelons prefer well-drained, sandy loam soil with a pH between 6.0 and 6.8. Heavy clay soil can be amended with compost, aged manure, or other organic matter to improve drainage and aeration. Before planting, conduct a soil test to determine the nutrient levels and pH. Amend the soil as needed based on the test results. Watermelons are heavy feeders, so incorporating plenty of compost or well-rotted manure into the soil before planting is essential.
How often should I water my watermelons?
Watermelons need consistent moisture, especially during fruit development. Water deeply and regularly, aiming for about 1-2 inches of water per week. Avoid overhead watering, as this can promote fungal diseases. Instead, use a soaker hose or drip irrigation to deliver water directly to the roots. Mulching around the plants helps retain moisture and suppress weeds. Reduce watering as the fruits ripen to concentrate the sugars and improve flavor.
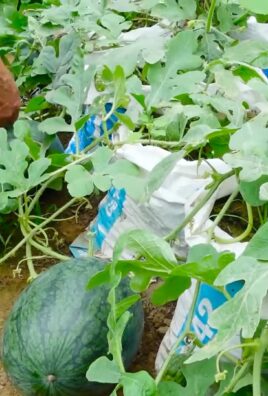
How do I know when my watermelons are ripe?
Determining when a watermelon is ripe can be tricky, but there are several indicators to look for. The tendril closest to the fruit should be brown and dry. The spot where the watermelon rests on the ground (the ground spot) should turn from white to yellow or creamy. When you thump the watermelon, it should sound hollow and deep. The skin should also be dull rather than shiny. These are all good signs that your watermelon is ready to harvest.
What are some common pests and diseases that affect watermelons, and how can I prevent them?
Common pests that affect watermelons include aphids, squash bugs, and vine borers. Diseases include powdery mildew, fusarium wilt, and anthracnose. To prevent these problems, practice good garden hygiene, such as removing plant debris and weeds. Use row covers to protect young plants from pests. Encourage beneficial insects like ladybugs and lacewings to control aphids. Choose disease-resistant varieties. Rotate your crops each year to prevent soilborne diseases. Apply organic fungicides or insecticides as needed, following label instructions carefully.
Can I grow watermelons in containers?
Yes, you can grow watermelons in containers, but you’ll need a large container (at least 20 gallons) with good drainage. Choose a bush or dwarf variety that is well-suited for container growing. Use a high-quality potting mix and provide regular fertilization. Water container-grown watermelons more frequently than those grown in the ground, as the soil in containers dries out more quickly. Provide support for the vines as they grow.
What are some good companion plants for watermelons?
Companion planting can help improve watermelon growth and deter pests. Good companion plants for watermelons include marigolds, basil, nasturtiums, and oregano. Marigolds deter nematodes and other soil pests. Basil repels aphids and whiteflies. Nasturtiums attract beneficial insects. Oregano is a natural insect repellent. Avoid planting watermelons near potatoes or tomatoes, as they can compete for nutrients.
How can I improve the sweetness of my watermelons?
Several factors contribute to the sweetness of watermelons. Choose a variety known for its sweetness. Provide adequate sunlight and water. Fertilize regularly with a balanced fertilizer. Reduce watering as the fruits ripen to concentrate the sugars. Harvest the watermelons at the peak of ripeness.
What if my watermelon plant produces flowers but no fruit?
This can be due to several factors, including insufficient pollination, lack of nutrients, or stress from extreme temperatures. Watermelons require pollination to set fruit. Attract pollinators to your garden by planting flowers that attract bees and other beneficial insects. Hand-pollinate the flowers if necessary. Ensure your plants are receiving adequate nutrients. Protect your plants from extreme temperatures with shade cloth or row covers.
Leave a Comment