

Grow Winter Red Radishes, even when the snow is falling? Absolutely! Imagine harvesting vibrant, peppery radishes from your own garden in the heart of winter. Sounds like a dream, right? Well, it doesn’t have to be! This DIY guide is packed with simple, effective tricks to extend your growing season and enjoy fresh, homegrown radishes all year round.
For centuries, cultures around the world have relied on clever techniques to cultivate food beyond the typical growing season. From ancient Roman greenhouses to traditional cold frames, the desire to nurture life through the winter months is deeply rooted in our history. Now, you can tap into that same ingenuity with these easy-to-follow tips.
Why should you bother learning how to grow winter red radishes? Because fresh, flavorful produce shouldn’t be a seasonal luxury! Store-bought radishes simply can’t compare to the crisp, peppery bite of homegrown ones. Plus, gardening is a fantastic way to relieve stress, connect with nature, and enjoy the satisfaction of nurturing something from seed to table. I’m excited to share these simple DIY tricks that will help you enjoy a winter harvest of delicious red radishes. Let’s get started!
Grow Your Own Winter Red Radishes: A DIY Guide
Hey there, fellow gardening enthusiasts! I’m so excited to share my experience growing winter red radishes. These little guys are a fantastic addition to your garden, providing a spicy crunch and vibrant color even when the weather turns chilly. Plus, they’re incredibly easy to grow, making them perfect for beginners and seasoned gardeners alike. Let’s dive in!
Choosing the Right Variety
Before we get our hands dirty, it’s important to choose the right radish variety. While many radishes are best suited for spring or fall, winter radishes are specifically bred to withstand colder temperatures and mature over a longer period.
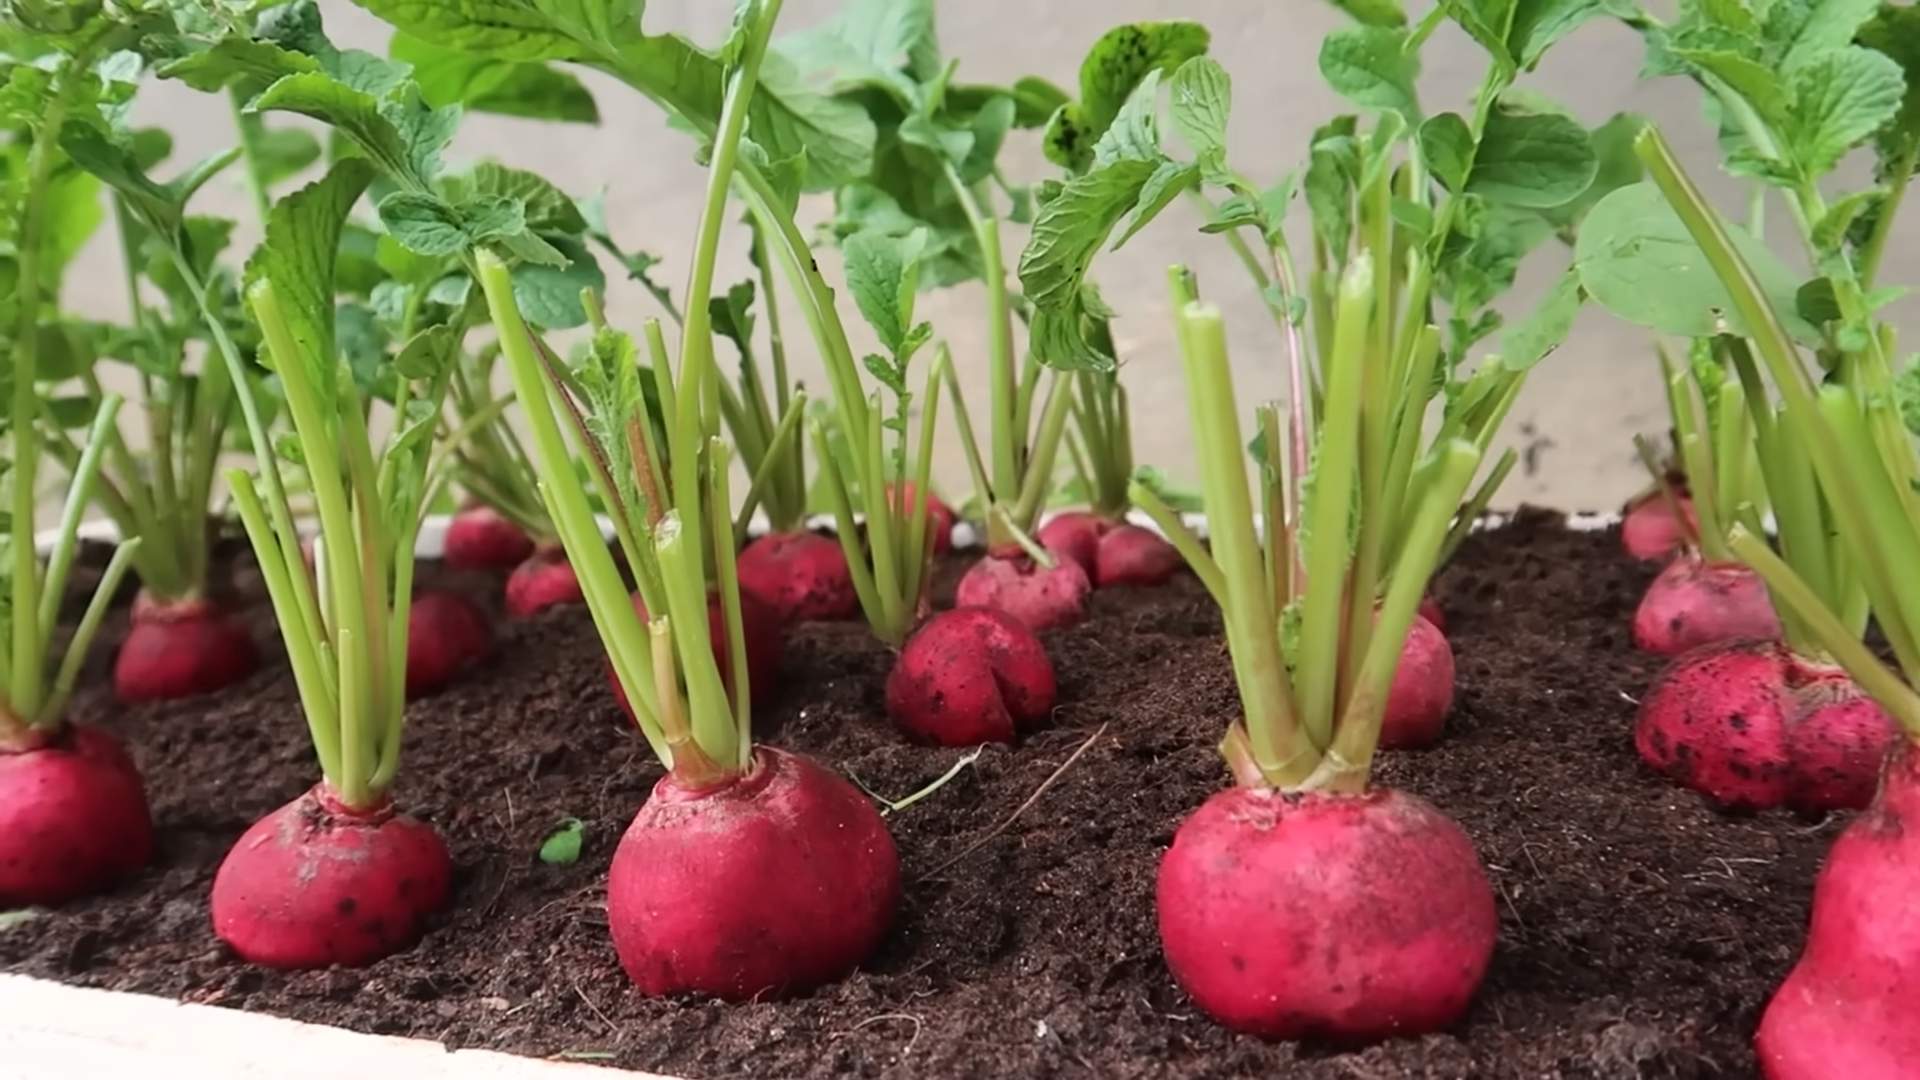
* Winter Red: This is my personal favorite! They have a beautiful red skin and a crisp, slightly peppery flavor. They also store well, which is a huge bonus.
* China Rose: Another great option with a mild flavor and attractive pink skin.
* Black Spanish Round: If you’re looking for something a bit more pungent, this variety is for you. They have a black skin and a strong, spicy flavor.
Preparing Your Garden Bed
Radishes thrive in well-drained soil that’s rich in organic matter. Here’s how I prepare my garden bed:
* Timing is Key: I usually start planting my winter radishes in late summer or early fall, about 4-6 weeks before the first expected frost. This gives them enough time to mature before the really cold weather sets in.
* Sunlight: Radishes need at least 6 hours of sunlight per day. Choose a location in your garden that receives plenty of sunshine.
* Soil Preparation:
1. Clear the Area: Remove any weeds, rocks, or debris from the planting area.
2. Loosen the Soil: Use a garden fork or tiller to loosen the soil to a depth of at least 12 inches. This will allow the radish roots to grow easily.
3. Amend the Soil: Incorporate plenty of compost or well-rotted manure into the soil. This will improve drainage, add nutrients, and help retain moisture. I usually add about 2-3 inches of compost.
4. Smooth the Surface: Rake the soil smooth to create a level planting surface.
Planting Your Radish Seeds
Now for the fun part – planting the seeds!
* Spacing: Radishes need adequate space to grow. I usually plant my seeds about 1 inch apart in rows that are 6-8 inches apart.
* Depth: Plant the seeds about ½ inch deep.
* Sowing the Seeds:
1. Create Furrows: Use a hoe or your finger to create shallow furrows in the prepared soil.
2. Sow the Seeds: Sprinkle the radish seeds evenly along the furrows.
3. Cover the Seeds: Gently cover the seeds with soil.
4. Water Thoroughly: Water the planting area gently but thoroughly. This will help the seeds germinate and establish strong roots.
Caring for Your Radishes
Radishes are relatively low-maintenance, but they do need some care to thrive.
* Watering: Keep the soil consistently moist, but not waterlogged. Water deeply whenever the top inch of soil feels dry. I usually water every 2-3 days, depending on the weather.
* Thinning: Once the seedlings emerge, thin them to about 2-3 inches apart. This will give the radishes enough room to grow to their full size. Don’t just toss the thinnings! You can add them to salads for a peppery kick.
* Weeding: Keep the planting area free of weeds. Weeds compete with radishes for nutrients and water. I like to hand-pull weeds regularly.
* Fertilizing: Radishes don’t need a lot of fertilizer, but a light feeding of a balanced fertilizer can help them grow. I usually use a liquid fertilizer diluted to half strength. Apply the fertilizer every 2-3 weeks.
* Pest Control: Radishes are generally pest-resistant, but they can sometimes be attacked by flea beetles or aphids.
* Flea Beetles: These tiny beetles can chew small holes in the leaves. To control flea beetles, I use row covers or insecticidal soap.
* Aphids: These small, sap-sucking insects can weaken the plants. To control aphids, I use a strong spray of water or insecticidal soap.
Harvesting Your Radishes
The best part of growing radishes is harvesting them! Winter radishes typically take 50-60 days to mature.
* When to Harvest: Harvest your radishes when they reach the desired size. I usually harvest them when they are about 1-2 inches in diameter.
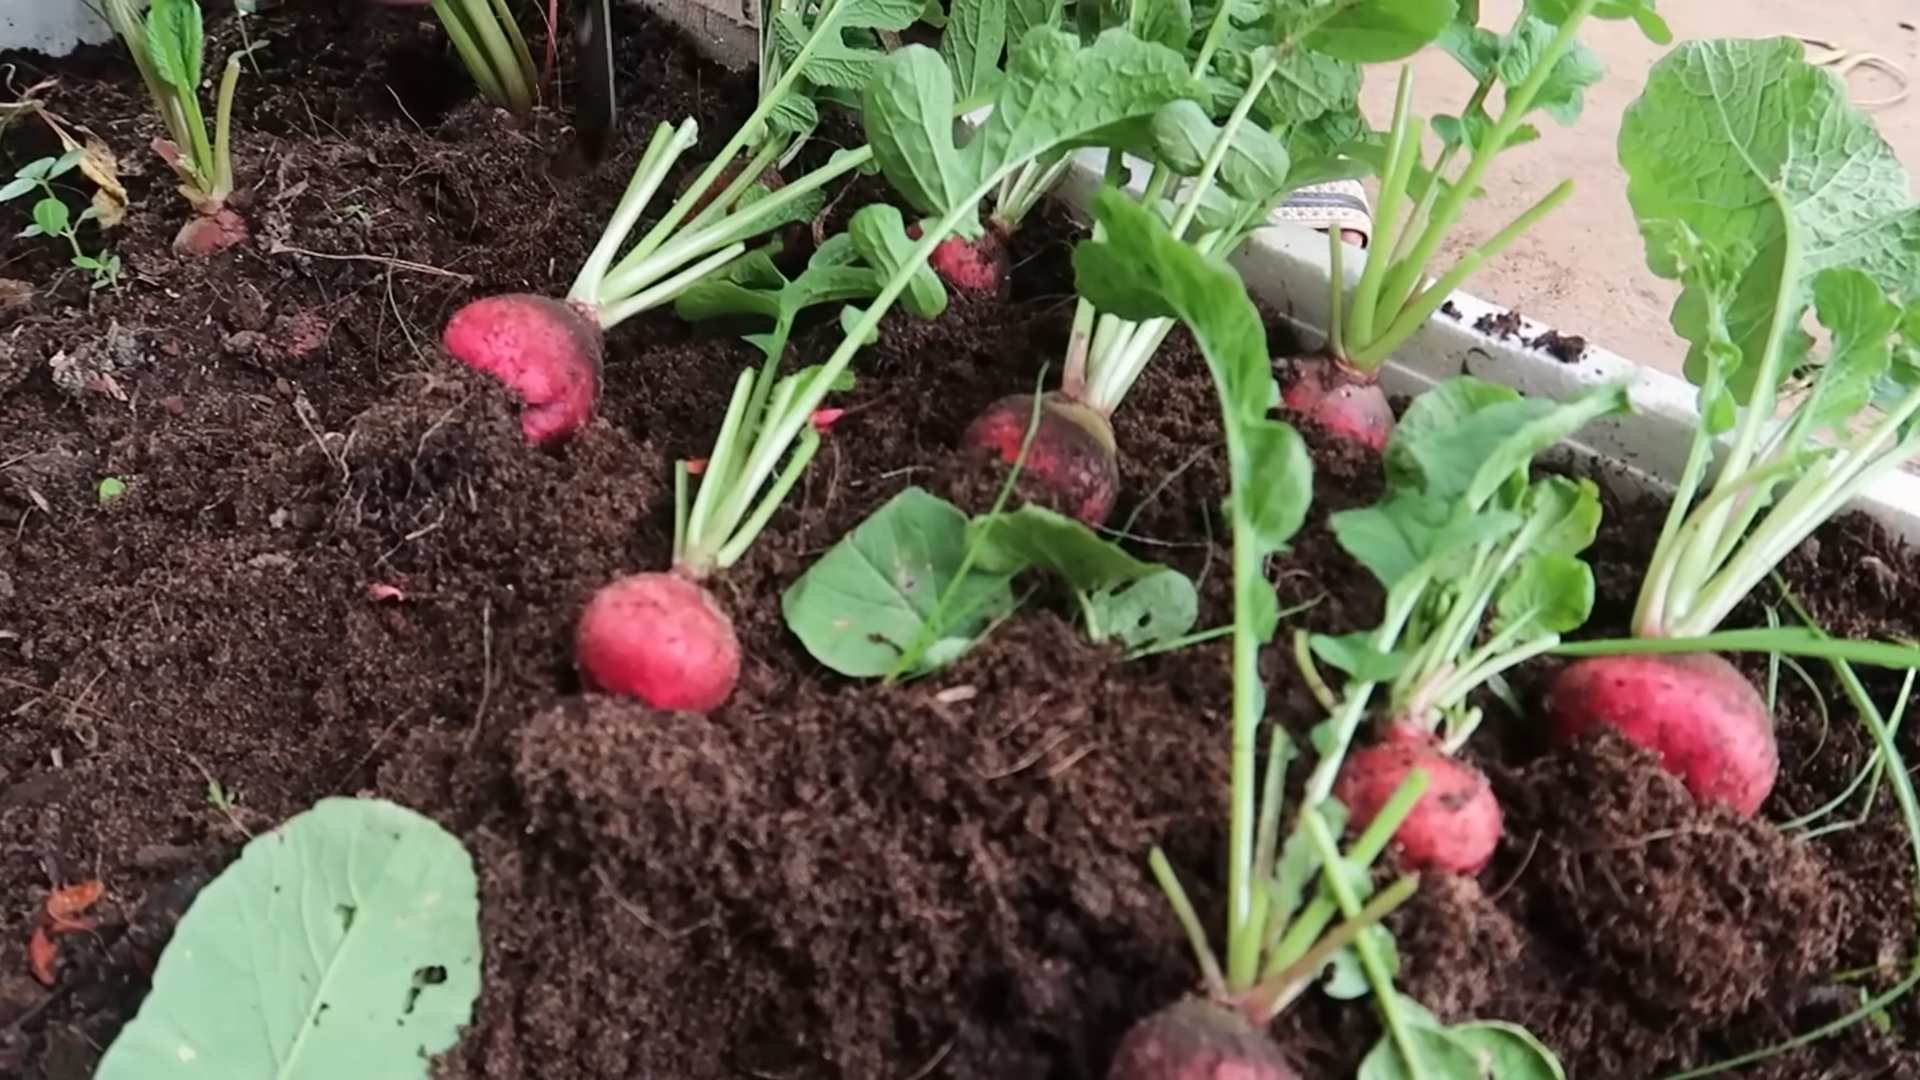
* How to Harvest: Gently pull the radishes from the soil. If the soil is dry, you may need to loosen it with a garden fork first.
* Storage: Store your radishes in the refrigerator. Remove the leaves and store the radishes in a plastic bag or container. They should last for several weeks.
Troubleshooting
Even with the best care, you may encounter some problems while growing radishes. Here are some common issues and how to address them:
* Radishes are too small: This could be due to overcrowding, lack of sunlight, or poor soil. Make sure to thin the seedlings properly, provide adequate sunlight, and amend the soil with compost.
* Radishes are cracked: This is usually caused by inconsistent watering. Make sure to water regularly and deeply, especially during dry periods.
* Radishes are too spicy: This can be caused by hot weather or stress. Try to provide some shade during the hottest part of the day and water regularly.
* Radishes are woody: This is usually caused by letting the radishes grow too large. Harvest them when they are still young and tender.
Enjoying Your Harvest
Now that you’ve harvested your radishes, it’s time to enjoy them! Here are some of my favorite ways to use winter red radishes:
* Salads: Add sliced radishes to salads for a spicy crunch.
* Snacks: Eat radishes raw with a sprinkle of salt.
* Pickled Radishes: Pickle your radishes for a tangy and flavorful treat.
* Roasted Radishes: Roast your radishes with other vegetables for a delicious side dish.
* Radish Greens: Don’t throw away the radish greens! They are edible and can be used in salads, soups, or stir-fries.
Extending the Harvest
To extend your radish harvest, consider succession planting. Sow a new batch of seeds every 2-3 weeks. This will ensure a continuous supply of fresh radishes throughout the fall and winter.
Protecting from Frost
As the weather gets colder, you may need to protect your radishes from frost. Here are a few options:
* Row Covers: Cover your radishes with row covers to protect them from frost and cold temperatures.
* Cold Frames: Build a cold frame over your radishes to provide extra protection.
* Mulch: Apply a thick layer of mulch around your radishes to insulate the soil and protect the roots.
Saving Seeds
If you want to save seeds from your radishes, allow a few plants to bolt (flower and produce seeds). Once the seed pods are dry, harvest them and store the seeds in a cool, dry place.
Final Thoughts
Growing winter red radishes is a rewarding experience. With a little bit of planning and care, you can enjoy fresh, spicy radishes even during the coldest months of the year. I hope this guide has been helpful. Happy gardening!
Conclusion
So, there you have it! Growing your own winter red radishes isn’t just a gardening project; it’s an investment in fresh, flavorful produce that brightens up even the coldest months. We’ve walked through the simple steps, from selecting the right seeds and preparing your soil to protecting your precious crop from frost. Now, it’s time to put that knowledge into action and experience the satisfaction of harvesting your own vibrant, peppery radishes.
Why is this DIY trick a must-try? Because it empowers you to control the quality and freshness of your food. Store-bought radishes simply can’t compare to the crispness and intense flavor of those you’ve nurtured yourself. Plus, growing your own food is incredibly rewarding, connecting you to the natural world and providing a sense of accomplishment. Imagine the delight of adding freshly harvested winter red radishes to your salads, sandwiches, or even enjoying them as a simple, healthy snack.
But the fun doesn’t stop there! Feel free to experiment with different varieties of winter radishes. Consider trying ‘French Breakfast’ for a milder flavor or ‘Black Spanish’ for a more pungent kick. You can also play around with companion planting. Carrots and lettuce are excellent companions for radishes, helping to deter pests and improve soil health.
Another variation to consider is succession planting. By planting a small batch of seeds every week or two, you can ensure a continuous harvest of fresh radishes throughout the winter. This is especially useful if you have limited space or a large family to feed.
Don’t be afraid to get creative with your radish harvest! Use the greens in salads or stir-fries for a nutritious and flavorful addition. Pickle the radishes for a tangy condiment that adds a pop of color to any meal. Roast them with other root vegetables for a hearty and satisfying side dish. The possibilities are endless!
We truly believe that anyone can successfully grow winter red radishes, even with limited space or gardening experience. The key is to follow the simple steps outlined in this guide and to be patient and observant. Pay attention to your plants, water them regularly, and protect them from extreme weather conditions.
Now, we want to hear from you! Have you tried growing winter red radishes before? What are your favorite tips and tricks? What challenges did you face, and how did you overcome them? Share your experiences in the comments below. Your insights could help other gardeners succeed and inspire them to embark on their own radish-growing adventures.
So, grab your seeds, prepare your soil, and get ready to enjoy the delicious rewards of growing your own winter red radishes. We’re confident that you’ll be amazed by the flavor and freshness of these homegrown gems. Happy gardening!
Frequently Asked Questions (FAQ)
What is the best time to plant winter red radishes?
The ideal time to plant winter red radishes is typically in late summer or early fall, about 4-6 weeks before the first expected frost. This allows them enough time to mature before the coldest part of winter sets in. Check your local frost dates to determine the best planting time for your specific region. Planting too early can result in bolting (premature flowering) due to the warmer temperatures, while planting too late may not give them enough time to mature before the ground freezes.
How much sunlight do winter red radishes need?
Winter red radishes need at least 6 hours of direct sunlight per day to thrive. Choose a location in your garden that receives plenty of sunlight, especially during the shorter days of winter. If you’re growing them indoors, consider using grow lights to supplement natural sunlight. Insufficient sunlight can result in leggy growth and smaller, less flavorful radishes.
What kind of soil is best for growing winter red radishes?
Winter red radishes prefer well-drained, loose soil that is rich in organic matter. Amend your soil with compost or well-rotted manure before planting to improve drainage and fertility. Avoid heavy clay soils, as they can become waterlogged and hinder root development. A slightly acidic to neutral soil pH (around 6.0-7.0) is ideal.
How often should I water my winter red radishes?
Water your winter red radishes regularly, especially during dry periods. Keep the soil consistently moist, but avoid overwatering, which can lead to root rot. Water deeply and less frequently, rather than shallowly and more often. Check the soil moisture regularly and adjust your watering schedule accordingly.
Do I need to fertilize my winter red radishes?
While winter red radishes don’t require heavy fertilization, a light feeding of a balanced fertilizer can help promote healthy growth. Apply a fertilizer that is rich in phosphorus and potassium, which are essential for root development. Avoid fertilizers that are high in nitrogen, as they can encourage leafy growth at the expense of root development. Follow the instructions on the fertilizer label carefully.
How do I protect my winter red radishes from frost?
Protecting your winter red radishes from frost is crucial for a successful harvest. Cover your plants with row covers, blankets, or plastic sheeting when frost is predicted. Make sure the covering extends to the ground to trap heat. You can also mulch around the plants with straw or leaves to insulate the soil and protect the roots. If you’re growing them in containers, move them to a sheltered location, such as a garage or shed, during periods of extreme cold.
How long does it take for winter red radishes to mature?
Winter red radishes typically mature in about 30-45 days, depending on the variety and growing conditions. Check the seed packet for specific maturity dates. You can start harvesting them when the roots reach the desired size. Don’t let them get too large, as they can become woody and bitter.
What are some common pests and diseases that affect winter red radishes?
Common pests that can affect winter red radishes include flea beetles, aphids, and root maggots. Flea beetles can be controlled with insecticidal soap or diatomaceous earth. Aphids can be washed off with a strong stream of water or treated with insecticidal soap. Root maggots can be prevented by using row covers or by incorporating beneficial nematodes into the soil. Diseases that can affect winter red radishes include damping-off and root rot. Damping-off can be prevented by using sterile potting mix and avoiding overwatering. Root rot can be prevented by ensuring good drainage and avoiding overwatering.
Can I grow winter red radishes in containers?
Yes, winter red radishes can be successfully grown in containers. Choose a container that is at least 6 inches deep and has drainage holes. Use a well-draining potting mix and water regularly. Place the container in a sunny location that receives at least 6 hours of direct sunlight per day. Container-grown radishes may require more frequent watering and fertilization than those grown in the ground.
How do I know when my winter red radishes are ready to harvest?
You’ll know your winter red radishes are ready to harvest when the tops of the roots are visible above the soil line and have reached the desired size. Gently pull them from the ground, being careful not to damage the roots. Harvest them promptly, as they can become woody and bitter if left in the ground too long. Enjoy your fresh, homegrown radishes!
Leave a Comment