

Growing Sprouts at Home is easier than you think, and I’m here to show you how! Forget those expensive, pre-packaged sprouts from the grocery store – imagine having a constant supply of fresh, nutritious sprouts right on your kitchen counter. This isn’t just about saving money; it’s about connecting with the natural world and enjoying the incredible burst of flavor and health benefits that sprouts offer.
Sprouting seeds for food has a rich history, dating back thousands of years. Ancient cultures in China and other parts of Asia recognized the nutritional power of sprouts, using them as a vital food source, especially during times of scarcity. Today, we’re rediscovering this ancient wisdom, realizing that growing sprouts at home is a simple yet powerful way to boost our diets.
Why do you need this DIY trick? Because life is busy! We all want to eat healthier, but sometimes the effort feels overwhelming. Sprouting is the perfect solution. It requires minimal effort, no special equipment (you probably have everything you need already!), and delivers a concentrated dose of vitamins, minerals, and enzymes. Plus, it’s incredibly satisfying to watch those tiny seeds transform into vibrant, edible greens in just a few days. Let’s dive in and unlock the secrets to successful home sprouting!
Grow Your Own Delicious Sprouts at Home: A Beginner’s Guide
Hey there, fellow food enthusiasts! Ever thought about growing your own food, but felt intimidated by gardening? Well, I’ve got the perfect solution: sprouts! They’re incredibly easy to grow indoors, packed with nutrients, and add a delightful crunch to salads, sandwiches, and stir-fries. Plus, you don’t need a green thumb or a lot of space. Let’s dive into how you can cultivate these little powerhouses in your own kitchen.
What You’ll Need
Before we get started, let’s gather our supplies. The beauty of sprouting is that you probably already have most of these items at home!
* Sprouting Seeds: This is the most important ingredient! You can find sprouting seeds online or at your local health food store. Some popular choices include:
* Alfalfa
* Broccoli
* Radish
* Mung beans
* Lentils
* Adzuki beans
Important: Make sure you’re using seeds specifically labeled for sprouting. Regular garden seeds may be treated with chemicals that aren’t safe for consumption.
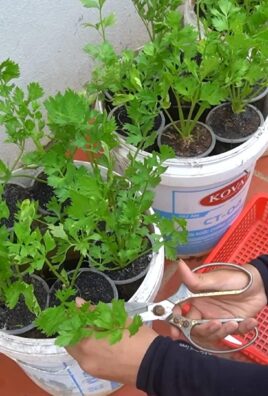
* Sprouting Jar or Container: You have a few options here:
* Mason Jar with Sprouting Lid: This is a classic and readily available option. Sprouting lids have a mesh screen that allows for easy rinsing and drainage.
* Sprouting Tray: These are tiered trays that allow for multiple batches of sprouts to grow simultaneously.
* DIY Sprouting Jar: You can easily convert a mason jar into a sprouting jar by using cheesecloth or a nylon screen secured with a rubber band.
* Water: Clean, filtered water is best.
* Dark Location: Sprouts need darkness to germinate properly. A cupboard or drawer works perfectly.
* Well-Lit Location (after germination): Once the sprouts have germinated, they need indirect sunlight to develop their green color.
* Bowl or Tray: To catch any drips from your sprouting jar.
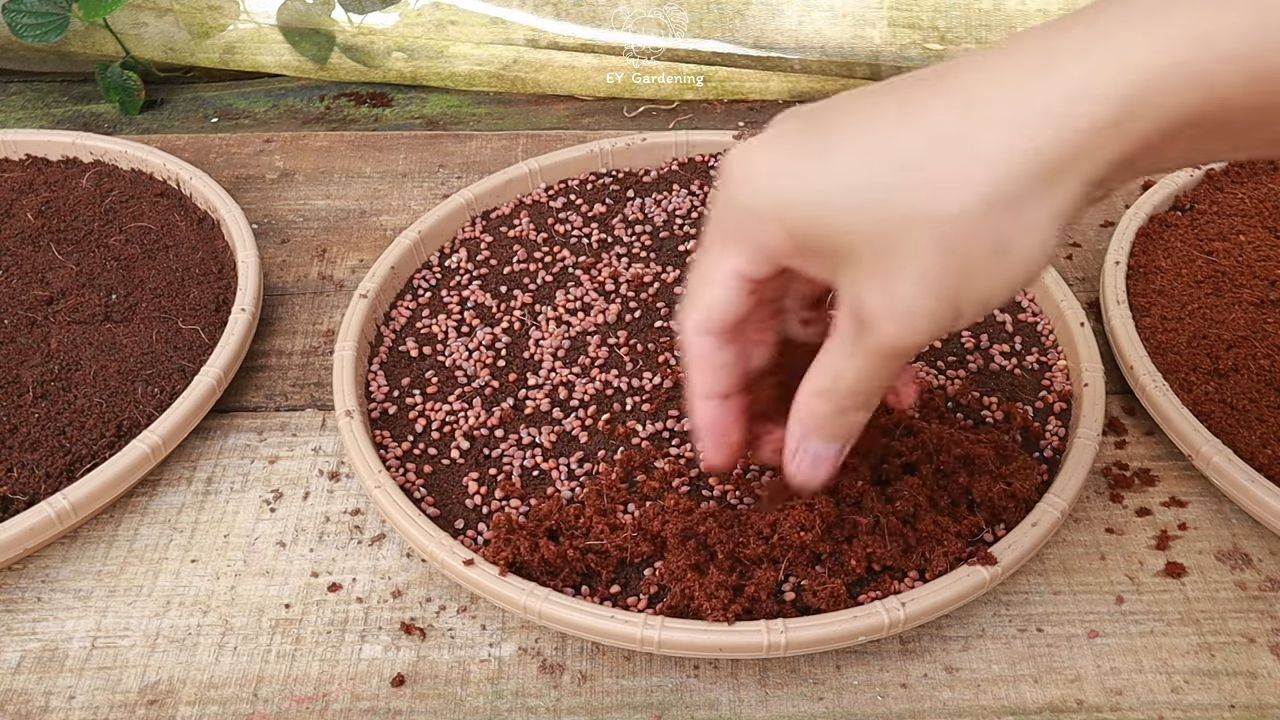
Choosing Your Seeds
Selecting the right seeds is crucial for a successful sprouting experience. Here’s what I recommend:
* Start Small: Begin with a small amount of seeds, especially if you’re a beginner. A tablespoon or two is usually sufficient for a mason jar.
* Variety is the Spice of Life: Experiment with different types of seeds to find your favorites. Each variety has a unique flavor and texture.
* Quality Matters: Purchase seeds from a reputable source to ensure they are viable and free from contaminants.
* Consider Sprout Time: Different seeds have different sprouting times. Some, like alfalfa, sprout in just a few days, while others, like mung beans, may take a bit longer.
Step-by-Step Sprouting Guide
Now for the fun part! Let’s get those seeds sprouting.
Phase 1: Soaking
1. Rinse the Seeds: Place your chosen amount of seeds in a strainer and rinse them thoroughly under cool water. This removes any debris or dust.
2. Transfer to Jar: Transfer the rinsed seeds to your sprouting jar or container.
3. Add Water: Cover the seeds with plenty of cool, filtered water. The seeds will expand as they soak, so make sure there’s enough room. I usually use about 2-3 times the volume of seeds.
4. Soak Time: Let the seeds soak for the recommended time. This varies depending on the type of seed:
* Alfalfa: 4-8 hours
* Broccoli: 4-8 hours
* Radish: 4-8 hours
* Mung beans: 8-12 hours
* Lentils: 8-12 hours
* Adzuki beans: 8-12 hours
I usually soak them overnight for convenience.
Phase 2: Rinsing and Draining
This is the most important part of the sprouting process. Rinsing and draining the seeds regularly prevents mold and bacteria growth.
1. Drain the Water: After the soaking period, drain the water from the jar using your sprouting lid or cheesecloth. Make sure to drain as much water as possible.
2. Rinse Thoroughly: Rinse the seeds with cool, filtered water. Swirl the seeds around to ensure they are all thoroughly rinsed.
3. Drain Again: Drain the water completely.
4. Invert the Jar: Place the jar upside down at an angle in a bowl or tray to allow any excess water to drain out. This is crucial to prevent the seeds from sitting in water.
5. Repeat: Repeat the rinsing and draining process 2-3 times per day. Consistency is key!
Phase 3: Germination and Growing
1. Darkness is Key: For the first few days, keep the sprouting jar in a dark, well-ventilated location. A cupboard or drawer works perfectly. This encourages germination.
2. Continue Rinsing: Continue rinsing and draining the sprouts 2-3 times per day.
3. Check for Growth: After a day or two, you should start to see tiny sprouts emerging from the seeds.
4. Introduce Light: Once the sprouts have germinated and have small tails, move the jar to a location with indirect sunlight. This will help them develop their green color. Avoid direct sunlight, as it can overheat the sprouts.
5. Continue Rinsing: Continue rinsing and draining the sprouts 2-3 times per day.
Phase 4: Harvesting and Storing
1. Harvest Time: The sprouts are ready to harvest when they have reached your desired length. This usually takes 3-7 days, depending on the type of seed.
2. Final Rinse: Give the sprouts a final rinse before harvesting.
3. Remove Hulls (Optional): Some people prefer to remove the seed hulls from the sprouts. You can do this by placing the sprouts in a bowl of water and gently agitating them. The hulls will float to the surface and can be skimmed off.
4. Dry Thoroughly: Dry the sprouts as much as possible. You can use a salad spinner or pat them dry with a clean towel.
5. Store in the Refrigerator: Store the sprouts in an airtight container in the refrigerator. They should last for up to a week.
Troubleshooting
Even with the best intentions, sometimes things don’t go as planned. Here are some common issues and how to address them:
* Mold: Mold is the biggest enemy of sprouts. It’s usually caused by insufficient rinsing and draining. If you see mold, discard the entire batch of sprouts. To prevent mold, make sure to rinse and drain the sprouts thoroughly 2-3 times per day. Good ventilation is also important.
* Unpleasant Odor: An unpleasant odor can also indicate bacterial growth. Discard the sprouts and start over.
* Slow Germination: Slow germination can be caused by several factors, including old seeds, cold temperatures, or insufficient soaking. Make sure you’re using fresh seeds and soaking them for the recommended time.
* Uneven Growth: Uneven growth is normal. Some seeds will germinate faster than others.
Tips and Tricks for Sprouting Success
Here are a few extra tips to help you become a sprouting pro:
* Use a Sprouting Calendar: Keep track of when you started each batch of sprouts. This will help you determine when they are ready to harvest.
* Experiment with Flavors: Add different spices or herbs to the soaking water to infuse the sprouts with flavor.
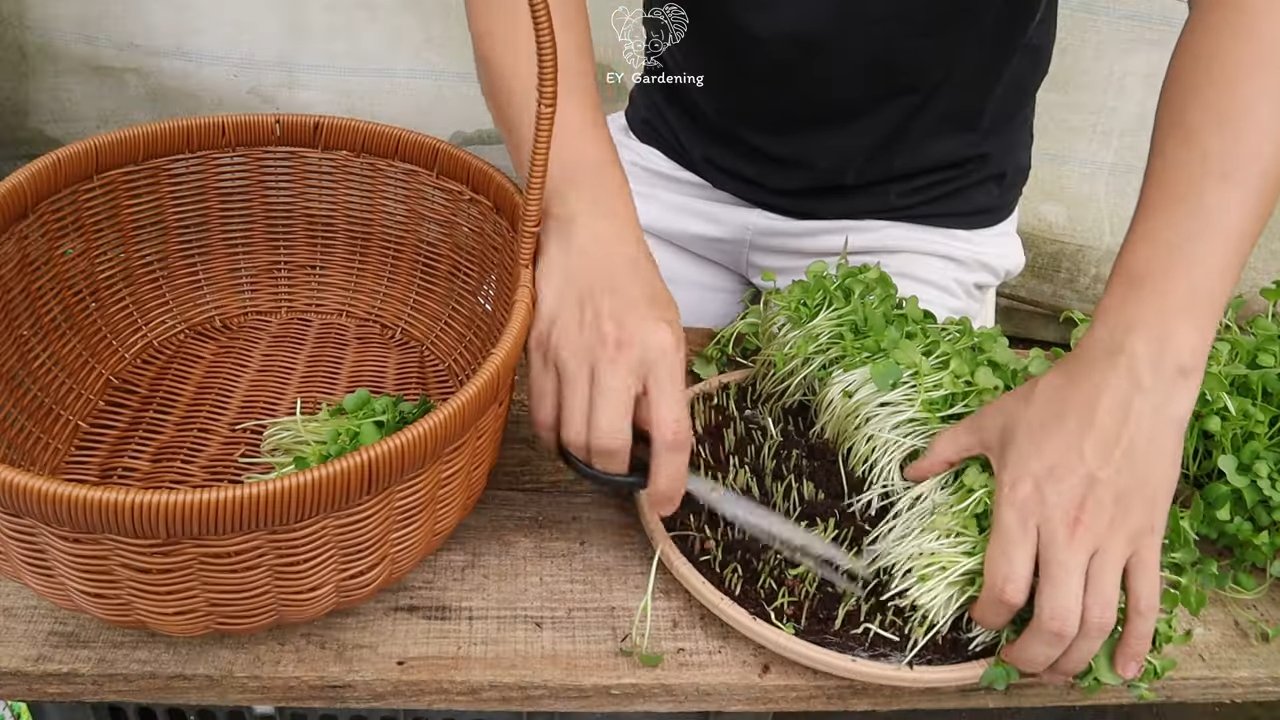
* Grow Microgreens: Once you’ve mastered sprouting, try growing microgreens. Microgreens are similar to sprouts, but they are grown in soil and harvested when they have their first set of true leaves.
* Enjoy Your Sprouts: Add your sprouts to salads, sandwiches, stir-fries, soups, and smoothies. They’re a delicious and nutritious addition to any meal.
Why Sprout? The Benefits of Homegrown Goodness
Sprouting isn’t just a fun hobby; it’s a fantastic way to boost your health and well-being. Here’s why I love sprouting:
* Nutrient Powerhouse: Sprouts are packed with vitamins, minerals, and enzymes. The sprouting process actually increases the nutritional value of the seeds.
* Easy Digestion: Sprouts are easier to digest than mature seeds or beans.
* Cost-Effective: Growing your own sprouts is much cheaper than buying them at the store.
* Fresh and Local: You can enjoy fresh, local sprouts year-round, regardless of the season.
* Sustainable: Sprouting is a sustainable way to grow your own food. It requires very little water and energy.
So, there you have it! Everything you need to know to start growing
Conclusion
So, there you have it! Growing sprouts at home is not only incredibly easy and cost-effective, but it’s also a fantastic way to inject a burst of fresh, vibrant flavor and nutrition into your daily meals. Forget those expensive, pre-packaged sprouts from the grocery store that often come with a hefty price tag and a shorter shelf life. With just a few simple supplies and a little patience, you can cultivate your own miniature garden right in your kitchen.
This DIY trick is a must-try for several compelling reasons. First and foremost, the freshness factor is unparalleled. You’re harvesting sprouts at their peak nutritional value, ensuring you’re getting the maximum benefit from their concentrated vitamins, minerals, and enzymes. Secondly, the cost savings are significant. A single packet of seeds can yield multiple batches of sprouts, making it a far more economical option than repeatedly purchasing them. Thirdly, it’s incredibly rewarding to watch these tiny seeds transform into edible greens, connecting you to the natural world in a tangible way.
But the benefits don’t stop there. Growing sprouts at home allows you to customize your flavor profile. Experiment with different types of seeds to discover your favorites. Do you prefer the peppery kick of radish sprouts? Or the mild, nutty flavor of alfalfa? Perhaps the slightly sweet taste of broccoli sprouts is more your style. The possibilities are endless!
Consider these variations to elevate your sprouting game:
* **Sprout Blends:** Combine different types of seeds for a complex and interesting flavor profile. A mix of alfalfa, clover, and radish sprouts is a popular choice.
* **Sprouting in Different Containers:** While a mason jar is a classic choice, you can also use specialized sprouting trays or even a simple colander lined with cheesecloth.
* **Adding Flavor Enhancers:** After the initial rinsing, try adding a small amount of lemon juice or apple cider vinegar to the rinse water for a subtle flavor boost.
* **Sprouting for Pets:** Many sprouts are safe and nutritious for pets, especially birds and small animals. Research which sprouts are suitable for your furry or feathered friends.
We wholeheartedly encourage you to give this DIY trick a try. It’s a simple, satisfying, and sustainable way to enhance your diet and connect with the natural world. Once you experience the joy of harvesting your own fresh sprouts, you’ll wonder why you didn’t start sooner.
Don’t be afraid to experiment and find what works best for you. The beauty of growing sprouts at home is that it’s a forgiving process. Even if you make a few mistakes along the way, you’ll still likely end up with a delicious and nutritious harvest.
So, grab some seeds, a jar, and get sprouting! We’re confident that you’ll love the results. And most importantly, we want to hear about your experience. Share your sprouting successes (and even your challenges!) in the comments below. Let us know what types of sprouts you’re growing, what variations you’ve tried, and how you’re incorporating them into your meals. Your insights and experiences will help inspire others to embark on their own sprouting adventures. Let’s build a community of home sprouters and share the joy of fresh, homegrown goodness!
FAQ
Frequently Asked Questions About Growing Sprouts at Home
Q: What types of seeds are best for sprouting?
A: The most popular seeds for sprouting include alfalfa, broccoli, radish, clover, mung beans, lentils, and adzuki beans. However, it’s crucial to use seeds specifically intended for sprouting, as garden seeds may be treated with chemicals that are not safe for consumption. Look for seeds labeled “for sprouting” or “for microgreens” to ensure they are food-grade and free from harmful treatments. Avoid sprouting seeds from the nightshade family (tomatoes, peppers, eggplant) as they can be toxic.
Q: How long does it take for sprouts to grow?
A: The sprouting time varies depending on the type of seed. Generally, most sprouts are ready to harvest within 3 to 7 days. Mung beans tend to sprout the fastest, while others like broccoli or alfalfa may take a bit longer. Keep an eye on your sprouts and harvest them when they reach your desired length and flavor.
Q: What is the best way to prevent mold growth during sprouting?
A: Mold growth is a common concern when sprouting, but it can be easily prevented with proper hygiene and ventilation. The key is to rinse your sprouts thoroughly at least twice a day with fresh, cool water. This helps to remove any bacteria or fungal spores that may be present. Ensure that your sprouting container has adequate drainage and airflow to prevent moisture buildup. Avoid overcrowding the container with too many seeds. If you notice any signs of mold, discard the entire batch of sprouts immediately.
Q: How do I store sprouts after harvesting?
A: Once your sprouts are ready to harvest, rinse them thoroughly and drain them well. Gently pat them dry with a clean paper towel or salad spinner to remove excess moisture. Store the sprouts in a clean, airtight container in the refrigerator. They should last for up to a week, but it’s best to consume them as soon as possible for optimal freshness and flavor.
Q: Can I grow sprouts in direct sunlight?
A: While sprouts need light to develop their chlorophyll and turn green, direct sunlight can be too intense and cause them to dry out or overheat. It’s best to keep your sprouts in a well-lit area, but away from direct sunlight. Indirect sunlight or artificial light is ideal.
Q: Are there any health risks associated with eating sprouts?
A: While sprouts are generally safe to eat, there is a small risk of foodborne illness if they are not grown or handled properly. This is because the warm, moist environment required for sprouting can also be conducive to the growth of bacteria like Salmonella and E. coli. To minimize this risk, always use clean seeds, rinse your sprouts thoroughly, and store them properly. Individuals with weakened immune systems, pregnant women, and young children should exercise extra caution and may want to cook sprouts before consuming them.
Q: My sprouts smell bad. Are they still safe to eat?
A: A foul or unpleasant odor is a sign that your sprouts have gone bad and should not be consumed. This is usually due to bacterial contamination or mold growth. Discard the entire batch immediately to avoid any potential health risks.
Q: Can I use tap water for sprouting?
A: While tap water is generally safe for sprouting, it’s best to use filtered or purified water if possible. Tap water may contain chlorine or other chemicals that can inhibit sprouting or affect the flavor of your sprouts.
Q: What do I do if my sprouts are not growing?
A: If your sprouts are not growing, there could be several reasons. First, make sure your seeds are viable and specifically intended for sprouting. Check the expiration date on the seed packet. Second, ensure that you are rinsing your sprouts regularly and providing them with adequate moisture. Third, check the temperature of your sprouting environment. Sprouts generally prefer a temperature between 60°F and 70°F (15°C and 21°C). Finally, make sure your sprouts are getting enough light.
Q: Can I eat the seed hulls of sprouts?
A: Yes, the seed hulls of most sprouts are edible and contain fiber. However, some people may find them slightly bitter or difficult to digest. If you prefer, you can remove the seed hulls by gently agitating the sprouts in a bowl of water. The hulls will float to the surface and can be easily skimmed off.
Leave a Comment