

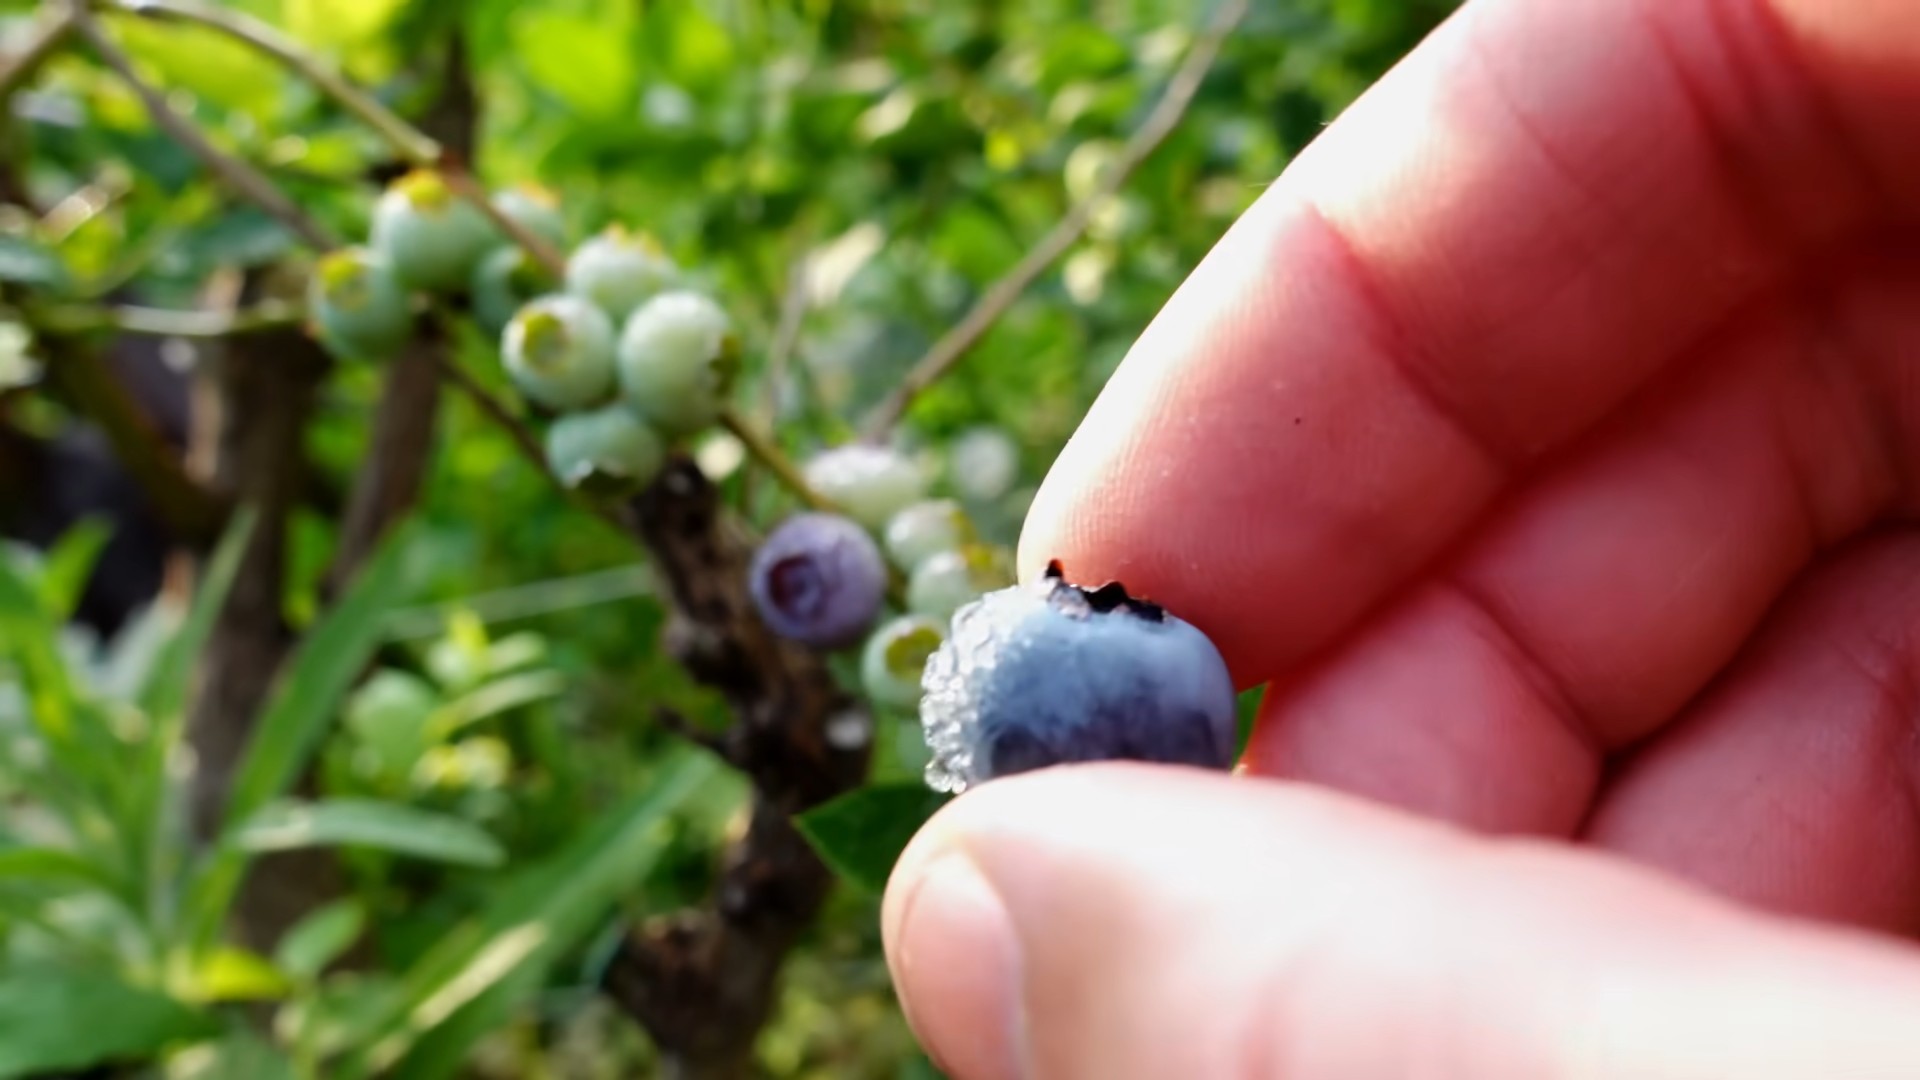
Healthy blueberries at home – that’s the dream, isn’t it? Imagine stepping out into your own backyard and plucking juicy, sun-ripened blueberries straight from the bush. No more trips to the grocery store, no more questionable origins, just pure, homegrown goodness. But let’s be honest, growing blueberries can seem a little intimidating. They’re known for being a bit finicky, and the thought of failing to produce those delicious berries can be discouraging.
Blueberries have a rich history, deeply intertwined with Native American cultures who not only consumed them for sustenance but also used them for medicinal purposes. They understood the secrets to cultivating these little gems long before modern agriculture caught on. Now, we’re bringing that knowledge home, adapting it for the everyday gardener like you and me!
That’s why I’m so excited to share these simple, yet effective, DIY tricks and hacks that will transform your blueberry growing experience. Whether you’re a seasoned gardener or just starting out, these tips will help you create the perfect environment for your blueberry bushes to thrive. We’ll cover everything from soil preparation and watering techniques to pest control and pruning strategies. With a little know-how and a dash of elbow grease, you’ll be enjoying a bountiful harvest of healthy blueberries at home in no time. Let’s get started!
Growing Onions From Scraps: A Beginner’s Guide
Hey there, fellow gardening enthusiasts! Ever wondered if you could regrow onions from those little scraps you usually toss in the compost? Well, guess what? You absolutely can! It’s a super easy and rewarding way to reduce food waste and get a continuous supply of fresh onions. I’ve been doing this for a while now, and I’m excited to share my secrets with you. Let’s dive in!
What You’ll Need
Before we get started, let’s gather our supplies. This is a pretty low-key project, so you probably have most of this stuff already:
* **Onion Scraps:** The bottom 1-2 inches of an onion bulb, with the roots still attached (even if they’re tiny!). I usually save these when I’m chopping onions for cooking.
* **Potting Soil:** A good quality potting mix is essential for healthy growth.
* **Small Pots or Containers:** Any small pot will do, as long as it has drainage holes. I often use recycled yogurt containers or plastic cups.
* **Water:** Tap water is fine, but rainwater is even better if you have access to it.
* **Sunny Location:** Onions need plenty of sunlight to thrive. A windowsill or a spot in your garden that gets at least 6 hours of sun is ideal.
* **Optional: Rooting Hormone:** This isn’t necessary, but it can help speed up the rooting process.
Preparing Your Onion Scraps
Okay, so you’ve got your supplies. Now, let’s get those onion scraps ready for planting.
1. **Choose the Right Scraps:** Look for onion bottoms that are firm and healthy. Avoid any that are mushy or have signs of rot. The more roots attached, the better your chances of success.
2. **Let Them Dry (Optional):** Some people recommend letting the cut end of the onion scrap dry out for a day or two before planting. This helps prevent rot. I’ve tried it both ways, and honestly, I haven’t noticed a huge difference, but it’s worth a shot if you’re worried about rot. Just leave them on a paper towel in a cool, dry place.
3. **Remove Excess Layers (Optional):** If the outer layers of the onion scrap are looking a bit dry or papery, you can gently peel them away. This will help the new roots emerge more easily.
Planting Your Onion Scraps
Alright, the moment we’ve been waiting for! Let’s get those onion scraps planted.
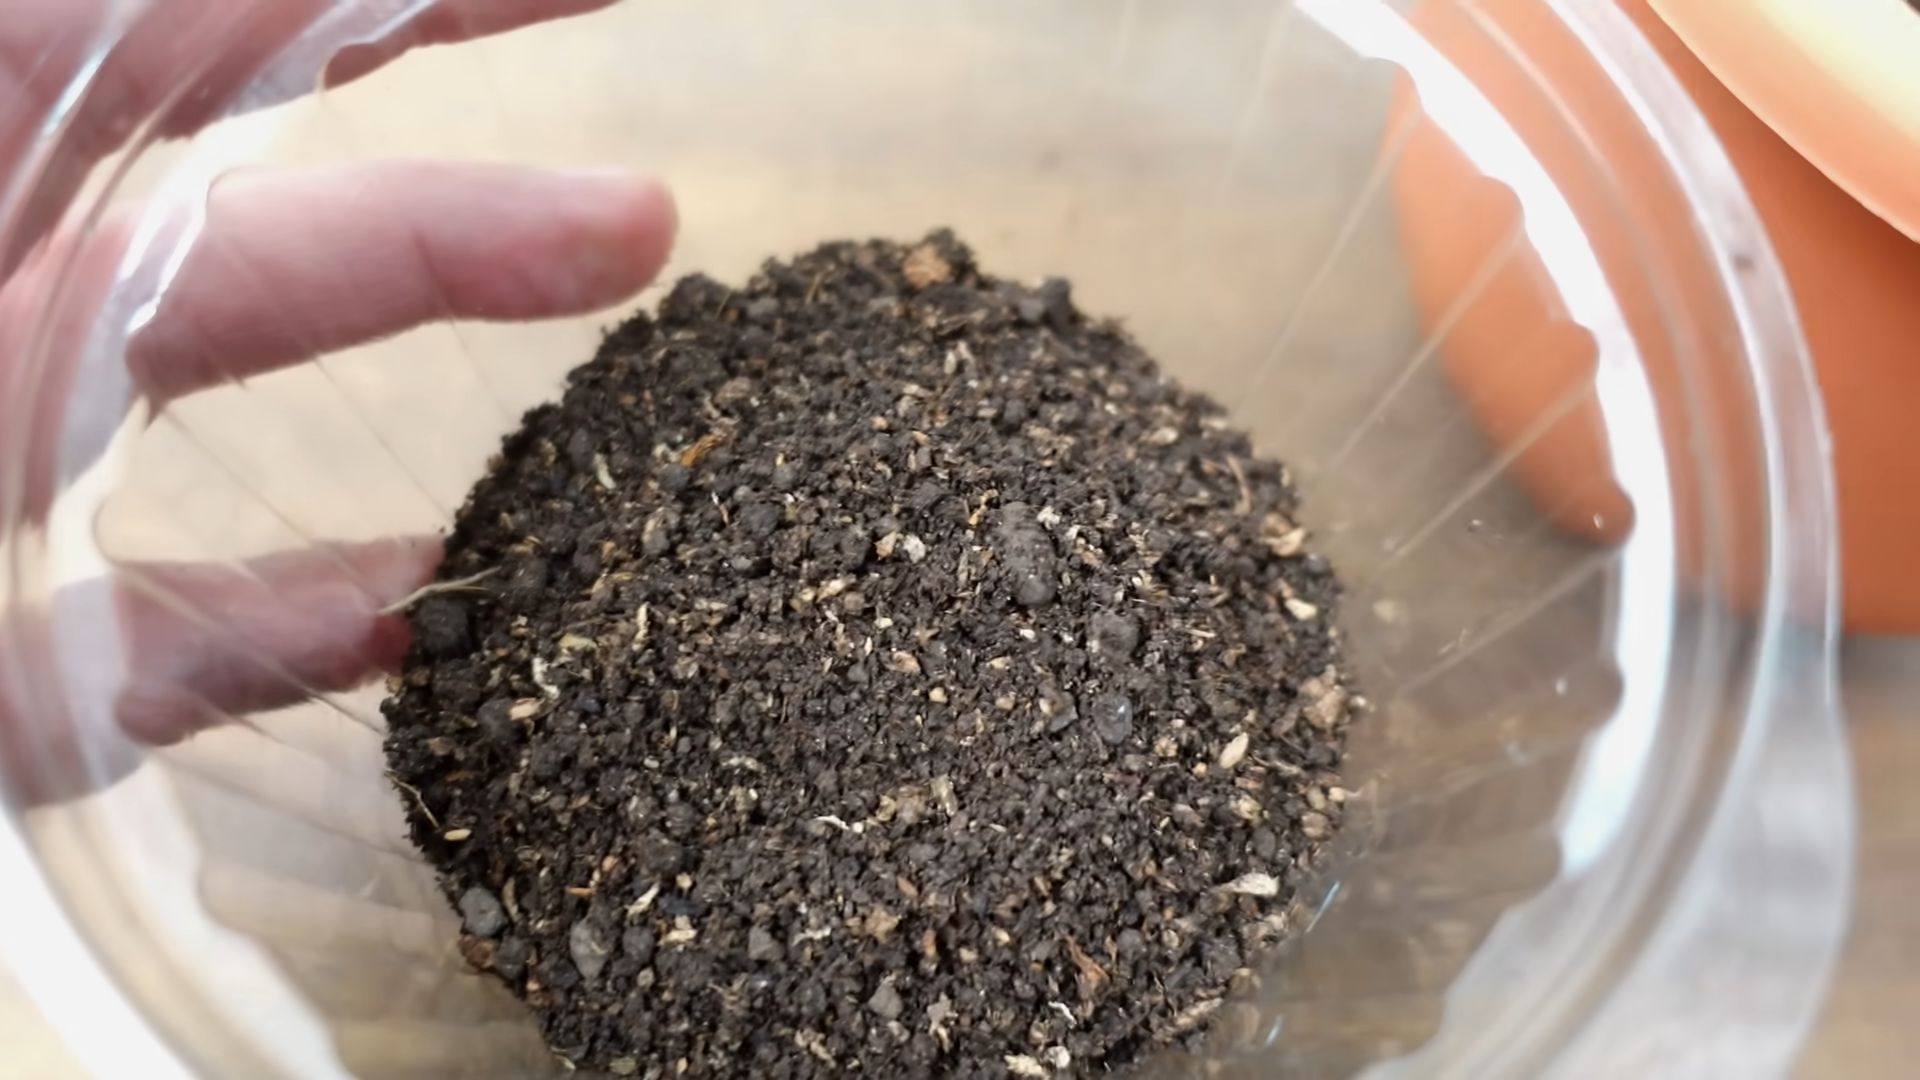
1. **Fill Your Pots:** Fill your pots or containers with potting soil, leaving about an inch of space at the top.
2. **Make a Hole:** Use your finger or a small tool to create a hole in the center of the soil, deep enough to accommodate the onion scrap.
3. **Plant the Onion Scrap:** Place the onion scrap in the hole, root-side down. Make sure the bottom of the onion is covered with soil, but the top part is still exposed.
4. **Gently Press the Soil:** Gently press the soil around the onion scrap to secure it in place.
5. **Water Thoroughly:** Water the soil thoroughly until it’s evenly moist. Don’t overwater, though, as this can lead to rot.
Caring for Your Regrowing Onions
Now that your onion scraps are planted, it’s time to give them some TLC.
1. **Water Regularly:** Keep the soil consistently moist, but not soggy. Water when the top inch of soil feels dry to the touch.
2. **Provide Sunlight:** Place your pots in a sunny location where they’ll get at least 6 hours of direct sunlight each day. If you don’t have a sunny spot indoors, you can use a grow light.
3. **Fertilize (Optional):** You can fertilize your regrowing onions every few weeks with a balanced liquid fertilizer. This will help them grow faster and produce more greens. I like to use a diluted fish emulsion fertilizer.
4. **Monitor for Pests and Diseases:** Keep an eye out for any signs of pests or diseases. Common onion pests include aphids and thrips. If you spot any pests, you can try spraying them with insecticidal soap.
5. **Rotate Your Onions (If Planting Outdoors):** If you’re planting your onions outdoors, it’s a good idea to rotate them to a different location each year. This helps prevent soilborne diseases.
Harvesting Your Regrown Onions
The best part! Harvesting your own homegrown onions.
1. **Harvesting Greens:** You can start harvesting the green shoots of your regrown onions as soon as they’re a few inches tall. Simply snip off the greens with scissors, leaving about an inch of the plant intact. The plant will continue to grow and produce more greens. I love adding these to salads, soups, and stir-fries.
2. **Harvesting Bulbs (Optional):** If you want to grow full-sized onion bulbs, you’ll need to transplant your regrown onions into a larger pot or into your garden. Allow the bulbs to mature for several months, until the tops start to fall over. Once the tops have fallen over, you can dig up the bulbs and let them cure in a dry, well-ventilated place for a few weeks.
Troubleshooting
Sometimes, things don’t go exactly as planned. Here are a few common problems you might encounter and how to fix them:
* **Onion Scrap Rotting:** If your onion scrap starts to rot, it’s likely due to overwatering. Make sure the soil is well-draining and avoid watering too frequently. You can also try letting the cut end of the onion scrap dry out for a day or two before planting.
* **Slow Growth:** If your onions are growing slowly, it could be due to a lack of sunlight or nutrients. Make sure they’re getting enough sunlight and fertilize them regularly.
* **Yellowing Leaves:** Yellowing leaves can be a sign of overwatering, underwatering, or nutrient deficiency. Check the soil moisture and adjust your watering accordingly. You may also need to fertilize your onions.
* **Pests:** Keep an eye out for pests like aphids and thrips. If you spot any pests, you can try spraying them with insecticidal soap.
Tips and Tricks for Success
Here are a few extra tips to help you get the most out of your onion regrowing project:
* Use a Variety of Onions: Try regrowing different types of onions, such as yellow onions, red onions, and white onions. Each type will have a slightly different flavor.
* Plant in Stages: Plant new onion scraps every few weeks to ensure a continuous supply of fresh onions.
* Experiment with Different Growing Mediums: You can also try growing your onion scraps in water. Simply place the onion scrap in a glass of water, making sure the bottom of the onion is submerged. Change the water every few days.
Hey there, fellow gardening enthusiasts! Ever wondered if you could regrow onions from those little scraps you usually toss in the compost? Well, guess what? You absolutely can! It’s a super easy and rewarding way to reduce food waste and get a continuous supply of fresh onions. I’ve been doing this for a while now, and I’m excited to share my secrets with you. Let’s dive in!
What You’ll Need
Before we get started, let’s gather our supplies. This is a pretty low-key project, so you probably have most of this stuff already:
* **Onion Scraps:** The bottom 1-2 inches of an onion bulb, with the roots still attached (even if they’re tiny!). I usually save these when I’m chopping onions for cooking.
* **Potting Soil:** A good quality potting mix is essential for healthy growth.
* **Small Pots or Containers:** Any small pot will do, as long as it has drainage holes. I often use recycled yogurt containers or plastic cups.
* **Water:** Tap water is fine, but rainwater is even better if you have access to it.
* **Sunny Location:** Onions need plenty of sunlight to thrive. A windowsill or a spot in your garden that gets at least 6 hours of sun is ideal.
* **Optional: Rooting Hormone:** This isn’t necessary, but it can help speed up the rooting process.
Preparing Your Onion Scraps
Okay, so you’ve got your supplies. Now, let’s get those onion scraps ready for planting.
1. **Choose the Right Scraps:** Look for onion bottoms that are firm and healthy. Avoid any that are mushy or have signs of rot. The more roots attached, the better your chances of success.
2. **Let Them Dry (Optional):** Some people recommend letting the cut end of the onion scrap dry out for a day or two before planting. This helps prevent rot. I’ve tried it both ways, and honestly, I haven’t noticed a huge difference, but it’s worth a shot if you’re worried about rot. Just leave them on a paper towel in a cool, dry place.
3. **Remove Excess Layers (Optional):** If the outer layers of the onion scrap are looking a bit dry or papery, you can gently peel them away. This will help the new roots emerge more easily.
Planting Your Onion Scraps
Alright, the moment we’ve been waiting for! Let’s get those onion scraps planted.
1. **Fill Your Pots:** Fill your pots or containers with potting soil, leaving about an inch of space at the top.
2. **Make a Hole:** Use your finger or a small tool to create a hole in the center of the soil, deep enough to accommodate the onion scrap.
3. **Plant the Onion Scrap:** Place the onion scrap in the hole, root-side down. Make sure the bottom of the onion is covered with soil, but the top part is still exposed.
4. **Gently Press the Soil:** Gently press the soil around the onion scrap to secure it in place.
5. **Water Thoroughly:** Water the soil thoroughly until it’s evenly moist. Don’t overwater, though, as this can lead to rot.
Caring for Your Regrowing Onions
Now that your onion scraps are planted, it’s time to give them some TLC.
1. **Water Regularly:** Keep the soil consistently moist, but not soggy. Water when the top inch of soil feels dry to the touch.
2. **Provide Sunlight:** Place your pots in a sunny location where they’ll get at least 6 hours of direct sunlight each day. If you don’t have a sunny spot indoors, you can use a grow light.
3. **Fertilize (Optional):** You can fertilize your regrowing onions every few weeks with a balanced liquid fertilizer. This will help them grow faster and produce more greens. I like to use a diluted fish emulsion fertilizer.
4. **Monitor for Pests and Diseases:** Keep an eye out for any signs of pests or diseases. Common onion pests include aphids and thrips. If you spot any pests, you can try spraying them with insecticidal soap.
5. **Rotate Your Onions (If Planting Outdoors):** If you’re planting your onions outdoors, it’s a good idea to rotate them to a different location each year. This helps prevent soilborne diseases.
Harvesting Your Regrown Onions
The best part! Harvesting your own homegrown onions.
1. **Harvesting Greens:** You can start harvesting the green shoots of your regrown onions as soon as they’re a few inches tall. Simply snip off the greens with scissors, leaving about an inch of the plant intact. The plant will continue to grow and produce more greens. I love adding these to salads, soups, and stir-fries.
2. **Harvesting Bulbs (Optional):** If you want to grow full-sized onion bulbs, you’ll need to transplant your regrown onions into a larger pot or into your garden. Allow the bulbs to mature for several months, until the tops start to fall over. Once the tops have fallen over, you can dig up the bulbs and let them cure in a dry, well-ventilated place for a few weeks.
Troubleshooting
Sometimes, things don’t go exactly as planned. Here are a few common problems you might encounter and how to fix them:
* **Onion Scrap Rotting:** If your onion scrap starts to rot, it’s likely due to overwatering. Make sure the soil is well-draining and avoid watering too frequently. You can also try letting the cut end of the onion scrap dry out for a day or two before planting.
* **Slow Growth:** If your onions are growing slowly, it could be due to a lack of sunlight or nutrients. Make sure they’re getting enough sunlight and fertilize them regularly.
* **Yellowing Leaves:** Yellowing leaves can be a sign of overwatering, underwatering, or nutrient deficiency. Check the soil moisture and adjust your watering accordingly. You may also need to fertilize your onions.
* **Pests:** Keep an eye out for pests like aphids and thrips. If you spot any pests, you can try spraying them with insecticidal soap.
Tips and Tricks for Success
Here are a few extra tips to help you get the most out of your onion regrowing project:
* Use a Variety of Onions: Try regrowing different types of onions, such as yellow onions, red onions, and white onions. Each type will have a slightly different flavor.
* Plant in Stages: Plant new onion scraps every few weeks to ensure a continuous supply of fresh onions.
* Experiment with Different Growing Mediums: You can also try growing your onion scraps in water. Simply place the onion scrap in a glass of water, making sure the bottom of the onion is submerged. Change the water every few days.
* Don’t Be Afraid to Experiment: Gardening is all about experimentation. Don’t be afraid to try new things and see what works best for you.
Why Regrow Onions?
Regrowing onions from scraps is not only a fun and rewarding project, but it’s also a great way to:
* Reduce Food Waste: Instead of throwing away those onion scraps, you can give them a new life.
* Save Money: You’ll save money on groceries by growing your own onions.
* Enjoy Fresh, Homegrown Produce: There’s nothing quite like the taste of fresh, homegrown onions.
* Learn About Gardening: Regrowing onions is a great way to learn about gardening and connect with nature.
Beyond the Basics: Growing Different Types of Onions
While regrowing from scraps is fantastic, you can also explore growing onions from sets or seeds for a wider variety.
Growing Onions from Sets
Onion sets are small, immature onion bulbs that are easy to plant and grow. They offer a head start compared to seeds.
1. Choose Your Sets: Select healthy, firm sets from your local garden center.
2. Prepare the Soil: Ensure your garden bed has well-draining soil and amend with compost.
3. Plant the Sets: Plant the sets about 1 inch deep and 4-6 inches apart.
4. Water and Care: Keep the soil consistently moist and weed regularly.
Growing Onions from Seeds
Growing onions from seeds requires more patience but allows you to choose from a wider range of varieties.
1. Start Seeds Indoors: Start seeds indoors 8-10 weeks before the last expected frost.
2. Transplant Seedlings: Transplant seedlings outdoors when they are about 4-6 inches tall.
3. Provide Support: Ensure the seedlings have adequate support and space to grow.
4. Consistent Watering: Water regularly and fertilize as needed.
Advanced Tips for
Conclusion
So, there you have it! Cultivating healthy blueberries at home is not only achievable but also incredibly rewarding. This DIY trick, focusing on creating the perfect acidic environment and providing consistent care, unlocks the secret to plump, juicy, and vibrantly flavored blueberries right in your backyard. Forget expensive store-bought berries that lack that homegrown zest; with a little effort and this simple guide, you can enjoy a bountiful harvest year after year.
This method is a must-try for several reasons. First, you have complete control over the growing process, ensuring your blueberries are free from harmful pesticides and chemicals. Second, the taste difference is undeniable. Freshly picked blueberries, ripened under the sun in your own garden, burst with a sweetness and intensity that store-bought varieties simply can’t match. Third, it’s a sustainable and cost-effective way to enjoy these nutritional powerhouses. Once your blueberry bushes are established, they’ll provide you with years of delicious fruit.
But don’t stop there! Feel free to experiment with different blueberry varieties to find your favorites. Consider adding companion plants like azaleas or rhododendrons, which thrive in similar acidic conditions and can enhance the beauty of your blueberry patch. You can also explore different mulching materials, such as pine needles or shredded oak leaves, to see which works best for your soil and climate. For those with limited space, dwarf blueberry varieties are perfect for container gardening, allowing you to enjoy fresh blueberries even on a small balcony or patio.
Remember, patience is key. It may take a few years for your blueberry bushes to reach their full potential, but the wait is well worth it. The satisfaction of harvesting your own homegrown blueberries and sharing them with family and friends is truly unparalleled.
We wholeheartedly encourage you to give this DIY trick a try. It’s a simple, effective, and rewarding way to enjoy the benefits of fresh, healthy blueberries at home. And once you’ve experienced the joy of growing your own, we’d love to hear about it! Share your experiences, tips, and photos in the comments below. Let’s build a community of blueberry enthusiasts and help each other cultivate the best possible harvest. Happy growing!
Frequently Asked Questions (FAQ)
Q: What type of soil is best for growing blueberries?
A: Blueberries thrive in acidic soil with a pH between 4.5 and 5.5. This is crucial for nutrient absorption. Most garden soils are not naturally acidic enough, so you’ll need to amend the soil before planting. You can use soil testing kits to determine your soil’s pH and then amend it with sulfur or peat moss to lower the pH. Adding organic matter, such as compost or well-rotted manure, can also improve soil drainage and fertility. Remember to retest the soil pH periodically and adjust as needed to maintain the optimal range for healthy blueberry growth.
Q: How often should I water my blueberry bushes?
A: Blueberries need consistent moisture, especially during the growing season. Water deeply and regularly, aiming for about 1-2 inches of water per week. The best way to determine if your blueberry bushes need water is to check the soil moisture. Stick your finger into the soil about 2-3 inches deep. If the soil feels dry, it’s time to water. Avoid overwatering, as this can lead to root rot. Mulching around the base of the plants helps retain moisture and suppress weeds. During periods of drought, you may need to water more frequently.
Q: What kind of fertilizer should I use for blueberries?
A: Use an acid-loving fertilizer specifically formulated for blueberries, azaleas, or rhododendrons. These fertilizers contain ammonium sulfate or sulfur-coated urea, which help maintain the soil’s acidity. Fertilize in early spring, just before new growth begins, and again in late spring or early summer. Follow the instructions on the fertilizer package carefully to avoid over-fertilizing, which can damage the plants. Organic options like composted manure or blood meal can also be used, but be sure to monitor the soil pH and adjust as needed.
Q: How do I prune blueberry bushes?
A: Pruning is essential for maintaining the health and productivity of your blueberry bushes. Prune in late winter or early spring, before new growth begins. Remove any dead, damaged, or diseased branches. Also, prune out any low-growing branches that touch the ground, as these can be susceptible to disease. For young plants, focus on shaping the bush and removing any weak or spindly growth. For mature plants, remove some of the older, less productive canes to encourage new growth. Aim for an open, airy structure that allows sunlight to penetrate the center of the bush.
Q: How do I protect my blueberries from birds?
A: Birds love blueberries just as much as we do! To protect your crop, you can use netting to cover the bushes. Be sure to secure the netting tightly to the ground to prevent birds from getting underneath. You can also use bird repellent devices, such as reflective tape or scarecrows. Another option is to plant your blueberry bushes near other plants that birds find less appealing. Regularly inspect your bushes for signs of bird damage and take action promptly to prevent further losses.
Q: What are some common blueberry pests and diseases?
A: Blueberries can be susceptible to various pests and diseases, including blueberry maggot, Japanese beetles, aphids, and fungal diseases like powdery mildew and botrytis blight. Regularly inspect your plants for signs of infestation or disease. Use organic pest control methods whenever possible, such as insecticidal soap or neem oil. Ensure good air circulation around the plants to prevent fungal diseases. Remove any infected leaves or branches promptly. If you suspect a serious pest or disease problem, consult with your local agricultural extension office for advice.
Q: Can I grow blueberries in containers?
A: Yes, you can absolutely grow blueberries in containers! Choose dwarf or semi-dwarf varieties that are well-suited for container gardening. Use a large container with good drainage and fill it with an acidic potting mix specifically formulated for blueberries. Water regularly and fertilize as needed. Container-grown blueberries may need more frequent watering and fertilization than those grown in the ground. Place the container in a sunny location that receives at least 6 hours of sunlight per day.
Q: How long does it take for blueberry bushes to produce fruit?
A: It typically takes 2-3 years for blueberry bushes to start producing a significant amount of fruit. However, you may get a small harvest in the first year or two after planting. The amount of fruit will increase as the plants mature. Proper care, including acidic soil, consistent watering, and regular fertilization, will help your blueberry bushes reach their full potential and produce a bountiful harvest.
Q: What are some good companion plants for blueberries?
A: Companion planting can benefit blueberries by attracting pollinators, repelling pests, and improving soil health. Good companion plants for blueberries include azaleas, rhododendrons, cranberries, strawberries, and herbs like thyme and rosemary. These plants share similar growing requirements and can create a mutually beneficial environment. Avoid planting blueberries near plants that prefer alkaline soil, such as lavender or lilacs.
Q: How do I know when blueberries are ripe?
A: Blueberries are ripe when they are a deep, uniform blue color and easily detach from the stem. They should also be plump and slightly soft to the touch. Taste a few berries to make sure they are sweet and flavorful. Avoid picking blueberries that are still green or reddish, as they will not ripen further after being picked. Harvest your blueberries regularly as they ripen to encourage continued production.
Leave a Comment