

High yield carrot growing might seem like a distant dream if you’ve only ever harvested a few spindly roots from your garden. But trust me, with a few clever tricks and DIY hacks, you can transform your carrot patch into a bountiful source of sweet, crunchy goodness! For centuries, carrots have been a staple crop, dating back to ancient Persia where they were originally purple and white. Over time, selective breeding gifted us with the vibrant orange variety we know and love today.
But let’s face it, store-bought carrots just don’t compare to the flavor and satisfaction of harvesting your own. Plus, knowing exactly where your food comes from and how it’s grown is incredibly empowering. That’s why I’m so excited to share these simple, yet effective, DIY techniques that will help you achieve high yield carrot growing in your own backyard. Whether you’re a seasoned gardener or just starting out, these tips will help you maximize your harvest and enjoy the freshest, most delicious carrots imaginable. Get ready to dig in and discover the secrets to a carrot-filled success!
Unlock Bumper Carrot Harvests: My Foolproof DIY Guide
Hey there, fellow gardening enthusiasts! I’m so excited to share my secrets for growing ridiculously abundant carrot crops. Forget those tiny, pale carrots you sometimes get from the store – we’re talking vibrant, sweet, and satisfyingly large carrots, all thanks to a few simple DIY techniques. I’ve spent years tweaking my methods, and I’m confident that these tips will help you achieve carrot-growing success, even if you’re a beginner. Let’s dive in!
Choosing the Right Carrot Variety
First things first, selecting the right carrot variety is crucial. Not all carrots are created equal! Some are better suited for certain soil types or climates. Here’s what I look for:
* Soil Type Compatibility: If you have heavy clay soil, opt for shorter, rounder varieties like ‘Parisian’ or ‘Thumbelina.’ These are less likely to struggle with dense soil. For looser, sandier soil, longer varieties like ‘Nantes’ or ‘Imperator’ will thrive.
* Days to Maturity: Consider your growing season length. Shorter-season varieties mature faster, which is ideal if you live in a cooler climate.
* Disease Resistance: Look for varieties that are resistant to common carrot diseases like Alternaria leaf blight.
* Personal Preference: Do you prefer sweet, tender carrots for snacking, or larger, more robust carrots for cooking? Experiment with different varieties to find your favorites!
My personal go-to varieties are ‘Nantes’ for their sweetness and ‘Bolero’ for their disease resistance and adaptability.
Preparing the Soil: The Foundation for Success
Carrots need loose, well-drained soil to grow long and straight. This is arguably the most important step! Rocky or compacted soil will result in stunted, forked, or misshapen carrots. Here’s my soil preparation routine:
* Clear the Area: Remove any rocks, sticks, roots, or debris from the planting area. Even small pebbles can impede carrot growth.
* Loosen the Soil: Use a garden fork or tiller to loosen the soil to a depth of at least 12 inches. This allows the carrot roots to penetrate easily.
* Amend the Soil: Incorporate plenty of organic matter, such as compost, well-rotted manure, or peat moss. This improves soil drainage, aeration, and fertility. I usually add a 2-3 inch layer of compost and work it into the soil.
* Avoid Fresh Manure: Fresh manure can be too high in nitrogen, which can cause excessive foliage growth at the expense of root development. It can also introduce weed seeds.
* Consider Raised Beds: If you have particularly poor soil, consider growing carrots in raised beds filled with a custom soil mix. This gives you complete control over the soil conditions.
* pH Testing: Carrots prefer a slightly acidic soil pH of 6.0 to 6.8. Test your soil pH and amend accordingly with lime (to raise pH) or sulfur (to lower pH).
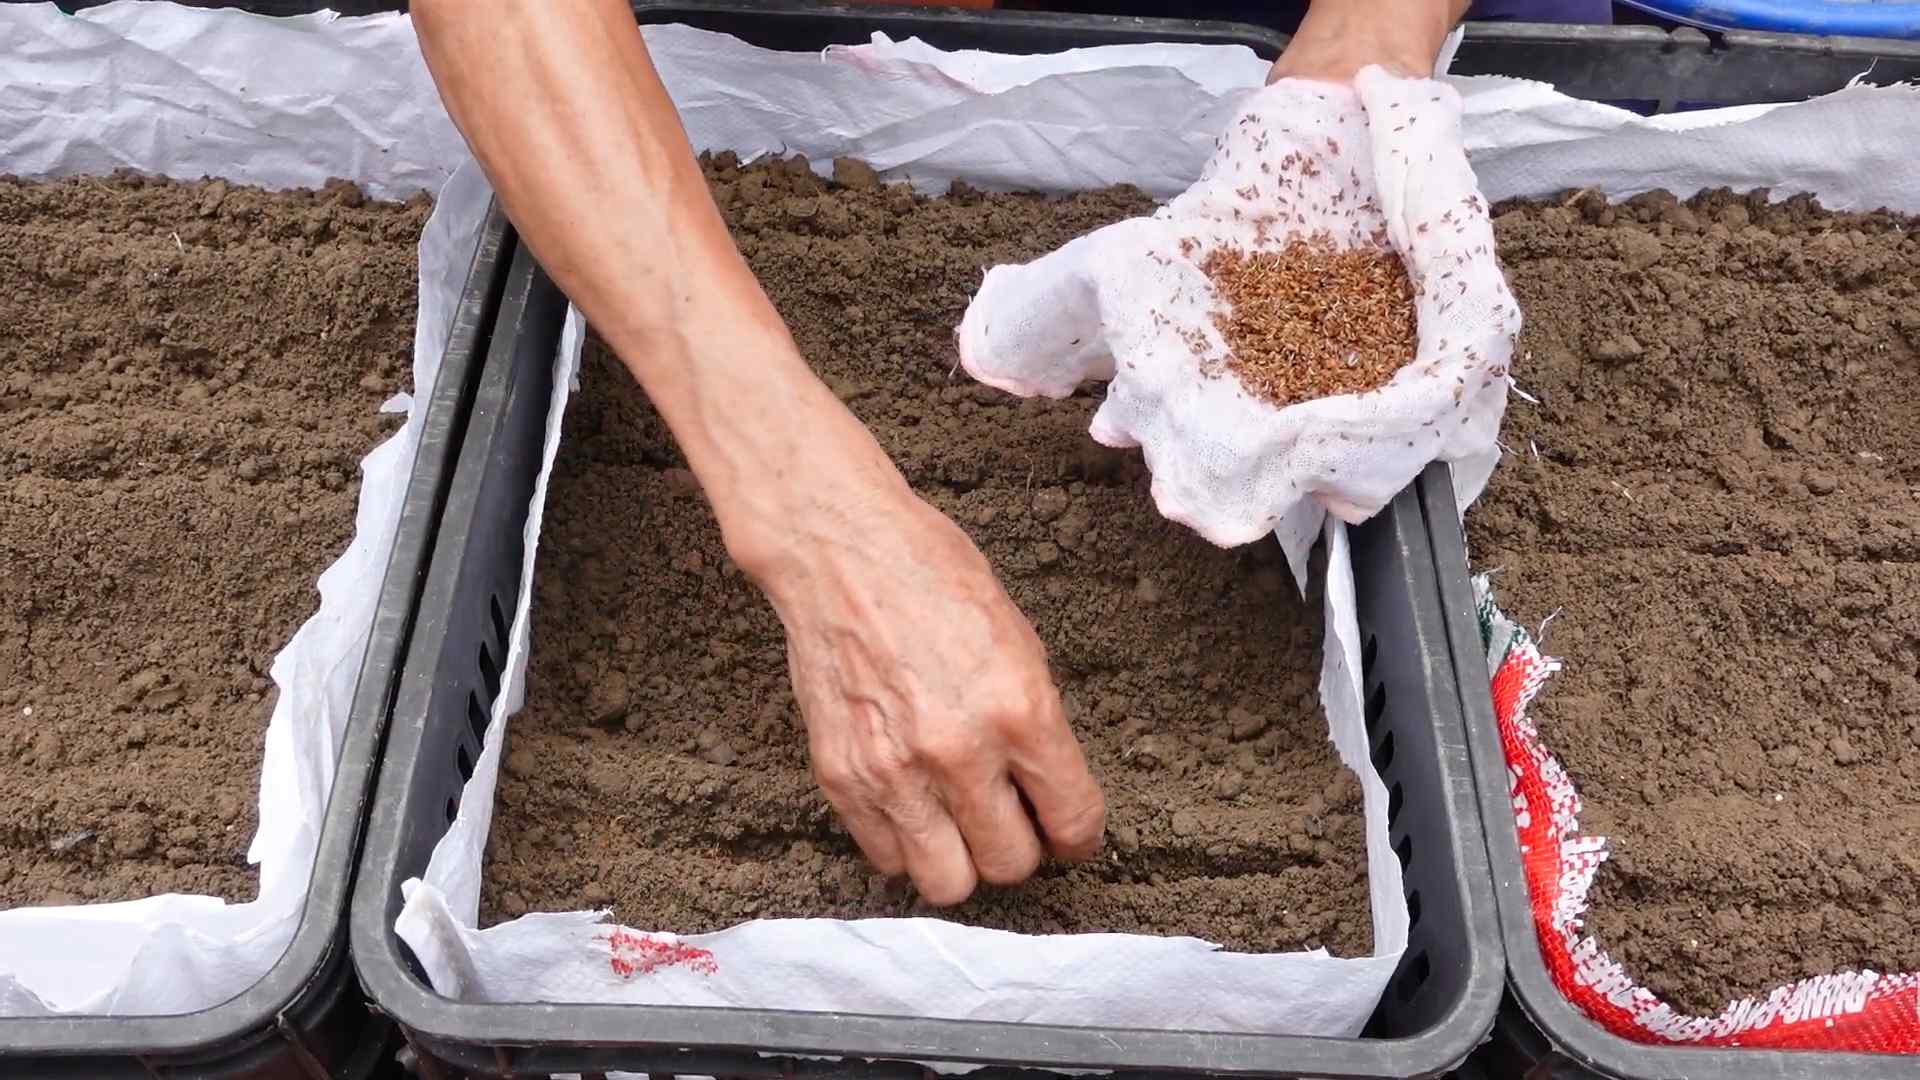
Sowing the Seeds: Precision is Key
Carrot seeds are tiny, which can make sowing them evenly a challenge. Here’s my method for achieving optimal spacing:
* Timing is Everything: Sow carrot seeds directly into the garden soil 2-4 weeks before the last expected frost in spring. You can also sow a second crop in late summer for a fall harvest.
* Create Shallow Furrows: Use a hoe or your finger to create shallow furrows about 1/4 to 1/2 inch deep and 1-2 inches apart.
* Space the Seeds: Sprinkle the seeds thinly along the furrows. This is where patience comes in! Overcrowding leads to smaller carrots. I find it helpful to mix the seeds with sand to make them easier to handle.
* Cover the Seeds: Gently cover the seeds with a thin layer of soil or vermiculite.
* Water Gently: Water the area gently with a watering can or hose with a gentle spray nozzle. Avoid washing away the seeds.
* Keep the Soil Moist: Carrot seeds need consistent moisture to germinate. Keep the soil consistently moist but not waterlogged until the seedlings emerge, which usually takes 1-3 weeks.
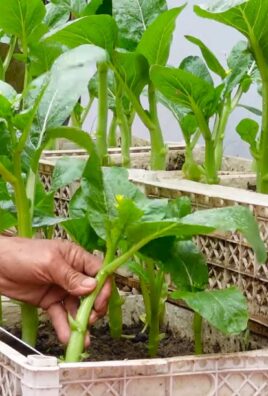
Thinning the Seedlings: Crucial for Carrot Size
Thinning is essential for giving your carrots enough space to develop properly. Don’t skip this step!
* When to Thin: Thin the seedlings when they are about 1-2 inches tall.
* How to Thin: Carefully pull out the weaker seedlings, leaving the strongest ones spaced about 1-2 inches apart.
* Successive Thinning: You may need to thin the seedlings again a few weeks later, leaving about 3-4 inches between plants.
* Don’t Disturb the Roots: Be careful not to disturb the roots of the remaining seedlings when thinning. Water the area well after thinning to help settle the soil.
Watering and Fertilizing: Keeping Carrots Happy
Consistent watering and proper fertilization are essential for healthy carrot growth.
* Watering: Water deeply and regularly, especially during dry periods. Carrots need about 1 inch of water per week. Avoid overhead watering, which can promote fungal diseases. Soaker hoses or drip irrigation are ideal.
* Fertilizing: Carrots are not heavy feeders, but they do benefit from a balanced fertilizer. I like to use a fertilizer that is lower in nitrogen and higher in phosphorus and potassium, such as a 5-10-10 or 5-15-15. Apply the fertilizer according to the package directions.
* Side-Dressing: You can also side-dress the carrots with compost tea or fish emulsion every few weeks to provide them with extra nutrients.
Weed Control: Protecting Your Precious Carrots
Weeds compete with carrots for water, nutrients, and sunlight. Keeping your carrot patch weed-free is crucial.
* Hand-Weeding: The best way to control weeds in a carrot patch is by hand-weeding. Be careful not to disturb the carrot roots when weeding.
* Mulching: Apply a layer of organic mulch, such as straw or shredded leaves, around the carrots to suppress weed growth and retain moisture.
* Pre-Emergent Herbicides: I generally avoid using herbicides, but if you’re struggling with a severe weed problem, you can consider using a pre-emergent herbicide before planting. Be sure to follow the label directions carefully.
Pest and Disease Management: Staying Vigilant
Carrots are generally pest-resistant, but they can be susceptible to certain pests and diseases.
* Carrot Rust Fly: The carrot rust fly is a common pest that can damage carrot roots. Cover your carrot patch with row covers to prevent the flies from laying their eggs.
* Leaf Blight: Leaf blight is a fungal disease that can cause the leaves to turn yellow and brown. Improve air circulation around the plants and avoid overhead watering to prevent leaf blight. You can also spray with a fungicide if necessary.
* Nematodes: Nematodes are microscopic worms that can damage carrot roots. Rotate your crops and amend the soil with organic matter to control nematodes.
* Regular Inspection: Regularly inspect your carrot plants for signs of pests or diseases. The earlier you catch a problem, the easier it will be to control.
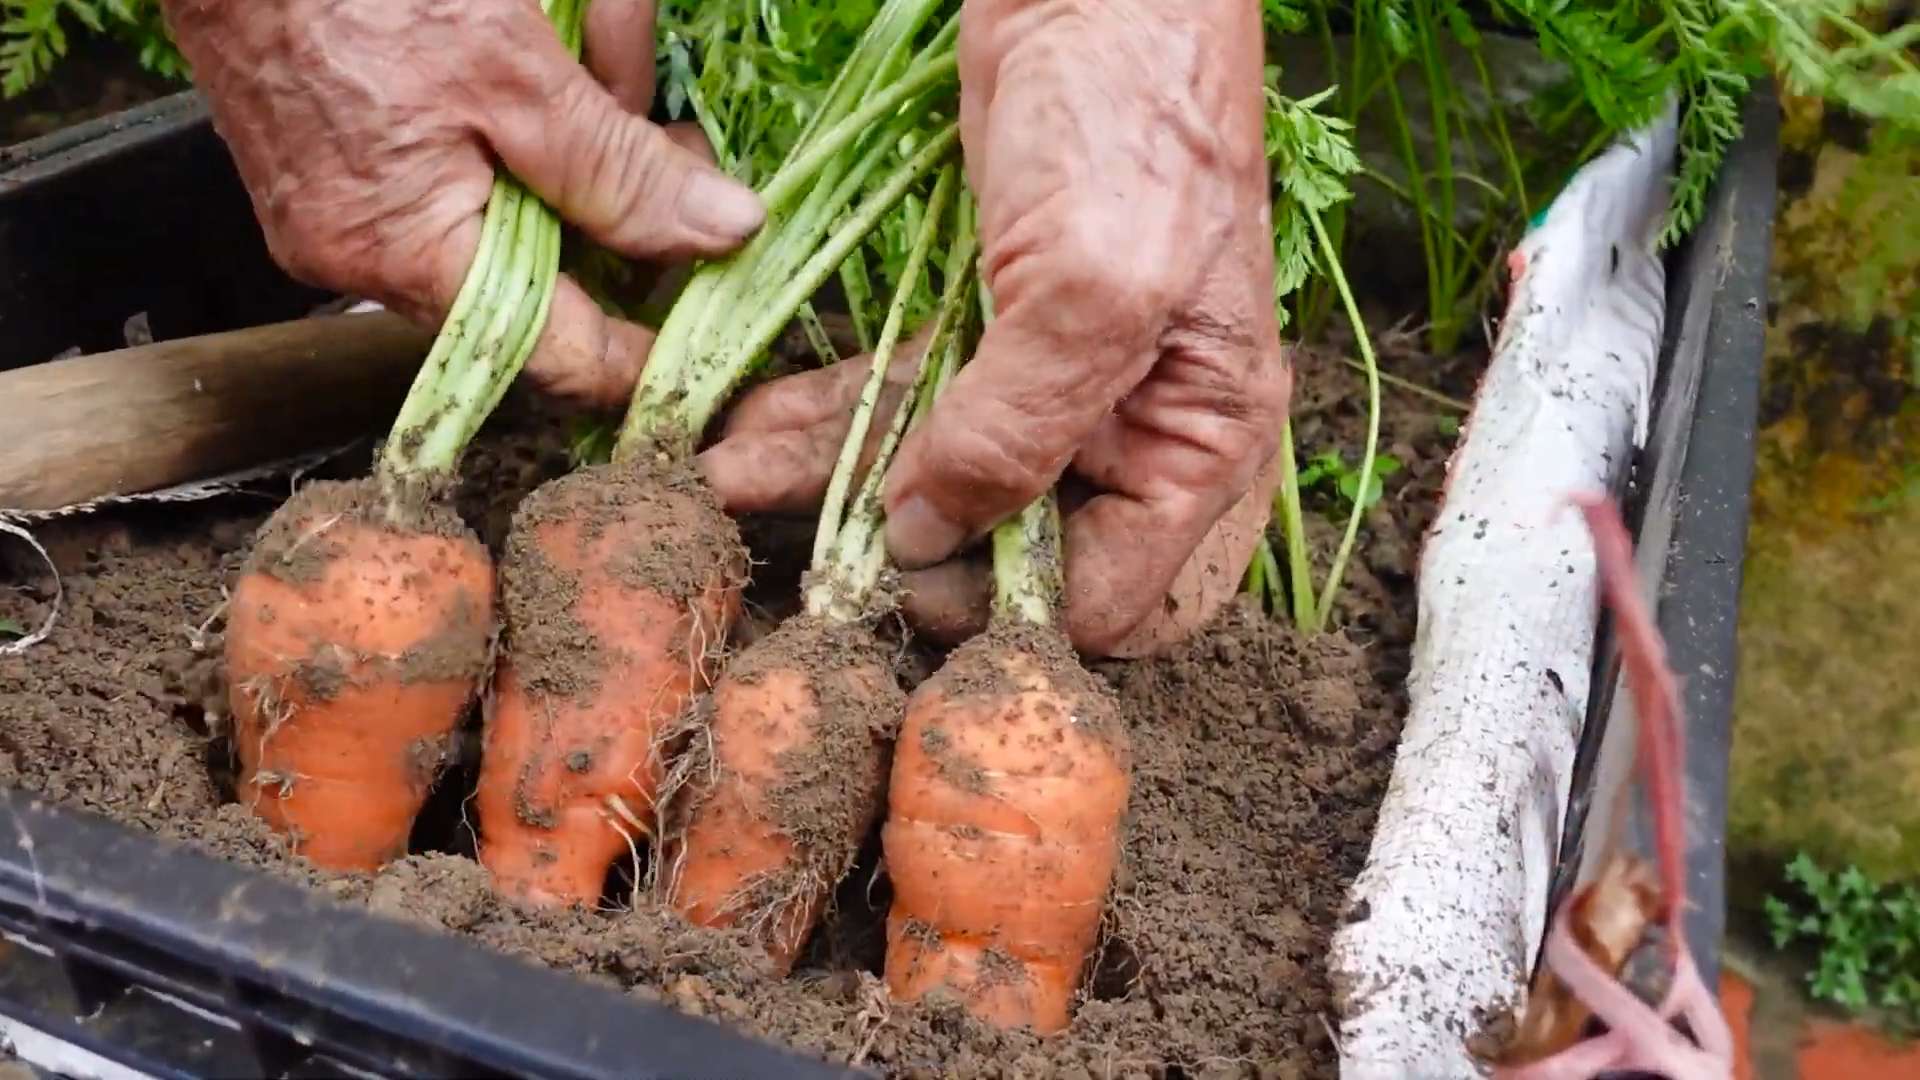
Harvesting: The Sweet Reward
Harvesting carrots is the most rewarding part of the process!
* When to Harvest: Carrots are typically ready to harvest when they reach the desired size, which is usually 60-80 days after planting, depending on the variety.
* How to Harvest: Loosen the soil around the carrots with a garden fork or trowel. Gently pull the carrots out of the ground by the tops.
* Washing and Storing: Wash the carrots thoroughly and remove any excess soil. Store the carrots in a cool, dark, and humid place, such as a refrigerator or root cellar. You can also store them in a container filled with moist sand or sawdust.
* Enjoy! Savor the taste of your homegrown carrots! They’re delicious raw, roasted, steamed, or added to soups and stews.
Bonus Tip: Succession Planting for Continuous Harvests
To enjoy a continuous supply of fresh carrots throughout the growing season, practice succession planting. Sow a new batch of seeds every 2-3 weeks. This will ensure that you always have carrots ready to harvest.
Troubleshooting Common Carrot Problems
Even with the best care, you might encounter some challenges. Here are a few common problems and how to address them:
* Forked Carrots: This is usually caused by rocky or compacted soil. Make sure to prepare the soil thoroughly before planting.
* Small Carrots: This can be caused by overcrowding, poor soil fertility, or insufficient watering. Thin the seedlings properly, fertilize regularly, and water deeply.
* Bitter Carrots: This can be caused by hot weather or inconsistent watering. Provide shade during the hottest part of the
Conclusion
So, there you have it! Unlocking the secrets to high yield carrot growing isn’t about magic; it’s about understanding the needs of your carrots and providing them with the optimal environment to thrive. We’ve explored simple yet effective DIY tricks that can significantly boost your harvest, transforming your garden from a sparse patch to a carrot cornucopia.
Why is this a must-try? Because who doesn’t want more carrots? Imagine pulling up vibrant, juicy carrots, bursting with flavor, knowing you cultivated them with your own hands and a few clever techniques. Beyond the sheer abundance, these methods promote healthier, more robust plants, leading to carrots that are not only bigger but also taste better. You’ll be the envy of your gardening friends, and your dinner table will thank you.
But don’t stop there! Experiment with different variations to tailor these techniques to your specific garden conditions and preferences. For instance, if you’re dealing with heavy clay soil, consider amending it with even more organic matter, such as well-rotted compost or aged manure, to improve drainage and aeration. You could also try companion planting with herbs like rosemary or sage, which are known to deter carrot root flies. If you’re growing in containers, ensure they are deep enough to accommodate the full length of the carrot roots and use a high-quality potting mix specifically formulated for vegetables.
Another exciting variation is to explore different carrot varieties. While Nantes types are generally reliable and productive, consider branching out to try Chantenay carrots, which are shorter and sturdier, or even colorful varieties like purple or yellow carrots for a unique twist. Each variety has its own nuances, so experimenting will help you discover which ones thrive best in your garden and appeal to your taste buds.
Remember, gardening is a journey of continuous learning and refinement. Don’t be afraid to make mistakes; they’re valuable learning opportunities. The key is to observe your plants closely, pay attention to their needs, and adapt your techniques accordingly.
We’re confident that these DIY tricks will empower you to achieve a bountiful carrot harvest. Now, it’s your turn to put them into practice! We encourage you to try these methods in your own garden and share your experiences with us. What worked best for you? Did you discover any other helpful tips or variations? Your insights could inspire other gardeners and contribute to a collective wealth of knowledge.
Share your photos, stories, and tips on social media using relevant gardening hashtags. Let’s create a community of carrot-growing enthusiasts who are passionate about maximizing their yields and enjoying the fruits (or rather, vegetables) of their labor. Happy gardening, and may your carrot harvest be plentiful!
Frequently Asked Questions (FAQ)
What if I don’t have access to all the materials mentioned in the DIY tricks?
That’s perfectly fine! The beauty of DIY is its adaptability. If you can’t find a specific type of organic matter, substitute it with something similar that’s readily available to you. For example, if you don’t have access to composted leaves, you can use shredded newspaper or cardboard as a mulch. The key is to focus on the underlying principles: improving soil drainage, providing essential nutrients, and suppressing weeds. Don’t let the lack of a specific ingredient deter you from trying the techniques. Get creative and find alternatives that work for your situation.
How often should I water my carrots after implementing these DIY tricks?
Watering frequency depends on several factors, including your climate, soil type, and the stage of growth of your carrots. As a general rule, aim to keep the soil consistently moist but not waterlogged. Check the soil moisture level regularly by sticking your finger about an inch deep into the soil. If it feels dry, it’s time to water. During hot, dry weather, you may need to water daily, while during cooler, wetter periods, you may only need to water every few days. Remember that consistent moisture is crucial for carrot development, as fluctuations in soil moisture can lead to cracked or split roots.
My carrots are growing, but they are small and stunted. What could be the problem?
Several factors can contribute to small and stunted carrots. One common issue is compacted soil, which restricts root growth. Make sure your soil is loose and well-drained before planting. Another possibility is nutrient deficiency. Carrots need adequate levels of phosphorus and potassium for healthy root development. Consider amending your soil with a balanced fertilizer or bone meal to provide these essential nutrients. Overcrowding can also lead to stunted growth, so thin your seedlings to the recommended spacing. Finally, pests and diseases can also affect carrot growth. Inspect your plants regularly for signs of infestation or disease and take appropriate action if necessary.
Can I use these DIY tricks for other root vegetables besides carrots?
Absolutely! Many of the principles behind these DIY tricks are applicable to other root vegetables as well. Improving soil drainage, providing essential nutrients, and suppressing weeds are all beneficial for crops like radishes, beets, turnips, and parsnips. However, keep in mind that each vegetable has its own specific needs, so you may need to make some adjustments to the techniques. For example, radishes prefer cooler temperatures and shorter growing seasons than carrots, while parsnips require a longer growing season and more fertile soil. Research the specific requirements of each vegetable before applying these DIY tricks.
How do I know when my carrots are ready to harvest?
The time it takes for carrots to mature depends on the variety and growing conditions. As a general rule, carrots are typically ready to harvest 60-80 days after planting. You can check for ripeness by gently pulling back the soil around the top of the carrot to expose the crown. If the carrot is the desired size and color, it’s likely ready to harvest. You can also harvest a few carrots early to test their flavor and texture. If they are tender and sweet, you can start harvesting the rest of your crop.
What are some common pests and diseases that affect carrots, and how can I prevent them?
Carrot root flies are a common pest that can damage carrot roots. You can prevent them by using row covers to protect your plants and by practicing crop rotation. Carrot rust flies are another pest that can cause similar damage. Leaf blight is a fungal disease that can cause lesions on carrot leaves. You can prevent it by providing good air circulation and avoiding overhead watering. Nematodes are microscopic worms that can attack carrot roots. You can control them by using resistant varieties and by practicing soil solarization. Regularly inspect your plants for signs of pests and diseases and take appropriate action if necessary.
Is it possible to achieve a truly high yield carrot growing in containers?
Yes, it is absolutely possible to achieve a high yield of carrots even when growing them in containers. The key is to choose the right container size, use a high-quality potting mix, and provide adequate water and nutrients. Select containers that are at least 12 inches deep to accommodate the full length of the carrot roots. Use a potting mix that is well-draining and rich in organic matter. Water your carrots regularly, especially during hot, dry weather. Fertilize them with a balanced fertilizer every few weeks to provide essential nutrients. With proper care, you can enjoy a bountiful harvest of carrots from your container garden. Remember to choose carrot varieties that are suitable for container growing, such as shorter, rounder types.


Leave a Comment